Table of Contents
Advertisement
Quick Links
Advertisement
Table of Contents

Related Manuals for TRENDnet THA-103AC


Summary of Contents for TRENDnet THA-103AC
- Page 1 Cover Page TRENDnet User’s Guide ...
-
Page 2: Table Of Contents
Table of Contents TRENDnet User’s Guide Repeater Mode ........................ 17 Contents LAN .......................... 18 DHCP Client ........................ 18 Product Overview ................ 2 Static IP .......................... 18 Package Contents ...................... 2 Wireless ........................ 18 Overview ........................ 2 Wi‐Fi Settings ........................ 18 Interface ........................ 3 ... - Page 3 Table of Contents TRENDnet User’s Guide © Copyright 2014 TRENDnet. All Rights Reserved. ii ...
-
Page 4: Product Overview
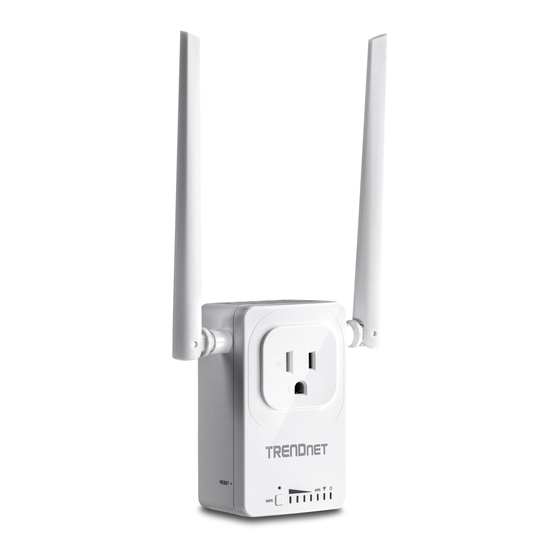
Overview Product Overview TRENDnet’s Home Smart Switch with WiFi AC Extender, model THA‐103AC, is a combination smart electrical outlet and powerful AC750 wireless extender. Use the free Apple® or Android™ mobile app from any internet connection to turn on and off a light, fan, electronic device, or appliance. Create a daily schedule to turn on/off the outlet to match your needs or to give the illusion that you’re home. Place the THA‐103AC in an area of your home with low wireless coverage – the powerful built‐in WiFi extender connects to either an existing WiFi AC or WiFi N router and broadcasts WiFi AC433 or ... -
Page 5: Interface
THA‐103AC TRENDnet User’s Guide Interface Over Current Protection Trips relay when current exceeds 15 Amps Wireless Extender AC750 WiFi Extender Connects to either an existing WiFi AC or WiFi N router and broadcasts WiFi AC433 or N300 networks External Antennas Powerful external dual band antennas maximize WiFi coverage One Touch Connection Power Switch Securely connect to the router at the touch of the Wi‐Fi Protected Setup (WPS) button Reset button LED Indicators LED indicators convey device status Power Switch (right panel) – To turn the device on and off physically Reset button (left panel) – Press and hold the reset button for 5 seconds to reset the Compatibility device to factory default settings. (saving the previous configuration is ... -
Page 6: Setting Up Tha-103Ac
THA‐103AC TRENDnet User’s Guide iOS Setup Setting up THA‐103AC A smart phone is required to proceed with this setup. There are 3 ways to setup the THA‐103AC switch to connect with your existing wireless network; WPS, using a mobile app, or going through device’s web configuration page. Download TRENDnet Smart Home app from Google Play or Apple Store. When using a mobile app to setup the device manually, the mobile device needs to support either wireless N or wireless AC connection. If your mobile device does not ... - Page 7 THA‐103AC TRENDnet User’s Guide Enter the device’s password (default is admin) and create a name for this Tap on the + button to access the configuration page. You can add the device switch. by using LAN search or QR code scan. Tap Done after the information is filled. Tab the >> symbol to access the Device Settings Advanced Setting WiFi Setting and go to WiFi settings. Tap on QR Code button and point your phone camera lens to the device’s label ...
-
Page 8: Android Setup
For more app features, please refer to Managing the App section. Once Select the Wireless SSID/Name you would like to connect to and enter the set up, the wireless repeater extended your wireless network automatically. correct password, then tap OK. Android Setup A smart phone is required to proceed with this setup. 1. Download TRENDnet Smart Home app from Google Play. 2. Plug the THA‐103AC to a power outlet and power on the device. © Copyright 2015 TRENDnet. All Rights Reserved. ... - Page 9 THA‐103AC TRENDnet User’s Guide 3. Connect your mobile phone to THA‐103AC; you should be able to see a 5. Tap on QR Code button and point your phone camera lens to the device’s label Network Name similar to THA‐103AC_24G_1234 for 2.4 GHz wireless band or where the QR code is located. The app should detect the THA‐103AC’s product THA‐103AC_5G_1234 for 5 GHz wireless band under the available wireless ...
- Page 10 THA‐103AC TRENDnet User’s Guide 7. Tab the >> symbol to access Advanced Setting WiFi Information and go to 8. Select the Wireless SSID/Name you would like to connect to and enter the WiFi settings. correct password, then tap OK. Please allow couple of minutes for the device to connect to the wireless network and reboot. 9. When you see the device Status is back to Online, the setup is complete. Now you can manage your appliances locally and remotely. ...
-
Page 11: Managing The App
THA‐103AC TRENDnet User’s Guide Unlink a smart switch Managing the App 1. Tap the tool section; the delete button will appear. To delete the device, simply iOS system tap on the remove icon on the left then tap the Delete box again. Remember to tap the tool option again to return to the main screen. Power on/off the connected device 1. Tap on the added switch and tap the power circle to turn the power on/off on the connected device. ... -
Page 12: Modify Device Password
THA‐103AC TRENDnet User’s Guide Modify Device Password Note: If device password is changed from initial setup, please update the new password under Device Setting section. 1. Tap on the >> symbol, Advanced Setting and tap on Password. Scheduling You can create a schedule for the connected device to power on or off. Add a Schedule 1. Tap on the >> symbol, Advanced Setting and tap on the Schedule. Tap on Edit and + symbol again to create a schedule. 2. Enter the current device’s password and enter the new password then click OK 2. Adjust the time, create a Description, select an Action, choose the day/days of the week then tap Save to save the schedule. ... - Page 13 THA‐103AC TRENDnet User’s Guide 4. Once all schedules are added, tap Done to go back to the schedule list. You can also enable/disable this action from the schedule list page. When disabled, the power will not be changed. 3. The schedule will be added to the schedule list © Copyright 2015 TRENDnet. All Rights Reserved. ...
-
Page 14: Wi-Fi Settings
THA‐103AC TRENDnet User’s Guide Delete a Schedule Wi‐Fi Settings 1. Tap on the >> symbol, Advanced Setting and tap on the Schedule Setting. Tap on Edit and tap on the delete symbol to remove a saved schedule. 1. Tap on the >> symbol, Advanced Setting and tap on the WiFi Setting 2. Tap on > and select a Wireless SSID/Name you would like to connect to and enter the correct password for that device then tap OK. ... -
Page 15: Android System
THA‐103AC TRENDnet User’s Guide Unlink a smart switch Android system 1. Tap the tool section; the delete button will appear. To delete the device, simply tap on the delete button. Remember to tap the tool option again to return to Power on/off the connected device the main screen. 1. Tap on the added switch and tap the power circle to turn the power on/off on the connected device. When the power icon is blue, the connected device is receiving power. Red means the outlet is powered off. This page also displays the current power information related to the connected device, current, voltage and power. The Energy section displays the current total energy usage. ... -
Page 16: Modify Device Password
THA‐103AC TRENDnet User’s Guide Modify Device Password Scheduling 1. Tap on the >> symbol, Advanced Setting. Under the Modify Device Password section, tap on the Change Device Password. You can create a schedule for the connected device to power on or off. Add a Schedule 1. Tap on the >> symbol, Advanced Setting and tap on the Schedule Setting. Tap on Edit and tap on + symbol again to add a schedule. 2. Enter the current device’s password and enter the new password then click OK. Note: If device password is changed from initial setup, please update the new ... - Page 17 THA‐103AC TRENDnet User’s Guide 2. Adjust the time, create a name, select an action, choose the day/days of the 4. Once all schedules are added, tap Done to go back to the schedule list. You can week then tap Save to save the schedule. also enable/disable this action from the schedule list page. When disabled, the power will not be changed. Delete a Schedule 1. Tap on the >> symbol, Advanced Setting and tap on the Schedule Setting. Tap 3. The schedule will be added to the schedule list. on Edit and tap on the delete symbol to remove a saved schedule. © Copyright 2015 TRENDnet. All Rights Reserved. 15 ...
-
Page 18: Wi-Fi Settings / Wi-Fi Information
THA‐103AC TRENDnet User’s Guide 2. When finished, tap Done to go back to the Schedule Setting list. Wi‐Fi Settings / Wi‐Fi Information 1. Select the Wireless SSID/Name you would like to connect to and enter the password, then tap OK. Please allow couple of minutes for the device to connect to the wireless network and reboot. 2. When you see the device Status is back to Online, the setup is complete. Now you can manage your appliances locally and remotely. ... -
Page 19: Browser Management
THA‐103AC TRENDnet User’s Guide Browser Management The Wireless and Administrator features can be managed via web browser and below are the default values for the device. This information can also be found on the preset sticker. Default IP http://192.168.10.100 Default Name/ID admin Default Password admin Default SSID THA‐103AC_24G_xxxx THA‐103AC_5G_xxxx Mode Default Wireless Key password 1. Plug THA‐103AC to a wall outlet and power it on. Connect your computer or laptop to the device’s default SSID. ... -
Page 20: Dhcp Client
THA‐103AC TRENDnet User’s Guide LAN Wireless Wi‐Fi Settings This section explains how to connect the device to your existing wireless network. 1. Go to Wireless tab on the left and select 2.4Ghz Wi‐Fi Settings to connect to your existing wireless N network. Select 5Ghz Wi‐Fi Settings to connect to your existing wireless AC network. DHCP Client Allows the device to request an IP address from a DHCP server (eg. router) when connected. Static IP Select this option and configure a static IP address for the switch. 2. Click on Site Survey button and the configuration page will appear ... -
Page 21: Wireless Clients
THA‐103AC TRENDnet User’s Guide 3. The device will restart. 4. You can verify the connection status at Device Status page. Select your wireless network and enter the wireless key (password) to connect to your network, then click Apply to save. Wireless Clients You can see which device is connected to the device under this page. There are 2 options under Repeat Wireless Settings section, Enable and Disable. If you would like to use the same SSID as your existing network for the device, select Enable. If you would like to separate the SSID from your existing network, select Disable. © Copyright 2015 TRENDnet. All Rights Reserved. 19 ... -
Page 22: Administrator
THA‐103AC TRENDnet User’s Guide Update Firmware Administrator You can update the device firmware on this page. The latest firmware information can be found on www.trendnet.com. Once you have downloaded Management the latest firmware, unzip the download firmware file, select Choose File to You can change the administrator’s password here as well as adjusting the device time. locate it and click Apply to load. If you would like to modify administrator password, please make sure to update them in the app as well. Configuration Save Settings Save the configuration you’ve made to the device. Restore Configuration Settings Restore the configurations you’ve saved for the device. ... -
Page 23: Led Control
THA‐103AC TRENDnet User’s Guide Power Control You can turn the connected device on and off from here also. Power Schedule You can also create and manage the power schedule here, the changes will reflect automatically in the app. Select the power mode, time, day of the week and type in the name for this action and click Add to add a schedule. LED Control You can turn the LED on and off once you have set up the device, if you do not want the LEDs to activate. © Copyright 2015 TRENDnet. All Rights Reserved. ... -
Page 24: Status
THA‐103AC TRENDnet User’s Guide Status This page displays the device information and current status. © Copyright 2015 TRENDnet. All Rights Reserved. 22 ... - Page 25 THA‐103AC TRENDnet User’s Guide Federal Communication Commission Interference Statement Europe – EU Declaration of Conformity This equipment has been tested and found to comply with the limits for a Class B digital device, pursuant to Part 15 of the FCC Rules. These limits are designed to provide Europe – EU Declaration of Conformity reasonable protection against harmful interference in a residential installation. This ...
- Page 26 THA‐103AC TRENDnet User’s Guide For product available in the USA/Canada market, only channel 1~11 can be operated. IC Statement: Selection of other channels is not possible. Pour les produits disponibles aux États‐Unis / Canada du marché, seul le canal 1 This device complies with Industry Canada license‐exempt RSS standard(s). Operation is à 11 peuvent être exploités. Sélection d'autres canaux n'est pas possible. subject to the following two conditions: (1) this device may not cause interference, and (2) this device must accept any interference, including interference that may cause ...
- Page 27 THA‐103AC TRENDnet User’s Guide [Lithuanian] reikalavimus ir kitas 1999/5/EB, 2006/95/EB ir 2009/125/EB Direktyvos nuostatas. TRENDnet tímto prohlašuje, že tento THA‐103AC je ve shodě se Česky [Czech] základními požadavky a dalšími příslušnými ustanoveními směrnice Hierbij verklaart TRENDnet dat het toestel THA‐103AC in Nederlands 1999/5/ES, 2006/95/ES, a 2009/125/ES. overeenstemming is met de essentiële eisen en de andere relevante [Dutch] bepalingen van richtlijn 1999/5/EG, 2006/95/EG, en 2009/125/EG. Undertegnede TRENDnet erklærer herved, at følgende udstyr THA‐ Dansk [Danish] 103AC overholder de væsentlige krav og øvrige relevante krav i Hawnhekk, TRENDnet, jiddikjara li dan THA‐103AC jikkonforma mal‐ Malti [Maltese] direktiv 1999/5/EF, 2006/95/EF, og 2009/125/EF. ħtiġijiet essenzjali u ma provvedimenti oħrajn relevanti li hemm fid‐ Dirrettiva 1999/5/KE, 2006/95/KE, u 2009/125/KE. Hiermit erklärt TRENDnet, dass sich das Gerät THA‐103AC in Deutsch Übereinstimmung mit den grundlegenden Anforderungen und den [German] Alulírott, TRENDnet nyilatkozom, hogy a THA‐103AC BRmegfelel a Magyar ...
- Page 28 General Public License ("LGPL"). shipping from outside of the USA are responsible for custom charges, including but not Go to http://www.trendnet.com/gpl or http://www.trendnet.com Download section limited to, duty, tax, and other fees. and look for the desired TRENDnet product to access to the GPL Code or LGPL Code. These codes are distributed WITHOUT WARRANTY and are subject to the copyrights of WARRANTIES EXCLUSIVE: IF THE TRENDNET PRODUCT DOES NOT OPERATE AS the developers. TRENDnet does not provide technical support for these codes. Please go ...
- Page 29 ...
Need help?
Do you have a question about the THA-103AC and is the answer not in the manual?
Questions and answers