Table of Contents
Advertisement
Quick Links
Advertisement
Table of Contents

Related Manuals for TRENDnet TEW-822DRE


Summary of Contents for TRENDnet TEW-822DRE
-
Page 2: Table Of Contents
Status - Wireless Client List ...................35 Access Point Set Up ..................... 16 Status (Access Point Mode) – IPv6 ..............35 Connecting to your computer to TEW-822DRE ..........16 Access (Access Point Mode) – MAC Filter ............36 Access (Access Point Mode) – Multiple SSID ..........37 Range Extender Web Management .......... - Page 3 Avertissement: ....................... 53 Radiation Exposure Statement: ..............53 Déclaration d'exposition aux radiations: ............ 53 Europe – EU Declaration of Conformity ............54 Safety ......................... 54 EMC..........................54 Radio Spectrum & Health .................. 54 © Copyright 2015 TRENDnet. All Rights Reserved.
-
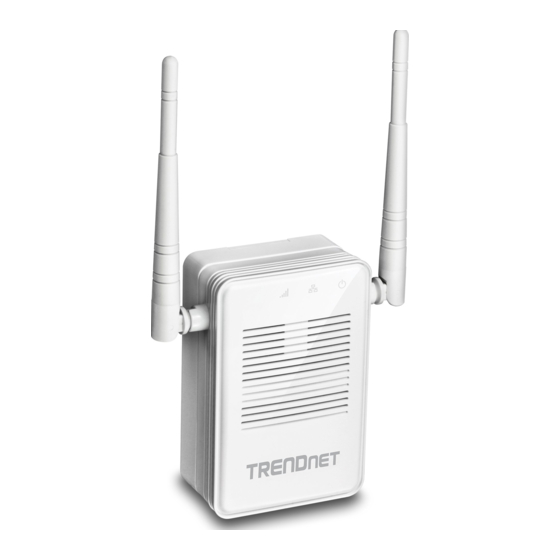
Page 4: Product Overview
Supports the latest encryption standards Features Compatibility TRENDnet's AC1200 WiFi Range Extender, model TEW-822DRE, offers Compatible with legacy wireless devices extreme wireless coverage to eliminate existing wireless network dead spots. Setup takes minutes with no drivers to install and it stays out of the Targeted Beamforming way by plugging directly into an outlet. -
Page 5: Package Contents
• TEW-822DRE • Multi-Language Quick Installation Guide • CD-ROM (User’s Guide) If any package content is missing or damaged, please contact the retail store, online retailer, or reseller/distributor from which the product was purchased. © Copyright 2015 TRENDnet. All Rights Reserved. -
Page 6: Hardware Features
Mode Switch turn off the wireless. Position the switch to button for 10 seconds with a pin or paper clip Extender to operate TEW-822DRE in Range to reset configuration to factory default. Extender mode. Position the switch to AP to Power Plug To exchange different style of power plug. - Page 7 When this light is off, there is no power on your range extender. The light will also blink when WPS is activated. The light will stop blinking and remain solid blue automatically once WPS process is completed. © Copyright 2015 TRENDnet. All Rights Reserved.
-
Page 8: Application Diagram
GHz and 5 GHz bands to the clients for dual band concurrent connections. Simply plug the TEW-822DRE at a location in between your wireless router and your computer or mobile device to eliminate the dead spot of connection. © Copyright 2015 TRENDnet. All Rights Reserved. -
Page 9: Range Extender Set Ups
Protected Setup (WPS) button or web browser configuration. WPS Connection 1. Plug in the TEW-822DRE to a power outlet nearby your wireless router and position the operation switch to Extender. 4. The WPS will stop blinking and the Wireless LED will lit when the connection is established. - Page 10 TRENDnet User’s Guide TEW-822DRE 5. Install the TEW-822DRE in the final location. For maximum performance, install the TEW-822DRE in a location where there is at least 2 bars of connection from your WiFi router to a mobile device. If the Wireless LED lights in blue, the wireless connection to the router is good.
-
Page 11: Web Browser Configuration
TRENDnet User’s Guide TEW-822DRE Web Browser Configuration 1. Plug in the TEW-822DRE to a power outlet nearby your wireless router and position the operation switch to Extender. Preset label in Device label the package under the device 2. Open your computer or mobile device wireless network settings and search TRENDnet822_2.4G_xxxx... - Page 12 TEW-822DRE with a network cable. admin and the password is admin.) Connect a network cable (not included in the package) from your computer to the TEW-822DRE’s network port. 4. The Setup Wizard is prompting on the screen. Click Next. © Copyright 2015 TRENDnet. All Rights Reserved.
- Page 13 TEW-822DRE 5. Change your administrator password from the factory default setting and then click Next. 7. The TEW-822DRE will start searching for available wireless networks. 6. Choose manual setting to search and select your wireless router Select the wireless router or access point you want to connect with manually and then click on Next.
- Page 14 TRENDnet User’s Guide TEW-822DRE In the case that you want to specifically connect to TEW-822DRE or your wireless router, you can setup the extended network with a different name. Click Next after you choose your extended wireless network name. 8. Enter the WiFi password and then click Next. (When necessary, check on Show Password to make sure the WiFi password you 10.
- Page 15 TRENDnet User’s Guide TEW-822DRE 11. TEW-822DRE will reboot to apply the change. It will take about a minute before TEW-822DRE ready to work. 12. Relocate the TEW-822DRE and plug at a location between wireless router and your computer. Check the signal strength from the location you choose to the wireless router.
-
Page 16: Access Point Set Up
To start using your TEW-822DRE, just position the operation mode switch to AP. Connect a network cable (not included in the package) home router to the TEW-822DRE’s network port. And, then plug in the TEW- 822DRE to a power socket. Then the dual band wireless is ready to use. -
Page 17: Range Extender Web Management
Accessing TEW-822DRE with dynamic IP: Make sure your computer is also having the dynamic IP from your home router. To find out the exact IP address of TEW-822DRE, you can check the DHCP client list on your router management page. -
Page 18: System Settings
IP with 192.168.10.100) Click Save to save the changes Dynamic IP Dynamic IP (DHCP) IP address : The IPv4 settings are getting from DHCP server automatically and showing here. © Copyright 2015 TRENDnet. All Rights Reserved. -
Page 19: Static Ip
Check this box to enable DHCP Server on TEW- Static IP Address Server : 822DRE IP Address : Enter the TEW-822DRE management IP address DHCP IP Assign a range of IP addresses to allocate Subnet Mask : Management IP network range Address Range : through the access point’s DHCP server... -
Page 20: Main - System
TRENDnet User’s Guide TEW-822DRE Main - System Password Enter the new administrator password here. password : Setup TEW-822DRE system name and changing the administrator’s Verify Enter the new administrator password again. password. Password: Show Check this box when necessary if you want to... -
Page 21: Main - Time Settings
NTP Server: Enter the address of the time server. (i.e. time.trendnet.com) Time Zone: Select the time zone of the country you are currently in. The TEW-822DRE will set its time based on your selection. Enable Check this box if your time zone has daylight Daylight savings. -
Page 22: Main - Ipv6 (Access Point Mode)
IPv6 Address : Choose the way to assign the IPv6 address: link- local, static, or dynamic (auto-configuration). Link-Local IPv6 Address By default, the TEW-822DRE is set to link-local only. You can access the TEW-822DRE easily with its link-local IPv6 address. IPv6 Address Settings... -
Page 23: Dynamic Ipv6 Address
Primary DNS Enter the primary domain name server IPv6 Server : address Secondary DNS Enter the secondary domain name server IPv6 Server : address Click Save Settings to save the changes © Copyright 2015 TRENDnet. All Rights Reserved. -
Page 24: Wireless (Range Extender Mode)
Select the wireless router or access point you want to connect with In case that you want to specifically connect to TEW-822DRE or your and then click Next. (If you don’t find the wireless network you wireless router, you can setup the extended network to a different name. - Page 25 TRENDnet User’s Guide TEW-822DRE Confirm the network setup and then click Next. TEW-822DRE will reboot to apply the change. It will take about a minute before TEW-822DRE ready to work. © Copyright 2015 TRENDnet. All Rights Reserved.
-
Page 26: Wireless (Access Point Mode) - Basic
Check the box to enable the wireless. And then Wireless : select the schedule between Always or the time Set the TEW-822DRE wireless basic settings. Choose the appropriate schedule you setup. Click on Add New to add wireless band and setup the connection requirements. - Page 27 1 field. 5GHz: Visibility Choose visible so your wireless device can search Status : and find the TEW-822DRE network name, or Choose Shared Key or both invisible to hide the name from network search. open and shared key in authentication field.
- Page 28 WPA and WPA2 mode and cypher type in TKIP or AES (recommended). 5GHz Wireless MAC address: MAC address of TEW-822DRE 5GHz wireless interface. SSID: Shows current Service Set Identifier is currently in use. This SSID is human readable and performs And then enter the key in Pre-shared Key field.
-
Page 29: Wireless (Access Point Mode) - Advanced
Wireless signal transmission power. Choose the Power : lower number when you have crowed wireless devices. So, the TEW-822DRE has toned down signal to prevent wireless interference. WMM Enable: Check to enable or disable WMM. This is the Quality of Service (QoS) feature for prioritizing... -
Page 30: Wireless (Access Point Mode) - Wps
Wireless (Access Point Mode) - WPS WiFi Protected Setup Enable : Check this box to enable WPS feature WPS is the simplest way to connect a wireless client to the TEW-822DRE. Lock WPS-PIN Lock/ enable WPS PIN setup You don’t have to select the encryption mode and fill in a long encryption Setup : passphrase every time you want to setup a wireless connection. -
Page 31: Status - System Information
Showing the current firmware version TEW- Version : 822DRE is running. Time: Showing the current TEW-822DRE system time. Device Mode: The TEW-822DRE is running on Range Extender (AP Repeater) mode or Access Point (AP) Mode. MAC Address: MAC address of the network port. - Page 32 Channel: Shows the TEW-822DRE 2.4GHz wireless is currently communicating on which channel. 5GHz Wireless MAC address: MAC address of TEW-822DRE 5GHz wireless interface. SSID: Shows current Service Set Identifier is currently in use. This SSID is human readable and performs as ESSID to setup wireless groups.
-
Page 33: Status - Local Logs
Log Options: Filter the logs listed in the viewer. Select the kind of log you want to list and click on Apply log All system logs of TEW-822DRE saves locally. Access this page you can Options Now. quickly and easily browse through or find out the event you are looking for. -
Page 34: Status - Statistics
Collisions: How many collision happened on LAN port. the 5GHz wireless network. Collisions: How many collision happened on Error: How many traffic errors happened the Ethernet network. over time on 5GHz wireless network. © Copyright 2015 TRENDnet. All Rights Reserved. -
Page 35: Status - Wireless Client List
TRENDnet User’s Guide TEW-822DRE Status - Wireless Client List Status (Access Point Mode) – IPv6 List all the wireless clients connecting to TEW-822DRE. Lost out the IPv6 settings and status. 2.4GHz/5GHz Wireless Client List Connected Shows how long this wireless client connected to... -
Page 36: Access (Access Point Mode) - Mac Filter
Primary DNS Shows the primary IPv6 domain name server IP Address : address. Secondary DNS Shows the secondary IPv6 domain name server Address : IP address. Click Save Settings to save the changes © Copyright 2015 TRENDnet. All Rights Reserved. -
Page 37: Access (Access Point Mode) - Multiple Ssid
SSID1 is enabled and SSID 2~4 are disabled. Enable SSID : Check this box to enable the wireless network (SSID). Wireless Setting the human readable wireless network Network name (SSID) for identification. Name : © Copyright 2015 TRENDnet. All Rights Reserved. -
Page 38: Access (Access Point Mode) - User Limit
TRENDnet model and version. To find out if there is a firmware upgrade available for your device, please check your TRENDnet model and version using the link. Maximum Wireless Clients on 2.4GHz/5GHz http://www.trendnet.com/downloads/ Enable Limit : Check this box to start limiting the number of connections. -
Page 39: Tools - Backup Settings
Enter the IPv6 address you want to ping and click Ping. import the previous settings. Restore Factory Click Factory Default to restore settings Default Settings to factory defaults. System Reboot Click Reboot to reboot your TEW- 822DRE. © Copyright 2015 TRENDnet. All Rights Reserved. -
Page 40: Tools (Access Point Mode) - Schedule
Time Format : Select the 12 or 24 hour time format Start time : The starting hour and minute for this schedule Start time : The stopping hour and minute for this schedule Click Add to add a schedule entry. © Copyright 2015 TRENDnet. All Rights Reserved. -
Page 41: Tools - Email Notification
From Email Enter the email address where the email Address: notification is sending from. TEW-822DRE can send out email notification when the system log is full. To Email Enter the email address to send the logs Address: Email Subject: Enter the email subject to use when logs are sent... -
Page 42: Tools - Remote Logging
All LED indicators are turned on by default. You can turn them off so they TEW-822DRE, you can setup the Syslog Service Settings to send the are not create weird lighting at night. Check on the LED Disable and then system log over the network. -
Page 43: Tools - Logout
TRENDnet User’s Guide TEW-822DRE Tools - Logout Logout from the system management securely. © Copyright 2015 TRENDnet. All Rights Reserved. -
Page 44: Technical Specifications
802.11ac: FCC: 26 dBm (typical), CE: 20 dBm (typical) @ 867 Mbps Receiving 802.11a: -65 dBm (typical) @ 54 Mbps Sensitivity: 802.11b: -83 dBm (typical) @ 11 Mbps 802.11g: -65 dBm (typical) @ 54 Mbps © Copyright 2015 TRENDnet. All Rights Reserved. -
Page 45: Troubleshooting
TRENDnet User’s Guide TEW-822DRE Troubleshooting I entered http://192.168.10.100 but I am not able to access Situation: I typed http://tew-822dre but I am not able to access the unit. Situation: the unit. What should I do? What should I do? Solution: Solution: 1. - Page 46 How can I access the TEW-822DRE once it is setup? Situation: Solution: You can use its host name (http://tew-822dre) or IP address to access the TEW-822DRE. After repeater setup, the TEW-822DRE will get an IP address from your router (DHCP). Check the DHCP client list on your router if you want to access the TEW-822DRE with its IP address.
-
Page 47: Appendix
Windows Key + C and click on Search. 5. Select Internet Protocol Version 4 (TCP/IPv4) and then click Properties. 2. Type “network” in the search box and click Settings to focus your search. 3. Choose View Network Connections © Copyright 2015 TRENDnet. All Rights Reserved. -
Page 48: Windows 7
6. Click Use the following address and enter the static IP address Windows 7 and related information. For setting up the TRENDNET PRODUCT, 1. Click Control Panel from the Start menu. you can enter 192.168.10.10 as your IP address, 255.255.255.0 as the Subnet mask. - Page 49 3. Click Change adapter settings on the left-hand side. 6. Click Use the following address and enter the static IP address and related information. For setting up the TRENDNET PRODUCT, you can enter 192.168.10.10 as the IP address, 255.255.255.0 as the Subnet mask.
-
Page 50: Os X
3. Choose TCP/IP. In Configure IPv4, select Manually. Input the static IP address, subnet mask, and your router IP address. (In order to setup the TRENDNET PRODUCT, you can put in 192.168.10.10 as the IP address, 255.255.255.0 as the subnet mask and leave router in blank. - Page 51 TRENDnet User’s Guide TEW-822DRE 4. Click Apply to apply the changes. © Copyright 2015 TRENDnet. All Rights Reserved.
-
Page 52: Regulations
This device complies with Part 15 of the FCC Rules. Operation is subject to the following two conditions: (1) This device may not cause harmful interference, and (2) this device must accept any interference received, including interference that may cause undesired operation. © Copyright 2015 TRENDnet. All Rights Reserved. -
Page 53: Industry Canada
Radiation Exposure Statement: This equipment complies with IC radiation exposure limits set forth for an uncontrolled environment. This equipment should be installed and operated with minimum distance 20cm between the radiator & your body. © Copyright 2015 TRENDnet. All Rights Reserved. -
Page 54: Energy Efficiency
TRENDnet User’s Guide TEW-822DRE Europe – EU Declaration of Conformity This product is herewith confirmed to comply with the Directives. TRENDnet hereby declare that the product is in compliance with the essential requirements and other relevant provisions under our sole Directives responsibility. -
Page 55: Rohs
Hereby, TRENDnet, declares that this TEW-822DRE is in Directiva1999/5/CE, 2006/95/CE e 2009/125/CE. compliance with the essential requirements and other relevant Slovensko TRENDnet izjavlja, da je ta TEW-822DRE v skladu z bistvenimi provisions of Directive 1999/5/CE, 2006/95/CE and [Slovenian] zahtevami in ostalimi relevantnimi določili 2009/125/CE. -
Page 56: Erp Statement
Per 10 minučių be duomenų perdavimo. Kai prietaisas de ahorro de energía, tras 10 minutos de ausencia de nenaudojamas, jis gali būti ict išjungtas naudojant maitinimo transmisión de datos. Cuando el dispositivo no está en uso, se © Copyright 2015 TRENDnet. All Rights Reserved. - Page 57 Quando o dispositivo não está sendo usado pode ser desligado no botão de energia, ou simplesmente desligando o adaptador de corrente para economia de energia adicional. Modo de espera em rede: 4.79watts © Copyright 2015 TRENDnet. All Rights Reserved.
-
Page 58: Limited Warranty
Go to http://www.trendnet.com/gpl or http://www.trendnet.com Download appropriately for safe shipment. Customers shipping from outside of the USA and section and look for the desired TRENDnet product to access to the GPL Code or Canada are responsible for return shipping fees. Customers shipping from LGPL Code.
Need help?
Do you have a question about the TEW-822DRE and is the answer not in the manual?
Questions and answers