Table of Contents
Advertisement
Quick Links
Download this manual
See also:
Installation Manual
Advertisement
Table of Contents

Related Manuals for Viking RVSOE


Summary of Contents for Viking RVSOE
- Page 1 Installation 3 Series Built-In Electric 30” Single and Double Ovens...
-
Page 2: Table Of Contents
Table of Contents Warnings & Important Safety Information _______________________________________________3 Dimensions _________________________________________________________________________5 Specifications _______________________________________________________________________6 Cutout Dimensions __________________________________________________________________7 Flush Mount Installation ______________________________________________________________8 Electrical Requirements _____________________________________________________________10 General Information ________________________________________________________________11 Installation _________________________________________________________________________12 Final Preparation ___________________________________________________________________15 Performance Checklist ______________________________________________________________16 Service & Registration_______________________________________________________________18... -
Page 3: Warnings & Important Safety Information
IMPORTANT – Please Read and Follow • Before beginning installation, read these Your safety and the safety of others is instructions thoroughly and carefully. very important. • DO NOT remove permanently affixed We have provided many important safety labels, warnings or plates from the messages in this manual and on your product as this may void the warranty. - Page 4 IMPORTANT – Please Read and Follow WARNING WARNING DO NOT use the handle or oven door to Frame grounded by a 4-conductor cable lift the oven. Remove door before assembly. See installation section. installation to ensure that it is not used to lift the unit.
-
Page 5: Dimensions
Dimensions 30” Single Oven 30” Double Oven ” ” - 3 / - 3 / ( 6 4 ( 6 4 - 3 / ( 7 4 8 ” - 3 / ( 7 5 4 ” - 3 / - 3 / - 3 / ( 1 3... -
Page 6: Specifications
Specifications 30"W. Electric Single/Double Description RVSOE RVDOE Overall width 29-3/4” (75.6 cm) Overall height 29-3/8” (74.6 cm) 51-3/8” (130.5 cm) Overall depth To front of door 25-3/16” (64.3 cm) Cutout width Standard—28-1/2” (72.4 cm minimum) Flush mount*—29-5/8” (75.25 cm) Cutout height Standard—28-1/4”... -
Page 7: Cutout Dimensions
Cutout Dimensions (For standard installation and flush mount* installations) 30” Double Oven Built-In 30” Single Oven Built-In 2 ” 2 ” - 1 / - 1 / - 1 / ( 6 1 ” ( 6 1 ” 8 ” ( 7 1 4 ”... -
Page 8: Flush Mount Installation
Dimensions (Flush mount installation) LEGEND Blocking Finished Surfaces Finished Finished Surfaces Surfaces Vertical Blocking Vertical Blocking FLUSH CUTOUT FLUSH CUTOUT 29-5/8” (75.2 cm) 29-5/8” (75.2 cm) 25-1/4” (64.1 cm) 25-1/4” (64.1 cm) 29-1/2” (74.9 cm) C 51-1/2” (130.8 cm) *Note: To install the oven in a flush mount application the flush mount accessory kit (D30FTS for single ovens and D30FTD for double ovens) is required. - Page 9 Dimensions (Flush mount installation) Top View Distance will vary depending on the cabinet Vertical Blocking Screw Screw CRITICAL DIMENSIONS A 28-1/2” (72.4 cm) 1-1/2” (3.8 cm)
-
Page 10: Electrical Requirements
Electrical Requirements • Oven requires a separate, grounded • This unit is equipped with a No. 10 4-wire, 240V (AC), 30 amp (single ovens) ground wire in the conduit. and 50 amp (double ovens) service with its own circuit breaker. •... -
Page 11: General Information
General Information • All openings in the wall behind the • Detach the product from the metal anchor appliance or in the floor under the strip by removing the attachment screw. appliance should be sealed. • DO NOT remove the protective wrapping •... -
Page 12: Installation
General Information Site Preparation • BE SURE that support for this appliance is Note: It is recommended that a thorough perpendicular to the front facing of the site inspection be conducted PRIOR to wall or cabinet before you perform the unpacking and moving this appliance. - Page 13 Installation (cont.) Close the door until it stops. Push in/lift door up/and then out. Repeat for all doors. Unscrew pallet screws from side of oven. Remove racks. Green White White Neutral Neutral Green Black Black Wiring option 1* Wiring option 2* (connect the white and green to the incoming neutral) (connect the white to the incoming neutral, attach green to grounded junction box)
- Page 14 Installation (cont.) White Neutral Green Black Wiring option 3* Lift oven into position. (connect the white to the incoming neutral, attach green to suitable ground) Push oven straight in. Attach screws to the side of the framing. Note: Two screws for single ovens, four screws for double ovens (screws not included).
-
Page 15: Final Preparation
Installation Open door completely. Rotate door Close door. hinge to locked position. Final Preparation 1. Some stainless steel parts may have a 2. The interior of the oven should be washed protective wrap, which must be peeled thoroughly with hot, soapy water to off. -
Page 16: Performance Checklist
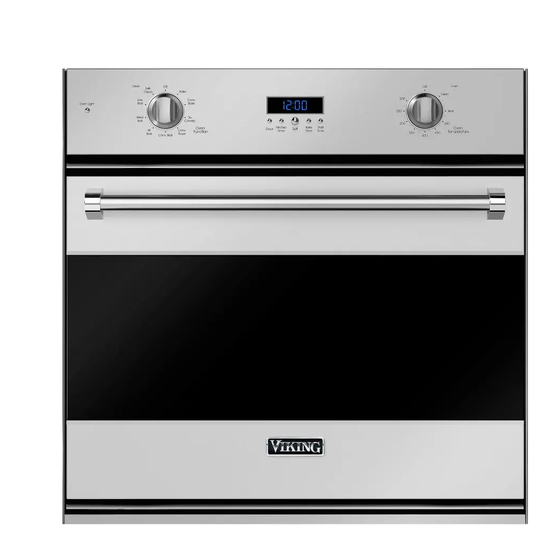
Performance Checklist A qualified installer should carry out the following checks: □ Check oven Bake Function—bake element on full power, center and outside broil elements at partial power. Convection Bake function—bake and broil elements the same with the convection fan “ON”. □... - Page 17 Performance Checklist (cont.) RVSOE/RVDOE Self-Clean Electronic Temperature Off/On Indicator Light Control Timing Center Indicator Light Interior Oven Function Selector Oven Light Control...
-
Page 18: Service & Registration
Clearly describe the problem that you are having. If you are unable to obtain the name of an authorized service agency, or if you continue to have service problems, contact Viking Range, LLC at 1-888-845-4641, or write to: VIKING RANGE , LLC... - Page 19 Notes ________________________________________________________________________________________________________________________________________________________ ________________________________________________________________________________________________________________________________________________________ ________________________________________________________________________________________________________________________________________________________ ________________________________________________________________________________________________________________________________________________________ ________________________________________________________________________________________________________________________________________________________ ________________________________________________________________________________________________________________________________________________________ ________________________________________________________________________________________________________________________________________________________ ________________________________________________________________________________________________________________________________________________________ ________________________________________________________________________________________________________________________________________________________ ________________________________________________________________________________________________________________________________________________________ ________________________________________________________________________________________________________________________________________________________ ________________________________________________________________________________________________________________________________________________________ ________________________________________________________________________________________________________________________________________________________ ________________________________________________________________________________________________________________________________________________________ ________________________________________________________________________________________________________________________________________________________ ________________________________________________________________________________________________________________________________________________________ ________________________________________________________________________________________________________________________________________________________ ________________________________________________________________________________________________________________________________________________________ ________________________________________________________________________________________________________________________________________________________ ________________________________________________________________________________________________________________________________________________________ ________________________________________________________________________________________________________________________________________________________ ________________________________________________________________________________________________________________________________________________________...
- Page 20 Viking Range, LLC 111 Front Street Greenwood, Mississippi 38930 USA (662) 455-1200 For product information, call 1-888-845-4641 or visit our website at vikingrange.com in the US or brigada.ca in Canada (063015) F21197A EN...
Need help?
Do you have a question about the RVSOE and is the answer not in the manual?
Questions and answers