Viking RDSOE306SS Use & Care Manual
Built-in electric 30” single and double ovens
Hide thumbs
Also See for RDSOE306SS:
- Service manual (60 pages) ,
- Installation manual (4 pages) ,
- Manual (36 pages)
Table of Contents
Advertisement
Advertisement
Table of Contents

Related Manuals for Viking RDSOE306SS


Summary of Contents for Viking RDSOE306SS
- Page 1 Use & Care Viking Range Corporation 111 Front Street Greenwood, Mississippi 38930 USA (662) 455-1200 For product information, call 1-888-845-4641 or visit the Viking Web site at vikingrange.com Built-In Electric 30” Single and Double Ovens F20945D EN (021513)
-
Page 2: Table Of Contents
Product Care appliance needs. For more information about the complete and Cleaning and Maintenance ___________________________________43 growing selection of Viking products, contact your dealer or visit us Self-Clean Cycle _____________________________________________45 online at vikingrange.com Replacing Oven Lights _______________________________________47... -
Page 3: Warnings & Safety
Warnings & Safety Warnings & Safety Warning and Important Safety Instructions appearing in this manual WARNING are not meant to cover all possible conditions and situations that may occur. Common sense, caution, and care must be exercised when installing, maintaining, or operating the appliance. DO NOT use commercial oven cleaners inside the oven. - Page 4 Warnings & Safety Warnings & Safety To Prevent Fire or Smoke Damage Cooking Safety • Be sure all packing materials are removed from the appliance before • Use dry, sturdy pot-holders. Damp pot-holders may cause burns from steam. Dishtowels or other substitutes should NEVER be used as potholders operating it.
- Page 5 Warnings & Safety Warnings & Safety Important Safety Notice and Warning • Other potentially hot surfaces include oven vent, surfaces near the vent The California Safe Drinking Water and Toxic Enforcement Act of 1986 opening, oven door, areas around the oven door, and oven window. (Proposition 65) requires the Governor of California to publish a list of •...
- Page 6 If you notice the cooling fan is not operating or you observe unusual • DO NOT allow food to remain in the oven for more than 2 hours after or excessive noise coming from the cooling fan, contact a Viking the end of the cooking cycle.
-
Page 7: Before Using Oven
Before Using Oven Setting the Clock Oven The time-of-day must be set before Important! Before first use, wipe interior with soapy water and dry any other program can be used. thoroughly. Then set the oven selector to “BAKE”, the thermostat When your oven is first connected to to 350°F, and operate for an hour. -
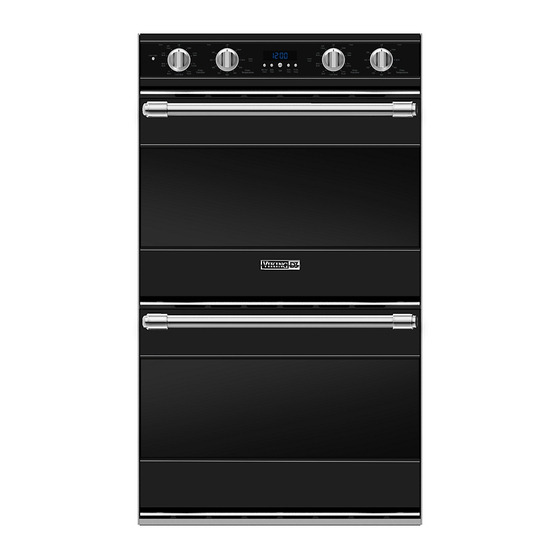
Page 8: Oven Control Panel
Oven Control Panel Oven Control Panel Electronic Timing Center Temperature Control Interior Oven Light Contro The Electronic Timing Center is used to Each oven has a separate temperature control The oven has interior oven lights that are program and control all timing functions. dial. -
Page 9: Oven Features
Oven Features Clocks and Timers Electronic Timing Center The Electronic Timing Center is used to program and control all timing functions. It has five CLEAN OVEN CLEAN OVEN SELF CLEAN CLEAN OVEN OVEN SELF CLEAN CLEAN CLEAN CLEAN OVEN OVEN OVEN OVEN CLEAN... - Page 10 Clocks and Timers Clocks and Timers Timer Alarm To Set The Automatic Time Bake Program: (cont.) At the end of a MIN/SEC TIMER program or BAKE TIME program, 3. Set the Oven Function selector to the desired function – the alarm will consist of three beeps followed by three beeps every BAKE, CONVECTION BAKE, or TRUCONVEC™, etc.
-
Page 11: Functions And Settings
Functions and Settings Functions and Settings To enter into the Oven Settings mode: These functions allow you to customize the oven controls to suit your specific tastes. The following oven settings are available: Degree Format 1. Press and hold the “MIN/SEC TIMER” button for 3 seconds. The oven has been preset to the Fahrenheit temperature scale. -
Page 12: Using The Oven
Using the Oven Using the Oven Preheat Rack Positions For best results, it is extremely important that you preheat your oven Each oven is equipped with three heavy-duty racks, including two to the desired cooking temperature before placing food items in the TruGlide™... -
Page 13: Conventional And Convection Cooking
Using the Oven Using the Oven Conventional and Convection Cooking Conventional and Convection Cooking (cont.) Because of variations in food density, surface texture and consistency, • Some recipes, especially those that are homemade, may require some foods may be prepared more successfully using the conventional adjustment and testing when converting from standard to bake setting. -
Page 14: Condensation
Using the Oven Using the Oven Condensation Pan Placement Tips The oven is supplied with a system which provides a natural circulation • When using large (15" x 13") flat pans or trays that cover most of of air. In most cases, this natural circulation will eliminate any observed the rack, rack positions 2 or 3 produce the best results. -
Page 15: Baking
Baking Baking BAKE (Two-Element Bake) TRU CONV (TruConvec™) Full power heat is radiated from the bake The rear element only operates at full element in the bottom of the oven cavity power. There is no direct heat from the and supplemental heat is radiated from bottom or top elements. -
Page 16: Baking Chart
Baking Baking Baking Chart Convection Baking Chart Single Rack Time Single Rack Time Food Pan Size Position Temp (min) Food Pan Size Position Temp (min) BREADS BREADS Biscuits Cookie sheet 3 or 4 400˚ F (204.4˚ C) 8 - 10 Biscuits Cookie sheet 2 &... -
Page 17: Solving Baking Problems
Solving Baking Problems Roasting CONV ROAST Baking problems can occur for many reasons. Check the chart below (Convection Roast) for the causes and remedies for the most common problems. It is important to remember that the temperature setting and cooking The convection element runs in times you are accustomed to using with your previous oven may vary conjunction with the inner and outer... - Page 18 Roasting Roasting Roasting Tips Roasting Tips (cont.) (cont.) • When using a meat thermometer, insert the probe halfway into the After preparing the meat and placing on broiler pan, follow these center of the thickest portion of the meat. (For poultry, insert the steps for proper probe placement.
-
Page 19: Conventional Roasting Chart
Roasting Roasting Conventional Roasting Chart Convection Roasting Chart (when using the Bake or Convection Bake setting) Internal Time Internal Time Food Weight Temp (min/lb) Temp Food Weight Temp (min/lb) Temp BEEF BEEF Rib roast Rib roast Rare 4 - 6 lbs 325˚... -
Page 20: Broiling
Broiling Broiling CONV BROIL LOW BROIL (Convection Broil) This mode uses only a fraction of the The top element operates at full power. available power to the inner broil This function is exactly the same as element for delicate top-browning. The regular broiling with the additional inner broil element is on for only part of benefit of air circulation by the... -
Page 21: Broiling Chart
Broiling Broiling Broiling Chart Broiling Tips • ALWAYS use a broiler pan and grid for broiling. They are designed Type and Time to provide drainage of excess liquid and fat away from the cooking Cut of Meat Weight Setting Rack (min) surface to help prevent splatter, smoke, and fire. -
Page 22: Convection Dehydrate/Defrost
Convection Dehydrate/Defrost Cleaning and Maintenance Convection Dehydrate Any piece of equipment works better and lasts longer when This oven is designed not only to cook, but also to dehydrate fruits maintained properly and kept clean. Cooking equipment is no and vegetables. exception. -
Page 23: Self-Clean Cycle
Cleaning and Maintenance Self-Clean Cycle Oven Racks This oven features an automatic pyrolytic self-cleaning cycle. During this Clean with detergent and hot water. Stubborn spots can be scoured cycle, the oven reaches elevated temperatures in order to burn off soil and with a soap-filled steel wool pad. -
Page 24: Replacing Oven Lights
Self-Clean Cycle Replacing Oven Lights WARNING To start the Self-Clean cycle: 1. Close the door completely. ELECTRICAL SHOCK HAZARD 2. Turn the oven selector knob clockwise to the “SELF CLEAN” mode. Disconnect the electric power at the main fuse or circuit breaker before replacing bulb. -
Page 25: Troubleshooting
Temperature control knob is rotated too far obtain the name of an authorized service agency, or if you continue past broil position. to have service problems, contact Viking Range Corporation at Door will not open. Oven is still in self-clean mode. If oven is... -
Page 26: Warranty
WARRANTY, BREACH OF CONTRACT OR OTHERWISE. Some jurisdictions do not allow the exclusion or the date of original retail purchase or closing date for new construction, whichever period is longer. Viking limitation of incidental or consequential damages, so the above limitation or exclusions may not apply to Range Corporation, warrantor, agrees to repair or replace, at its option, any part which fails or is found to you.
Need help?
Do you have a question about the RDSOE306SS and is the answer not in the manual?
Questions and answers