Table of Contents
Advertisement
Advertisement
Table of Contents
Troubleshooting

Related Manuals for DèLonghi ESAM6600


Summary of Contents for DèLonghi ESAM6600
- Page 1 5713218221/ 02.13...
- Page 2 BEAN TO CUP ESPRESSO AND CAPPUCCINO MACHINE Instruction for use ESAM6600/ESAM6620/ESAM6650...
-
Page 3: Electrical Requirements
ElECTRICAl REqUIREMENTS Before using this appliance ensure that the voltage indicated on the product corresponds with the main voltage in your home, if you are in any doubt about your supply contact your local electricity company. The flexible mains lead is supplied connected to a B.S. 1363 fused plug having a fuse of 13 amp capacity. Should this plug not fit the socket outlets in your home, it should be cut off and replaced with a suitable plug, following the procedure outlined below. - Page 7 32 32...
-
Page 8: Table Of Contents
CONTENTS Cleaning the milk container after use ........14 Programming the quantities of coffee and milk in the cup ..15 ElECTRICAl REqUIREMENTS ........2 HEATING WATER ........... 15 INTRODUCTION ............8 Preparation ................15 Symbols used in these instructions .......... 8 Change the quantity of water delivered automatically. -
Page 9: Introduction
INTRODUCTION • Make sure the socket used is freely accessible at all times, enabling the appliance to be unplugged when necessary. Thank you for choosing the utomatic coffee and cappuccino • Unplug directly from the plug only. Never pull the power maker. We hope you enjoy using your new appliance. Take a cable as you could damage it. few minutes to read these instructions. •... -
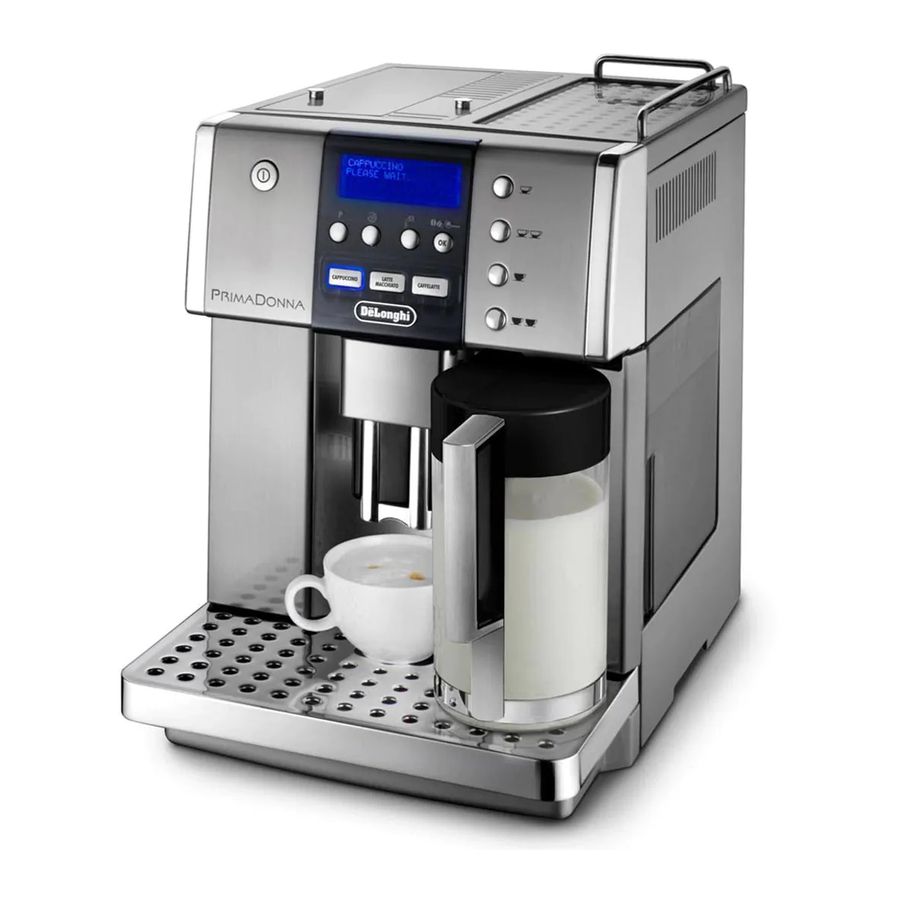
Page 10: Dpription
DPription of control panel Please note: (page 3 - D ) Keep these instructions. A number of buttons on the panel have a dual function. This is if the appliance is passed to other persons, they must also be indicated in brackets in the dPription. provided with these instructions. -
Page 11: Connecting The Appliance
Connecting the appliance appliance starts to give satisfactory results. Important! TURNING THE APPlIANCE ON Check that the mains power supply voltage corresponds to Please note: the value indicated on the rating plate on the bottom of the Before turning the appliance on, make sure the main switch on appliance. -
Page 12: Descaling
Saving, adjust time, auto-start, auto-off, Coffee temperature, Water the hours; 5. Press the OK button to confirm. The minutes flash on the hardness, Water filter, Beep, Statistics, default values. display; Descaling 6. Press the button (corresponding to the For instructions on descaling, see page 21. symbol on the display) to change the minutes;... -
Page 13: Setting Water Hardness
is displayed; to the symbol on the display), you can 3. Press the OK button; check: 4. Press the button (corresponding to the how many coffees have been made; symbol on the display) until the required the total of drinks with milk made (CaPPuCCino, time appears (15 or 30 minutes, or 1, 2 or 3 hours);... -
Page 14: Customising The Quantity
Customising the quantity • warm the cups by rinsing them with hot water (using the To change the quantity of coffee the appliance delivers hot water function). automatically into the cup, proceed as dPribed below. • set a higher coffee temperature in the menu. press for a few seconds, then release the the (short Making coffee using coffee beans coffee) or (long coffee) button, until the message “PrograM QuanTiTy”... -
Page 15: Making Drinks With Milk
Making cappuccino Please note! 1. after attaching the milk container, position the container if you use pre-ground coffee, you can only make one cup of pointer on 1 “ CaPPuCCino” printed on the milk container coffee at a time. lid (fig. 20). The quantity of froth can be adjusted during delivery by 1. -
Page 16: Cleaning The Milk Container After Use
HEATING WATER 2. Press the CaPPuCCino, laTTe MaCChiaTo or CaFFelaTTe button twice (within 2 seconds). Preparation Cleaning the milk container after use Important! Danger of burns. Important! Danger di scottature never leave the machine unsupervised while delivering hot When cleaning the internal tubes of the milk container, a little water. -
Page 17: Cleaning The Coffee Grounds Container
Cleaning the inside of the machine service door (a18), water tank (a12), Danger of electric shock! coffee spouts (a19) and hot water nozzle (a10), Before cleaning internal parts, the machine must be turned pre-ground coffee funnel (a8), off (see “Turning off”, page 10) and unplugged from the mains infuser (a11) power supply. -
Page 18: Cleaning The Milk Container
6. use the brush (a22) to remove any coffee residues left in spout and intake tube. the infuser housing, visible through the infuser door. 7. replace the lid on the milk container, turning it 7. after cleaning, replace the infuser by sliding it onto the anticlockwise to hook it in place. -
Page 19: Setting Water Hardness
water, fill with clean water and replace. “rinsing... Press The machine is now reprogrammed with the new water OK” is displayed. hardness setting. 9. empty the container used to collect the descaler solution WATER SOFTENER FIlTER and replace it under the hot water spout. 10. -
Page 20: Technical Specification
weeks, you should replace the filter: • eMC Directive 2004/108/eC and subsequent 1. extract the tank and exhausted filter; amendments 2. remove the new filter from the packaging and proceed as • Materials and accessories coming into contact with food illustrated on the previous pragraph (points 3-4-5-6). conform to the provisions of eC regulation 1935/2004. -
Page 21: Displayed Messages
DISPlAYED MESSAGES DISPlAYED MESSAGE POSSIBlE CAUSE REMEDY FILL TANK Insufficient water in the tank. Fill the tank with water and/or insert it correctly, pushing it as far as it will go until it clicks into place (fig. 3). ground Too Fine adJuST The grinding is too fine and the coffee is delivered too repeat coffee delivery and turn the grinding adjustment slowly or not at all. -
Page 22: Troubleshooting
TROUBlESHOOTING Below is a list of some of the possible malfunctions. if the problem cannot be resolved as dPribed, contact Customer Services. PROBlEM POSSIBlE CAUSE REMEDY The coffee is not hot The cups were not preheated. Warm the cups by rinsing them with hot water (using the hot water function).
Need help?
Do you have a question about the ESAM6600 and is the answer not in the manual?
Questions and answers