Table of Contents
Advertisement
Quick Links
Advertisement
Table of Contents

Subscribe to Our Youtube Channel
Related Manuals for geo-FENNEL FIRT1000


Summary of Contents for geo-FENNEL FIRT1000
- Page 1 Infrared Thermometer Operation Manual FIRT1000...
-
Page 2: Table Of Contents
TABLE OF CONTENTS ……………………………………….3 INTRODUCTION …………………………………………….3 FEATURES ………………………….4 WIDE RANGE APPLICATION ……………………………………………….4 1 SAFETY ……………………………5 2.DISTANCE & SPOT SIZE ……………………………………6 3 SPECIFICATIONS ………………………7 4 FRONT PANEL DESCRIPTION …………………………………………..7 5 INDICATOR ……………………………………………8 6 BUTTONS …………………………10 7 MEASURMENT PERATION ……………………………..11 8 BATTERY PLACEMENT …………………………………………. -
Page 3: Introduction
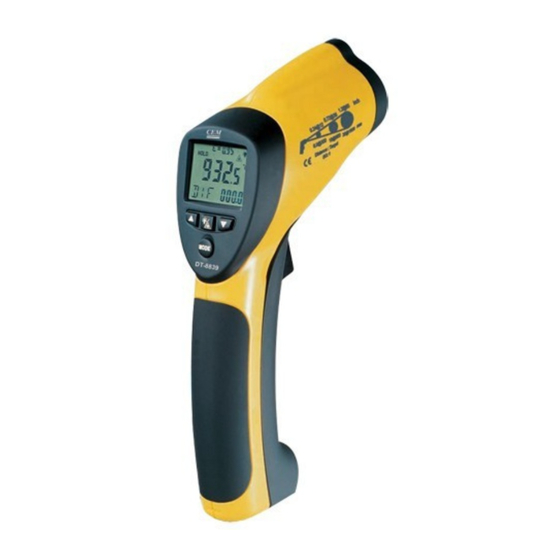
INTRODUCTION Thank you for purchase of the IR Thermometer. This Series is capable of non-contact (infrared) temperature measurements at the touch of a button. The built-in laser pointer increases target accuracy while the backlight LCD and handy push-buttons combine for convenient, ergonomic operation. -
Page 4: Wide Range Application
WIDE RANGE APPLICATION: Food preparation, Safety and Fire inspectors, Plastic molding, Asphalt, Marine and Screen printing, measure ink and Dryer temperature, HVAC/R, Diesel and Fleet maintenance. SAFETY Use extreme caution when the laser beam is turned on. Do not let the beam enter your eye, another person’s eye or the eye of an animal. -
Page 5: Distance & Spot Size
2 Distance & Spot Size As the distance (D) from the object increases, the spot size (S) of the area measured by the unit becomes larger. The relationship between distance and spot size for each unit is listed below. The focal point for each unit is 914mm (36”). -
Page 6: Specifications
3.SPECIFICATIONS Temperature range D: S -50 to 1000@(-58 to 1832R R R R ) 50:1 0.1@(0.1R R R R ) Display resolution Accuracy for targets: Assumes ambient operating temperature of 23 to 25@(73 to 77R) -50 to -20@*-58 to -4R+: ±5@(±9R) -20 to 200@(-4 to 392R): ±... -
Page 7: Front Panel Description
Safety “ CE ” Comply with EMC Note: Accuracy: Given at 18 to 28@ (64 to 82 R), less than 80 % RH. Field of View: Make sure that the target is larger than the unit’s spot size. The smaller the target, the closer you should be to it. When accuracy is critical, make sure the target is at least twice as large as the spot size. -
Page 8: Buttons
y Current temperature value 6.BUTTONS p"Up button (for EMS,HAL,LAL) q"MODE button (for cycling through the mode loop) r Down button (for EMS,HAL,LAL) s Laser/Backlight ON/OFF button (pull trigger and press button to activate laser/backlight) MODE Button Function The infrared thermometer measures Maximum (MAX), Minimum (MIN), Differential (DIF), and Average (AVG) Temp. - Page 9 Switching @ @ @ @ /R R R R , LOCK ON/OFF and SET ALARM. p p p p ! ! ! ! @ @ @ @ /R R R R q q q q ! ! ! ! LOCK ON/OFF r! SET ALARM Select the temperature units ( C or...
-
Page 10: Measurment Peration
7.MEASURMENT OPERATION p"Hold the meter by its Handle Grip and point it toward the surface to be measured. q"Pull and hold the Trigger to turn the meter on and begin testing. The display will light if the battery is good. Replace the battery if the display does not light. -
Page 11: Battery Placement
8.BATTERY REPLACEMENT p As battery power is not sufficient, LCD will display “ ” replacement with one new battery type 9V is required. q Open battery cover, then take out the battery from instrument and replace with a new 9-Volt battery and place the battery cover back. -
Page 12: Notes
9. NOTES: How it Works Infrared thermometers measure the surface temperature of an object. The unit’s optics sense emitted, reflected, and transmitted energy, which is collected and focused onto a detector. The unit’s electronics translate the information into a temperature reading, which is display n the unit. - Page 13 Reminders p"Not recommended for use in measuring shiny or polished metal surfaces ( stainless steel, aluminum, etc.).See Emissivity q"The unit cannot measure through transparent surfaces such as glass. It will measure the surface temperature of the glass instead. r"Steam, dust, smoke, etc., Can prevent accurate measurement by obstructing the unit’s optics.
-
Page 14: Maintenance & Clearing
Emissivity Values Substance Thermal emissivity Substance Thermal emissivity Asphalt 0.90 to 0.98 Cloth (black) 0.98 Concrete 0.94 Human skin 0.98 Cement 0.96 Lather 0.75 to 0.80 Sand 0.90 Charcoal (powder) 0.96 Earth 0.92 to 0.96 Lacquer 0.80 to 0.95 Water 0.92 to 0.96 Lacquer (matt) 0.97...
Need help?
Do you have a question about the FIRT1000 and is the answer not in the manual?
Questions and answers