
Subscribe to Our Youtube Channel
Related Manuals for geo-FENNEL FIRT 1600 Data


Summary of Contents for geo-FENNEL FIRT 1600 Data
- Page 1 Manual Utilizare User manual Termometru cu infrarosu Infrared Thermometer FIRT 1600 Data...
-
Page 2: Safety Instructions
K it l ivrare KIT CONSISTS OF termometru Infraroþu FIRT 1600, Data, baterie, Infrared Thermometer FIRT 1600 Data, battery, USB-cablu, trepied, software, sonda de tip K- USB-cable, tripod, software, Type-K tempera- tempera- turii, geantã, manual. ture probe, carrying case, manual. -
Page 3: Intended Use Of Instrument
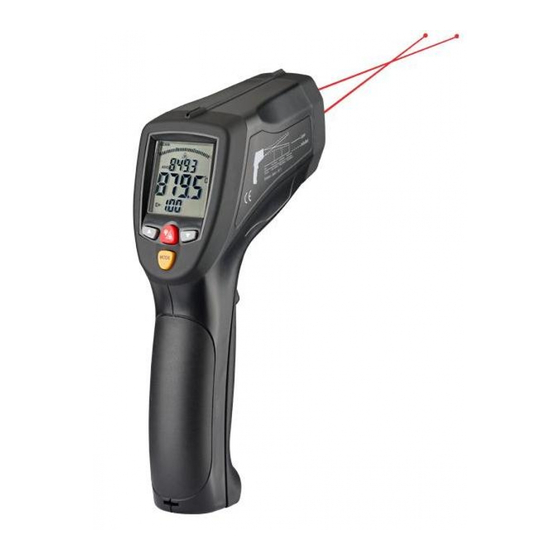
CARACTERISTICI: FEATURES •Termometru IR pentru temperatura fãrã contact • IR-Thermometer for non-contact temperature masuratori cu ajutorul laserului puncte measurements with laser dot • încorporate indicator laser dublu pentru • Built-in dual laser pointer for accurate targeting direcþionarea corectã • High measuring range (-50°C up to +1600°C) •... -
Page 4: Technical Data
DATE T EHNICE T ECHNICAL DATA Distanta: Marime Spot(D:S) 50 : 1 Distance : Spot Size (D:S) 50 : 1 Domeniu Maurare -50°C la +1600°C Measuring range -50°C to +1600°C Precizia masurarii IR Accuracy IR measuremrents -50°C la +20°C ±2,5°C -50°C to +20°C ±2,5°C +20°C la +400°C... -
Page 5: O Peration Elements
Elemente Operationale O PERATION ELEMENTS 1) IR -Sensor 1) IR sensor 2) L C-Display 2) L C display 3) C onector sonda K-Ti p 3) T ype K plug 4) U SB-conector 4) U SB plug 5) I luminare / Laser 5) B acklight / Laser 6) T asta AUF 6) B utton UP... -
Page 6: Display Indication
Indicatiile Display-ului D ISPLAY INDICATION 1) Simbol SCAN = Masurarea este activa 1) SCAN symbol = temperature measure- 2) Simbol HOLD = data “inghetata” pentru ment is running valoarea masurata 2) HOLD symbol = short data hold of 3) S imbol „Laser on“ measured value 4) Indicarea valorii masurate 3) „... -
Page 7: Replace Battery
TASTATURA K EYPAD 1) Pornire/Oprire display luminat si laser 1) ON/OFF display illumination and laser 2) SUS (pentru EMS, HAL, LAL) 2) UP (for EMS, HAL, LAL) 3) JOS ( pentru EMS, HAL, LAL) 3) DOWN (for EMS, HAL, LAL) 4) M ODE (Selectie program) 4) M ODE (program selection) INLOCUIRE B ATERIE... - Page 8 ÎNAINTE PORNIREA MÃSURÃTORILOR BEFORE STARTING MEASUREMENTS Distanta (D) : Spot (S) Distance (D) : Spot Size (S) Distanþa: raportul de la faþa loculuieste importantã The distance:spot ratio is important for evalu- pentru evaluarea zonei mãsurate. ation of the area measured. The larger the dis- Mai mare distanþã...
- Page 9 MATERIAL EMISSIVITY EMISIVITATE MATERIAL Asphalt 0,90 – 0,98 Asfalt 0,90 – 0,98 Brick 0,93 – 0,96 Caramida 0,93 – 0,96 C ement 0,96 C iment 0,96 Ceramic 0,90 – 0,94 Ceramice 0,90 – 0,94 C harcoal 0,96 c ãrbune 0,96 Chromium ox.
- Page 10 Masurari: Measurements Vizati tinta care urmeazã sã fie mãsuratã þi trageþi þi þineþi pe trãgaci. Aim at the target to be measured and pull and Apasand pe tragaci, instrumentului porneþte hold the trigger. By pulling the trigger the in- automat. strument automatically switches on.
- Page 11 D IF The difference value between highest and Valoarea Diferenþa dintre cea mai mare þi cea mai micã valoare mãsuratã este afiþatã (mica figura în lowest value measured is displayed (small partea de sus). figure on top). A VG A VG The average value of last IR measurement is Valoarea medie de mãsurare ultima IR este afiþatã...
-
Page 12: Backlight Illumination
DIRECÞIONAREL ASER LASER TARGETING Punctele cu laser pentru direcþionare pot fi activate The laser dots for targeting can be activated or sau dezactivate dacã este necesar. deactivated if required. Switch instrument on Porniti instrumentul þi apãsaþi butonul 1. and press button 1. Display shows symbol Pe afiþaj apare simbolul "... -
Page 13: Alarm Function
• Trageþi de declanþator pentru a comuta PORNIT • Pull trigger to switch instrument on. instrumentul. • Press MODE button until symbol for continuous • Apãsaþi butonul MODE pânã când simbolul measurement flashes in the display. pentru continua mãsurare clipeþte pe ecran. •... - Page 14 MEMOR E I M EMO FIRT 1600 Data poate salva pânã la 100 de FIRT 16 0 Data ca sav up to 100 va e . lu s valori. Pentru a stoca valori vã rugãm sã procedaþi dupã...
- Page 15 Anuleazã valori de memorie Cancel memory values • Trageþi þi þineþi de declanþator în funcþia LOG þi • Pull and hold trigger in LOG function and select selectaþi Poziþia de memorie "000" cu butoanele memory position „000“ with buttons UP and Sus si JOS.
-
Page 16: Usb Data Transfer
TRANSFER D ATE P RIN U SB USB DATA TRANSFER • Conectaþi la PC termometru • C onnect thermometer to PC • Trageþi de declanþator pentru a comuta PORNIT • Pull trigger to switch on the instrument. instrumentul. • Activate MAX/MIN/DIF/AVG mode and press •... -
Page 17: Garantie
Conformitate CE CE-CONFORMITY Instrumentul are marca CE în conformitate cu EN Instrument has CE-mark according to 61326-1:2006, EN 61326-2-1:2006. EN 61326-1:2006, EN 61326-2-1:2006. ACCEPTABILITATE e lectromagneticã ( CEM) ELECTROMAGNETIC ACCEPTABILITY (EMC) • Acesta nu poate fi complet exclusã, faptul cã •... -
Page 18: Exceptions From Responsibility
EXCEPTII PRIVIND RESPONSABILITATEA EXCEPTIONS FROM RESPONSIBILITY Utilizatorul acestui produs este de aþteptat sã The user of this product is expected to follow urmeze instrucþiunile din manualul de the instructions given in operators’ manual. INSTRUCTIUNI ". Deþi toate instrumentele din Although all instruments left our warehouse depozitul nostru sunt în perfectã...
Need help?
Do you have a question about the FIRT 1600 Data and is the answer not in the manual?
Questions and answers