Advertisement
INSTALLATION INSTRUCTIONS FOR REQUIRED AND OPTIONAL ACCESSORIES
FOR USE ON 42- AND 54-INCH LINEAR DIRECT VENT GAS FIREPLACES
[FIREPLACE MODELS:
Rhapsody42TEN and
HOT GLASS WILL CAUSE BURNS. DO NOT
TOUCH GLASS UNTIL COOLED. NEVER
ALLOW CHILDREN TO TOUCH GLASS.
• Fireplaces surfaces get EXTREMELY HOT!
• Install only when fireplace is OFF and COLD.
• The glass on the front of the fireplace reaches
EXTREMELY HIGH temperatures and can cause severe
burns if touched. Even after the gas is turned off,
fireplace surfaces remain extremely hot.
• Keep children away from an operating fireplace. Closely
supervise children in any room where a fireplace is
operating to prevent contact with glass.
CAUTION
RISK OF PERSONAL INJURY OR PROPERTY DAMAGE.
• Never operate fireplace without liner panels installed. These
appliances are NOT approved for operation without liner panels.
• Do NOT abuse glass doors by striking or slamming shut
• Never operate fireplace with glass door assembly removed.
• Handle glass door assembly with extreme care.
Replace damaged glass door assembly with approved
replacement assembly only.
• Use only media approved for use with these fireplaces
(as applicable). Failure to use approved media may result
in sooting, delayed ignition, or other improper fireplace
operation, and may void the warranty.
NOTICE
• Read all steps before starting installation.
• LEAVE THESE INSTRUCTIONS WITH THE APPLIANCE.
• All warnings, precautions, and instructions in the Installation
Instructions and Care and Operation Instructions provided
with the appliance also apply to these instructions.
• If you encounter any problems, need clarification of these
instructions, or are not qualified to properly install this
kit, contact your local distributor or dealer.
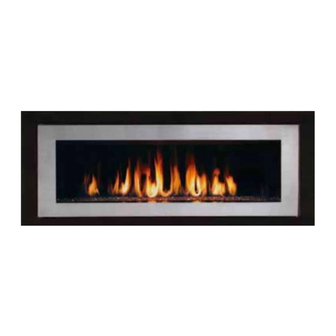
Figure 1: 54 in. DRL and Rhapsody linear gas fireplaces
with designer floor kit and Illusion Cityscape
firebox liner kit (both in black porcelain).
P900077-05
P/N 900077-05
Rev. NC 09/2014
Rhapsody54TEN]
DANGER
NOTE: DIAGRAMS & ILLUSTRATIONS ARE NOT TO SCALE.
GENERAL INFORMATION
This document contains installation instructions for the
following required and optional accessories for Rhapsody
linear direct vent gas fireplaces manufactured by INNOVATIVE
HEARTH PRODUCTS.
Kit descriptions, catalog/model numbers, and contents are
listed on the next page.
Required Accessory Kits
The following accessory kits are REQUIRED for complete
fireplace installation.
NOTE: Ensure these kits are available before installing
the fireplace.
• Firebox Liner Kit
• Floor Kit
• Media Kit *
*
Media kit required with "Designer" style floor kits only.
Optional Accessory Kits
The following accessories are OPTIONAL. However, to minimize
required labor, all options should be installed at time of
fireplace installation, if possible.
• Surround Kit
• Bezel Kit
• Firebox Backlight Kit **
• Power Vent Kit
(see manual 506022-01 for installation instructions)
**
Firebox backlight kit for use with "Cityscape" and "Illusion" style firebox
liner kits.
REQUIRED TOOLS
NOTE: Power tools are NOT recommended when installing
fireplace accessories, especially porcelain firebox liners.
• 5/16 in. Hex-head Nut Driver
• #3 Phillips Head Screwdriver
(for fireplace door removal/installation)
• Glass Cleaner (non-ammoniated)
• Non-abrasive rag
• High-temperature sealant
(e.g., Mill-Pac
; if installing firebox backlight kit)
®
• Safety Glasses
• Protective Work Gloves
HEARTH PRODUCTS
KITS AND ACCESSORIES
LINEAR DIRECT VENT FIREPLACES
ACCESSORY KITS
®
Advertisement
Table of Contents

Related Manuals for Astria Rhapsody42TEN


Summary of Contents for Astria Rhapsody42TEN
- Page 1 ACCESSORY KITS Rev. NC 09/2014 INSTALLATION INSTRUCTIONS FOR REQUIRED AND OPTIONAL ACCESSORIES FOR USE ON 42- AND 54-INCH LINEAR DIRECT VENT GAS FIREPLACES [FIREPLACE MODELS: Rhapsody42TEN and Rhapsody54TEN] GENERAL INFORMATION DANGER This document contains installation instructions for the HOT GLASS WILL CAUSE BURNS. DO NOT following required and optional accessories for Rhapsody ®...
-
Page 2: Required Accessories
INNOVATIVE HEARTH PRODUCTS • LINEAR GAS FIREPLACES • REQUIRED AND OPTIONAL ACCESSORIES REQUIRED ACCESSORIES OPTIONAL ACCESSORIES Firebox Liner Kits Firebox Liner Backlight Kits • (13) #10-16 x 3/8 Hex-head Sheet Metal Screws • (1) Left Lamp Bracket • (2) Side Panels •... - Page 3 INNOVATIVE HEARTH PRODUCTS • LINEAR GAS FIREPLACES • REQUIRED AND OPTIONAL ACCESSORIES INSTALLATION INSTRUCTIONS Remove baffle from fireplace floor, if installed Complete all steps in the order shown, including the installation 1. If unpacking the fireplace for the first time, remove the of optional accessories (if applicable).
- Page 4 INNOVATIVE HEARTH PRODUCTS • LINEAR GAS FIREPLACES • REQUIRED AND OPTIONAL ACCESSORIES 4. Route the lighting wiring up through the access opening, and slide it into the slot (Figure 8). Orifice 5. Plug the power plug end of the power harness into the AUX OUT port on the fireplace fan control module (Figure 8).
- Page 5 INNOVATIVE HEARTH PRODUCTS • LINEAR GAS FIREPLACES • REQUIRED AND OPTIONAL ACCESSORIES Install back panel (from required firebox liner kit) CONNECTION AND ROUTE WIRING FOR OPTIONAL PANEL BACKLIGHT KIT - SIT PROFLAME II SYSTEM 1. Insert the bottom edge of the back panel into the fireplace first, then position it in front of the previously installed reflector (Figure 11).
- Page 6 INNOVATIVE HEARTH PRODUCTS • LINEAR GAS FIREPLACES • REQUIRED AND OPTIONAL ACCESSORIES 7. With one set of three leads, connect the green wire to a lamp (Figure 14). Backlight Wire Routing Holes Figure 14: Attaching green wire to firebox liner backlight kit lamp, and inserting lamp into bracket 8.
- Page 7 INNOVATIVE HEARTH PRODUCTS • LINEAR GAS FIREPLACES • REQUIRED AND OPTIONAL ACCESSORIES Gather and reseal all wiring Install front floor section (from required floor kit) 1. Gather all wiring and pilot connections together at the end 1. Engage the lower front lip of the front floor section under of the slot, and reseal with high-temperature sealant, such the locking clips attached to the fireplace front ledge, and as Mill-Pac...
- Page 8 INNOVATIVE HEARTH PRODUCTS • LINEAR GAS FIREPLACES • REQUIRED AND OPTIONAL ACCESSORIES Install baffle (provided with fireplace) Install glass door assembly 1. With the baffle oriented as shown (Figure 20), slide the rear 1. Hold the glass door assembly by the sides, and hook the tabs into the slots in the back panel.
-
Page 9: Electronic Wiring Diagram
INNOVATIVE HEARTH PRODUCTS • LINEAR GAS FIREPLACES • REQUIRED AND OPTIONAL ACCESSORIES CAUTION Ground supply lead must be connected to the wire attached to the green ground screw located on the outlet box. Failure to do so will result in a potential safety hazard. The appliance must be electrically grounded in accordance with local codes, or in the absence of local codes, the National Electrical Code, ANSI/NFPA 70, latest edition (in Canada, the current CSA C22-1 Canadian Electrical Code). - Page 10 INNOVATIVE HEARTH PRODUCTS • LINEAR GAS FIREPLACES • REQUIRED AND OPTIONAL ACCESSORIES APPENDIX: ALTERNATE INSTALLATION INSTRUCTIONS Route and connect optional firebox liner backlight kit wiring and install lamp assemblies Figure 28: Attaching black and white wires to firebox liner NOTE: These instructions should be used in place of Route backlight kit lamp and connect optional firebox liner backlight kit wiring and install lamp assemblies on Page 6, for fireplaces without...
Need help?
Do you have a question about the Rhapsody42TEN and is the answer not in the manual?
Questions and answers