Table of Contents
Advertisement
INSTALLATION AND OPERATING INSTRUCTIONS
WARNING: If the information in these
instructions are not followed exactly, a fire or
explosion may result causing property
damage, personal injury or death.
Do not store or use gasoline or other
flammable vapors and liquids in the
vicinity of this or any other appliance.
WHAT TO DO IF YOU SMELL GAS
•
Do not try to light any appliance.
•
Do not touch any electrical switch; do not use
any phone in your building;
•
Immediately call your gas supplier from a
neighbor's phone. Follow the gas supplier's
instructions.
•
If you cannot reach your gas supplier, call the
fire department.
Installation and service must be performed by
a qualified installer, service agency or the gas
supplier.
This appliance may be installed in an aftermarket,
permanently located, manufactured home or mobile home,
where not prohibited by local codes.
This appliance is only for use with the type of gas indicated
on the rating plate. This appliance is not convertible for use
with other gases, unless a certified kit is used.
For Residential Use-Meets All HUD Requirements For
Manufactured Housing Installations
• READ BEFORE INSTALLING OR OPERATING AND SAVE THESE INSTRUCTIONS •
SUPER B-VENT GAS FIREPLACE
MODELS: BV(4536,5142)(N,P)(V,E)B
DUE TO HIGH TEMPERATURES, THE
APPLIANCE SHOULD BE LOCATED OUT OF
TRAFFIC AND AWAY FROM FURNITURE
AND DRAPERIES.
CHILDREN AND ADULTS SHOULD BE
ALERTED TO THE HAZARDS OF HIGH
SURFACE TEMPERATURE AND SHOULD
STAY AWAY TO AVOID BURNS OR
CLOTHING IGNITION.
YOUNG CHILDERN SHOULD BE
SUPERVISED WHEN THEY ARE IN THE
SAME ROOM AS THE APPLIANCE.
CLOTHING OR OTHER FLAMMABLE
MATERIAL SHOULD NOT BE PLACED ON
OR NEAR THE APPLIANCE.
KEEP THE ROOM AREA CLEAR AND FREE
FROM COMBUSTIBLE MATERIALS,
GASOLINE, AND OTHER FLAMMABLE
VAPORS AND LIQUIDS.
Advertisement
Table of Contents
Troubleshooting

Subscribe to Our Youtube Channel
Related Manuals for Martin BV4536


Summary of Contents for Martin BV4536
- Page 1 SUPER B-VENT GAS FIREPLACE INSTALLATION AND OPERATING INSTRUCTIONS WARNING: If the information in these instructions are not followed exactly, a fire or explosion may result causing property damage, personal injury or death. Do not store or use gasoline or other flammable vapors and liquids in the vicinity of this or any other appliance.
-
Page 2: Table Of Contents
TABLE OF CONTENTS TABLE OF CONTENTS IMPORTANT SAFETY INFORMATION: ...2 PRODUCT SPECIFICATIONS:...3 ...3 LTITUDE NSTALLATIONS LISTING & CODE APPROVAL: ...3 PRE-INSTALLATION INFORMATION: ...4 : ...4 EFORE TART :...4 IREPLACE OCATION ALL AND EILING LEARANCE : ...7 OMBUSTIBLE LEARANCES : ...8 ANTEL LEARANCES :...8... -
Page 3: Important Safety Information
IMPORTANT SAFETY INFORMATION IMPORTANT SAFETY INFORMATION IMPORTANT SAFETY INFORMATION: INSTALLER: Please leave these instructions with the owner. OWNER: Please read and retains these instructions for future reference. IMPORTANT: Read these instructions carefully before installing or trying to operate this appliance. •... -
Page 4: Product Specifications
MODEL LAB. CSA Decorative Vented Gas Fireplace ANSI Z21.50-2000•CSA 2.22-2000 BV4536 Series BV5142 Series CSA Decorative Vented Gas Fireplace ANSI Z21.50-2000•CSA 2.22-2000 This appliance is only for use with the type of gas indicated on the rating plate. This appliance is convertible for use with other gases, when a certified kit is used. -
Page 5: Pre-Installation Information
PRE-INSTALLATION INFORMATION PRE-INSTALLATION INFORMATION PRE-INSTALLATION INFORMATION: Before You Start: Read this homeowner manual thoroughly and follow all instructions carefully. Inspect all contents for shipping damage and immediately inform your dealer if any damage is found. Do not install any unit with damaged, incomplete, or substitute parts. - Page 6 PRE-INSTALLATION INFORMATION PRE-INSTALLATION INFORMATION Figure 1: Fireplace Dimensions...
- Page 7 PRE-INSTALLATION INFORMATION PRE-INSTALLATION INFORMATION Figure 2: Fireplace Locations and Minimum Clearances Requirements CAUTION: Measure fireplace dimensions and verify framing methods & wall covering details before framing construction begins.
-
Page 8: Wall And Ceiling Clearance Requirements
PRE-INSTALLATION INFORMATION PRE-INSTALLATION INFORMATION Figure 3: Wall & Ceiling Minimum Clearances Wall and Ceiling Clearance Requirements: Ensure that minimum clearances shown in Figure 3 are maintained. Left and right clearances are determined when facing the front of the appliance. Follow these instructions carefully to ensure safe installation. Failure to follow these requirements may create a fire hazard. -
Page 9: Mantel Clearances
PRE-INSTALLATION INFORMATION PRE-INSTALLATION INFORMATION Mantel Clearances: If a combustible mantel is installed, it must meet the clearance requirements detailed in Figure 4. Figure 4: Mantel Clearance Floor Clearances: The fireplace may be installed on a flat, hard combustible surface (i.e. flat wood, plywood, or particleboard). Be sure that the fireplace rests on a solid continuous floor or platform with appropriate framing support. -
Page 10: Finishing Material
PRE-INSTALLATION INFORMATION PRE-INSTALLATION INFORMATION CAUTION Measure fireplace dimensions and verify framing methods & wall covering details before framing construction begins. Finishing Material: NOTE Any remote wiring (i.e. remote control, wall switch or 120 volt wiring) must be done prior to final finishing to avoid costly reconstruction. -
Page 11: Vent Installation
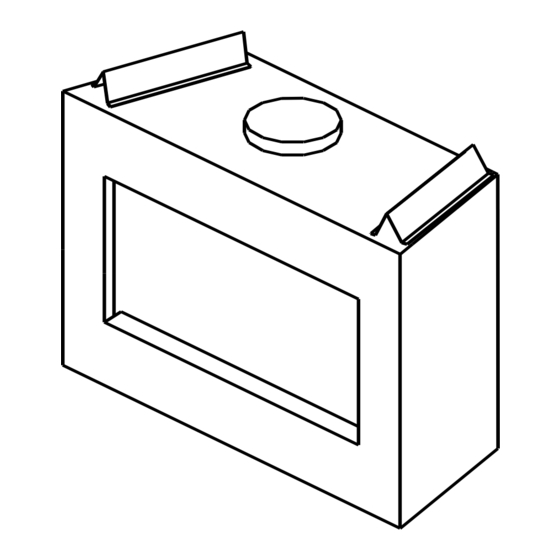
VENT INSTALLATION VENT INSTALLATION VENT INSTALLATION: The following venting instructions are provided as a general guideline. Always check with pipe manufacturer Positioning The Fireplace: The fireplace must be installed giving full consideration to the clearance and height requirements identified Bend out the four (4) nailing flanges located on the sides of the fireplace. For 5/8” drywall use the two (2) outer most flanges. -
Page 12: Installing Vent Components
VENT INSTALLATION VENT INSTALLATION Never use more than two (2) 45 degree elbows. When using adjustable elbows, never exceed 45 degrees. Vertical Venting with Two (2) 45 Degree Elbow: Figure 7: Horizontal Venting with Two (2) 45 Degree Elbow INSTALLING VENT COMPONENTS Before You Start: Plan your installation. - Page 13 VENT INSTALLATION VENT INSTALLATION Always maintain minimum clearances around vent systems. The minimum clearances to combustibles is 1” around vent pipe. For ceiling firestops and vertical sections of vent pipe a 1-inch minimum clearance all around the pipe must be maintained. Do not pack the open air spaces with insulation or other materials. This could cause high temperatures and may present a fire hazard.
- Page 14 VENT INSTALLATION VENT INSTALLATION Vent Termination: For Vertical Termination Figure 10: Minimum Vent Height for Various Roof Pitches Major building codes specify a minimum vent height above the rooftop depending on the pitch of the roof. Refer to the above figure for minimum heights, provided the termination cap is at least eight (8) feet from a vertical wall, and two (2) feet below a horizontal overhang.
-
Page 15: Ermination
VENT INSTALLATION VENT INSTALLATION When working on the roof, cover the opening of the installed vent pipes below to prevent debris falling in. To Locate and install Vertical Termination • Locate and mark the vent center point on the underside of the roof, and drive a nail through the center point. •... -
Page 16: Gas Line And Electrical
GAS LINE AND ELECTRICAL INSTALLATION GAS LINE AND ELECTRICAL INSTALLATION GAS LINE AND ELECTRICAL Gas Line Installation: Plumbing connections should only be performed by a qualified, licensed plumber. Main gas supply must be off when plumbing gas line to fireplace or performing service. •... -
Page 17: Lectrical Iring
GAS LINE AND ELECTRICAL INSTALLATION GAS LINE AND ELECTRICAL INSTALLATION Figure 12: Gas Pressure Check at Gas Valve Electrical Wiring: Standing Pilot Ignition Wiring-Millivolt Control: Do not connect 110-120 VAC to the Remote Wall Switch, DC Remote Control or the Millivolt Control Valve. The appliance will malfunction or the valve will be damaged. - Page 18 GAS LINE AND ELECTRICAL INSTALLATION GAS LINE AND ELECTRICAL INSTALLATION Figure 13: Wiring Diagram for Standing Pilot - Millivolt System These instructions supersede the section entitled “Hearth Mount” in the Millivolt hand held remote instructions supplied with the remote. Remote receiver must be mounted outside the appliance, due to high temperatures inside the chamber. This will prevent failures and longer battery life.
- Page 19 GAS LINE AND ELECTRICAL INSTALLATION GAS LINE AND ELECTRICAL INSTALLATION • Turn RS-ON-OFF switch to the “ON” position. If meter is reading more than 175 millivolt and the main burner does not come on, then replace control valve. If meter is reading less than 175 millivolt, then refer to TROUBLESHOOTING section of this manual to determine the cause of the low reading.
- Page 20 GAS LINE AND ELECTRICAL INSTALLATION GAS LINE AND ELECTRICAL INSTALLATION Remote receiver must be mounted outside the appliance, due to high temperatures inside the chamber. This will prevent failures and longer battery life. Plug in the remote connector wire to the remote receiver. Connect the wire terminal from the remote receiver to replace the 15’...
-
Page 21: Final Installation
FINAL INSTALLATION FINAL INSTALLATION FINAL INSTALLATION Wall Finishing: Definitions: Combustible Materials - Materials made of or surfaced with wood, compressed paper, plant fibers, or other materials that are capable of being ignited and burned. Such materials are considered combustible even though flameproof, fire retardant, treated, or plastered. -
Page 22: I Nstallation
FINAL INSTALLATION FINAL INSTALLATION Log Placement for fiber VDY24/18D3R: Step 1: Line up pins on bottom of Rear Log #1 with pins on grate bar and place on grate. Step 2: Place Front Left Log #2 on left front of grate bar lining up cutout in bottom of log with grate bar. -
Page 23: Glass Bi-Fold Door Installation
FINAL INSTALLATION FINAL INSTALLATION Glass Bi-Fold Door Installation: Glass doors must be installed on all Propane/LPG units and operated in the closed position to eliminate any potential for soot spillage into the room. When installing a natural gas unit with glass door option, the unit must be operated with glass doors completely opened or completely closed. - Page 24 FINAL INSTALLATION FINAL INSTALLATION Damper operation: For Massachusetts residents only: Installation of this vented gas fireplace in the Commonwealth of Massachusetts requires the damper to be permanently removed or welded into the fully open position. In addition, a naturally vented gas fireplace may not be installed in a bedroom or bathroom in the When damper arm (1) is all the way to the left and locked into position, the damper system is closed.
-
Page 25: Operating Instructions
OPERATING INSTRUCTIONS OPERATING INSTRUCTIONS Before Lighting the Fireplace: • Read the IMPORTANT SAFETY INFORMATION section at the beginning of this homeowner manual. • Before lighting, check the fireplace for possible gas leaks. • Before lighting, check for possible obstructions that could be blocking the vent termination or the front louver. •... -
Page 26: To Turn Off Gas To Appliance
OPERATING INSTRUCTIONS OPERATING INSTRUCTIONS STOP! Read the safety information below on this label. Open access door on left side of floor to reveal gas valve, then locate RS-OFF-ON rocker switch on left side inner chamber. Turn RS-OFF-ON rocker switch to “OFF”. Turn remote switch to “OFF”... - Page 27 OPERATING INSTRUCTIONS OPERATING INSTRUCTIONS LIGHTING INSTRUCTIONS ELECTRONIC IGN TO TURN OFF GAS TO APPLIANCE FOR YOUR SAFETY READ BEFORE LIGHTING WARNING:...
-
Page 28: Maintenance
MAINTENANCE MAINTENANCE MAINTENANCE Turn off gas before servicing fireplace. It is recommended that a qualified service technician perform these check-ups at the beginning of each heating season. The appliance area must be kept clear and free from combustible materials, gasoline and other flammable vapors and liquids. -
Page 29: Vent System
MAINTENANCE MAINTENANCE Vent System: The fireplace and venting system should be inspected before initial use and at least annually by a qualified field service person. Inspect the external vent cap on a regular basis to make sure that no debris is interfering with the airflow. -
Page 30: Parts List / Illustration
PARTS LIST / ILLUSTRATIONS PARTS LIST / ILLUSTRATIONS PARTS LIST / ILLUSTRATION VDY24/18D3R Item Description 4536 Rear Log 32D2118 Front Left Log 32D2117 Front Right Log 32D2116 Top Middle Log 32D2114 Top Right Log 32D2113 Top Left Log 32D2115 Firebox Components: Standard and Accessories Item Description Hi Temperature limit switch... - Page 31 PARTS LIST / ILLUSTRATIONS PARTS LIST / ILLUSTRATIONS Engine Components: Standing Pilot – Millivolt Control Item Description Gas Valve Assembly Pilot Assembly Burner Tube Flexhose with Shutoff Valve Rocker Switch Piezo Igniter Injector Burner Assembly Wire Assembly Grate Weld Assembly Conversion Kit (Not Shown) for MillivolControl Only 4536 Conversion NG to LPG 4536 Conversion LPG to NG...
- Page 32 Electronic Ignition Control Item Description Gas Valve Assembly Pilot Assembly Burner Tube Flexhose with Shutoff Valve Rocker Switch Injector Burner Assembly Wire Assembly Ignition Module Transformer Conversion Kit (Not Shown) for Electronic Ignition 4536 Conversion NG to LPG 4536 Conversion LPG to NG 5142 Conversion NG to LPG 5142 Conversion LPG to NG 4536NE...
-
Page 33: Troubleshooting
TROUBLESHOOTING STANDING PILOT - MILLIVOLT SYMPTOM POSSIBLE CAUSE Spark ignitor will A. Wire disconnected. not light pilot after repeated triggering of piezo. B. Defective ignitor. C. No gas or low gas pressure. D. No Propane/LPG in tank Pilot will not stay A. -
Page 34: Electronic Ignition
ELECTRONIC IGNITION... -
Page 35: General Troubleshooting
GENERAL TROUBLESHOOTING: Glass Soots A. Flame impingement on logs Poor draft due to A. Too much offset. venting B. Too many elbows C. Vent height too short D. Vent too close to roof line E. Blockage is restricting venting capacity F. -
Page 36: Limited Lifetime Warranty Policy
LIMITED LIFETIME WARRANTY POLICY Lifetime Warranty The following components are warranted for life to the original owner, subject to proof of purchase: Firebox, Combustion Chamber, Heat Exchanger, Grate, Stainless Steel Burners, and Vented Fiber Ceramic and Refractory Logs. Basic Warranty Martin Hearth &...
Need help?
Do you have a question about the BV4536 and is the answer not in the manual?
Questions and answers