Sign In
Upload
Download
Table of Contents
Contents
Add to my manuals
Delete from my manuals
Share
URL of this page:
HTML Link:
Bookmark this page
Add
Manual will be automatically added to "My Manuals"
Print this page
×
Bookmark added
×
Added to my manuals
Manuals
Brands
Miele Manuals
Oven
DG 6300
Operating and installation instructions
Miele DG 6300 Operating And Installation Instructions
Hide thumbs
1
Table Of Contents
2
3
4
5
6
7
8
9
10
11
12
13
14
15
16
17
18
19
20
21
22
23
24
25
26
27
28
29
30
31
32
33
34
35
36
37
38
39
40
41
42
43
44
45
46
47
48
49
50
51
52
53
54
55
56
57
58
59
60
61
62
63
64
65
66
67
68
69
70
71
72
73
74
75
76
77
78
79
80
81
82
83
84
85
86
87
88
89
90
91
92
93
94
95
96
97
98
99
100
101
102
103
104
105
106
107
108
109
110
111
112
113
114
115
116
117
118
119
120
page
of
120
Go
/
120
Contents
Table of Contents
Bookmarks
Table of Contents
Table of Contents
Warning and Safety Instructions
Correct Use
Caring for the Environment
Overview
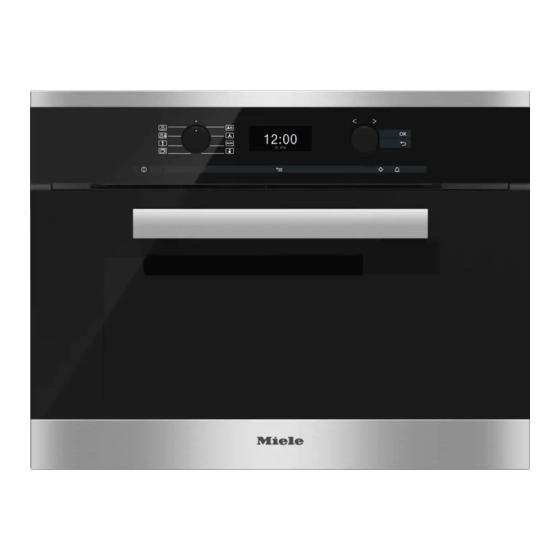
Steam Oven Front View
Accessories Supplied
Controls
Function Selector
Rotary Selector
Sensor Controls
Display
Symbols
Description of Functions
Water Container
Condensate Tray
Temperature
Duration
Noises
Heating-Up Phase
Cooking Phase
Steam Reduction
Oven Interior Lighting
Using for the First Time
General Settings
Cleaning for the First Time
Setting the Water Hardness Level
Set the Correct Boiling Point for Water
Main and Sub-Menus
Operation
Simple Operation
Interrupting Operation
Using the Oven - Further Functions
Switching on and off Automatically
Sequence of an Automatic Cooking Process
Changing Settings During a Cooking Process
Cancelling Cooking
Automatic Programmes
List of Food Types
To Use an Automatic Programme
User Programmes
To Create a User Programme
To Start a User Programme
To Change User Programmes
Change Cooking Stages
Change Name
To Delete User Programmes
Minute Minder
To Set the Minute Minder
To Change the Duration Set for the Minute Minder
To Cancel the Duration Set for the Minute Minder
General Notes
The Advantages of Cooking with Steam
Suitable Containers
Cooking Containers
Your Own Containers
Condensate Tray
Shelf Level
Frozen Food
Temperature
Duration
Cooking with Liquid
Your Own Recipes
Steam Cooking
Vegetables
Meat
Sausages
Fish
Shellfish
Mussels
Rice
Pasta
Dumplings
Grain
Dried Pulses
Hen's Eggs
Fruit
Menu Cooking (Cooking Whole Meals)
Sous-Vide (Vacuum) Cooking
Special Applications
Reheat
Defrost
Bottling
Extracting Juice with Steam
Make Yoghurt
Prove Dough
Dissolve Gelatine
Melt Chocolate
Skinning Vegetables and Fruit
Apple Storage
Blanching
Sweat Onions
Cook Bacon
Disinfect Items
Heat Damp Flannels
Decrystallise Honey
Making Eierstich
Settings
Opening the Settings Menu
Changing and Saving Settings
Settings Overview
Language
Time of Day
Display
Clock Format
Setting the Time
Date
Lighting
Display Brightness
Acoustic Information
Melody
Solo Tone
Keypad Tone
Units
Weight
Temperature
Keeping Warm
Recommended Temperatures
System Lock
Water Hardness
Showroom Programme
Demo Mode
Factory Default
Note for Test Institutes
Cleaning and Care
Important Information on Cleaning and Care
Appliance Front
Oven Interior
Water Container
Accessories
Side Runners
Descaling
Door
Problem Solving Guide
Optional Accessories
Cooking Containers
Cleaning and Care Products
Miscellaneous
Safety Instructions for Installation
Detailed Dimensions of Oven Front
Building-In Dimensions
Installation in a Tall Unit
Installation in a Base Unit
Installation in a Tall Unit in Combination with an Oven
Installation
After Sales Service, Data Plate
Advertisement
Quick Links
1
Steam Oven Front View
Download this manual
Operating and installation instructions
Steam oven
To avoid the risk of accidents or damage to the appliance it is essential
to read these instructions before it is installed and used for the first time.
en-GB
M.-Nr. 09 568 110
Table of
Contents
Previous
Page
Next
Page
1
2
3
4
5
Advertisement
Table of Contents
Need help?
Do you have a question about the DG 6300 and is the answer not in the manual?
Ask a question
Questions and answers
Related Manuals for Miele DG 6300
Oven Miele DG 6301 Operating And Installation Instructions
Steam oven (116 pages)
Oven Miele DG 6301 Operating And Installation Instructions
(116 pages)
Oven Miele DG 6800 Operating And Installation Instructions
(128 pages)
Oven Miele DG 6401 Operating And Installation Instructions
(116 pages)
Oven Miele DG 6400 Operating And Installation Instructions
(120 pages)
Oven Miele DG 6500 Operating And Installation Instructions
(112 pages)
Oven Miele DG6600CS Operating And Installation Instructions
(121 pages)
Oven Miele DG 6020 User Manual
(97 pages)
Oven Miele Steam Oven Operating Instructions Manual
Steam oven (96 pages)
Oven Miele DG 6010 Operating Instructions Manual
(92 pages)
Oven Miele DG 6010 Operating And Installation Instructions
(84 pages)
Oven Miele DG 6600 Installation Instructions Manual
(15 pages)
Oven Miele Steam oven Operating And Installation Instructions
(100 pages)
Oven Miele Steam oven Operating And Installation Instructions
(100 pages)
Oven Miele DG 6100 Operating And Installation Instructions
(92 pages)
Oven Miele DG 6001 Operating Instructions Manual
(88 pages)
This manual is also suitable for:
Dg 6400
Table of Contents
Save PDF
Print
Rename the bookmark
Delete bookmark?
Delete from my manuals?
Login
Sign In
OR
Sign in with Facebook
Sign in with Google
Upload manual
Upload from disk
Upload from URL


Need help?
Do you have a question about the DG 6300 and is the answer not in the manual?
Questions and answers