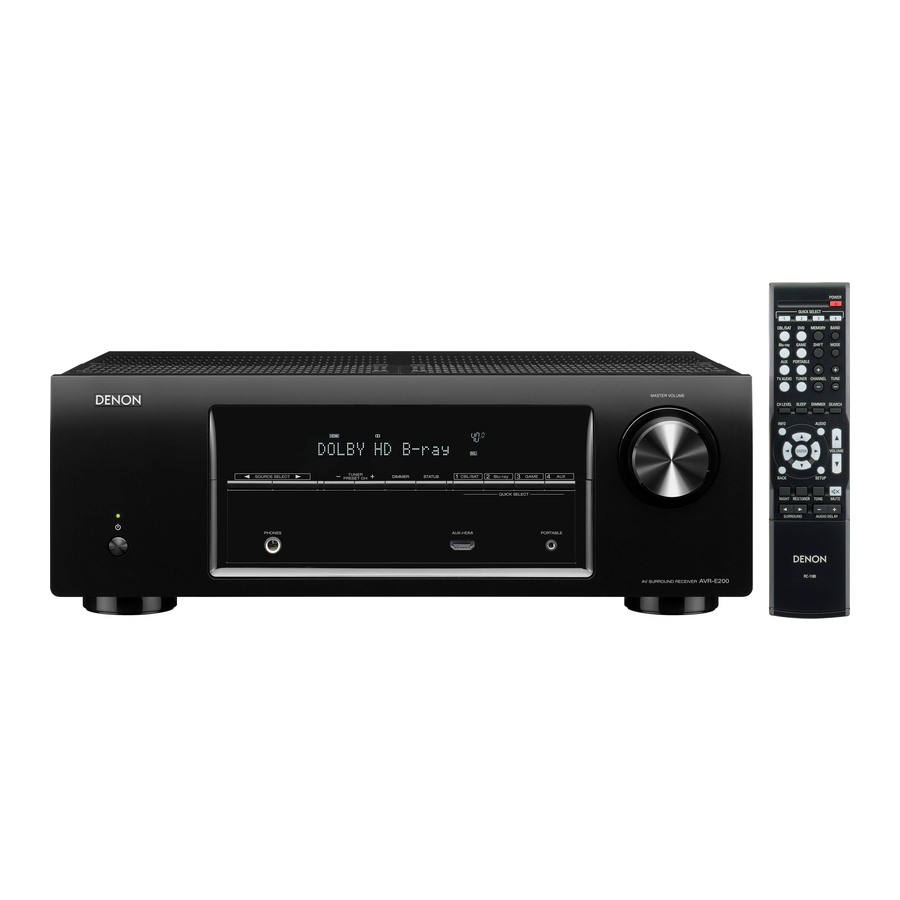
Denon AVR-E200 Service Manual
Av surround receiver
Hide thumbs
Also See for AVR-E200:
- Service manual (101 pages) ,
- Owner's manual (64 pages) ,
- Getting started (12 pages)
Table of Contents
Advertisement
Quick Links
e
AVR-E200
AVR-X500
• For purposes of improvement, specifications and design are subject to change without notice.
• Please use this service manual with referring to the operating instructions without fail.
• Some illustrations using in this service manual are slightly different from the actual set.
S0573-0V01DM/DG1302
SERVICE MANUAL
MODEL
AV SURROUND RECEIVER
Copyright 2013 D&M Holdings Inc. All rights reserved.
WARNING: Violators will be prosecuted to the maximum extent possible.
JP
E3
E2
P
P P
e
D&M Holdings Inc.
Ver. 1
E1
EA
E1C E1K E3B
P
P
Advertisement
Table of Contents

Related Manuals for Denon AVR-E200


Summary of Contents for Denon AVR-E200
-
Page 1: Service Manual
Ver. 1 SERVICE MANUAL MODEL E1C E1K E3B AVR-E200 AVR-X500 AV SURROUND RECEIVER • For purposes of improvement, specifications and design are subject to change without notice. • Please use this service manual with referring to the operating instructions without fail. -
Page 2: Table Of Contents
CONTENTS ABOUT THIS MANUAL .............3 PRINTED WIRING BOARDS ...........66 What you can do with this manual ..........3 FRONT ..................66 Using Adobe Reader (Windows version) ........4 DIGITAL ...................69 F-HDMI ..................71 SAFETY PRECAUTIONS ............6 POWER ...................71 NOTE FOR SCHEMATIC DIAGRAM .........7 REGULATOR ................73 NOTE FOR PARTS LIST ............7 TUNER ..................75 TECHNICAL SPECIFICATIONS ..........8... -
Page 3: About This Manual
ABOUT THIS MANUAL Read the following information before using the service manual. What you can do with this manual Search for a Ref. No. (phrase) Jump to the target of a schematic diagram (Ctrl+Shift+F) connector You can use the search function in Acrobat Reader to Click the Ref. -
Page 4: Using Adobe Reader (Windows Version)
Using Adobe Reader (Windows version) Add notes to this data (Sign) Magnify schematic / printed wiring board diagrams - 1 The Sign function lets you add notes to the data in this manual. (Ctrl+Space, mouse operation) Save the file once you have finished adding notes. Press Ctrl+Space on the keyboard and drag the mouse to select the area you want to view. [Example using Adobe Reader X] • The selected area is magnified. - Page 5 Magnify schematic / printed wiring board Magnify schematic / printed wiring board diagrams - 2 diagrams - 3 (Pan & Zoom function) (Loupe Tool function) The Pan & Zoom function lets you see which part of a The Loupe Tool function lets you magnify a specific magnified diagram is being shown in a separate window. part of a diagram in a separate window. [Example using Adobe Reader X] [Example using Adobe Reader X] On the "View" menu, point to "Zoom", and then click On the "View" menu, point to "Zoom", and then click "Pan & Zoom".
-
Page 6: Safety Precautions
SAFETY PRECAUTIONS The following items should be checked for continued protection of the customer and the service technician. LEAKAGE CURRENT CHECK Before returning the set to the customer, be sure to carry out either (1) a leakage current check or (2) a line to chassis resistance check. If the leakage current exceeds 0.5 milliamps, or if the resistance from chassis to either side of the power cord is less than 460 kohms, the set is defective. Be sure to test for leakage current with the AC plug in both polarities, in addition, when the set's power is in each state (on, off and standby mode), if applicable. CAUTION P lease heed the following cautions and instructions during servicing and inspection. ◎ Heed the cautions! ◎ Make a safety check after servicing! Cautions which are delicate in particular for servicing Check that all screws, parts and wires removed or are labeled on the cabinets, the parts and the chassis, disconnected when servicing have been put back in etc. Be sure to heed these cautions and the cautions their original positions, check that no serviced parts described in the handling instructions. -
Page 7: Note For Schematic Diagram
NOTE FOR SCHEMATIC DIAGRAM WARNING: Parts indicated by the z mark have critical characteristics. Use ONLY replacement parts recommended by the manufacturer. CAUTION: Before returning the set to the customer, be sure to carry out either (1) a leakage current check or (2) a line to chassis resistance check. If the leakage current exceeds 0.5 milliamps, or if the resistance from chassis to either side of the power cord is less than 460 kohms, the set is defective. WARNING: DO NOT return the set to the customer unless the problem is identified and remedied. NOTICE: ALL RESISTANCE VALUES IN OHM. k=1,000 OHM / M=1,000,000 OHM NOTE FOR PARTS LIST ALL CAPACITANCE VALUES ARE EXPRESSED IN MICRO FARAD, UNLESS OTHERWISE INDICATED. P INDICATES MICRO-MICRO FARAD. EACH VOLTAGE AND CURRENT ARE MEASURED AT NO SIGNAL INPUT CONDITION. CIRCUIT AND PARTS ARE SUBJECT TO CHANGE WITHOUT PRIOR NOTICE. NOTE FOR PARTS LIST Parts indicated by "nsp" on this table cannot be supplied. When ordering a part, make a clear distinction between "1" and "I" (i) to avoid mis-supplying. A part ordered without specifying its part number can not be supplied. -
Page 8: Technical Specifications
TECHNICAL SPECIFICATIONS n Audio Section n Tuner section • Power amplifier [FM](Note: μV at 75 Ω, 0 dBf = 1 x 10 –15 Rated output : Receiving Range (for E3/E3B) : Front : [FM] 87.5 MHz – 107.9 MHz [AM]520 kHz – 1710 kHz 75 W + 75 W (8 Ω, 20 Hz – 20 kHz with 0.08 % T.H.D.) Receiving Range (for E2, E1C) : 110 W + 110 W (6 Ω, 1 kHz with 0.7 % T.H.D.) [FM] 87.5 MHz – 108.0 MHz [AM]522 kHz – 1611 kHz 130W+130W(6Ω, JEITA) Usable Sensitivity : Center : [FM]1.2 μV (12.8 dBf) [AM]18 μV 75 W (8 Ω, 20 Hz – 20 kHz with 0.08 % T.H.D.) 50 dB Quieting Sensitivity : 110 W (6 Ω, 1 kHz with 0.7 % T.H.D.) [FM]MONO 2.8 μV (20.2 dBf) 130W(6Ω, JEITA) -
Page 9: Caution In Servicing
2. P ress X button while simultaneously while pressing SOURCE SELECT 0 and SOURCE SELECT 1 buttons. 3. C heck that the entire display is flashing at intervals of about 1 second, and then release the 2 buttons. The microprocessor will be initialized. Note: • If step 3 fails, start over from step 1. • A ll user settings will be lost and the factory setting will be recovered after the set is initialized. So make sure to note down your setting beforehand for restoring after the initialization. SOURCE SELECT 0 SOURCE SELECT 1 Service Jig When you update the firmware, you can use the following JIG (RS232C to internal connector conversion adapter). Please order it from Denon Official Service Distributor in your region if necessary. 8U-210100S WRITING KIT : 1 Set 606050028012P : 7P FFC(1.0) L-240 : 1 Set (Refer to "PROCEDURE FOR UPGRADING THE VERSION OF THE FIRMWARE".) -
Page 10: Disassembly
DISASSEMBLY • Disassemble in order of the arrow in the following figure. • In the case of the re-assembling, assemble it in order of the reverse of the following flow. • In the case of the reassembling, observe "Caution concerning disassembly and assembly!". • I f wire bundles are untied or moved to perform adjustment or replace parts etc., be sure to rearrange them neatly as they were originally bundled or placed afterward. Otherwise, incorrect arrangement can be a cause of noise generation. TOP CABINET FRONT PANEL ASSY DIGITAL PCB ASSY STANDBY PCB Refer to "DISASSEMBLY Refer to "DISASSEMBLY Refer to "DISASSEMBLY 4. STANDBY PCB" 1. FRONT PANEL ASSY" 2. DIGITAL PCB ASSY" and "EXPLODED VIEW" and "EXPLODED VIEW"... - Page 11 About the photos used for "descriptions of the DISASSEMBLY" section • T he shooting direction of each photograph used herein is indicated on the left side of the respective photograph as "Shooting direction: ***". (*** : A,B,C,D) • Refer to the diagram below about the shooting direction of each photograph. • Photographs with no shooting direction indicated were taken from the top of the set. The viewpoint of each photograph (Shooting direction) Shooting direction: B [View from the top] Front side Shooting direction: C Shooting direction: D Shooting direction: A Note: • B efore disassembling this unit, be sure to discharge the power line (the colored line in the schematic diagram).
-
Page 12: Front Panel Assy
1. FRONT PANEL ASSY → FRONT PANEL ASSY Proceeding : CABINET TOP (1) Remove the screws. View from the bottom (2) Remove the screws and disconnect the FFC. FRONT PANEL ASSY (3) Disconnect the connector wires. CN102 CN104 Please refer to "EXPLODED VIEW" for the disassembly method of each PCB included in FRONT PANEL ASSY. -
Page 13: Digital Pcb Assy
2. DIGITAL PCB ASSY → DIGITAL PCB ASSY Proceeding : CABINET TOP (1) Remove the screws. Shooting direction: A (2) R emove the screws. Disconnect the connector wires and FFC. CN90 CN205 CN95 DIGITAL PCB CN202... -
Page 14: Radiator Assy
3. RADIATOR ASSY Proceeding : TOP COVER → → DIGITAL PCB ASSY RADIATOR ASSY (1) Remove the screws. Shooting direction: A (2) R emove the screws then disconnect the connector wire. Remove the RADIATOR ASSY from the CHASSIS BOTTOM. MAIN PCB CN503... -
Page 15: Standby Pcb
4. STANDBY PCB → Proceeding : CABINET TOP STANDBY PCB Please refer to "EXPLODED VIEW" for the disassembly method of STANDBY PCB. 5. REGULATOR PCB → Proceeding : CABINET TOP REGULATOR PCB Please refer to "EXPLODED VIEW" for the disassembly method of REGULATOR PCB. 6. TRANS POWER → Proceeding : CABINET TOP TRANS POWER Please refer to "EXPLODED VIEW" for the disassembly method of TRANS POWER. -
Page 16: Special Mode
SPECIAL MODE Special mode setting button b P ress the X button to turn on the power while pressing both the button A and the button B at the same time. Mode Button A Button B Contents Firmware versions such as Main, DSP or OSD are displayed µcom/DSP/OSD Version display STATUS DIMMER in the FL display. Errors are displayed or when they occur. mode (Refer to 17 pagepage.) SOURCE SOURCE Backup data initialization is carried out. (Refer to 9 Initialization mode SELECT 0 SELECT 1 pagepage.) ---E2 model only--- Mode for switching tuner frequency SOURCE DIMMER Change tuner frequency step to AM9k/FM50kHz STEP or step SELECT 1 AM:10k/FM:200kHz. -
Page 17: Μcom/Dsp/Osd Version Display Mode
1.2. Display Order q Model destination information → w Main-µcom version → e DSP version → r OSD version Display State q Model destination information AVR-E200 E3, E3B model A V R - E 2 0 0 AVR-X500 E2, E1 model A V R - X 5 0 0 AVR-X500 E1C model A V R - X 5 0 0 E 1 C w Main-µcom version... -
Page 18: Errors Checking Mode (Displaying The Protection History)
2. Errors checking mode (Displaying the protection history) 2.1. Operation specifications Error mode (Displaying the protection history): When the set is started up in this mode, the error information is displayed. Starting up: When power is turned on, presssing both buttons [PRESET+] and [STATUS] at the same time for 3 seconds or more. Protection history mode is set. In this mode, information shown in the following sections is displayed. 2.2. About the display on the FL display Information about the last Protection operation is displayed. (1) Normal (when there has been no protection incident) P R O T E C T (2) For ASO (when the last protection incident was ASO protection) P R T : A S O Cause: T he line between speaker terminals is shorted, or speakers with impedance of less than the rated value. - Page 19 2.3. Clearing the protection history There are two ways to clear the protection history, as described below. (1) S tart up the set in error (protection display) mode and display the error, then press and hold down the "DIMMER" button for 3 seconds. P R T : D C Press the "DIMMER " button for 3 seconds. P R T : C L E A R The above is displayed and the protection history is cleared. P R O T E C T (2) Initialize. ( 9 page.) If you want to save a backup, perform the method in 2.3.(1) above.
-
Page 20: When The Microprocessor Is Replaced With A New One
WHEN THE MICROPROCESSOR IS REPLACED WITH A NEW ONE When the U-PRO (Microprocessor) or the Flash ROM is replaced, confirm the following. After PWB Name Ref. No. Description Remark replaced DIGITAL IC91 STM32F101ZE SOFTWARE: Main DIGITAL IC82 MX25L8006EM2I-12G SOFTWARE: DSP ROM DIGITAL IC14 MX25L8006EM2I-12G... - Page 21 1.3. INSTALL UPDATE TOOL (1) Click the "ST_Flash_Loder" folder. AVRE200 (2) Run the "Flash_Loader_Demonstrator_v2.4.0_Setup.exe" on program file. AVRE200 The following screen will be displayed. The Setup Status bar appears.
- Page 22 (3) Click the "Next" button. (4) Click the "Yes" button.
- Page 23 (5) Click the "Next" button after inputting "User Name" and "Company Name". (6) Click the "Next" button. The following screen will be displayed. The Setup Status bar appears.
- Page 24 (7) Click the "Finish" button.
-
Page 25: Update Firmware
2. UPDATE FIRMWARE (1) Connect the update terminal of AV receiver with the "WRITING KIT". (2) Set the switch of "WRITING KIT". (Refer to the table below.) DSPBOOT CNVSS (3) Press the X button to turn the power on of AV receiver. (4) Set the switch of "WRITING KIT". - Page 26 Click the “Next” button for 2nd time. Click the “Next” button for 3rd time.
- Page 27 (8) Choose Flash File(DSP1). Click the following button. From the file browser windows select file of "AVR1513_SF_DSP1(x.x.x).bin". Click the "Open" button.
- Page 28 Click the “Next” button. The following screen will be displayed. The Setup Status bar appears.
- Page 29 The following screen will be displayed and click the "Close" button.
- Page 30 (9) Set the switch of "WRITING KIT". (Refer to the table below.) DSPBOOT CNVSS (10) Press the "RESET" switch of "WRITING KIT". Wait for about 130 seconds until "Write Complete." is displayed on VFD. (11) Set the switch of "WRITING KIT". (Refer to the table below.) DSPBOOT CNVSS (12) Press the "RESET"...
- Page 31 Click the “Next” button for 2nd time. Click the “Next” button for 3rd time.
- Page 32 (15) Choose Flash File(DSP2). Click the following button. From the file browser windows select file of "AVRE1513_SF_DSP2(x.x.x).bin". Click the "Open" button.
- Page 33 Click the “Next” button. The following screen will be displayed. The Setup Status bar appears.
- Page 34 The following screen will be displayed and click the "Close" button.
- Page 35 (16) Set the switch of "WRITING KIT". (Refer to the table below.) DSPBOOT CNVSS (17) Press the "RESET" switch of "WRITING KIT". Wait for about 100 seconds until "Write Complete." is displayed on VFD. (18) Set the switch of "WRITING KIT" (Refer to the table below). DSPBOOT CNVSS (19) Press the "RESET"...
- Page 36 Click the “Next” button for 2nd time. Click the “Next” at 3rd time.
- Page 37 (22) Choose Flash File(OSD). Click the following button. From the file browser windows select file of "AVRE200_SF_OSD(vxx.x.x).bin". AVRE200 (v00.03) Click the "Open" button. (v00.03) AVRE200 AVRE200_SF_OSD(v00.03).bin AVRE200 AVRE200...
- Page 38 Click the “Next” button. AVRE200 AVRE200 (v00.03).bin The following screen will be displayed. AVRE200 AVRE200 (v00.03).bin The Setup Status bar appears.
- Page 39 The following screen will be displayed and click the "Close" button. (v00.03).bin AVRE200 AVRE200...
- Page 40 (23) Set the switch of "WRITING KIT". (Refer to the table below.) DSPBOOT CNVSS (24) Press the "RESET" switch of "WRITING KIT". Wait for about 30 seconds until "Write Complete." is displayed on VFD. (25) Set the switch of "WRITING KIT". (Refer to the table below.) DSPBOOT CNVSS (26) Press the "RESET"...
- Page 41 Click the “Next” button for 2nd time. Click the “Next” button for 3rd time.
- Page 42 (29) Choose Flash File(MAIN). Click the following button. (v00.03).bin AVRE200 AVRE200 From the file browser windows select file of "AVRE200_MCU(vxx.x.x).bin". AVRE200 Click the "Open" button. AVRE200 AVRE200...
- Page 43 Click the “Next” button. AVRE200 AVRE200 The following screen will be displayed. AVRE200 AVRE200 The Setup Status bar appears.
-
Page 44: Notice
The following screen will be displayed and click the "Close" button. AVRE200 AVRE200 (30) Set the switch of “Writing Kit". (Refer to the table below.) DSPBOOT CNVSS (31) Press the "RESET" switch of “Writing Kit". (32) Initializing. 1. Turn off the power using X button. 2. -
Page 45: Adjustment
ADJUSTMENT Audio Section Adjusting Idling Current Required measurement equipment: DC Voltmeter 1. Preparation (1) Avoid direct blow from an air conditioner or an electric fan and humidity should be moderate, and place the set at normal usage environment. Temperature should be at 15 °C ~ 30 °C (59 °F ~ 86 °F). (2) Presetting •... -
Page 48: Trouble Shooting
TROUBLE SHOOTING 1. POWER 1.1. Power not turn on Power not turn on. Are there any incomplete Is the ON/STANDBY connections in the Is there a short circuit Correct the short connectors connecting between the speaker circuit between the indicator on the front panel flashing red? between the various circuit terminals and the ground? -
Page 49: Analog Video
2. Analog video MONITOR OUT(CVBS) Output NG Check ±5VV The power supply circuitry is +5VV : C755 defective. -5VV : C754 Check input Check pattern from JK71 to IC71 and Check output (When the SAT/CBL function) check cable between AMP and player or Output V : IC71-1pin Vin3 : IC71-7pin... -
Page 50: Hdmi/Dvi
(6) Is the BD/DVD player's HDMI output setting correct? the BD/DVD player's operating instructions. (7) When you use a DENON BD/DVD player's, is the fluorescent display tube's "HDMI" indicator lit? If you use a non-DENON BD/ DVD player's, proceed to "YES". - Page 51 BD/DVD player is connected. (JK11/JK12/JK13/JK51) display's "HDMI" indicator lit? Is communication waveform confirmed in Test to the IC11,IC51 are If using a non-DENON BD/ point (DDC_CLK/DDC_DATA)? defective. DVD player, proceed to "NO". Is terminate the TMDS signal is 3.3V confirmed of Replace the IC11,IC51.
- Page 52 (19) Check power supply. The power supply circuitry is defective. Are 1.8V or 3.3V supplied to IC11 (each power supply pin)? The X101 or IC11 is defective. (20) Check xtal oscillator. Replace the new parts. Is there 28.6363MHz oscillation of X101? (21) Check RESET.
- Page 53 3.2. HDMI test point and waveforms HDMI test point and waveforms SAT/CBL COAX IN SAT/CBL DVD IN MONITOR MONITOR GAME SAT/CBL OPT IN OPT IN R146 R145 R106 R171 R111 R172 D142 D141 D101 D102 D111 D112 R655 R183 CN91 16 18 16 18 R173...
- Page 54 DDC_CLK/DDC_DATA/TMDS : Check items (16),(18) 0.9V DDC_CLK 2.48V TMDS SIGNAL DDC_DATA DVDD/XTAL/RESET/SCL : Check items (19),(20),(21) P-ON HDMI_SDA/SCL(I2C) : Check item (22) HDMI_SDA HDMI_SCL...
-
Page 55: Audio
4. AUDIO 4.1. AUDIO CHECK AUDIO OUTPUT : NG INPUT SURROND MODE SOURCE CHECK1 Check ANALOG AUDIO BLOCK. ANALOG 2CH DIRECT ANALOG INPUT SURROND MODE SOURCE CHECK2 Check Digital AUDIO BLOCK. COAX or OPT Legacy(PCM or DolbyDigital or dts…) INPUT SURROND MODE SOURCE CHECK3 Check via AD. - Page 56 4.2. Power AMP (MAIN UNIT) No sound is output. The protector operates. Is the power transistor open or short- circuited? Replace the power transistor. 2SB1560/2SD2390 Is the emitter resistance of the power transistor open? Replace the emitter resistance. 0.47Ω Is the base resistance of the power transistor open? Replace the base resistance.
- Page 57 Personal notes:...
-
Page 58: Clock Flow & Wave Form In Digital Block
CLOCK FLOW & WAVE FORM IN DIGITAL BLOCK IC11 Wave form ADV7623BSTZ CH1: RXP2 IC84 CS42528 (DIR+CODEC) RMCK(55) Coaxial1 (47)RXP2/GPO2 (49)RXP0 Optical1 (32)DAI2_LRCK SAI_SCLK(61) IC81 (33)DAI2_SCLK CS497024CVZ SAI_LRCK(60) (34)DAI2_DATA,DSD5 (AUDIO DSP) SAI_SDOUT(54) CH1: SDOUT CH2: LRCLK2 CH3: SCLK2 Test point Detail A JK71 20.DGND... -
Page 59: Analog Audio/Video Block Diagram
ANALOG AUDIO/VIDEO BLOCK DIAGRAM AVRE200/X500 ANALOG AUDIO/VIDEO BLOCK H/P OUT H/P L H/P R MAIN AMP 2SD2390/2SB1560 SPK OUT ANA_FL DA_FL ANA_FR DA_FR MAIN DA_CEN AUDIO IN SAT/CBL DA_SW PORTABLE(FRONT) DA_SL DA_SR TUNER DA_SBL FM/AM DA_SBR VOL IC NJU72340A AD_FL PRE OUT AD_FR MUTE... -
Page 60: Power Block Diagram
POWER BLOCK DIAGRAM AVRE200/X500 POWER BLOCK DIAGRAM MAIN+B POWER RELAY 47.1mA S1(AMP+B,-B) GBJ806 MAIN-B VOLUME IC(NJU72340A) 25mA ZJ7.5BT OPAMP x 1 Portable IN 7.5mA OPAMP x 3 D/A OUT 21mA RELAY*4 KIA7812BPI 145.1mA VOLUME(NJU72340A) S2(+12V,-12V) ZJ7.5BT NJM2595 S2 TOTAL : 370.2mA MM1Z5V1H OPAMP KIA7912PI... -
Page 61: Level Diagram
LEVEL DIAGRAM FRONT ch A/D IN A/D IN D/A OUT ELECTRIC PRE AMP1 POWER AMP REV AMP REV AMP VOLUME AUDIO IN SPK OUT FRONT NJU72340AFH3 DIGITAL H/P OUT CS42528 FRONT 40dB 40dB 30dB 30dB CS42528 SPK OUT DIFF. INPUT CS42528 FRONT 0dBFS=5.6Vpp... - Page 62 CENTER ch D/A OUT ELECTRIC PRE AMP1 POWER AMP VOLUME SPK OUT DSP OUT CENTER NJU72340AFH3 CENTER 40dB 40dB 30dB 30dB SPK OUT CS42528 FRONT DIFF. OUT 4.47Vrms/8ohm 0dBFS=5Vpp FULL SCALE LEVEL=2Vrms 20dB =1.77Vrms 20dB DOLBY LIMIT LEVEL (ALL ch-3dBFS) 0dBFS +29dB 10dB...
- Page 63 SURROUND ch D/A OUT ELECTRIC PRE AMP1 POWER AMP VOLUME SPK OUT DSP OUT SURROUND NJU72340AFH3 SURROUND 40dB 40dB 30dB 30dB SPK OUT CS42528 FRONT DIFF. OUT 4.47Vrms/8ohm 0dBFS=5Vpp FULL SCALE LEVEL=2Vrms 20dB =1.77Vrms 20dB DOLBY LIMIT LEVEL (ALL ch-3dBFS) 0dBFS +29dB 10dB...
- Page 64 SUBWOOFER ch D/A OUT SW SUM ELECTRIC REV AMP PRE AMP1 REV AMP VOLUME DSP OUT SW WOOFER PREOUT NJU72340AFH3 MUTE SUBWOOFER 40dB 40dB 30dB 30dB CS42528 DIFF. OUT 0dBFS=5Vpp FULL SCALE LEVEL=2Vrms 20dB =1.77Vrms 20dB DOLBY LIMIT LEVEL (ALL ch-3dBFS) 0dBFS PREOUT 10dB...
-
Page 65: Wiring Diagram
WIRING DIAGRAM AVRE200/X500 WIRING DIAGRAM AC CORD DIGITAL PCB ST-BY<-AC IN BN99 CN9B BN94 CN204 ST-BY<-DIGITAL CN97 CN90 CN95 CN203 REGUL.<- DIGITAL REGULATOR PCB ST-BY PCB CN503 BN501 BN502 MAIN PCB BN505 TRANS->MAIN CN102 TRANS CN101 FRONT PCB CN103 BN13A CN11A TRANS ->... -
Page 66: Printed Wiring Boards
PRINTED WIRING BOARDS FRONT (A SIDE) F1001 NO PARTS NO PARTS T 100mA L 250V LUG11 1513 = 23P R1066 NO PARTS CN101 FL101 Q1005 C1007 NO PARTS 1613/1713 = 25P C1075 J1052 J1042 D1007 C1008 J1019 NO PARTS J1043 J1044 J1050 J1020... - Page 67 PRINTED WIRING BOARDS MAIN (A SIDE) J5601 D5704 C5708 D5703 BK501 C5706 BN5703_2 R5714 J5628 JK504 JK503 J5656 J5677 J5655 C5717 J5629 BN5705_2 J5630 C5711 C5713 J5657 J5658 R5706 R5708 R5715 J5631 BN5707_2 R5718 J5632 C5609 C5612 C5610 C5613 R5725 C5614 C5611 R5716...
- Page 68 MAIN (B SIDE) C5617 C5616 C5620 C5619 Q5706 Q5703 Q5707 Q5704 Q5708 Q5705 Q5701 Q5601 Q5603 Q5604 Q5602 BN501 BN502 Q5508 Q5507 Q5408 Q5407 Q5308 Q5307 Q5208 Q5207 Q5108 Q5107 R5526 R5426 R5326 R5226 R5126 鉛フリー半田 半田付けには、鉛フリー半田 (Sn-Ag-Cu) を使用してください。 Lead-free Solder When soldering, use the Lead-free Solder (Sn-Ag-Cu).
-
Page 69: Digital
DIGITAL (A SIDE) SAT/CBL COAX IN SAT/CBL DVD IN MONITOR MONITOR GAME SAT/CBL OPT IN OPT IN R146 R145 R106 R171 R111 R172 D142 D141 D101 D102 D111 D112 R655 R183 CN91 16 18 16 18 R173 D122 R116 C931 D906 D121 R191 1 3 7... - Page 70 DIGITAL (B SIDE) 8.INT 7./RST 6./CE 9.+12V 8.RLY_GND 5.SDIO 7.PRE_GND 4.SCLK 6.-12V 3.VCC 5.DGND 2.R-OUT 4.+5VD 1.L-OUT 3.DGND 2.+5VH 1.VGND 5.+12V 4.PWR_RLY 3.P_DOWN 2.MCUGND 1.MCU+5V 鉛フリー半田 半田付けには、鉛フリー半田 (Sn-Ag-Cu) を使用してください。 Lead-free Solder When soldering, use the Lead-free Solder (Sn-Ag-Cu).
-
Page 71: F-Hdmi
F-HDMI POWER (A SIDE) (A SIDE) D155 C533 C529 C530 R502 C500 Pb Pb Pb Pb Pb Pb Pb Pb L500 ADJ-1 ADJ-2 R513 R512 R520 R519 R524 J9008 IC51 BK11 C525 C519 C521 C531 C511 C532 C534 CUP12512Z-2 F-HDMI J9007 TEST NEUTRAL... - Page 72 POWER (B SIDE) Q2003 Q2001 NEUTRAL LIVE Q2002 C2031 C2033 鉛フリー半田 半田付けには、鉛フリー半田 (Sn-Ag-Cu) を使用してください。 Lead-free Solder When soldering, use the Lead-free Solder (Sn-Ag-Cu).
-
Page 73: Regulator
REGULATOR (A SIDE) LUG21 POWER PCB BK204 REGULATOR PART CUP12513Z_2 CMD1A569-V1 MP STAGE_121221 J2004 BONDING BONDING 1.S2_AC 2.S2_GND Pb Pb Pb Pb Pb Pb Pb Pb 3.S2_AC 4.N.C 5.S3_AC 6.DGND 7.S3_AC BONDING J2013 J2021 J2025 J2018 J2026 AVRE200_X500_POWER_MP_CUP12513Z_A BOTTOM SIDE BOTTOM SIDE BOTTOM SIDE KIA278R05PI... - Page 74 REGULATOR (B SIDE) C2023 C2022 -12V C2016 C2012 C2010 +12V AVRE200_X500_POWER_MP_CUP12513Z_A 鉛フリー半田 半田付けには、鉛フリー半田 (Sn-Ag-Cu) を使用してください。 Lead-free Solder When soldering, use the Lead-free Solder (Sn-Ag-Cu).
-
Page 75: Tuner
PORTABLE TUNER TUNER PORTABLE (A SIDE) (B SIDE) (B SIDE) (A SIDE) C1060 BN11B JK102 CUP12425Z_2 NO PARTS *TUNER MODULE OPTION. *TUNER MODULE OPTION. BN508 BN508 AVR1513 E3 R5601 AVR1513 E3 R5601 AVR1513 E2 R5602 AVR1513 E2 R5602 AVR1513 E1C R5603 AVR1513 E1C R5603... -
Page 76: Schematic Diagrams
SCHEMATIC DIAGRAMS FRONT PART AVR1513/E200/X500 : 5.PORTABLE_L 25p -AVR1613/1713/E300 TO CN97 AVR1613/1713/E300 : 5.MIC_SIGNAL 1.25mm 25PIN FFC FROM DIGITAL B'D DIGITAL PART 23p -AVR1513/E200/X500 1.25mm 23PIN FFC CN101 FROM DIGITAL B'D FL101 CFL18BT021GINK CJP25GB286ZN LUG11 AVR1613/1713 RC101 D1001 R1066 F1001 1N4007ST CHASSIS E300 ONLY... -
Page 77: Schematic Diagrams (2/9)
CN202 CN205 SCHEMATIC DIAGRAMS (2/9) POWER PART POWER + POWER - STBY POWER... -
Page 78: Schematic Diagrams (3/9)
OPTION MAIN PART C5102,5202,5302 R5111,5211,5311 R5112,5212,5312 C5108,5208,5308 C5109,5209,5309 C5402,5502 R5411,5511 R5412,5512 C5408,5508 C5409,5509 AVR1513 CCKT1H471KB 220K 220K CCEA1JH470T CCFT1H104ZF /16/1713 OPTION AVRE200 HCQI2A471JZT OPEN OPEN CCEA1JH101E HCQI1H104JZT AVRX500 R5123, 5223, 5323, R5423, R5523 AVR1513/16/1713 470k OPTION(C5701) E200 AVR1513 AVRE200 PTC Thermistors E500 390k /16/1713... -
Page 79: Schematic Diagrams (4/9)
INPUT & VOLUME PART Tuner part option AGND MODEL(Ver.) TU101 MINI_L MINI_R E200 E3/E3B CNVYST990-A9U0 MUTE_+B X500 E2/E1 CNVYST990-D8E0 MCUGND DAC_MUTE X500 E1C CNVYST990-A2J0 MAIN_VOL_CLK MAIN_VOL_DATA R637 TUNER_INT R651 TUNER_RST R653 TUNER_CE R656 TUNER_SDIO R657 TUNER_SCLK +12V -12V IC70 OPEN R957 /RST OPEN... -
Page 80: Schematic Diagrams (5/9)
VIDEO PART ( PRE OUT-SUBWOOFER ) TO K FROM DSP PART NLM2595 S/W TABLE(SW2,5 CONTROL) FUNC.IN (14) (10) MUTE X (L) SAT/CBL R760 JK71 CJJ4S052Z 1.8K R766 MONITOR OUT 82(1%) DVD IN 10/50V C764 CBL/SAT IN 10/50V C763 R768 CVBS_SW2 CVBS_SW5 SUB_MUTE MCUGND... -
Page 81: Schematic Diagrams (6/9)
CODEC_MUTE DSP_MODE_SEL TO INPUT PART DIR_CE TO VIDEO PART DIR_RST DIR_MOSI TO F DIR_CLK TO E DIR_MISO HDMI_SW DSP_CS DSP_SPC1_IRQ DSP_PCP_BSY DSP_RST DSP_MOSI DSP_MISO DSP_CLK +3V3D SD[0:7] C972 OPEN DSP PART OPEN +3V3D C973 AD[0:19] OPEN DSP_AUDIO C937 OPEN C938 +3V3D D+1.8V +3V3D... -
Page 82: Schematic Diagrams (7/9)
FOR UPDATE TO FRONT B'D TO CN101 MCU PART CN97 CN91 CN97 CJP07GB113ZY CJP23GA115ZY 0ohm start EMC test AGND C940 C941 OPEN 0.1uF MINI_L MINI_R MCUGND DAC_MUTE DAC_MUTE MAIN_VOL_CLK MAIN_VOL_CLK MAIN_VOL_DATA MAIN_VOL_DATA TUNER_INT TUNER_INT TUNER_RST TUNER_RST TUNER_CE TUNER_CE TUNER_SDIO TUNER_SDIO TUNER_SCLK TUNER_SCLK R978... -
Page 83: Schematic Diagrams (8/9)
0.01uF OPEN(ADI RECOMMENDATION) HDMI PART TXEN HDMI_MCLK CVDD DVDD DVDDIO PVDD TVDD TXPLVDD TXAVDD TXPVDD HDMI_SCLK HDMI_LRCLK HDMI_TXEN HDMI_MCLK HDMI_SDATA3 HDMI_SCLK HDMI_SDATA2 HDMI_LRCLK HDMI_SDATA3 HDMI_SDATA1 HDMI_SDATA2 HDMI_SDATA0 HDMI_SDATA1 HDMI_SDATA0 R167 OPEN CEC_COM +5VH CEC_5V +5VH +3V3H CN9B CN9B DGND CJP23GA193ZY HDMI_RST 10022H-23C +3V3H... -
Page 84: Schematic Diagrams (9/9)
FRONT-HDMI IN PART OPEN R507 OPEN IC52 OPEN VCCA VCCB SCLA SCLB SDAA SDAB PCA9507DP R523 Q500 Q501 RT1P141C R501 RT1N241C R521 R525 R526 C500 19.HP DET JK51 OPEN R502 18.+5V 17.GND 16.DDC DATA OPEN D154 15.DDC CLK 14.NC CEC5V L500 13.CEC 12.CK-... -
Page 85: Exploded View
EXPLODED VIEW Only E3&E1C Only E2 Only E3 Only E2&E1C C2-1 C2-2 C2-3 C1-5 C1-1 C1-2 C1-4 C1-3 C3-1 WARNING: Parts marked with this symbol have critical characteristics. Use ONLY replacement parts recommended by the manufacturer. 印の部分は安全を維持するために重要 な部品です。従って交換時は必ず指定の 部品を使用してください。... - Page 86 PARTS LIST OF EXPLODED VIEW Please refer to the last chapter. z Parts indicated by "nsp" on this table cannot be supplied. z P.W.B. ASS'Y indicated by "nsp" on this table cannot be supplied. When repairing the P.W.B. ASS'Y, check the board parts list and order replacement parts. z Parts indicated by the "...
-
Page 87: Packing View
PACKING VIEW 5-9 5-10 UK plug Adaptor PARTS LIST OF PACKING & ACCESSORIES Please refer to the last chapter. z Parts indicated by "nsp" on this table cannot be supplied. z Parts indicated by the " ★ " mark are not illustrated in the exploded view. z The parts listed below are only for maintenance. -
Page 88: Semiconductors
SEMICONDUCTORS Only major semiconductors are shown. General semiconductors etc. are omitted from list. The semiconductors which have a detailed drawing in a schematic diagram are omitted from list. 1. IC's NJU72340A (DIGITAL :IC61) NJU72340A Terminal Functions... - Page 89 G Package Outline DIP16,DMP16 I PIN CONFIGURATION and BLOCK DIAGRAM NJM2595M (DIGITAL : IC71) Vin1 Vin2 75Ω Vout1 Driver Vin3 75Ω Vout2 Vin4 Driver Vin5 75Ω Vout3 Driver TC74VHC157F/FN/FT/FK Pin Assignment IEC Logic Symbol TC74VHC157FT (DIGITAL : IC85) - 1 - (15) SELECT SELECT...
- Page 90 CS42528 (DIGITAL : IC84) CS42528 Block diagram...
- Page 91 CS42528 Terminal Functions...
- Page 92 CS497024CVZ (DIGITAL : IC81)
- Page 93 CS497024CVZ Block diagram M12L16161A5TG (DIGITAL : IC83) M12L16161A5TG Terminal Functions Name Input Function System Clock Active on the positive going edge to sample all inputs. Disables or enables device operation by masking or enabling all inputs except CLK, CKE Chip Select and L(U)DQM.
- Page 94 STM32F101xC, STM32F101xD, STM32F101xE Pinouts and pin descriptions Pinouts and pin descriptions STM32F101ZE (DIGITAL : IC91) Figure 3. STM32F101xC, STM32F101xD and STM32F101xE access line LQFP144 pinout DD_2 SS_2 PA13 PA12 VBAT PA11 PC13-TAMPER-RTC PA10 PC14-OSC32_IN PC15-OSC32_OUT DD_9 SS_9 SS_5 LQFP144 DD_5 PF10 OSC_IN PD15...
- Page 95 Pin Name Symbol Pullup STBY stop Function 36 PA2 O(L) 37 PA3 O(L) 38 VSS_4 39 VDD_4 3.3V 40 PA4 DSP_CS O/L DSP Chip Select 41 PA5 DSP_CLK D3VPu O/L DSP_CLK 42 PA6 DSP_MISO D3VPu O/L DSP MISO 43 PA7 DSP_MOSI O/L DSP MOSI 44 PC4...
- Page 96 Pin Name Symbol Pullup STBY stop Function 102 PA10 UPDATE_RX O/L UPDATE RX 103 PA11 RESERVED O(L) RESERVED 104 PA12 RESERVED O(L) RESERVED 105 PA13 DEBUG JTMS / SWDIO 106 PCAP_2 Not Connected 107 VSS_2 108 VDD_2 3.3V 109 PA14 DEBUG JTCK / SWCLK 110 PA15...
-
Page 97: Pin Description
Pin Description ADV7623 (DIGITAL : IC11) DDCC_SCL 108 DDCA_SDA CVDD 107 RTERM CGND 106 5V_DETA RXC_C- 105 HP_CTRLA RXC_C+ 104 PGND TVDD 103 PVDD RXC_0- 102 XTAL1 RXC_0+ 101 XTAL CGND 100 PVDD RXC_1- 10 99 PGND RXC_1+ 11 98 PWRDNB TVDD 12 97 RESETB RXC_2- 13... - Page 98 ADV7623 Hardware Manual ADV7623 Terminal Functions Table 6. Function Descriptions Location Mnemonic Type Description DDCC_SCL Digital Input HDCP slave serial clock port C. DDCC_SCL is a 3.3 V input that is 5 V tolerant. CVDD Power Receiver comparator supply voltage (1.8V) CGND Ground TVDD and CVDD Ground...
- Page 99 ADV7623 Hardware Manual Location Mnemonic Type Description D in the HDMI interface. RXD_0+ HDMI Input Digital input channel 0 True of port D in the HDMI interface. CGND Ground TVDD and CVDD Ground RXD_1- HDMI Input Digital input channel 1 complement of port D in the HDMI interface.
- Page 100 ADV7623 Hardware Manual Location Mnemonic Type Description TXGND Ground TXAVDD Ground TX0- HDMI Output Differential Output Channel 0 Complement. Differential output of the red data at 10× the pixel clock rate; supports TMDS logic level. TX0+ HDMI Output Differential Output Channel 0 True. Differential output of the red data at 10×...
- Page 101 ADV7623 Hardware Manual Location Mnemonic Type Description MCLK_IN Digital Input Audio Reference Clock. 128 × N × fs with N = 1, 2, 3, or 4. Set to 128 × sampling frequency (fs), 256 × fs, 384 × fs, or 512 × fs.
- Page 102 ADV7623 Hardware Manual Location Mnemonic Type Description AP0_OUT Digital Output Audio output port 0. AP1_OUT Digital Output Audio output port 1. AP2_OUT Digital Output Audio output port 2. AP3_OUT Digital Output Audio output port 3. AP4_OUT Digital Output Audio output port 4. DGND Ground Ground for DVDD...
- Page 103 ADV7623 Hardware Manual Location Mnemonic Type Description CGND Ground TVDD and CVDD Ground RXA_C- HDMI Input Digital input clock Complement of port A in the HDMI interface. RXA_C+ HDMI Input Digital input clock True of port A in the HDMI interface. TVDD Power Receiver terminator supply voltage (3.3 V)
- Page 104 ADV7623 Hardware Manual Location Mnemonic Type Description B in the HDMI interface. RXB_1+ HDMI Input Digital input channel 1 true of port B in the HDMI interface. TVDD Power Receiver terminator supply voltage (3.3 V) RXB_2- HDMI Input Digital input channel 2 complement of port B in the HDMI interface.
- Page 105 AD8195 (F-HDMI : IC51) 30 AVCC PIN 1 29 PE_EN INDICATOR 28 TX_EN 27 AVEE 30 AVCC PIN 1 VTTI 26 AVCC AD8195 29 PE_EN INDICATOR 28 TX_EN 25 AVCC TOP VIEW (Not to Scale) 27 AVEE 24 AVEE VTTI 26 AVCC AD8195 23 AVCC...
- Page 106 5339QI-E EN5339 QFN Evaluation Board acking and Marking Information: http://www.enpirion.com/resource-center-packing-and-marking-information.htm EN5339QI (DIGITAL : IC17) Figure 3: Pin Out Diagram (Top View) NOTE A: NC pins are not to be electrically connected to each other or to any external signal, ground, or voltage. However, they must be soldered to the PCB.
-
Page 107: Fl Display
2. FL DISPLAY FLD (018BT021GINK) (FRONT : FL101) PIN CONNECTION GRID ASSIGNMENT... - Page 108 ANODE CONNECTION...
- Page 109 FRONT PCB ASS'Y FRONT REF No. Part No. Part Name Remarks Q'ty New SEMICONDUCTORS GROUP D1001,1002 00D9630328409 DIODE,RECTIFIER,AXIAL CVD1N4007ST D1003 90M-HD302360R DIODE,ZENER,1/2W,6.8V ZJ6.8BT(26MMT/B) CVDZJ6.8BT D1004 00D9430087209 DIODE,ZENER,1/2W,24V ZJ24BT(26MMT/B) CVDZJ24BT D1005 90M-HD302450R DIODE,ZENER,1/2W,13V ZJ13BT(26MMT/B) CVDZJ13BT D1012 943176010090S L.E.D,(GREEN/RED5PI) CVDBLBJEGJ204L IC102 943239005300M I.C,OPAMP BA4560RF-E2 HVIBA4560RF Q1001...
- Page 110 MAIN PCB ASS'Y MAIN REF No. Part No. Part Name Remarks Q'ty New SEMICONDUCTORS GROUP D5102 90M-HD302390R DIODE,ZENER,1/2W,3.3V ZJ3.3BT(26MMT/B) CVDZJ3.3BT D5103 00D9430182609 DIODE,SWITCHING ISS133(T/B) CVD1SS133MT D5104 90M-HD302390R DIODE,ZENER,1/2W,3.3V ZJ3.3BT(26MMT/B) CVDZJ3.3BT D5105,5106 00D9430182609 DIODE,SWITCHING ISS133(T/B) CVD1SS133MT D5202 90M-HD302390R DIODE,ZENER,1/2W,3.3V ZJ3.3BT(26MMT/B) CVDZJ3.3BT D5203 00D9430182609 DIODE,SWITCHING ISS133(T/B)
- Page 111 REF No. Part No. Part Name Remarks Q'ty New R5225 RES,CARBON(1/5W,10Kohm,J) CRD20TJ103T MAIN R5226 963252004160S PTCTHEMISTORS,CHIP(105'C) PRF18BC471QB5RB CRTPRF18BC471QB R5227 00MGD05562160 RES,CARBON(1/5W,5.6Kohm,J) CRD20TJ562T R5229 RES,CARBON(1/5W,15Kohm,J) CRD20TJ153T R5230,5231 RES,CARBON(1/5W,22Kohm,J) CRD20TJ223T R5232 RES,M-OXIDEFILM(1W/10ohm) CRG1SANJ100RT R5301 00MGD05104160 RES,CARBON(1/5W,100Kohm,J) CRD20TJ104T R5302 00MGD05681160 RES,CARBON(1/5W,680ohm,J) CRD20TJ681T R5303 RES,CARBON(1/5W,10Kohm,J) CRD20TJ103T R5304...
- Page 112 REF No. Part No. Part Name Remarks Q'ty New C5209 CAP,MYLAR(50V/0.1uF/J) HPE104J2AP050T HCQI1H104JZT MAIN C5301 943134500070S CAP,ELECT(100V/10uF) CCEA2AH100T C5302 CAP,MYLAR(100V/470pF/J) HPE471J2AP050T HCQI2A471JZT C5303 CAP,CERAMIC(50V/82pF/J) 82PF50VJ CCCT1H820JC C5304 CAP,MYLAR(50V/2200pF/J) HPE222J2AP050T HCQI1H222JZT C5305 943134501770S CAP,ELECT(50V/220uF) CCEA1HH221T C5306 CAP,CERAMIC(50V/33pF/J) CCC1H330J05FK5 CCCT1H330JC C5307 943134500070S CAP,ELECT(100V/10uF) CCEA2AH100T C5308...
- Page 113 DIGITAL PCB ASS'Y DIGITAL REF No. Part No. Part Name Remarks Q'ty New SEMICONDUCTORS GROUP D131 943209001080S DIODE,CHIP,SWITCHING 1SS355(T/B) CVD1SS355T D155 963209003510S DIODE,RELIABLEESDPROTECTION CVDCDS3C05HDMI1 D156,157 943202500730S DIODE,ZENER(5.1V/0.5W,SOD-123) CVDMM1Z5V1H D605,606 00D9430196306 DIODE,ZENER,1/2W,7.5V ZJ7.5BT(26MMT/B) CVDZJ7.5BT D609-611 943209001080S DIODE,CHIP,SWITCHING 1SS355(T/B) CVD1SS355T D612 943202500720S DIODE,ZENER(3.6V/0.5W,SOD-123) CVDMM1Z3V6H D903...
- Page 114 REF No. Part No. Part Name Remarks Q'ty New R603,604 RES,CHIP(1608/5%/27Kohm) CRJ10DJ273T DIGITAL R605,606 RES,CHIP(1608/5%/0ohm) 00200-0090 CRJ10DJ0R0T R609-613 RES,CHIP(1005/5%/33ohm) RM04JC33R CRJ06IJ330T R614 RES,CHIP(1608/5%/220ohm) 00200-0101 CRJ10DJ221T R615,616 RES,CHIP(1608/5%/100ohm) 00200-0100 CRJ10DJ101T R617,618 RES,CHIP(1608/5%/1Mohm) 00200-0095 CRJ10DJ105T R619,620 RES,CHIP(1608/5%/100ohm) 00200-0100 CRJ10DJ101T R621,622 RES,CHIP(1608/5%/1Mohm) 00200-0095 CRJ10DJ105T R623,624 RES,CHIP(1608/5%/100Kohm) 00200-0097...
- Page 115 REF No. Part No. Part Name Remarks Q'ty New R908 RES,CHIP(1005/5%/4.7Kohm) RM04JC4K7 CRJ06IJ472T DIGITAL R910 RES,CHIP(1005/5%/100Kohm) RM04JC100K CRJ06IJ104T R911 RES,CHIP(1005/5%/47Kohm) RM04JC47K CRJ06IJ473T R912 RES,CHIP(1608/5%/1Mohm) 00200-0095 CRJ10DJ105T R913 RES,CHIP(1005/5%/470Kohm) CRJ06IJ474T R914,915 RES,CHIP(1005/5%/1Kohm) RM04JC1K CRJ06IJ102T R916 RES,CHIP(1608/5%/10Kohm) 00200-0096 CRJ10DJ103T R917 RES,CHIP(1608/5%/4.7Kohm) 00200-0087 E3, E3B CRJ10DJ472T R917...
- Page 116 REF No. Part No. Part Name Remarks Q'ty New C676 CAP,CHIP(1005,16V/0.1uF) CCUI1C104KC DIGITAL C678 CAP,CHIP(1608,50V/330pF) 1608SIZE CCUS1H331JA C679 CAP,CHIP(1608,50V/1000pF) CCUS1H102KC C680,681 943134500070S CAP,ELECT(KR3,10uF/100V,6.3X11) CCEA2AH100T C682 CAP,CHIP(1005,16V/0.1uF) CCUI1C104KC C685-688 CAP,CHIP(1608,50V/1500pF) CCUS1H152KC C689,690 CAP,CHIP(1608,50V/330pF) 1608SIZE CCUS1H331JA C691,692 CAP,CHIP(1608,50V/1500pF) CCUS1H152KC C693 CAP,CHIP(1005,16V/0.1uF) CCUI1C104KC C694,695 CAP,CHIP(1608,50V/330pF) 1608SIZE CCUS1H331JA...
- Page 117 REF No. Part No. Part Name Remarks Q'ty New DIGITAL CN95 LOCK-WAFER/STRAIGHT/2MMPITCH/7PIN CJP07GI288ZY CN97 WAFER,FFC(23P-1.25mm,STRAIGHT) CJP23GA115ZY CN9A WAFER,FFC,SMD(23P-1mm,STRAIGHT) CJP23GA193ZY CN9B WAFER,FFC,SMD(23P-1mm,STRAIGHT) CJP23GA193ZY ET81 WIREASS'Y(1P,80MM,BLK,#22) CWE5202080A JK11-13 943643100040S JACK,HDMI(KSI-TWI,W/FLANGE) CJJ9H016Z JK15 943643100040S JACK,HDMI(KSI-TWI,W/FLANGE) CJJ9H016Z JK51 943643100040S JACK,HDMI(KSI-TWI,W/FLANGE) CJJ9H016Z JK62 943643101570S JACK,4P(W/R,W/R),SEPA-GND CJJ4P048U JK71 943643102370S...
- Page 118 POWER PCB ASS'Y POWER REF No. Part No. Part Name Remarks Q'ty New SEMICONDUCTORS GROUP D2001-2004 00D9630328409 DIODE,RECTIFIER,AXIAL CVD1N4007ST D2006 00D9430182609 DIODE,SWITCHING ISS133(T/B) CVD1SS133MT D2008 00D9430182609 DIODE,SWITCHING ISS133(T/B) CVD1SS133MT D2009 943203003170S DIODE,BRIDGE GBJ6066A,600V HVDGBJ606 D2031 00D9430182609 DIODE,SWITCHING ISS133(T/B) CVD1SS133MT D2032-2037 00D9630328409 DIODE,RECTIFIER,AXIAL CVD1N4007ST...
- Page 119 PANEL, SUB CGR1A533Y 943416100960D WINDOW, FL CGU1A462U 943412100710D KNOB, VOLUME CBN1A263 943412100720D KNOB, VOLUME CBN1A263C73 943446100590D PLATE, VOLUM KNOB CGX1A469 42141002400AD BADGE, DENON CGB1A254Z-V1 42141002401AD BADGE, DENON CGB1A254Z-Y-V1 943402103360D PANEL, FRONT E3/E3B CGW3A519RHWB63 943402103370D PANEL, FRONT E2/E1 CGW3A519RHWB63VB63 943402103380D PANEL, FRONT...
- Page 120 PARTS LIST OF PACKING & ACCESSORIES PACKING Ref. No. Part No. Part Name Remarks Q'ty New BAG,POLY CPP1A081X 2 90M-YC000780R CORD,POWER CJA523FBWA 90M-ZC000320R CORD,POWER E2/E1 CJA2B054Y 90M-YC000850R CORD,POWER CJA2N047WA 943611011130D CORD,POWER CJA2F118Y 3 943533101680D PAD,SNOW(TOP) CPS1A932 4 943533101690D PAD,SNOW(BOTTOM) CPS1A933 INSTRUCTIONMANUALASS'Y BAG,POLY(MANUAL) CPB1A197Z...
Need help?
Do you have a question about the AVR-E200 and is the answer not in the manual?
Questions and answers