dji OSMO User Manual
Hide thumbs
Also See for OSMO:
- Quick start manual (78 pages) ,
- User manual (53 pages) ,
- Instruction manual (6 pages)
Table of Contents
Advertisement
Advertisement
Table of Contents

Related Manuals for dji OSMO


Summary of Contents for dji OSMO
- Page 1 OSMO User Manual V1.0 2015.10...
-
Page 2: Using This Manual
Legend Important Tips Install the DJI GO App Search for ‘DJI GO’ on the App Store or Google Play and install the app on your mobile device. DJI GO supports iOS 8.0 (or later) or Android 4.1.2 (or later). ©... -
Page 3: Table Of Contents
Using this Manual Legend Install the DJI GO App Introduction Getting Started Intelligent Battery Mounting your Mobile Device Removing the Mobile Device Holder External Mounts Unlocking the Gimbal Locking the Gimbal Using the Osmo Controls and Operations Operation Modes Compatibility with the Zenmuse X3 for the Inspire 1 DJI GO App Download Connecting to the DJI GO App Key Pages Upgrading the Firmware Using the DJI GO App Using a Micro SD Card Maintenance Specifications Troubleshooting © 2015 DJI. All Rights Reserved. -
Page 4: Introduction
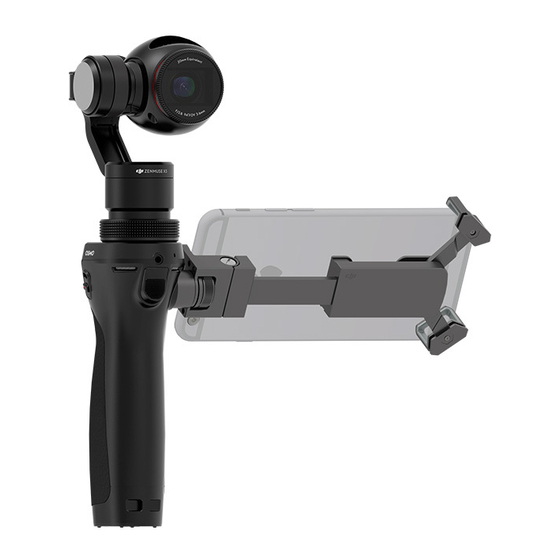
The camera tilts across a 170 degree range and has a pan rotation of 640 degrees. The DJI Rosette Mount on the side of the handle allows your mobile device to be mounted as a live HD viewfinder, and supports external devices including vehicle mounts and tripods for specialized filming applications. -
Page 5: Getting Started
Getting Started Intelligent Battery The 980 mAh Intelligent Battery can power the Osmo for about 65 minutes. Intelligent Battery Functions Battery Balancing Balances the voltage of each cell during charging. Overcurrent Protection Stops charging if the charging current is too large. - Page 6 Remove the battery from the charger unless it is charging to prevent battery discharging. Inserting the Battery Slide the locking switch at the base of the Osmo to open the battery cover. Insert the battery and lock the battery cover.
-
Page 7: Mounting Your Mobile Device
3. Place one end of your mobile device into the arms. 4. Extend the arms so that your entire mobile device is seated in the mobile device holder. 5. Rotate your mobile device to the desired position. © 2015 DJI. All Rights Reserved. -
Page 8: Removing The Mobile Device Holder
Removing the Mobile Device Holder The mobile device holder can be removed by rotating the knob counterclockwise. It is recommended to install the cap for the DJI Rosette Mount when it is not in use. External Mounts Different types of external mounts can be attached to the DJI Rosette Mount for unique applications. -
Page 9: Unlocking The Gimbal
Used to attach up to three other mounts at the same time. Visit the official DJI Store (http://store.dji.com) to learn more. Unlocking the Gimbal To protect the gimbal, the three motor axes are locked in place. To unlock the gimbal: 1. -
Page 10: Locking The Gimbal
OSMO User Manual You can choose to unlock the gimbal before or after the Osmo is turned on. It is recommended to unlock the gimbal before powering on the Osmo. The Osmo will beep slowly if the gimbal is locked after it is turned on. This means the camera is working normally but the gimbal is shut off. -
Page 11: Camera Status Indicator
Vertical movement tilts the camera. Horizontal movement pans the camera. [3] Shutter Button Press this button to take photos based on your settings in the DJI GO app. [4] Record Button Press this button once to start recording video, and again to stop recording. -
Page 12: System Status Indicator
The Osmo will return to SmoothTrack Mode once the Trigger is released. Quickly tap the Trigger twice to center the camera. When the Osmo is in Upright Mode and Underslung Mode, quickly tapping the Trigger three times will enter Selfie Mode. -
Page 13: Restore Default Wi-Fi Settings
Upright Mode can be used without any user input. In this mode, quickly tap the trigger twice to center the camera. Quickly tap the trigger three times and the camera will point at you, ready for a selfie. © 2015 DJI. All Rights Reserved. - Page 14 OSMO User Manual Underslung Mode Holding the Osmo upside down will cause it to enter Underslung Mode, in which the camera can easily capture images from a lower position. Quickly tapping the trigger twice will center the camera. Quickly tap the trigger three times and the camera will point at you, ready for a selfie.
-
Page 15: Compatibility With The Zenmuse X3 For The Inspire 1
Search ‘DJI GO’ on the App Store or Google Play and download the app to your mobile device. Connecting to the DJI GO App 1. Turn on the Osmo. Hold the handle still and avoid touching the gimbal while the Osmo starts up. ©... -
Page 16: Key Pages
3. If you are using the Osmo for the first time, follow the on-screen instructions to activate it. You will need to log in to your DJI account through an Internet connection. Re-connect to the Osmo Wi-Fi network after the activation is complete. - Page 17 Choose the shooting mode, ISO, shutter speed and exposure value. : Playback Tap to view photos and videos on the Micro SD card. : Time Bar Display the current recording time and remaining recording time. © 2015 DJI. All Rights Reserved.
- Page 18 Acceleration: Determines how closely the camera will follow the translated pan/tilt handle movement. • Joystick Settings Smoothing: Controls the deceleration of the gimbal. A small value will cause the gimbal to stop abruptly. © 2015 DJI. All Rights Reserved.
- Page 19 • Auto Calibration Reduces the drift caused by magnetic interference in the surroundings or human error. Hold the Osmo still and upright during the calibration. • Reset Gimbal Tap to reset the gimbal to the default settings.
- Page 20 Library Explore Once you login or register your DJI account, you will be able to conveniently upload and share your creations. The saved photos and videos can be uploaded to Skypixel (www.skypixel.com) and shared on social networks such as Facebook, Twitter, WeChat, Moments and Sina Weibo.
-
Page 21: Upgrading The Firmware
Using the DJI GO App Connect the Osmo to your mobile device and then launch the DJI GO app. You will be reminded if a new firmware upgrade is available. To start upgrading, connect your mobile device to the internet and follow the on-screen instructions. -
Page 22: Using A Micro Sd Card
When transporting the Osmo, keep it locked, in order to protect the gimbal, as shown below. The Osmo is not water resistant. Keep it away from sand and dust during use. After use, it is recommended to wipe the Osmo down with a soft dry cloth. Never spray any cleaning liquids onto the Osmo. -
Page 23: Specifications
4000 x 3000 pixels Single Shot Photo Burst Mode: 3 / 5 / 7 shots Auto Exposure Bracketing ( AEB ) : 3/5 bracketed frames @ 0.7EV bias Still Photography Modes Interval Timelapse Auto Panorama Selfie Panorama © 2015 DJI. All Rights Reserved. - Page 24 59° to 104° F ( 15° to 40° C ) Charging Temperature 14° to 122° F ( -10° to 50° C ) Operating Temperature Battery Charger Model SOY015A-1260120 100 – 240 V, 50 / 60 Hz Input Output 12.6 V, 1.2 A © 2015 DJI. All Rights Reserved.
-
Page 25: Troubleshooting
Osmo’s Wi-Fi network, restart the Osmo and try again. If the problem persists, reset the Osmo’s Wi-Fi network to its default settings by using the key combination and try again. (Key combination: Hold down the Trigger and Shutter Button at the same time. - Page 26 No. The mechanical structure of the Osmo’s camera is designed for hand held use. The 3-axis gimbal can be flattened and locked, and the position of the tilt motor is different. However, the Inspire 1’s camera can be used with the Osmo after it is upgraded with the latest firmware (to be released soon).
- Page 27 This content is subject to change. Download the latest version from www.dji.com/product/osmo If you have any questions about this document, please contact DJI by sending a message to DocSupport@dji.com. © 2015 DJI. All Rights Reserved.
Need help?
Do you have a question about the OSMO and is the answer not in the manual?
Questions and answers