Table of Contents
Advertisement
Available languages
Available languages
Quick Links
SP6853-1 Workshop 12:SP6439-3_ES.qxd 9/19/13 8:20 AM Page 1
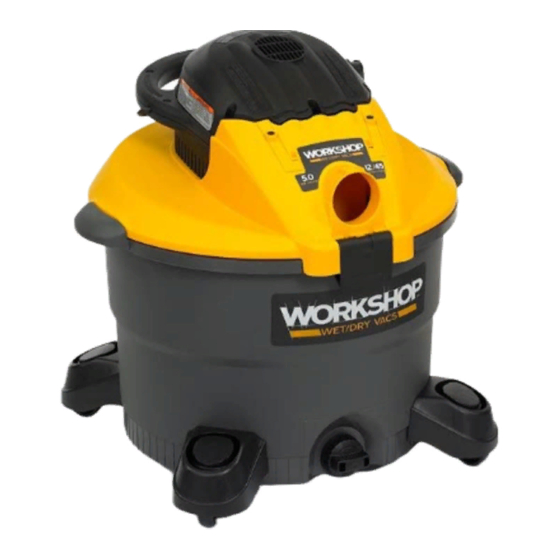
• Wet/Dry Vac
with Detachable
Blower
• 12 U.S. Gallon/
45 Liter
• WS1200DE0
FOR QUESTIONS OR INFORMATION CONTACT US AT:
1-888-455-8724 from the US and Canada
WARNING:
To reduce the risk of injury, the user must read and understand the
owner's manual before using this product.
• Español - página 17
• Français - page 33
SAVE THIS MANUAL FOR FUTURE REFERENCE
Part No. SP6853
www.WORKSHOPvacs.com
OWNER'S MANUAL
Printed in Mexico
MD
Advertisement
Chapters
Table of Contents

Related Manuals for Workshop WS1200DE0


Summary of Contents for Workshop WS1200DE0
- Page 1 SP6853-1 Workshop 12:SP6439-3_ES.qxd 9/19/13 8:20 AM Page 1 OWNER’S MANUAL • Wet/Dry Vac with Detachable Blower • 12 U.S. Gallon/ 45 Liter • WS1200DE0 FOR QUESTIONS OR INFORMATION CONTACT US AT: 1-888-455-8724 from the US and Canada www.WORKSHOPvacs.com WARNING: To reduce the risk of injury, the user must read and understand the owner’s manual before using this product.
-
Page 2: Table Of Contents
SP6853-1 Workshop 12:SP6439-3_ES.qxd 9/19/13 8:20 AM Page 2 TABLE OF CONTENTS Section Page Section Page Important Safety Instructions....2 Assemble the Detachable Blower Introduction ......4 for “Blowing”... -
Page 3: Save This Manual
SP6853-1 Workshop 12:SP6439-3_ES.qxd 9/19/13 8:20 AM Page 3 • Do not use with damaged cord, plug or - Do not direct air at bystanders. other parts. If your Vac is not working - Keep children away when blowing. as it should, has missing parts, has... -
Page 4: Introduction
SP6853-1 Workshop 12:SP6439-3_ES.qxd 9/19/13 8:20 AM Page 4 INTRODUCTION This Wet/Dry Vac with Detachable Blower Read this owner’s manual to familiarize is intended for household use. It may be yourself with the product features and to used for vacuuming wet or dry debris and understand the specific usage of your may be used as a blower. -
Page 5: Filter Removal And Installation
SP6853-1 Workshop 12:SP6439-3_ES.qxd 9/19/13 8:20 AM Page 5 FILTER REMOVAL & INSTALLATION Removal and Installation Integrated Filter of the Qwik Lock™ Filter PUSH Plate with Center DOWN Hole Filter Removal: 1. Hold the Filter tabs of the Qwik Lock™ Filter in each hand. -
Page 6: Caster/Caster Foot Assembly
SP6853-1 Workshop 12:SP6439-3_ES.qxd 9/19/13 8:20 AM Page 6 CASTER/CASTER FOOT ASSEMBLY With the power head and lid assembly removed from the drum, and the drum Caster upside down on the floor: Caster Stem 1. Insert the 4 caster feet into the bottom Caster Ball of drum, as shown on the 4 locations. -
Page 7: Accessory Storage
SP6853-1 Workshop 12:SP6439-3_ES.qxd 9/19/13 8:20 AM Page 7 ACCESSORY STORAGE Locking Sleeve Your WORKSHOP Wet/Dry Vac is designed to provide accessory storage The Locking Sleeve is designed to which is built into the four caster feet. You provide added strength in accessory may conveniently store your accessory connections. -
Page 8: Positioning Detachable Blower (Power Head Assembly)
SP6853-1 Workshop 12:SP6439-3_ES.qxd 9/19/13 8:20 AM Page 8 POSITIONING DETACHABLE BLOWER (Power Head Assembly) 1. To remove the detachable blower from 3. Rotate the detachable blower down the lid assembly, press down on the until the travel of the unit stops. -
Page 9: Operation
SP6853-1 Workshop 12:SP6439-3_ES.qxd 9/19/13 8:20 AM Page 9 OPERATION WARNING: To reduce the risk of fire, explosion, or damage to Vac: • Do not leave Vac running while unattended - you may fail to notice important signs indicating abnormal operation such as loss of suction, debris/liquid exiting the exhaust, or abnormal motor noises. -
Page 10: Choosing The Correct Filter
SP6853-1 Workshop 12:SP6439-3_ES.qxd 9/19/13 8:20 AM Page 10 OPERATION (continued) Choosing the Correct Filter c. If you are using your vacuum to pick up very fine dust, it will be necessary WARNING: To reduce the risk of for you to empty the drum and clean... -
Page 11: Emptying The Drum
SP6853-1 Workshop 12:SP6439-3_ES.qxd 9/19/13 8:20 AM Page 11 OPERATION (continued) Emptying the Drum Blowing Feature Your Wet/Dry Vac has a “detachable WARNING: To reduce the risk of blower”. It has the capability to be used injury from accidental starting, as a dedicated blower for yard work, patio... -
Page 12: Assemble The Detachable Blower For "Blowing
SP6853-1 Workshop 12:SP6439-3_ES.qxd 9/19/13 8:20 AM Page 12 OPERATION (continued) 1. Familiarize yourself with the detachable 2. Insert the male-male adapter into the blower portion of your Wet/Dry Vac. blowing port of the detachable blower. Connect the large end of the extension 2. -
Page 13: Maintenance
SP6853-1 Workshop 12:SP6439-3_ES.qxd 9/19/13 8:20 AM Page 13 MAINTENANCE 5. Examine foam pad for reuse. If you Blower Intake need to replace it, check the service WARNING: To reduce the risk of part section of this manual. injury from accidental starting, 6. -
Page 14: Cleaning A Wet Filter
SP6853-1 Workshop 12:SP6439-3_ES.qxd 9/19/13 8:20 AM Page 14 MAINTENANCE (continued) Cleaning A Wet Filter Cord Maintenance When vacuuming is complete, unplug the Remove Filter from Vac, run water through cord and wrap it around the motor cover. the Filter from a hose or spigot. Take care... -
Page 15: Warranty
LIMITED WARRANTY This limited warranty is offered by Emerson Tool Company, a division of Emerson Electric Co., located at the address below (“ETC” or “we” or “our” or “us”) and applies to our WORKSHOP- branded Wet/Dry Vacuums (collectively, the “WORKSHOP® Product”). - Page 16 WORKSHOP Product or provide you with a refund. The decision to repair or replace your WORKSHOP Product or to provide a refund is at our sole discretion. Repair or replacements provided to you by ETC are at no cost to you if covered under this limited warranty.
- Page 17 SP6853-1 Workshop 12:SP6439-3_ES.qxd 9/19/13 8:20 AM Page 17 MANUAL DEL USUARIO • Aspiradora para mojado/seco con soplador desmontable • 12 galones EE.UU. /45 litros • WS1200DE0 ¿PREGUNTAS O COMENTARIOS? COMUNÍQUESE CON NOSOTROS EN: 1-888-455-8724 desde los EE.UU. y Canadá www.WORKSHOPvacs.com...
-
Page 18: Instrucciones De Seguridad Importantes
SP6853-1 Workshop 12:SP6439-3_ES.qxd 9/19/13 8:20 AM Page 18 INDICE Sección Página Sección Página Instrucciones de seguridad importantes ..18 Ensamblaje del soplador desmontable Introducción ....... 20 para “soplar”... - Page 19 SP6853-1 Workshop 12:SP6439-3_ES.qxd 9/19/13 8:20 AM Page 19 • No tire de la aspiradora usando el cordón ni la lleve - No utilice el soplador para trabajos que no sean soplar suciedad y residuos. por el cordón, ni use el cordón como asa, ni cierre - No use la aspiradora como rociador.
-
Page 20: Introducción
SP6853-1 Workshop 12:SP6439-3_ES.qxd 9/19/13 8:20 AM Page 20 INTRODUCCIÓN Esta aspiradora para mojado/seco con soplador Lea este manual del usuario para familiarizarse con desmontable está diseñada para uso doméstico las características del producto y para entender la solamente. Se puede utilizar para recoger materiales utilización específica de su nueva aspiradora. -
Page 21: Remoción E Instalación Del Filtro
SP6853-1 Workshop 12:SP6439-3_ES.qxd 9/19/13 8:20 AM Page 21 REMOCIÓN E INSTALACIÓN DEL FILTRO Remoción e instalación Placa de filtro del filtro Qwik Lock™ EMPUJE Integrated Filter integrada con agujero HACIA PUSH Plate with Center Remoción del filtro: ABAJO DOWN central Hole 1. -
Page 22: Ensamblaje De Las Ruedecillasy Los Pies De Ruedecilla
SP6853-1 Workshop 12:SP6439-3_ES.qxd 9/19/13 8:20 AM Page 22 ENSAMBLAJE DE LAS RUEDECILLAS Y LOS PIES DE RUEDECILLA Con el cabezal del motor y el ensamblaje de la tapa quitados del tambor y con el tambor ubicado en Ruedecilla Caster posición invertida en el piso: Vástago de la ruedecilla... -
Page 23: Almacenamiento De Accesorios
SP6853-1 Workshop 12:SP6439-3_ES.qxd 9/19/13 8:20 AM Page 23 ALMACENAMIENTO DE ACCESORIOS Su aspiradora para seco/mojado WORKSHOP está Manguito de fijación diseñada para brindar almacenamiento de El manguito de fijación está diseñado para brindar accesorios, el cual está incorporado en los cuatro fuerza adicional en las conexiones de los accesorios. -
Page 24: Posicionamiento Del Soplador Desmontable
SP6853-1 Workshop 12:SP6439-3_ES.qxd 9/19/13 8:20 AM Page 24 POSICIONAMIENTO DEL SOPLADOR DESMONTABLE (ensamblaje del cabezal del motor) 1. Para quitar el soplador desmontable del 3. Gire el soplador desmontable hacia abajo hasta ensamblaje de la tapa, presione hacia abajo sobre que el recorrido de la unidad se detenga. -
Page 25: Funcionamiento
SP6853-1 Workshop 12:SP6439-3_ES.qxd 9/19/13 8:20 AM Page 25 FUNCIONAMIENTO ADVERTENCIA: Para reducir el riesgo de incendio, explosión o daños a la aspiradora: • No deje la aspiradora en marcha mientras esté desatendida. Usted podría no notar señales importantes que indiquen un funcionamiento anormal, tal como pérdida de succión, residuos o líquido que salen por el escape o ruidos anormales del motor. -
Page 26: Selección Del Filtro Correcto
SP6853-1 Workshop 12:SP6439-3_ES.qxd 9/19/13 8:20 AM Page 26 FUNCIONAMIENTO (continuación) Selección del filtro correcto c. Si está utilizando la aspiradora para recoger polvo muy fino, será necesario que ADVERTENCIA: Para reducir el riesgo de vacíe el tambor y limpie el filtro a intervalos daños a la aspiradora, no haga funcionar el... -
Page 27: Vaciado Del Tambor
SP6853-1 Workshop 12:SP6439-3_ES.qxd 9/19/13 8:20 AM Page 27 FUNCIONAMIENTO (continuación) Vaciado del tambor Dispositivo de soplado La aspiradora para mojado seco cuenta con un ADVERTENCIA: Para reducir el riesgo de “soplador desmontable”. Tiene capacidad para usarse lesiones debidas a un arranque accidental, como soplador dedicado para trabajo de jardín,... -
Page 28: Ensamblaje Del Soplador Desmontable Para "Soplar
SP6853-1 Workshop 12:SP6439-3_ES.qxd 9/19/13 8:20 AM Page 28 FUNCIONAMIENTO (continuación) 1. Familiarícese con la porción del soplador desmon- Orificio de soplado Blowing Port table de la aspiradora para mojado/seco. Boquilla 2. Quite el soplador desmontable de la aspiradora Blower sopladora... -
Page 29: Mantenimiento
SP6853-1 Workshop 12:SP6439-3_ES.qxd 9/19/13 8:21 AM Page 29 MANTENIMIENTO Entrada del soplador 5. Examine si la almohadilla de espuma se puede volver a utilizar. Si necesita cambiarla, revise la ADVERTENCIA: Para reducir el riesgo de sección sobre piezas de servicio de este manual. -
Page 30: Limpieza De Un Filtro Mojado
SP6853-1 Workshop 12:SP6439-3_ES.qxd 9/19/13 8:21 AM Page 30 MANTENIMIENTO (continuación) Limpieza de un filtro mojado Mantenimiento del cordón Después de quitar el filtro, haga pasar agua a través de Cuando se haya completado la limpieza con la él usando una manguera o desde una espita. Tenga aspiradora, desenchufe el cordón y enróllelo alrededor... -
Page 31: Garantía
Manual del Usuario que se le entregue a usted con el Producto WORKSHOP, durante un período de cinco (5) años a partir de la fecha de compra original (el “Período de Garantía”). Esta garantía limitada se termina si el comprador original transfiere el Producto WORKSHOP a cualquier otra persona o entidad. - Page 32 COMERCIABILIDAD O IDONEIDAD PARA UN PROPÓSITO ESPECÍFICO, TANTO SI EL PROPÓSITO HA SIDO REVELADO COMO SI NO LO HA SIDO Y SI EL PRODUCTO WORKSHOP HA SIDO O NO HA SIDO DISEÑADO O FABRICADO ESPECÍFICAMENTE PARA USO POR USTED O PARA EL PROPÓSITO QUE USTED TENGA.
- Page 33 SP6853-1 Workshop 12:SP6439-3_ES.qxd 9/19/13 8:21 AM Page 33 MODE D’EMPLOI • Aspirateur de liquides et de poussières avec soufflante amovible • 12 gallons É.-U./45 litres • WS1200DE0 EN CAS DE QUESTIONS OU POUR OBTENIR DES INFORMATIONS, VEUILLEZ NOUS CONTACTER AU : 1-888-455-8724 depuis les États-Unis et le Canada...
-
Page 34: Instructions Importantes Relatives À La Sécurité
SP6853-1 Workshop 12:SP6439-3_ES.qxd 9/19/13 8:21 AM Page 34 TABLE DES MATIÈRES Sujet Page Sujet Page Instructions importantes relatives à la sécurité ..34 Assemblage de la soufflerie amovible Introduction ......36 pour «... - Page 35 SP6853-1 Workshop 12:SP6439-3_ES.qxd 9/19/13 8:21 AM Page 35 aspirateur ne fonctionne pas comme il faut, s’il - Gardez les enfants à distance lors du fonction- manque des pièces, s’il quelqu’un l’a laissé tomber, nement de la soufflante. s’il est endommagé, s’il a été laissé à l’extérieur ou - N’utilisez la soufflante que pour souffler des...
-
Page 36: Introduction
SP6853-1 Workshop 12:SP6439-3_ES.qxd 9/19/13 8:21 AM Page 36 INTRODUCTION Cet aspirateur de liquides et de poussières avec Lisez ce mode d’emploi pour vous familiariser avec soufflerie amovible est conçu pour un emploi les fonctions du produit et pour comprendre les résidentiel. -
Page 37: Retrait Et Installation Du Filtre
SP6853-1 Workshop 12:SP6439-3_ES.qxd 9/19/13 8:21 AM Page 37 RETRAIT ET INSTALLATION DU FILTRE Retrait et installation du filtre Plaque de filtre Qwik Lock™ Integrated Filter intégrée avec trou PUSH Plate with Center Retrait du filtre : APPUYER DOWN central Hole 1. -
Page 38: Assemblage Des Roulettes/Pieds À Roulette
SP6853-1 Workshop 12:SP6439-3_ES.qxd 9/19/13 8:21 AM Page 38 ASSEMBLAGE DES ROULETTES/PIEDS À ROULETTES La tête du moteur et l’ensemble de couvercle ayant été retirés du tambour, et le tambour ayant été placé en Roulette Caster position renversée sur le sol : Tige à... -
Page 39: Rangement Des Accessoires
RANGEMENT DES ACCESSOIRES Votre aspirateur de liquides et de poussières Manchon de verrouillage WORKSHOP a été conçu de façon à incorporer de Le manchon de verrouillage a été conçu de façon à meilleurs points de rangement des accessoires sur permettre des raccordements plus solides des chacun des quatre pieds des roulettes. -
Page 40: Positionnement De La Soufflerie Amovible
SP6853-1 Workshop 12:SP6439-3_ES.qxd 9/19/13 8:21 AM Page 40 POSITIONNEMENT DE LA SOUFFLANTE AMOVIBLE (ensemble de tête du moteur) 1. Retirer la soufflerie amovible de l’ensemble de 3. Faire tourner la soufflerie amovible vers le bas couvercle en appuyant vers le bas sur la patte de jusqu’à... -
Page 41: Fonctionnement
SP6853-1 Workshop 12:SP6439-3_ES.qxd 9/19/13 8:21 AM Page 41 FONCTIONNEMENT AVERTISSEMENT : pour réduire le risque d’incendie, d’explosion ou d’endommagement de l’aspirateur : • Ne laissez pas en marche pendant que vous êtes absent – vous vous risqueriez de manquer des signes importants indiquant un fonctionnement anormal, comme une perte de puissance d’aspiration, la sortie de... -
Page 42: Choix Du Filtre Correct
SP6853-1 Workshop 12:SP6439-3_ES.qxd 9/19/13 8:21 AM Page 42 FONCTIONNEMENT (suite) Choix du filtre correct d. Voir la rubrique intitulée « Retrait et installation du filtre » pour obtenir des instructions sur la façon de changer le filtre AVERTISSEMENT : pour réduire le risque à... -
Page 43: Vidage Du Tambour
SP6853-1 Workshop 12:SP6439-3_ES.qxd 9/19/13 8:21 AM Page 43 FONCTIONNEMENT (suite) Vidage du tambour Fonction de soufflante L’aspirateur de liquides et de poussières est muni AVERTISSEMENT : pour réduire le risque de d’une « soufflerie amovible ». Cette soufflerie peut être blessure en raison d’une mise en marche... -
Page 44: Assemblage De La Soufflerie Amovible Pour « Souffler
SP6853-1 Workshop 12:SP6439-3_ES.qxd 9/19/13 8:21 AM Page 44 FONCTIONNEMENT (suite) 1. L’opérateur/opératrice doit se familiariser avec la soufflerie amovible de l’aspirateur de liquides et de Blowing Port Orifice d’éjection d’air poussières. Suceur de 2. Retirer la soufflerie amovible de l’aspirateur en... -
Page 45: Entretien
SP6853-1 Workshop 12:SP6439-3_ES.qxd 9/19/13 8:21 AM Page 45 ENTRETIEN 5. Examiner le tampon en mousse en vue de sa Admission de la soufflerie réutilisation. S’il s’avère nécessaire de le remplacer, consulter la section de ce mode d’emploi qui est AVERTISSEMENT : pour réduire le risque de consacrée aux pièces de rechange. -
Page 46: Nettoyage D'un Filtre Humide
SP6853-1 Workshop 12:SP6439-3_ES.qxd 9/19/13 8:21 AM Page 46 ENTRETIEN (suite) Nettoyage d’un filtre humide Entretien du cordon d’alimentation Une fois le filtre retiré, faites couler de l’eau au Une fois votre travail d’aspiration terminé, travers du filtre à l’aide d’un tuyau d’arrosage ou débranchez le cordon d’alimentation et enroulez-le... -
Page 47: Garantie
(5) ans à compter de la date d’achat d’origine (la « Période de garantie »). La présente garantie limitée cesse de produire des effets si l’acheteur original cède le Produit WORKSHOP à une autre personne physique ou morale. - Page 48 La décision de réparer ou de remplacer votre Produit WORKSHOP ou de vous en rembourser le prix d’achat est à notre discrétion absolue. La réparation ou le remplacement d’un Produit par ETC pour votre bénéfice ne vous coûtera rien si vous bénéficiez de la couverture de la présente garantie limitée.
-
Page 49: Repair Parts
SP6853-1 Workshop 12:SP6439-3_ES.qxd 9/19/13 8:21 AM Page 49 REPAIR PARTS (12 U.S. Gallon) WARNING SERVICING OF DOUBLE-INSULATED WET/DRY VAC In a double-insulated Wet/Dry Vac, two systems of insulation are provided instead of grounding. No grounding means is provided on a double-insulated appliance, nor should a means for grounding be added. - Page 50 SP6853-1 Workshop 12:SP6439-3_ES.qxd 9/19/13 8:21 AM Page 50 REPAIR PARTS (12 U.S. Gallon)
- Page 51 SP6853-1 Workshop 12:SP6439-3_ES.qxd 9/19/13 8:21 AM Page 51 REPAIR PARTS (12 U.S. Gallon)
- Page 52 SP6853-1 Workshop 12:SP6439-3_ES.qxd 9/19/13 8:21 AM Page 52 c 2013 Emerson Part No. SP6853 Form No. SP6853-1 Printed in Mexico 08/13...
Need help?
Do you have a question about the WS1200DE0 and is the answer not in the manual?
Questions and answers