Table of Contents
Advertisement
Available languages
Available languages
Quick Links
FK 89EL .20 X/HA (CF)
Italiano
Istruzioni per l'uso
FORNO
Sommario
Istruzioni per l'uso,1
English
Operating Instructions
OVEN
Contents
Operating Instructions,1
Warnings,2
Assistance,3
Description of the appliance,4
Description of the appliance,5
Installation,14
Modes,17
Advertisement
Table of Contents

Related Manuals for Hotpoint Ariston FK 89EL .20 X


Summary of Contents for Hotpoint Ariston FK 89EL .20 X
-
Page 1: Table Of Contents
FK 89EL .20 X/HA (CF) Italiano Istruzioni per l’uso FORNO Sommario Istruzioni per l’uso,1 Avvertenze,2 Assistenza,3 Descrizione dell’apparecchio,4 Descrizione dell’apparecchio,5 Installazione,6 Avvio e utilizzo,8 Programmi,9 Precauzioni e consigli,12 Manutenzione e cura,12 Anomalie e rimedi,13 English Operating Instructions OVEN Contents Operating Instructions,1... -
Page 2: Avvertenze
Avvertenze Warnings ATTENZIONE: Questo apparecchio e le sue parti WARNING: The appliance and its accessible parts accessibili diventano molto caldi durante l’uso. become hot during use. Care should be taken to Bisogna fare attenzione ed evitare di toccare gli avoid touching heating elements. Children less than 8 elementi riscaldanti. -
Page 3: Assistenza
Assistenza Assistance Attenzione: Warning: L’apparecchio è dotato di un sistema di diagnostica automatica che consente The appliance is fitted with an automatic diagnostic system which detects any di rilevare eventuali malfunzionamenti. Questi vengono comunicati dal display malfunctions. Malfunctions are signalled through messages of the following tramite messaggi del tipo: “F--”... -
Page 4: Descrizione Dell'apparecchio
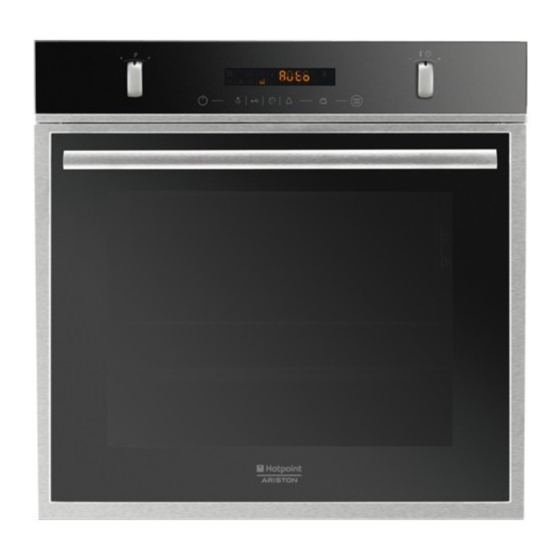
Descrizione dell’apparecchio Description of the appliance Vista d’insieme Overall view 1 pOSIzIONE 1 1 pOSItION 1 2 pOSIzIONE 2 2 pOSItION 2 3 pOSIzIONE 3 3 pOSItION 3 4 pOSIzIONE 4 4 pOSItION 4 5 pOSIzIONE 5 5 pOSItION 5 6 GUIDE di scorrimento dei ripiani 6 GUIDES for the sliding racks 7 Ripiano LECCARDA... -
Page 5: Descrizione Dell'apparecchio
Descrizione dell’apparecchio Description of the appliance pannello di controllo Control panel 1 Manopola pROGRAMMI 1 SELECtOR knob 2 ACCENSIONE pANNELLO 2 CONtROL pANEL pOWER BUttON 3 DISpLAY 3 DISpLAY 4 Manopola tERMOStAtO/IMpOStAzIONE tEMpI 4 tHERMOStAt / tIMER knob 5 AVVIO/ARREStO 5 StARt / StOp 6 Icona CONtAMINUtI 6 MINUtE MINDER icon... -
Page 6: Installazione
Installazione Centraggio e fissaggio Per fissare l’apparecchio al mobile: • aprire la porta del forno; ! È importante conservare questo libretto per poterlo consultare in ogni • togliere i 2 gommini che coprono i fori di fissaggio posti sulla cornice momento. - Page 7 Prima di effettuare l’allacciamento accertarsi che: • la presa abbia la messa a terra e sia a norma di legge; • la presa sia in grado di sopportare il carico massimo di potenza della macchina, indicato nella targhetta caratteristiche (vedi sotto); •...
-
Page 8: Avvio E Utilizzo
Avvio e utilizzo Il contaminuti a tempo scaduto emette un segnale acustico, che si arresta dopo 30 secondi o premendo un qualsiasi tasto attivo. Per regolare il contaminuti: AttENzIONE! Il forno è dotato di 1. Premere l’icona un sistema di arresto griglie che 2. -
Page 9: Programmi
porta del forno ed anche nella parte inferiore della porta forno.All’inizio del Programma BARBECUE programma FAST COOKING la ventola funziona a bassa velocità. Si attiva l’elemento riscaldante superiore e il girarrosto (ove presente). La temperatura elevata e diretta del grill è consigliata per gli alimenti che ! A fine cottura la ventola rimane attiva finché... - Page 10 per il programma scelto, il display visualizza la scritta “Hot” e non è possibile programmare la durata di cottura avviare la cottura; attendere che il forno si raffreddi. 1. Premere l’icona finchè non lampeggiano l’icona e i digit numerici sul display; ! Al raggiungimento della fase di cottura il forno emette un segnale acustico.
- Page 11 BARBECUE FORNO PIZZA • Inserire la griglia in posizione 3 o 4, disporre • Utilizzare una teglia in alluminio leggero, appoggiandola sulla griglia in gli alimenti al centro della griglia. dotazione. • Si consiglia di impostare la temperatura al massimo. Non allarmarsi Con la leccarda si allungano i tempi di cottura e difficilmente si ottiene una se la resistenza superiore non resta costantemente accesa: il suo pizza croccante.
-
Page 12: Manutenzione E Cura,12
precauzioni e consigli Risparmiare e rispettare l’ambiente • Ove possibile, evitare di pre-riscaldare il forno e cercare sempre di riempirlo. Aprire la porta del forno quanto necessario, perché vi sono ! L’apparecchio è stato progettato e costruito in conformità alle norme dispersioni di calore ogni volta che viene aperta. -
Page 13: Anomalie E Rimedi
3. Afferrare la porta ai due lati esterni, richiudendola lentamente ma non del tutto. Poi tirare la porta verso di sé estraendola dalla sua sede (vedi figura). Rimontare la porta seguendo il procedimento in senso contrario. Controllare le guarnizioni Controllare periodicamente lo stato della guarnizione attorno alla porta del forno. -
Page 14: Installation
Installation Centring and fixing Secure the appliance to the cabinet: • Open the oven door. ! Please keep this instruction booklet in a safe place for future reference. If • Remove the 2 rubber plugs covering the fixing holes on the perimeter the appliance is sold, given away or moved, please make sure the booklet is frame. - Page 15 Before connecting the appliance to the power supply, make sure that APPLIANCE SPECIFICATIONS • the appliance is earthed and the plug is compliant with the law. • the socket can withstand the maximum power of the appliance, which is width 43.5 cm indicated on the data plate.
-
Page 16: Start-Up And Use
Start-up and use To adjust the timer proceed as follows: 1. Press the icon. WARNING! The oven is provided 2. Adjust the time as desired by turning the TIMER knob towards “ ” and “ ”. with a stop system to extract the 3. -
Page 17: Modes
! Once cooking has been completed, the cooling fan continues to operate FAN GRILLING mode until the oven has cooled down sufficiently. The top heating element and the rotisserie spit (where present) are activated and the fan begins to operate. During part of the cycle the circular heating element Oven light is also activated. -
Page 18: Practical Cooking Advice
! Do not open the oven door as this will disrupt the cooking time and 5. When cooking has finished, “END” appears on the display and a buzzer temperature. sounds. • For example: it is 9:00 a.m. and a duration of 1 hour and 15 minutes is programmed. -
Page 19: Cooking Advice Table
Cooking advice table Rack position Recommended Cooking Modes Foods Weight Preheating (Kg) Temperature duration (°C) (minutes) standard sliding Manual guide rails guide rails 210-220 Multilevel* Pizza on 2 racks 2 and 4 1 and 3 20-25 Pies on two racks/cakes on 2 racks 2 and 4 1 and 3 30-35... -
Page 20: Maintenance And Care,20
precautions and tips Consumers should contact their local authority or retailer for information concerning the correct disposal of their old appliance. ! This appliance has been designed and manufactured in compliance with Respecting and conserving the environment international safety standards. The following warnings are provided for safety •... -
Page 21: Troubleshooting
3. Grip the door on the two outer sides and close it approximately half way. Pull the door towards you, lifting it out of its slot (see diagram). To replace the door, reverse this sequence. Inspecting the seals Check the door seals around the oven regularly. If the seals are damaged, please contact your nearest Service Centre (see Assistance). - Page 24 195121974.00 04/2014 - XEROX FABRIANO Indesit Company S.p.A. Viale Aristide Merloni,47 60044 Fabriano (AN) www.hotpoint.eu...
Need help?
Do you have a question about the FK 89EL .20 X and is the answer not in the manual?
Questions and answers