Table of Contents
Advertisement
Quick Links
Bonanza V35
Instructions
Please read these instructions before building the model and retain
Please read these instructions before building the model and retain
them for future reference!
them for future reference!
Safety Instructions
!
This model is not a toy!
Not suitable for under 14 year olds!
* Beginners should seek the help of an experienced modeler
to ensure the safe operation of the model
* Assemble the model away from small children
* Observe all of the safety instructions when assembling
the model. You are responsible for its safe operation
* Keep these instruction for reference even after you have
completed the model
GB
00 6134
Part. No.
Advertisement
Table of Contents

Related Manuals for Jamara Bonanza V35


Summary of Contents for Jamara Bonanza V35
-
Page 1: Safety Instructions
Bonanza V35 00 6134 Instructions Part. No. Please read these instructions before building the model and retain Please read these instructions before building the model and retain them for future reference! them for future reference! Safety Instructions This model is not a toy! -
Page 2: Table Of Contents
Always observe any local laws regarding the operation of model aircraft. General Information As the company JAMARA Modelltechnik has no infl uence over the Warning! use, maintenance or conditions under which our products will op- In some countries it is a legal requirement to carry third party in- erate, we accept no responsibility for any damage caused be it of demnity insurance when operating a radio controlled model. -
Page 3: Kit Contents
Kit Contents • CNC Laser cut formers and ribs, strip, die-cut selected balsa and light ply sheet. • Fitting kit including, horns, hinges etc. • Clear canopy. • Instructions. Building the Model 1. Glue the fuselage parts together over a building board to ensure that they remain fl... - Page 4 Building the Model 5. Pin the fuselage plate onto the building board inverted and The perfect choice of modelling clamps to build this or any other model are our Mini Microfi Clamps. Item Nr. 19 0037 X ! glue the formers to it ensuring that they are vertical as shown. Item Nr.
- Page 5 Building the Model 11. Use pieces of scrap to strengthen the joint around the engine mount. 12. Fit and glue the fuselage upper formers into place. 13. Use thin foil or greaseproof paper to cover the area of the 14. Fit the stringers noting that they protrude into the fuselage fuselage where the battery access hatch fi...
- Page 6 Building the Model 17. Fit the hatch to the fuselage and sand it down for a good fi t. 18. Moisten 2-3 strips of balsa sheet and use them to plank the bottom of the fuselage. Do not fully plank this area to allow you to fi...
- Page 7 Building the Model 23. Moisten balsa sheet strips and use them to plank the fuselage. 24. Glue the elevator mounting plate into place. 25. Fit the left and right servo plates and the upper capping. 26. Fitting the (13mm) mini servos. The servos are fi...
- Page 8 Building the Model 29. Use a pin to fi nd the position of the servo frames and cut 30. Use pins to fi x the elevator into position. Do NOT glue it at away the sheeting as shown. this stage! 31.
- Page 9 Building the Model 33. With the elevators in place (or 2 pieces of 4mm scrap) glue 34. When the glue has completely cured remove the elevators the decking securely to the rear of the fuselage. and sand the decking/fuselage joint smooth. Do Not glue the decking to the elevators! 35.
- Page 10 Building the Model 39. Use a craft knife to separate the ribs from sheet. 40. Fit the ribs, rear spar and inner leading edge and when every thing is square and true glue the parts together. 41. Fit the left and right hand servo frames. 42.
- Page 11 Zusammenbau 45. Dampen balsa sheet and use it to plank the upper side of the 46. Rear wing sheeting. wing as shown. 47. Complete the upper sheeting as shown and fi t the servo cable 48. Make a linkage as shown to drive the air-brakes. Once this is extensions.
- Page 12 Building the Model 51. Securely glue the wing halves together fi tting the wing joiner Microfi x Micro Clamps are available from us, JAMARA e.K. at the same time. Item Nr. 19 0037 X 1 Item Nr. 19 0036 X 6 The lower side should now be sheeted and the whole wing fi...
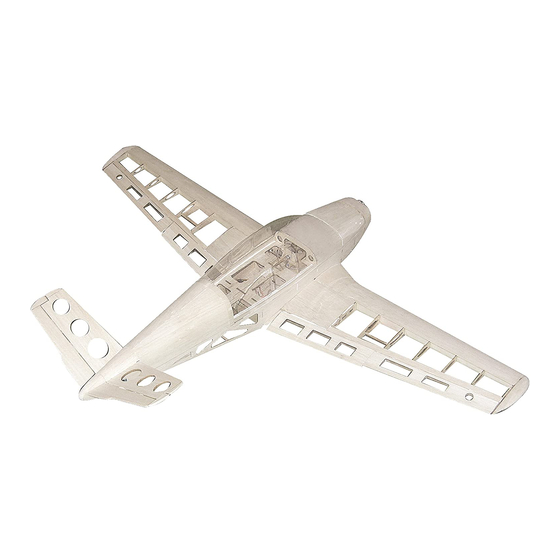
- Page 13 Zusammenbau 55. Retracting undercarriage fi tted. 56. Paint the canopy from the inside having used making tape or liquid mask to protect the areas which you want to remain clear. 58. The completed model ready for covering. 57. Air-Brake linkage.
-
Page 14: Control Throws And Centre Of Gravity
Set Up Power Recomendations: Centre of Gravity: 62-65mm Behind the leading edge Brushless Out Runner with approx. 180W output and a size of Elevator Throw: 10-12mm D: 28xL:30mm. 1000-1100 Rpm/V Aileron Throw: 12-15mm ESC: 18-25A BEC. If a retracting undercarriage and or Air-Brakes are fi... -
Page 15: Plans
Plan - The original can be found on the DVD which is included with the kit Left Wing... -
Page 16: Plans
All rights reserved. Copyright JAMARA e.K. 2009 Copying or reproduction in whole or part, The original can be found on the included DVD only with the expressed permission of JAMARA e.K. Fuselage Complete model Jamara e. K. Inh. Erich Natterer Am Lauerbühl 5 - DE-88317 Aichstetten...
Need help?
Do you have a question about the Bonanza V35 and is the answer not in the manual?
Questions and answers