Table of Contents
Advertisement
Quick Links
Advertisement
Table of Contents

Related Manuals for Mitsubishi CP3800DW


Summary of Contents for Mitsubishi CP3800DW
- Page 1 DIGITAL COLOR PRINTER MODEL CP3800DW User’s Manual Version 1.31...
- Page 2 Mitsubishi Electric Corporation, or the respective other holders of rights. Except in cases permitted by applicable laws, these may not be duplicated or used without consent...
-
Page 3: Introduction
Introduction Thank you for purchasing this device. This document explains the handling and operation required to use this printer. Please read this document well before use. ■About the symbols The symbols shown have the following meanings: Caution Accidents caused by failure to heed the warnings accompanying this symbol could lead to physical injury or property damage. - Page 4 American, Canadian Users ● Parts number Rating Mark(S) of Conformity Plug CAT-009 125V 13A Cord 1.31mm (16AWG) 3C Connector EF-28 125V 13A Parts number Rating Mark(S) of Conformity Plug KP-30 125V 13A Cord 1.31mm (16AWG) 3C Connector KS-32 125V 13A Parts number Rating Mark(S) of Conformity...
- Page 5 Hierbij verklaart Mitsubishi Electric Corporation dat het toestel CP3800DW in overeenstemming is met de essentiële eisen en de andere relevante bepalingen van richtlijn 1999/5/EG Bij deze verklaart Mitsubishi Electric Corporation dat deze CP3800DW voldoet aan de essentiële eisen en aan de overige relevante bepalingen van Richtlijn 1999/5/EC. French Par la présente Mitsubishi Electric Corporation déclare que ľappareil CP3800DW est...
- Page 6 1999/5/CE. Spanish Por medio de la presente Mitsubishi Electric Corporation declara que el CP3800DW cumple con los requisitos esenciales y cualesquiera otras disposiciones aplicables o exigibles de la Directiva 1999/5/CE.
-
Page 7: Table Of Contents
Introduction ················································································································· 2 Cautions for Set-up ···························································································· 2 Table of Contents ································································································ 6 Checking the Contents ··························································································· 7 Names of Components ··························································································· 8 Connecting the Power Cord ············································································· 9 Connecting to the Computer ············································································ 9 Paper and Ribbon ····································································································· 10 Setting the Media ······································································································... -
Page 8: Checking The Contents
Please check that the printer and all accessories are included in the package. Printer Unit Paper Holder Paper Cassette Set in the printer ( ) Set in the printer ( ) *Remove wrapping before use Power Cord×2 User's Manual Europe,US Printer Driver Safety Guide Start-up Guide... -
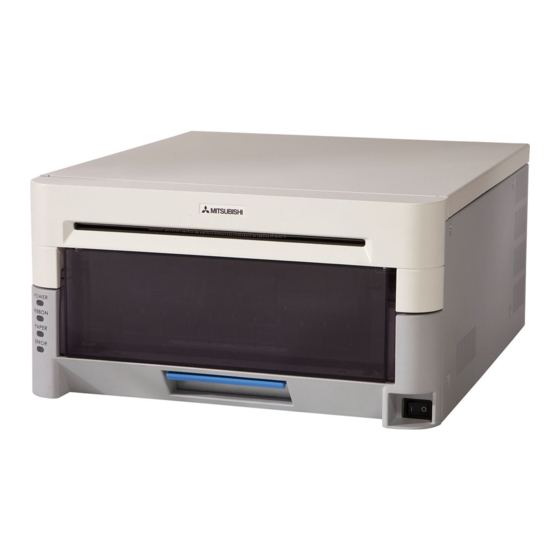
Page 9: Names Of Components
[Front of Unit] Print Feed Out Power Switch Scrap Box Open Lever Platen Roller [Back of Unit] USB port Ventilation [Side of Unit] Power Plug Socket Ventilation CAUTION ・ Please be careful not to hurt yourself or damage anything on the edges of the printer. -
Page 10: Connecting The Power Cord
1. Make sure that the printer’s power switch is set to the OFF position. 2. Plug the cord connector end into the printer Power Plug Socket. 3. Plug the cord into the wall outlet. 1. Make sure that both the printer and computer power switches are set to the OFF position. 2. -
Page 11: Paper And Ribbon
Type 8inch Paper Width: 203mm Ribbon Width: 210mm CAUTION ・ Set the paper and ribbon without putting them directly on the work surface. Any dust or dirt could get inside the printer and adversely affect the print quality. - Page 12 1. Release the Open Lever, and pull out the mechanism unit. Open Lever 2. Open the Paper Release lever. Paper Release Lever 3. Remove the scrap box. Hold the center and lift it up straight. Caution) Never remove the dust box diagonally. The dust box may be damaged and the printer may not operate normally.
- Page 13 5. Install the new roll of paper on the paper holder. When installing it, make sure there are no gaps between the paper and the holder. Make sure the paper is not sticking out. If the end of the roll is uneven (with paper sticking out), remove it from the holder, and flatten it.
- Page 14 7. Remove the tape, and advance the roll as indicated by the arrow. Set the end of the paper about 5mm beyond the roller. When doing this, insert the paper straight along the seal. If it isn’t inserted straight, the paper will be crooked, which could cause white line on the edges of the print, ribbon wrinkles, and register slippage.
- Page 15 9. Turn the paper in the direction of the arrow. When it is advanced enough, the buzzer will beep, and the flashing LED (orange) will go out. It is easier to set if the paper is turned while securing the holder with one hand. 10.
- Page 16 11. Set the new ribbon into the ribbon cassette. Advance the ribbon in the direction of the arrow, and take up any slack. Take Up Supply Supply side Set it with the supply side in front. Set here 13.Close the mechanism unit. *When the mechanism unit is closed, the printer will run initialization (4 blank sheets will be fed out).
-
Page 17: T R O U B L E - S H O O T I N G
Power Ribbon Paper Error The flashing LED indicates the printer status LED display Refer Status Solution Power Ribbon Paper Error Paper End ● Put in a new roll of paper P.12 Ribbon End ● Put in a new roll of ribbon P.16 Door is Open Set the paper properly and close the... -
Page 18: Solving Media Errors
1. Pull out the mechanism unit. 2. Remove the ribbon cassette. a. If the paper is jammed: 1. Pull any paper remaining in the printer in the direction shown, and cut off any wrinkled or partially printed areas evenly with scissors. Printing over an already printed area will cause the ribbon to stick, and the paper will jam again. - Page 19 2. Remove the scrap box, and rewind the paper. 3. Cut off any partially printed, wrinkled, or otherwise inferior paper evenly with a pair of scissors, and reset the paper. If wrinkles or partially printed areas are left, it could cause the paper to jam again. Cutting the paper ×...
- Page 20 b. If the ribbon is pulled into the mechanism: 1. Cut the ribbon. 2. Carefully remove any ribbon remaining in the mechanism. Any pieces of ribbon left inside the mechanism could affect print quality. In this case, clean the platen roller see P.22 3.
- Page 21 c. If the printer is stopped in the middle of cutting: 1. Turn the power back ON. Free the jammed paper, and return the cutter blade to its ready position. If the jammed paper cannot be freed, please contact a service representative. 2.
-
Page 22: C L E A N I N G
If there is an indent on the pictures at a regular interval, or if the back of the picture (white side) is dirty, clean the platen roller. There may be dust, grime, adhesives, etc. from the ribbon or paper on the platen roller. 1. -
Page 23: S P E C I F I C A T I O N S
Model CP3800DW Print type Thermal dye sublimation transfer Print mode High-speed mode High quality mode Resolution 300×300dpi 300×600dpi 8×4 203×102mm 8×5 203×127mm 8×6 203×152mm Print size 8×8 203×203mm 8×10 203×254mm 203×297mm 8×12 203×305mm 8×10 130 sheets Print sheet 8×12 110 sheets 8×10... - Page 24 Ctra. de Rubi, 76-80 - Apdo. 420 08190-Sant Cugat del Valles - (Barcelona) Spain Phone +34 93 565 3154 FAX +34 93 589 4388 Please contact the nearest Mitsubishi sales branch to get DOC (Declaration of Conformity) of the EC Directive 1999/5/EC.
Need help?
Do you have a question about the CP3800DW and is the answer not in the manual?
Questions and answers