Table of Contents
Advertisement
Quick Links
DIGITAL COLOR PRINTER
MODEL
CP800DW
OPERATION MANUAL
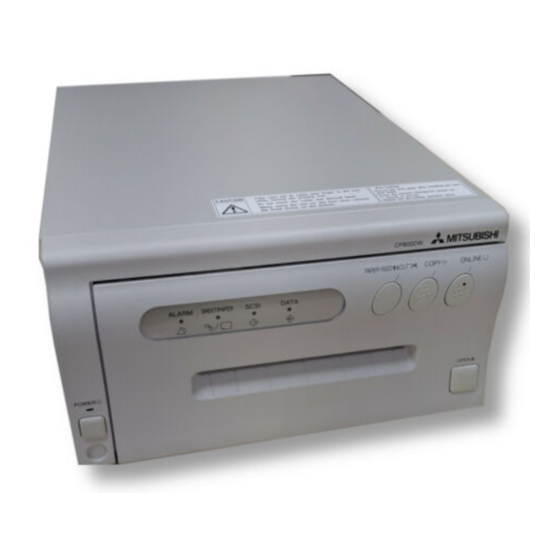
ALARM
SHEET/PAPER
SCSI
DATA
POWER
THIS OPERATION MANUAL IS IMPORTANT
TO YOU.
PLEASE READ IT BEFORE USING YOUR
DIGITAL COLOR PRINTER.
This digital colour printer complies with the requirements of the EC
Directive 89/336/EEC, 73/23/EEC and 93/68/EEC.
The electro-magnetic susceptibility has been chosen at a level that
gains proper operation in residential areas, on business and light
industrial premises and on small-scale enterprises, inside as well as
outside of the buildings. All places of operation are characterised by
their connection to the public low voltage power supply system.
CP800DW
OPEN
Advertisement
Table of Contents

Related Manuals for Mitsubishi CP800DW


Summary of Contents for Mitsubishi CP800DW
- Page 1 TO YOU. PLEASE READ IT BEFORE USING YOUR DIGITAL COLOR PRINTER. This digital colour printer complies with the requirements of the EC Directive 89/336/EEC, 73/23/EEC and 93/68/EEC. The electro-magnetic susceptibility has been chosen at a level that gains proper operation in residential areas, on business and light industrial premises and on small-scale enterprises, inside as well as outside of the buildings.
-
Page 2: Table Of Contents
PAPER SHEET SET ... 11 REMOVING PRINTING UNIT FIXING SCREW AND PROTECTIVE CUSHION ... 11-12 INSERTION OF PRINT PAPER ... 12-13 INSERTION OF INK SHEET ... 14-15 USAGE AND KEEPING OF PAPER SHEET SET ... 16 INSTALLING PRINTER DRIVER ... 17... -
Page 3: Safety Precautions
In the interest of safety, please observe the following precautions: POWER REQUIREMENT This Digital Color Printer is designed to operate on 120V, 60Hz AC in U.S.A. and Canada, 220-240V, 50Hz AC in Europe. Never connect to any outlet or power supply having a different voltage or frequency. -
Page 4: Unsuitable Locations
PLACES WITH HIGH HUMIDITY AND DUST Do not place the unit at a high humidity and dusty locations. They can cause extensive damage to the printer. Avoid places where the unit is likely to be exposed to oily fumes and vapors. - Page 5 SAFETY PRECAUTIONS CONNECTING DEVICES Read thoroughly "Operating Precautions" of the instruction booklets for the devices connected with the Digital Color Printer. The power cord must be disconnected after printing is over. CAUTION ON RELOCATING When transporting this unit, make sure it is not likely to be subjected to impacts. They can be a prime cause for damage. Further, make sure to disconnect the power cord from the power outlet, and the cables from the connected devices.
-
Page 6: Features & Functions
6 6 6 6 6 PAPER FEED & CUT BUTTON Pressing this button, the print paper is fed and cut. When ON LINE indicator is lit, this button is not functional. FRONT PANEL CP800DW ALARM SHEET/PAPER SCSI DATA 7 7 7 7 7 COPY BUTTON Prints image from memory. -
Page 7: Inside Of Printing Unit
FEATURES & FUNCTIONS 1 1 1 1 1 INK CASSETTE COMPARTMENT Load the ink cassette here. Insert the cassette gently until it snaps into place. 2 2 2 2 2 INK CASSETTE LOCKING LEVER Push this lever to take the ink cassette out. Store the printing unit fixing screw here. -
Page 8: Connections
1 2 3 4 5 6 7 8 1 2 3 4 5 6 7 8 PARALLEL DIRECT SNAP AC LINE PARALLEL OFF SCSI Digital Color Printer PIN NO. Connector :JD36SL equivalent (36-pin) Input level :TTL PARALLEL input connector port :signal allocation See next page for PARALLEL DATA SIGNALS. -
Page 9: Parallel Data Signal
19-30, 33 for twist pair return FAULT FAULT 14, 15, 34-36 (INITIALIZE) DCP : Digital Color Printer Function From/to Strobe pulse for data reading. Incoming pulse width should PC/DCP be 0.5 ms minimum. At regular conditions, “High” data will be read after becoming “Low”. -
Page 10: Connection With Scsi Data Signal Equipment
To SCSI port ID No. switch SCSI ID No. SCREW 1 2 3 4 5 6 7 8 1 2 3 4 5 6 7 8 PARALLEL DIRECT SNAP PARALLEL OFF SCSI Digital Color printer NOTE NOTE AC LINE POWER... -
Page 11: Setting Mode Switches
CONNECTIONS 2 2 2 2 2 Turn on the power of the personal computer connected. 3 3 3 3 3 Confirm that ON LINE button on the front panel is lit. Set the mode switches (DIP-SW) on the rear panel according to the connected device. 1 2 3 4 5 6 7 8 1 2 3 4 5 6 7 8 With the mode switch No.1, switch parallel or SCSI. -
Page 12: Before Operation
BEFORE OPERATION Before printing, 1. Remove the fixed screw on the printing unit and the protective cushion. (pages 11-12) 2. Insert print paper to this unit. (pages 12-13) 3. Install the ink cassette to this unit. (pages 14-15) PAPER SHEET SET The following types of paper sheet sets are available. -
Page 13: Protective Cushion
BEFORE OPERATION Removing the protective cushion Unplug the power cord from outlet for safety. 1 1 1 1 1 Press OPEN button. The printing unit advances to the front. Do not touch the thermal head. Fingerprints or dust on the thermal head will degrade the print quality. 2 2 2 2 2 Pull out the protective cushion from the right side. - Page 14 3 3 3 3 3 Insert the print paper between roller 1 and 2. 4 4 4 4 4 Insert the edge of the print paper to the roller 3. · Be sure to insert the paper straight. 5 5 5 5 5 Feed the print paper through the paper outlet with your hand.
-
Page 15: Insertion Of Ink Sheet
BEFORE OPERATION INSERTION OF INK SHEET INSTALLING THE INK SHEET Install the ink sheet to the ink cassette before installing the ink cassette to the unit. 1 1 1 1 1 Put the colored roller of the ink sheet to the ink cassette. 2 2 2 2 2 Put the thin stick of white roller to the ink cassette. - Page 16 INSERT THE PRINTING UNIT 1 1 1 1 1 Push the printing unit until it is locked into place. 2 2 2 2 2 After plugging the power cord, press POWER button on the front panel. 3 3 3 3 3 Press ON LINE button to put out a lamp on the button.
-
Page 17: Usage And Keeping Of Paper Sheet Set
BEFORE OPERATION USAGE AND KEEPING OF PAPER SHEET SET • Fingerprints or dust on the paper’s surface may degrade print quality and cause paper jams. Immediately after the paper is replaced, 2-3 images may be printed with a blank part due to hand’s dust or oil. •... -
Page 18: Installing Printer Driver
INSTALLING PRINTER DRIVER Printer driver is required to print the data from a personal computer connected with this unit. CPD-04 and CPD-05 are supplied with this unit. Product name Applies for WindowsNT CPD-01NT Version 2.4 or later CPD-04 Applies for Microsoft Version 2.3 or later... -
Page 19: Indication On The Front Panel & Countermeasures
INDICATION ON THE FRONT PANEL & COUNTERMEASURES If for some reason printing is not possible or error occurs during printing, the indicator on the front panel will be lit. In this case, follow the procedure described below. ALARM SHEET/PAPER SCSI DATA ●... -
Page 20: Before Calling For Service
BEFORE CALLING FOR SERVICE Symptom No power The image is not printed. The image stored in the memory can not be enlarged to the possible print area. The image can not be transferred. COPY button does not work. Check & Remedy •... -
Page 21: Overcoming Paper Jams & Other Blockages
OVERCOMING PAPER JAMS & OTHER BLOCKAGES 1 1 1 1 1 Press OPEN button to pull out the printing unit. 2 2 2 2 2 Take out the ink cassette. • Push the ink cassette locking lever to unlock the ink cassette. (See page 6.) 3 3 3 3 3 Turn the knob on the right side of the printing unit clockwise. -
Page 22: Spec & Options
Weight 14.5kg Standard accessories Power cords (for 120V and 220V), Ink cassette, Spacer(4), Operation manual, Sheet “Installing print paper and ink sheet”, SCSI Terminator, Printer driver (CPD-04, CPD-05), Label for MODE switch PRINT PAPER AND INK SHEET Product name Print paper size... - Page 23 MITSUBISHI ELECTRONICS AMERICA, INC. 5665 PLAZA DRIVE P.O. BOX 6007 CYPRESS, CA 90630 – 0007, USA Mitsubishi Electric Europe B.V. UK Branch Travellers Lane, Hatfield, Herts. AL10 8XB, England, U.K. Phone (1) 707 276100 German Branch Gothaer Strasse 8, Postfach 1548, 40880 Ratingen 1, Germany...
Need help?
Do you have a question about the CP800DW and is the answer not in the manual?
Questions and answers