Table of Contents
Advertisement
Quick Links
Advertisement
Table of Contents

Related Manuals for VTech VT9042


Summary of Contents for VTech VT9042
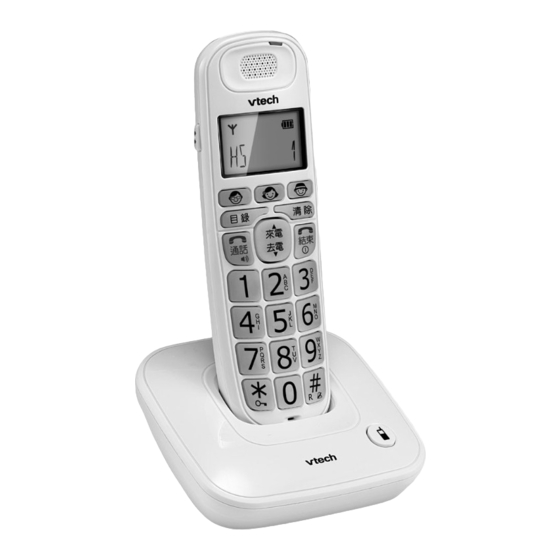
- Page 1 User’s manual w w w. v t e c h . c o m / h k / t e l Model:VT9042...
-
Page 2: Table Of Contents
TABLE OF CONTENTS 1. IMPORTANT SAFETY INSTRUCTIONS ..........1 2. SET UP THE TELEPHONE ............... 2 Package Contents ..................2 Location ......................2 Connect the Base Station ................3 Install and Charge the Handset Batteries ............4 3. GET TO KNOW YOUR PHONE ..............5 Overview of the Handset ................5 Overview of the Base Station .................7 Handset LCD Display Icons and Symbols ............7... - Page 3 5. PRIVATE CONTACTS ................17 Add a New Contacts Entry................17 Search for a Contacts Entry................17 View a Contacts Entry ..................17 Edit a Contacts Entry ..................18 Delete a Contacts Entry ................18 Delete the Entire Private Contacts..............18 Check the Contacts Usage ................18 Set the Fast Dial Numbers................19 5.8.1 Add or Edit the Fast Dial Number ...........19...
- Page 4 8. DEFAULT SETTINGS ................30 9. TROUBLESHOOTING ................31 10. TECHNICAL SPECIFICATIONS ............. 34 11. CARE AND MAINTENANCE INSTRUCTIONS........35...
-
Page 5: Important Safety Instructions
6. Do not overload wall outlets and extension cords as this can result in the risk of fire or electric shock. 7. Unplug this product from the wall outlet and refer servicing to VTech under the following conditions: • When the power supply cord or plug is damaged or frayed. -
Page 6: Set Up The Telephone
SET UP THE TELEPHONE Package Contents The package contains the following items: • 1 Handset • 1 Base station • 1 AC power adapter • 2 Telephone line cords • 2 NiMH rechargeable batteries • 1 Chinese user's manual • 1 English user's manual Location For maximum coverage and reduce the interference, here are some guidelines you... -
Page 7: Connect The Base Station
Connect the Base Station Power supply Telephone line cord 1. Insert the DC plug of the power adapter and the telephone line cord into the base station, as shown above. 2. Insert the other end of the power adapter into the wall outlet not controlled by a wall switch and the telephone line cord into a telephone wall jack. -
Page 8: Install And Charge The Handset Batteries
Install and Charge the Handset Batteries 1. Slide open the battery compartment cover. 2. Place the two batteries as indicated. Respect the polarity. 3. Slide the battery compartment cover back. 4. Put the handset on the base to charge for 16 hours first time. A beep indicates that the handset is properly placed on the base. -
Page 9: Get To Know Your Phone
GET TO KNOW YOUR PHONE Overview of the Handset 1. SLIDE UP/DOWN During a call: Press to increase or decrease the earpiece volume. 2. M1/M2/M3 - DIRECT MEMORY KEYS In idle mode: Press and hold to dial the stored number. 3. - Page 10 4. UP/CALL LOG In idle mode: Press to access the call log. In menu mode: Press to scroll up the menu items. In contacts list/ redial list/ call log: Press to scroll up the list. 5. DOWN/REDIAL LIST In idle mode: Press to access the redial list. In menu mode: Press to scroll down the menu items.
-
Page 11: Overview Of The Base Station
Overview of the Base Station 1. CHARGING CRADLE 2. PAGE Press the Page on the base station to page your handset. It will ring for approximately 60 seconds. Press and hold to initiate registration mode. Handset LCD Display Icons and Symbols The screen display gives you information on the current status of the telephone. - Page 12 Steadily on when the ringer is switched off. Steadily on when an alarm is set. Flashes when the alarm time set before reaches. Steadily on when the keypad is locked. Steadily on when more digits are existed before the text currently displayed. Steadily on when more digits are existed after the text currently displayed.
-
Page 13: Menu Structure
Menu Structure In idle mode, pressing will firstly access the CONTACTS menu. Refer to the following for the menu structure. Key Press Main Menu CONTACTS CALL LOG BS SET Sub menu Review contacts list Review Call Log DEL HS DIALMODE Under a Contacts Under a selected Call FLASH... -
Page 14: Text And Digit Entry Table
Text and Digit Entry Table The following table shows you where each letter and punctuation character can be found. Respective character table will be used when corresponding menu language is selected. This will be helpful when storing a name in the contacts or renaming your handset. In editing mode, a cursor is displayed to indicate the current text entry position. -
Page 15: Use Your Phone
USE YOUR PHONE Make a Call 4.1.1 Preparatory Dialing Enter the phone number and press to dial the number, press it again to turn on the speakerphone. Press to clear the entry. 4.1.2 Direct Dialing Press to take the line and enter the phone number. Press it again to turn on the speakerphone. -
Page 16: Answer A Call
Answer a Call If the handset is not on the base station: When the phone rings, press to answer a call, press it again to turn on the speakerphone. If the handset is on the base station and if AUTO ANS is set to be ON: When the phone rings, pick up the handset to answer a call. -
Page 17: Mute A Call
Mute a Call With the call muted, you can talk to someone nearby without letting the caller hear you during a call. During a call: Press to mute the microphone and "MUTED" will be displayed on the screen. Your caller cannot hear you. Press again to resume the microphone. -
Page 18: Store A Redial Number Into The Contacts
4.10.2 Store a Redial Number into the Contacts 1. Follow Steps 1 and 2 in section 4.10.1. 2. Press to select STORE. 3. Press to enter the name. 4. Press to store the redial number into the contacts. 5. Press to select contacts melody. -
Page 19: Make An Internal Call
4.12 Make an Internal Call This feature is only applicable when there are at least two registered handsets. It allows you to make internal calls, transfer external calls from one handset to another handset and make conference calls. If the called handset is not answered within 60 seconds, the called handset will stop ringing and the calling handset will return to standby mode. -
Page 20: Make A 3-Way Conference Call
4.12.4 Make a 3-way Conference Call The conference call feature allows one external call to be shared with two handsets (in intercom). The three parties can share the conversation and no network subscription is required. During an external call: 1. Follow Steps 1 to 4 in section 4.12.3. 2. -
Page 21: Private Contacts
PRIVATE CONTACTS Your phone can store up to 20 private contacts entries with names and numbers. Each contacts entry can have a maximum of 20 digits for the phone number and eight characters for the name. You can also select different ringtones for your contacts entries. Contacts entries are stored alphabetically by name. -
Page 22: Edit A Contacts Entry
Edit a Contacts Entry In idle: 1. Press to select CONTACTS main menu item and then press to access the contacts list. 2. Press to select the desired contacts entry. 3. Press to select EDIT. 4. Press and the current contents of the selected contacts entry displays. 5. -
Page 23: Set The Fast Dial Numbers
Set the Fast Dial Numbers After setting the fast dial numbers, you can dial to the pre-set numbers by pressing and holding the respective digit keys from idle mode. 5.8.1 Add or Edit the Fast Dial Number 1. Press to select CONTACTS main menu item and then press to access the contacts list. -
Page 24: Caller Display (Network Dependent)
CALLER DISPLAY (NETWORK DEPENDENT) This feature is available if you have subscribed to the Caller Line Identification service from your network service provider. Your phone can store up to 10 received calls with date/time information in the call log. The number will be shown on the screen when the phone is ringing. -
Page 25: Delete The Entire List Of The Call Log
Delete the Entire List of the Call Log 1. Follow Steps 1 and 2 in Section 6.1. 2. Press to select DEL ALL. 3. Press to confirm. 4. Press to re-confirm. View the Details of the Call Log Entry 1. Follow Steps 1 and 2 in Section 6.1. 2. -
Page 26: Phone Settings
PHONE SETTINGS Your phone comes with a selection of settings that you can change to personalize your phone the way you like it to work. Clock Settings You will need to set the correct date and time so that you know when you received call log entries. -
Page 27: Set The Date
7.1.4 Set the Date 1. Press to select CLOCK. 2. Press to select SET DATE. 3. Press to enter the date information. The date entered will be in the format you set in section 7.1.1. 4. Press to confirm. NOTE If date has been set before, the current date will be displayed, otherwise, "DD--MM--YY"... -
Page 28: Handset Settings
7.2.2 Set the Alarm Time (if the Alarm is set to be ON) 1. Follow Steps 1 to 3 in Section 7.2.1. 2. Enter the alarm time. 3. Press to set the snooze function. 4. Press to select ON or OFF. 5. -
Page 29: Set The Ringer Volume
7.3.3 Set the Ringer Volume You can set the ringer volume level. A total of 6 ringer volume levels including OFF are provided for your selection. 1. Press to select HS SET. 2. Press to select RINGER. 3. Press to select RING VOL. 4. -
Page 30: Select Base
7.3.6 Select Base If you have registered the handset to more than one base, you can select any one of them to use with your handset. 1. Press to select HS SET. 2. Press to select SEL BASE. 3. Press to select the desired base. -
Page 31: Base Settings
7.3.10 Set the Direct Memory Keys There are three direct memory keys . You can store three numbers into these keys and dial them directly from idle mode. 1. Press to select HS SET. 2. Press to select MEM KEY. 3. -
Page 32: Change The Flash Time
7.4.3 Change the Flash Time The default flash time is best suitable for your country and network operator. It is unlikely that you should need to change this setting unless advised to do so. 1. Press to select BS SET. 2. -
Page 33: Registration
Registration Your handset and base station is pre-registered. Up to five handsets can be registered to a single base station. If for some reason, the handset is not registered to the base station ( flashes even when the handset is near the base station), register your handset according to the following procedure. -
Page 34: Default Settings
DEFAULT SETTINGS Items Default Values Default Settings of Handset LANGUAGE ENGLISH EXT RING MELODY 1 INT RING MELODY 2 INT RING VOLUME VOLUME 3 EXT RING VOLUME VOLUME 3 EARPIECE VOLUME VOLUME 3 SPEAKER VOLUME VOLUME 3 HANDSET NAME KEY TONE LOW BATTERY BEEP OUT OF RANGE BEEP AUTO ANSWER... -
Page 35: Troubleshooting
TROUBLESHOOTING If you have difficulty with your phone, please try the suggestions listed below. Problem Solutions My telephone does • Make sure the batteries are installed and charged correctly. not work at all. For optimum daily performance, return the handset to the telephone base after use. - Page 36 There is • The handset may be out of range. Move it closer to the interference during telephone base. a telephone • If you subscribe to high-speed Internet service (digital conversation. My subscriber line - DSL) through your telephone line, you must calls fade out when install a DSL filter between the telephone base and the I am using the...
- Page 37 PBX systems. Technical Support For technical support, please call VTech Technical Inquiry Hotline 852-2667 7433. Please read out the serial number of this telephone to Technical Center. The serial number can be found in the battery compartment after having the batteries...
-
Page 38: Technical Specifications
10. TECHNICAL SPECIFICATIONS Basic Information Handset: width / depth / height = 57.7 X 36.4 X 180.5 mm Dimensions Base: width / depth / height = 115.7 X 114.3X 57.2 mm Handset: 161.7g Weight Base: 122.2g Indoor: 50m Valid range Outdoor: 300m Standby time: 100Hours approx. -
Page 39: Care And Maintenance Instructions
11. CARE AND MAINTENANCE INSTRUCTIONS Take care of your telephone • Your cordless telephone contains sophisticated electronic parts, so you must treat it with care. • Avoid rough treatment. • Place the handset down gently. • Save the original packing materials to protect your telephone if you ever need to ship it. Avoid water •... - Page 40 Suite 1601, Lever Tech Centre, 69-71 King Yip Street, Kwun Tong, Kowloon, Hong Kong. Customer Service Hotline: (852) 2666 5558 Technical Inquiry Hotline: (852) 2667 7433 Distributed in Hong Kong by: VTech Telecommunications Ltd. © 2012 VTech Telecommunication Ltd. All Rights Reserved. 91-006134-010-100...
Need help?
Do you have a question about the VT9042 and is the answer not in the manual?
Questions and answers