Table of Contents
Advertisement
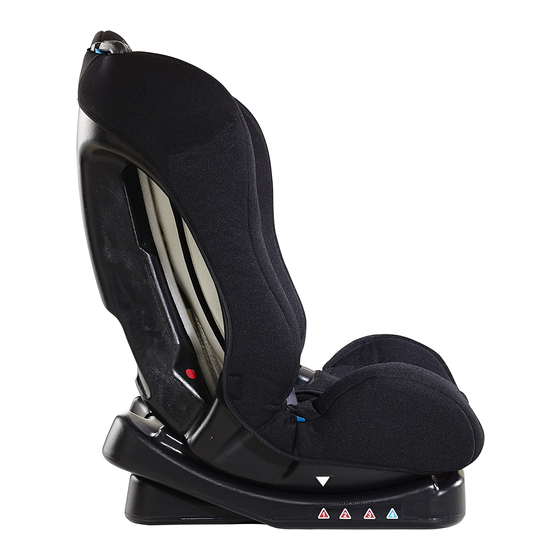
Chilton Car Seat
Group 0,1 child car seat
This product conforms to ECE R44.04
Group 0,1 child car seat.
Suitable for children from 0kg to 18kg (approx 0 to 4 years old)
Instructions: Please read carefully and keep for future reference.
Your child's safety may be affected if you do not follow these
instructions.
V2
Advertisement
Table of Contents

Related Manuals for My Child Chilton


Summary of Contents for My Child Chilton
- Page 1 Chilton Car Seat Group 0,1 child car seat This product conforms to ECE R44.04 Group 0,1 child car seat. Suitable for children from 0kg to 18kg (approx 0 to 4 years old) Instructions: Please read carefully and keep for future reference.
-
Page 2: General Safety Information - Read First
Safety NOTICES 1. The child car seat must only be used in vehicles which are fitted with a three point seatbelt system that has been approved by regulation ECE-16 or similar. 2. A correct fit is likely if the vehicle manufacturer has declared in the vehicle hand book that the vehicle is capable of accepting a ‘Universal ’child restraint for this group. - Page 3 Getting started Read Carefully Before Attempting to Fit the Child Car Seat Warning: NEVER leave your child unattended – your child’s safety is your responsibility. Warning: The child car seat must be fitted in accordance with the manufacturer’s instructions. Incorrect installation could be dangerous. Warning: This installation must only be performed by a competent adult.
- Page 4 EXTREME HAZARD NEVER USE IN FRONT PASSENGER SEATS EQUIPPED WITH AIRBAGS (SRS) THIS CAN INCLUDE REAR PASSENGER SEATS THAT ARE EQUIPPED WITH AIRBAGS* *Consult car manufacturer for suitability. Children’s bodies are not able to withstand the forces exerted on them by a deploying air-bag When using the child car seat Warning: Make sure that the child car seat is placed somewhere so that rigid items and plastic parts do not become trapped in doors or...
- Page 5 around the airbag. Warning: Do not place anything under the child car seat (e.g. a towel or cushion) as this could affect the performance of the seat in an accident. Warning: Avoid winter clothing bundling - Bulky clothing can lead to incorrect harness tightening.
-
Page 6: Table Of Contents
Sunlight/hot days Warning: Don’t leave your child in the child car seat while parked in direct sunlight or on a hot day. Warning: Do not subject the child car seat to prolonged direct sunlight as this may be dangerous for your child (the metal and plastic fittings could become hot) and may cause the fabric to fade. -
Page 7: Welcome
0161 335 2508. Welcome Thank you for purchasing the Chilton Car Seat. Please read these instructions carefully before use to ensure safe and satisfactory operation of this product. Your child’s safety is your responsibility. If you have a query with this product or require replacement parts, please contact your nearest MyChild retailer. -
Page 8: Parts Checklist
Parts checklist Seat cover Harness adjuster button (under seat cover) Shoulder pads & straps Harness adjuster strap Harness release button Seat recline adjuster Harness buckle Shoulder belt guides Buckle pad Instruction manual pocket... - Page 9 Parts checklist Shoulder belt guides Shoulder straps Shoulder strap height settings Shoulder strap yoke Seatbelt channel opening Red safety clip Angle block...
-
Page 10: Positioning The Child Car Seat
Positioning the child car seat The child car seat can only be used with an automatic 3-point safety belt (A) and NOT with a 2-point lap belt (B). If your centre rear passenger seat is fitted with a three point seatbelt system (A) then you should use it. -
Page 11: Installing The Seat - Rearward Facing For Use With Group 0 [0-10Kg]
Installing the seat - rearward facing For use with group 0 [0-10kg] WARNING! Do not try to fit the child seat using any part of the child seat that is not specifically designed to hold it in place. The instructions and the fitting picture (on the side of the child seat) specify the correct parts of the child seat to attach fitting devices (e.g car seats and ISOFIX points). - Page 12 Installing the seat - rearward facing (continued) For use with group 0 [0-10kg] Attention: The child car seat must be in its most reclined position (4) when rearward facing. Note: If seat will not recline to position (4) check that block (A) is fully forward.
- Page 13 Installing the seat - rearward facing (continued) For use with group 0 [0-10kg] Place the child car seat in the vehicle on a suitable forward facing passenger seat. Pull out approximately a metre of seatbelt and route the lap belt section across the seat and buckle up the seatbelt (C).
-
Page 14: Installing The Seat - Rearward Facing For Use With Group 0 [0-10Kg]
Installing the seat - rearward facing (continued) For use with group 0 [0-10kg] Attach the belt clip (F) to the diagonal shoulder belt as close as you can to the seat buckle without the clip actually touching the buckle. NOTE: Do not attempt to attach the clip to both belts, it should only be attached to the diagonal shoulder belt. -
Page 15: Installing The Seat - Forward Facing For Use With Group 1 [9-18Kg]
Installing the seat - forward facing For use with group 1 [9-18kg] WARNING! Do not try to fit the child seat using any part of the child seat that is not specifically designed to hold it in place. The instructions and the fitting picture (on the side of the child seat) specify the correct parts of the child seat to attach fitting devices (e.g car seats and ISOFIX points). - Page 16 Installing the seat - forward facing (continued) For use with group 1 [9-18kg] Rotate the angle block (B) on the underside of the child car seat to the back and click it into place. IMPORTANT: If you cannot easily click the block into place, check that the seat is NOT still in position 4.
- Page 17 Installing the seat - forward facing (continued) For use with group 1 [9-18kg] click Rear view of child car seat and belt routing. Place the child car seat in the Thread the seatbelt tongue vehicle on a suitable forward through the opening on the side of facing passenger seat.
-
Page 18: Installing The Seat - Forward Facing For Use With Group 1 [9-18Kg]
Installing the seat - forward facing (continued) For use with group 1 [9-18kg] Attach the belt clip (D) to the diagonal shoulder belt as close as you can to the seat buckle without the clip actually touching the buckle. NOTE: Do not attempt to attach the clip to both belts, it should only be attached to the diagonal shoulder belt. -
Page 19: Placing Your Child In The Seat
Placing your child in the child seat Press the harness adjuster button Press the red button (B) on the (A) and pull forward on the buckle and unfasten the harness. shoulder straps (not the shoulder pads) to completely loosen the harness. - Page 20 Placing your child in the child seat With your child in the seat, match the two halves of the harness buckles together and insert them into the crotch buckle until you hear a click. Make sure the shoulder straps fit your child snugly by pulling the adjuster belt (C).
-
Page 21: Adjusting The Harness Height
Adjusting the harness height The harness should exit the child car seat at the same height as the child’s shoulder and should not exit higher or lower than the child’s shoulder. WARNING: You should not attempt to adjust the harness height with a child seated in the child car seat. - Page 22 Adjusting the harness height (continued) Unhook the shoulder straps at the Remove the straps, pulling them rear of the seat shell by sliding the out from the front of the seat. straps through the slits in yoke (B). Thread both shoulder pads through Push the shoulder pads back the slots in the back of the seat through the seat at your desired...
-
Page 23: Removing The Seat Cover
Adjusting the harness height (continued) Thread the shoulder straps through Reconnect the shoulder straps to each shoulder pad and pass the the yoke and check all straps are shoulder straps through the same passing through at the same slot slots as the shoulder pads. height. - Page 24 Removing the seat cover (continued) Unhook the shoulder straps at the Remove the straps, pulling them rear of the seat shell by sliding the out from the front of the seat. straps through the slits in yoke (B). Unfasten the Velcro tabs (C) on Carefully loosen the cover from both sides of the seat.
-
Page 25: Replacing The Seat Cover
Replacing the seat cover Pass both shoulder straps through the two side slots (A) in the seat cover. Thread the crotch strap through the slot (B) in the centre of the seat cover base and pass the harness adjuster strap through the hole (C) at the front of the seat cover base. -
Page 26: Replacing The Seat Cover
Replacing the seat cover (continued) Place the crotch pad (E) over the buckle. Fasten the buckle (this will help prevent the straps twisting). Thread the shoulder straps (F) through the shoulder pads (G) (keeping the seams on the shoulder pads outwards. Thread the shoulder straps through the child seat at the same height as the shoulder pads. -
Page 27: Maintenance And Cleaning
Maintenance and cleaning Storage 1) Store this child car seat in a safe place when not in use. 2) DO NOT place heavy objects on top of it. 3) Always store the child car seat in a dry environment. 4) DO NOT store the child car seat near a direct heat source such as a radiator. - Page 28 Customerservice@kooltrade.co.uk Imported by MyChild. M34 3QA www.mychildonline.co.uk Tel: 0161 335 2508...
Need help?
Do you have a question about the Chilton and is the answer not in the manual?
Questions and answers