Table of Contents
Advertisement
Quick Links
- 1 Seat Rotation
- 2 Installation Group 0+ [Birth-13Kg]
- 3 Rearward-Facing Using Isofix and Top Tether
- 4 Rearward-Facing Using Isofix and Vehicle's 3-Point Seat Belt
- 5 Forward-Facing Using Isofix and Vehicle's 3-Point Seat Belt
- 6 Removing the 5-Point Harness System for Group II, III Mode
- Download this manual
This product conforms to ECE R44.04
Group 0+,1,2,3 child restraint. Suitable for children from birth to 36kg (approx 0 to 12 years
old)
Instructions: Please read carefully and keep for future reference. Your child's safety may
be affected if you do not follow these instructions.
V3
Chadwick Car Seat
Group 0+,1,2,3 ISOFIX child car seat
Advertisement
Table of Contents

Related Manuals for My Child Chadwick


Summary of Contents for My Child Chadwick
- Page 1 Chadwick Car Seat Group 0+,1,2,3 ISOFIX child car seat This product conforms to ECE R44.04 Group 0+,1,2,3 child restraint. Suitable for children from birth to 36kg (approx 0 to 12 years old) Instructions: Please read carefully and keep for future reference. Your child’s safety may...
-
Page 2: Table Of Contents
Contents 1. Your 3 year warranty 2. General safety information - READ FIRST 3. Welcome 4. Parts checklist 5. Positioning the child restraint 9-10 6. Using the 5-point harness 10-11 7. Headrest/harness adjustment 8. Seat rotation 9. Seat recline 10. Installation Group 0+ [Birth-13kg] 13-19 a. -
Page 3: Your 3 Year Warranty
Your 3 year warranty Whilst we make and test our products to the highest standards of durability there’s always a small chance of a hiccup! Our promise is to repair, replace or refund a MyChild product that has an identified manufacturing defect from the date of purchase for a full 3 years thereafter at no extra cost. - Page 4 Safety 5. Child car seats can mark vehicle seat upholstery. The manufacturer cannot be held responsible for damage or marking to vehicle seats. 6. The following situations could be illegal and will invalidate the warranty: a) Any modifications or change of use of the child car seat that have not been authorised or advised by the manufacturer.
- Page 5 Airbags and your child’s safety EXTREME HAZARD NEVER USE IN FRONT PASSENGER SEATS EQUIPPED WITH AIRBAGS (SRS) THIS CAN INCLUDE REAR PASSENGER SEATS THAT ARE EQUIPPED WITH AIRBAGS* *Consult car manufacturer for suitability. Children’s bodies are not able to withstand the forces exerted on them by a deploying air-bag When using the child restraint Warning: Make sure that the child restraint is placed somewhere so that rigid items and plastic parts do not become trapped in doors or movable seat units when the seat is in...
- Page 6 Seatbelt Warning: NEVER use any load bearing contact points other than those described in these instructions or marked on the child restraint. Warning: Ensure that the lap section of the harness is worn low down, so that the pelvis is firmly engaged. Warning: Make sure that ALL the passengers in your vehicle have their seatbelts fastened, as unrestrained people can be very dangerous to the child in an accident.
-
Page 7: Welcome
Welcome Thank you for purchasing the Chadwick Car Seat. Please read these instructions carefully before use to ensure safe and satisfactory operation of this product. The Chadwick Car Seat is suitable for: Group Weight Approx. Age Child Restraint Direction Fitting Methods 1. -
Page 8: Parts Checklist
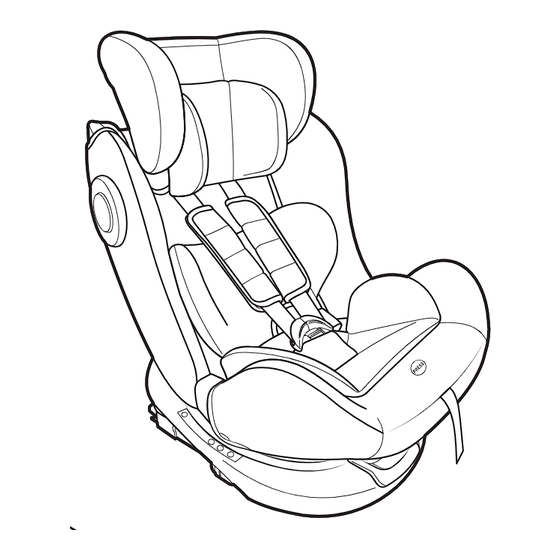
Parts checklist... -
Page 9: Positioning The Child Restraint
Parts checklist Headrest Rotation handle Diagonal belt guide (Group II, III) Diagonal belt guide (Group 0+, I) Shoulder belt M Side impact protection Insert cushion Top tether hook Lap belt guide Seat base Crotch pad ISOFIX connector Harness adjuster button Height adjustment handle Harness adjuster strap Top tether adjuster... -
Page 10: Using The 5-Point Harness
Positioning the child car seat WARNING: Never under any circumstance use this child restraint with a 2-point lap belt. WARNING: Never use on rearward or side facing vehicle seats. In the direction of travel Against the direction of travel With 3-point seatbelt* Yes* With 2-point seatbelt With ISOFIX and Top Tether anchorage systems... -
Page 11: Headrest/Harness Adjustment
Using the 5-point harness 3. To fasten: Match the two halves of the harness buckles together and insert them into the crotch buckle until you hear a click. 4. To tighten: Pull adjuster strap (H). Headrest/harness adjustment The headrest/harness can be adjusted to 11 height positions. 1. -
Page 12: Seat Rotation
Seat rotation 1. Pull the rotation handle (K) using one hand and rotate the seat 180° in either direction using your other, free hand. Release the rotation handle and check that the seat is locked in position. Seat recline The child restraint has 3 recline positions when forward-facing and 1 permitted recline position when rearward-facing. -
Page 13: Installation Group 0+ [Birth-13Kg]
Installation Group 0+ [Birth-13kg] Rearward-facing using ISOFIX and Top Tether IMPORTANT: Use the insert cushion with smaller children weighing less than 9kg. The insert cushion provides extra comfort and the necessary support while the child is small. 1. Ensure the child restraint is rearward-facing (See “Seat rotation” on page 12 for details). -
Page 14: Rearward-Facing Using Isofix And Top Tether
Installation Group 0+ [Birth-13kg] Rearward-facing using ISOFIX and Top Tether 6. Lock the two ISOFIX connector arms (P) onto click the passenger seat ISOFIX anchorage points. The ISOFIX connectors will “click” and the indicators (i) will turn green signalling they are locked correctly to the anchorage points. - Page 15 Installation Group 0+ [Birth-13kg] Rearward-facing using ISOFIX and Top Tether 9. Connect the tether strap’s hook (N) to a suitable anchor point. Most vehicles will have a top tether anchor point either on the luggage shelf (i), the back of the passenger seat (ii) or on the vehicle floor (iii).
-
Page 16: Rearward-Facing Using Vehicle's 3-Point Seat Belt
Installation Group 0+ [Birth-13kg] Rearward-facing using vehicle’s 3-point seat belt IMPORTANT: Use the insert cushion with smaller children weighing less than 9kg. The insert cushion provides extra comfort and the necessary support while the child is small. 1. Ensure the child restraint is rearward-facing (See “Seat rotation” on page 12 for details). -
Page 17: Rearward-Facing Using Isofix And Vehicle's 3-Point Seat Belt
Installation Group 0+ [Birth-13kg] Rearward-facing using vehicle’s 3-point seat belt 6. Buckle up the vehicle seat belt (ii), put the insert cushion (D) back and tighten the 3-point safety belt pulling the slack up towards the seat belt retractor (i), ensuring there are no twists and that all slack has been removed from the belt. - Page 18 Installation Group 0+ [Birth-13kg] Rearward-facing using ISOFIX and vehicle’s 3-point Seat Belt 4. Squeeze the red ISOFIX release button between your thumb and forefinger and slide the ISOFIX connector arm (P) out as far as it will go. Repeat for the other ISOFIX connector on the opposite side of the child restraint.
- Page 19 Installation Group 0+ [Birth-13kg] Rearward-facing using ISOFIX and vehicle’s 3-point Seat Belt 7. Release the 5-point harness buckle 8. Pull out the vehicle’s 3-point safety (See “Using the 5-point harness” on belt as far as it will go. Thread the lap pages 10-11 for details) and remove the belt through the lap belt guides (E) on insert cushion (D).
-
Page 20: Placing A Child In The Child Restraint (Group 0+ [Birth-13Kg])
Installation Group 0+ [Birth-13kg] Placing a child in the child restraint (Group 0+ [Birth-13kg]) 2. Press the red release button (i), 1. Press the belt adjuster button (G) and unbuckle the harness and move the pull forward on the shoulder straps (not shoulder straps apart. - Page 21 Installation Group 0+ [Birth-13kg] Placing a child in the child restraint (Group 0+ [Birth-13kg]) 4. Adjust the headrest to the optimal height for your baby (See “Headrest/ harness height adjustment” on page 11 for details). The headrest should be positioned so that the shoulder straps are at a slightly lower height than the child’s shoulders.
-
Page 22: Installation Group I [9-18Kg]
Installation Group 1 [9-18kg] Rearward-facing using ISOFIX and vehicle’s 3-point Seat Belt This installation method is the same as for Group 0+ [Birth-13kg] please see “Installation Group 0+ [Birth-13kg] - Rearward-facing using ISOFIX and Top Tether” on pages 13-15 AND “Placing a child in the child restraint (group 0+ [Birth-13kg])” on page 20-21. IMPORTANT: ONLY use the insert cushion with smaller children weighing less than 9kg. - Page 23 Installation Group 1 [9-18kg] Forward-facing using ISOFIX and Vehicle’s 3-point Seat Belt 6. Lock the two ISOFIX connector arms (P) onto the passenger seat click ISOFIX anchorage points. The ISOFIX connectors will “click” and the indicators (i) will turn green signalling they are locked correctly to the anchorage points.
-
Page 24: Forward-Facing Only Using Vehicle's 3-Point Seat Belt
Installation Group 1 [9-18kg] Forward-facing using ISOFIX and Vehicle’s 3-point Seat Belt 8. IMPORTANT! Ensure that the lap belt section and shoulder belt section BOTH pass through the belt guide nearest the seat buckle. The child restraint is now fitted and you can go to “Placing a child in the child restraint (group I [9-18kg])”... - Page 25 Installation Group 1 [9-18kg] Forward-facing ONLY using Vehicle’s 3-point Seat Belt 4. Pull out the vehicle’s 3-point safety belt as far as necessary. Thread the shoulder belt section through the shoulder belt guide (L) nearest to the vehicle’s seat belt retractor (i).
-
Page 26: Placing A Child In The Child Restraint (Group I [9-18Kg])
Installation Group 1 [9-18kg] Placing a child in the child restraint (Group I [9-18kg]) 1. Press the belt adjuster button (G) and 2. Press the red release button (i), pull forward on the shoulder straps (not unbuckle the harness and move the the shoulder pads) to completely loosen shoulder straps apart. -
Page 27: Removing The 5-Point Harness System For Group Ii, Iii Mode
Installation Group 1 [9-18kg] Placing a child in the child restraint (Group I [9-18kg]) 5. Place the shoulder straps over the child’s shoulders. Match the two halves of the harness buckles together and insert them into the crotch buckle until you hear a click. 6. - Page 28 Removing the 5-point harness for group II, III mode 2. Press the red release button (i), 3.Unzip the zip on the back of the seat unbuckle the harness and move the cover and unhook the harness straps at shoulder straps apart. the rear of the seat shell by sliding the straps through the slits in the yoke (S).
- Page 29 Removing the 5-point harness for group II, III mode 6. Unbutton the press studs (i) on each side of the seat base and lift up the seat base fabric (ii). Pull the harness buckle (J) through the slot in the fabric. Match the two buckle tongues (iii) together and fasten them into...
-
Page 30: Installation Group Ii [15-25Kg] And Group Iii [22-36Kg]
Installation Group II [15-25kg] and Group III [22-36kg] Forward-facing using ISOFIX and Vehicle’s 3-point Seat Belt 1. Ensure the child restraint is forward-facing (See “Seat rotation” on page 12 for details). 2. Adjust the seat recline to position 1 (See “Seat recline” on page 12). IMPORTANT! ONLY position 1 MUST be used for group II or group III. -
Page 31: Forward-Facing Using Vehicle's 3-Point Seat Belt
Installation Group II [15-25kg] and Group III [22-36kg] Forward-facing using ISOFIX and Vehicle’s 3-point Seat Belt 6. Lock the two ISOFIX connector arms (P) onto the passenger seat click ISOFIX anchorage points. The ISOFIX connectors will “click” and the indicators (i) will turn green signalling they are locked correctly to the anchorage points. -
Page 32: Placing A Child In The Child Restraint (Group Ii-Iii [15-36Kg])
Installation Group II [15-25kg] and Group III [22-36kg] Placing a child in the child restraint (Group II, II [15-36kg]) 1. Place the child in the child restraint and adjust the headrest to the optimal height for your child (See “Headrest/ harness height adjustment”... -
Page 33: Removing The Isofix Installed Car Seat
Removing the ISOFIX installed child restraint 1. Working on one side of the child restraint at a time: Push the child restraint into the passenger seat to ease the tension on the ISOFIX connector arms and press the red ISOFIX release button (i). The ISOFIX indicator should turn red and the arm should be free from the anchor point. -
Page 34: Refitting The 5-Point Harness
Removing and fitting seat covers 2. Base cover: Unbutton the press studs (i, ii, iii) on both sides of the cover and buttons (iv) on each side of the base. Feed the harness buckle through the slot in the fabric and remove the cover. -
Page 35: Maintenance And Cleaning
Maintenance and cleaning IMPORTANT: The child restraint MUST be used with the seat cover as it is an integral part of the child restraint. Storage 1) Store this child car seat in a safe place when not in use. 2) DO NOT place heavy objects on top of it. 3) Always store the child car seat in a dry environment. - Page 36 Customer service UK: Customerservice@kooltrade.co.uk Service Clients Fr: sav@kooltrade.co.uk Imported by Kooltrade Ltd. M34 3QA www.mychild.co.uk Tel: 0161 335 2508...
Need help?
Do you have a question about the Chadwick and is the answer not in the manual?
Questions and answers