Advertisement
Quick Links
Quick Guide
XX255-21-00
ViconNet JUMP and ZONE
Vicon Industries Inc.
Tel: 631-952-2288 Fax: 631-951-2288 Toll Free: 800-645-9116
24-Hour Technical Support: 800-34-VICON (800-348-4266) UK: 44/(0) 1489-566300
Vicon Industries Inc. does not warrant that the functions contained in this equipment will meet your requirements or that the
operation will be entirely error free or perform precisely as described in the documentation. This system has not been designed
to be used in life-critical situations and must not be used for this purpose.
www.vicon-security.com
Document Number: 8009-8255-21-00
Issued: 714
Product specifications subject to change without notice.
Copyright © 2014 Vicon Industries Inc. All rights reserved.
Advertisement

Related Manuals for Vicon ViconNet JUMP


Summary of Contents for Vicon ViconNet JUMP
- Page 1 24-Hour Technical Support: 800-34-VICON (800-348-4266) UK: 44/(0) 1489-566300 Vicon Industries Inc. does not warrant that the functions contained in this equipment will meet your requirements or that the operation will be entirely error free or perform precisely as described in the documentation. This system has not been designed to be used in life-critical situations and must not be used for this purpose.
- Page 2 The product shows a significant change in performance. 2. Retain Instructions - Retain all safety and operating 19. Replacement Parts - Use only Vicon specified replacement instructions for future reference. parts or an approved equivalent to prevent unit damage and injury.
- Page 3 Important Safeguards – Indoor Use (Cont) 25. For Rack-Mounted Units Only – The following precautions apply to all rack-mounted units. Elevated Operating Ambient - If installed in a closed or multi-unit rack assembly, the operating ambient temperature of the rack environment may be greater than room ambient.
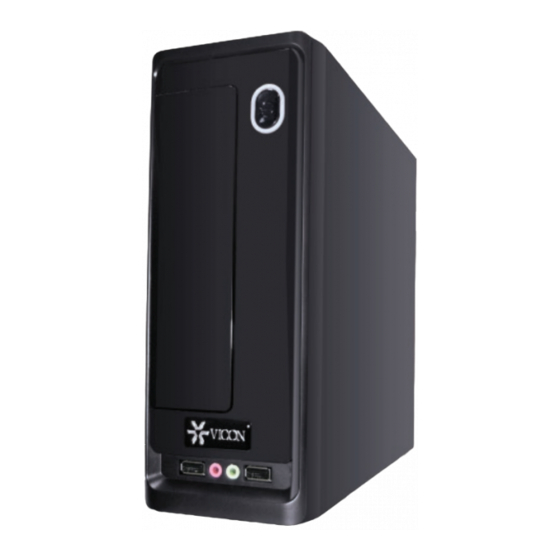
- Page 4 This manual provides a quick overview for the configuration and operation of the ViconNet JUMP and ZONE NVRs. ViconNet JUMP and ZONE offer all the performance and features of the open platform enterprise-scale software, limited to a single NVR system, JUMP supporting up to 6 cameras and ZONE supporting up to 16 or 24 cameras.
- Page 5 Ports may vary subject to variations in hardware, but will be similar in function. Rear Panel Connections – ViconNet JUMP NVR Refer to the figure below for a description of the rear panel connections for the ViconNet JUMP NVR (VJP).
- Page 6 Quick Guide Note that on this specific hardware configuration both display ports can be used for the purpose of setting up the NVR and camera but are not designed to be used for continuous video viewing (use ViconNet Viewer from a remote PC). •...
- Page 7 Quick Guide Rear Panel Connections - ViconNet ZONE NVR Series The ViconNet ZONE NVR (VZN) is available in desk-top or rack-mount versions. The connections are similar for both. The illustration below shows the desk-top version. • Network Port: A standard RJ-45 connector used to connect to a LAN/WAN.
- Page 8 Speaker Out, Mic In Jacks: Used to connect audio devices and microphones. Mounting The ViconNet JUMP NVR can be desk-top mounted in a stand provided or VESA mounted. The ViconNet ZONE NVR is available in desk-top or rack- mount versions.
- Page 9 Quick Guide ViconNet JUMP/ZONE NVR Connections After the ViconNet JUMP/ZONE NVR is permanently mounted, the connections are made. Refer to Rear Panel diagrams as needed. Important Notes • The connection of external hardware may require simple hand tools. Do not apply power or plug-in the unit to any outlet until instructed to do so.
- Page 10 Quick Guide Make the following connections to the NVR: Note A mouse and keyboard are required for setup. • Position the monitor(s) in a permanent fixed location. Connect the monitor to the appropriate connector, VGA, DVI or HDMI (a DVI- VGA adapter can be used if required).
-
Page 11: Using Viconnet
A camera or device must be added to the Nucleus of the system to be recognized on the ViconNet site list. ViconNet cameras must point to the Nucleus in their setup. Vicon open standard cameras, as well as cameras from other manufacturers (third party), must be added to the system. - Page 12 Quick Guide To log in to the ViconNet application: 1. At your NVR, double-click the ViconNet icon on your Windows® desktop or select StartViconNet. The ViconNet Login window appears. Enter your user name and password; the default login in is admin and no password. 1.
- Page 13 Quick Guide Main Window After logging in to the ViconNet application, the Main window is displayed, as shown below, enabling you to: • View and listen to live video and audio. • Play back recorded video and audio. • Print or export image frames. Setup Logout Exit...
- Page 14 Configuring Storage Locations (typically not required for hardware sold by Vicon) Configuring a storage location consists of defining the actual location of the video/audio database. You must also define the storage size of each storage location, depending on the available disk size.
- Page 15 Quick Guide 3. Click . The Storage Database Utilities window is displayed with the tab selected by default. 4. Click . The bottom portion of the Storage Database Utilities window is enabled, as follows: 5. Click the arrow next to the Select Disk dropdown list and then select the required location.
- Page 16 Quick Guide 6. In the Directory Size field, type in the required size (between the minimum and maximum). 7. Click in the bottom of the window. The new storage location information is added to the storage location list at the top of the window. Navigator Window Click on the Main window to display the Navigator...
- Page 17 Quick Guide Navigator List Recorded Device Content Area Navigator List Playback Controls Start Time Logout and Exit Logging Out Logging out is performed when you want to exit from the ViconNet application, but need the application to remain open, for example, to log in as a different user.
- Page 18 16 or 24 cameras, model dependant. Note The ViconNet JUMP does not support local display. It can be used with the ViconNet Web Viewer to view local video (refer to Using the Web Viewer at the end of this manual).
- Page 19 Quick Guide Thereafter, when the Play button is selected, the devices in the Main window Display Location area are displayed in their respective locations in the Main window, ready for viewing and playing back. The following example shows the Video Display area after the Four display mode has been selected.
- Page 20 Quick Guide To select a device using the Site List: 1. In the Main window, select the appropriate display mode, as described in the previous section. 2. Expand the required transmitter to display a list of the currently connected cameras and microphones. Note: The cameras and microphones that appear in the Site List are automatically detected by the system during startup.
- Page 21 Quick Guide The following example shows four live video transmissions displayed in the Video Display area. The name of each camera is located in the top of each video display location. Note You can manually stop the transmission at any time by clicking STOP.
- Page 22 Quick Guide Use the Site Map to select cameras from a drawing, map or set of maps without having to know to which transmitter it is connected. The Site Map can be navigated in a similar way to Site List. However, the devices in the Site Map list are organized by maps, meaning by physical location of devices as opposed to by device name.
- Page 23 Quick Guide The following options are available for working with the selected map in the map set: From left to right, these controls are for: • Navigate to the parent map • Navigate to other maps in the map set •...
- Page 24 Quick Guide To select whether to display device name, secondary ID or both: In the Groups list select the required option from the dropdown list and click Go. To view a camera or hear a microphone from the Groups list: Select a camera/microphone in the Groups list or drag and drop it from the list to the Video Display area or enter the device’s secondary ID in the Go box and click Go.
- Page 25 Quick Guide To control the live picture quality: In order to improve transmission speed, the maximum quality of live images is set automatically according to the selected display mode. The Single mode is assigned the highest available resolution, while other modes are assigned lesser resolutions, in proportion to their number of views.
- Page 26 Quick Guide Step 4: Operating a PTZ Camera From the ViconNet Main window you can easily operate and control any PTZ camera configured in your system. All PTZ functions are performed and are available only for one selected PTZ camera at a time. To operate a PTZ camera: 1.
- Page 27 Quick Guide Option Description Yellow These arrows serve only as direction markers. Direction Clicking anywhere in the video display will cause the camera to move in that Arrows direction. If you move the mouse (while still holding down the mouse button), the camera will follow the mouse.
- Page 28 Description Determines the speed of the auto pan. Stops uncontrolled directional movement of the video display. Configures Vicon PTZ settings. Adjusts the focus. Controls the amount of light entering behind the PTZ lens. This affects your ability to observe the proximity of objects to one another in the video display location, as follows: Automatically adjusts the light to the displayed video.
- Page 29 Quick Guide Playing Back Recorded Video/Audio The ViconNet system enables you to select and play back recorded video and audio segments that have been stored in defined storage locations. You can play back data that was recorded manually or that was recorded automatically as a result of an alarm event or a preconfigured schedule.
- Page 30 Quick Guide Note You can select (optional) the required viewing option from the Navigator List Controls (Regular, Archives, or Both). The Navigator List is updated depending on your selection. Storage Location AVDB (Storage Type) Contents Transmitter Recorded Devices Select a camera/microphone either from the Navigator List or by using standard drag and drop functionality.
- Page 31 Quick Guide Step 2: Selecting the Playback Time Interval The playback time interval is the range of time for the recorded video and audio segment you want to view and play back. Time Interval Controls – Start Time and End Time You can select a specific time period, defined by its start and end time, for the recorded segment(s) by: •...
- Page 32 Quick Guide (Light blue area) • Click to zoom in on the marked recorded segment. • Repeat the previous two sub-steps (mark and zoom) to zoom in further on the selected recorded segment, if required. Note If you have selected more than one device in the Recorded Device Contents area, all recorded segments for all devices in the marked (shaded) area will be zoomed in on simultaneously.
- Page 33 Quick Guide Step 4: Displaying Recorded Video/Audio Content The next step is to view the actual recorded segments in the Main window. Each recorded video segment is displayed in a video display location according to the parameters that you selected in the previous steps. To display recorded video/audio content: •...
- Page 34 Quick Guide Each recorded segment appears in its selected display location with its camera source information (date, time, and camera name). The segments are paused and the playback controls are now enabled. Step 4: Playing Back from a Selected Camera/Microphone The ViconNet system enables you to simultaneously play back recorded video and audio segments in the Main window from either a single or all currently displayed recorded cameras or microphones, depending on the...
- Page 35 Quick Guide 3. (Optional) Use the playback buttons to navigate through the recorded segment(s) during playback, as required. Option Description Play Forward Forward x2, x5, x10, x50, x100 Forward – frame by frame Forward x¼, x½ Play Reverse Reverse x2, x5, x10, x50, x100 Reverse –...
- Page 36 Quick Guide To perform quick playback (Start Quick Playback From, Start Playback From Time): In the Main window, right-click in the required camera display location. Select Start Quick Playback From, and the number of seconds from the current moment from which you want to play back. Select Start Playback From Time, and a calendar is displayed to select the date to playback the video.
- Page 37 Quick Guide To perform a museum search: 1. In the Navigator window, ensure that the required camera and time interval are selected. 2. Click the button. The Museum Search window is displayed. The Video Display area shows the first frame of the selected time interval.
- Page 38 Quick Guide Option Description This button clears all the current colored grid blocks in the view. You can then use the Pencil tool to define grid blocks for specific ROIs within the display view surface. NOTE: Change detection does not function unless ROIs are identified by colored grid blocks.
- Page 39 Quick Guide 6. If you want to find "episodes" (sets of consecutive frames in which a significant difference in ROIs is detected), do the following: • From the dropdown list, select the length of time over which changes must continuously occur. Note The default duration is 1.5 seconds.
- Page 40 Quick Guide 4. From the list provided, select which behaviors are to be searched for (All Analytics will automatically check all behaviors). 5. Click the button. A list of behavior violations will display at the bottom of the screen. 6. Click the event you want to display. A slider visually represents at what point in the selected time span each behavior violation occurred.
- Page 41 Quick Guide Creating Archives The ViconNet system enables you to create archives, which contain selected recorded data from a video database. This consists of selecting the specific devices, the specific recorded data, and the destination location for where you want to save the data. You can then view it at a later time.
- Page 42 Quick Guide 4. In the Archive area, navigate to the required archive destination (network path, CD-ROM or DVD device). The destination details are displayed automatically at the bottom of the Archive area. 5. In the Archive Name Ext field, enter a logical archive name. The archive name is automatically added to the archive date and time details.
- Page 43 Quick Guide Note If required, you can stop the archive creation process by clicking Stop Archive. 9. When the Archive completed successfully message is displayed, click The new archive is displayed in the Navigator List with an Archive icon (instead of a database icon ), as well as a list of its contents.
- Page 44 Quick Guide Exporting Frames You can save selected single frames or groups of consecutive frames being viewed in playback to any network destination as JPEG images. To export a selected frame: 1. Play back the required camera, as described in Playing Back Recorded Video/Audio.
- Page 45 Quick Guide Creating Video Clips You can create a short video using the various video formats from a selected playback segment, which can then be viewed using Windows Media Player. The video screen converter utility allows conversion of any video/audio data into standard/common format, enabling you to view/listen to the data with standard video/audio tools.
- Page 46 Quick Guide 5. Select the File Type from the dropdown list: AVI, MPEG-4, DivX (requires codec installation) or xVid. Note Video recorded in MPEG-4 and H.264 compression can only be exported to MPEG-4 or Xvid. Video created from ViconNet compression or a JPEG recording (i.e., I-Onyx and 3rd party cameras) can also create AVI files as well as MPEG-4 or Xvid.
- Page 47 Quick Guide Help ViconNet provides an integrated Help window. Press the F1 key and a popup window will display; expand the window to find links to all relevant ViconNet documentation and tutorial videos. Using the Web Viewer Since the VN-NVR-JUMP is not capable of local display, the ViconNet Web Viewer can be used to view cameras.
- Page 48 Quick Guide The Web Viewer (client) will run by browsing to the JUMP's IP address. After login, the Main screen displays. The Web Viewer Main screen provides all the tools needed to work with the ViconNet system.
-
Page 49: Shipping Instructions
Shipping Instructions Use the following procedure when returning a unit to the factory: 1. Call or write Vicon for a Return Authorization (R.A.) at one of the locations listed below. Record the name of the Vicon employee who issued the R.A. -
Page 50: Vicon Standard Equipment Warranty
“autopan” or “tour” modes of operation. Such continuous operation is outside the scope of this warranty. Any product sold as “special” or not listed in Vicon’s commercial price list: One year from date of original retail purchase. - Page 51 Vicon Industries Inc. For office locations, visit the website: www.vicon-security.com...
Need help?
Do you have a question about the ViconNet JUMP and is the answer not in the manual?
Questions and answers