Table of Contents
Advertisement
Quick Links
Installation and Operation Manual
XX221-00-05
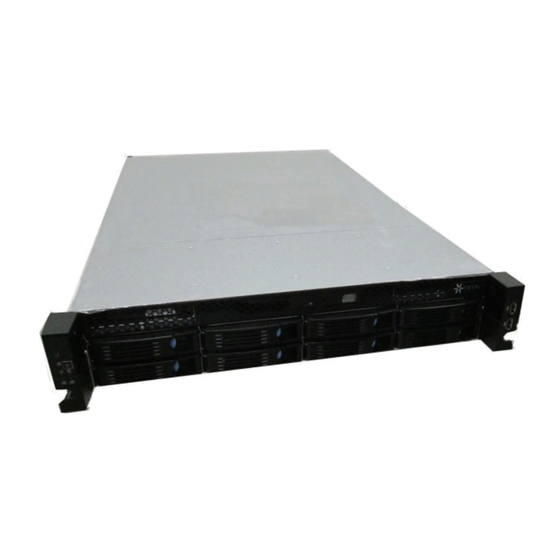
ViconNet VN-NVR Shadow with
Internal RAID
Vicon Industries Inc.
Tel: 631-952-2288 Fax: 631-951-2288 Toll Free: 800-645-9116
24-Hour Technical Support: 800-34-VICON (800-348-4266) UK: 44/(0) 1489-566300
Vicon Industries Inc. does not warrant that the functions contained in this equipment will meet your requirements or that the
operation will be entirely error free or perform precisely as described in the documentation. This system has not been designed
to be used in life-critical situations and must not be used for this purpose.
www.vicon-security.com
Document Number: 8009-8221-00-05
Issued: 614
Product specifications subject to change without notice.
Copyright © 2014 Vicon Industries Inc. All rights reserved.
Advertisement
Table of Contents

Related Manuals for Vicon VN-NVR Shadow


Summary of Contents for Vicon VN-NVR Shadow
- Page 1 24-Hour Technical Support: 800-34-VICON (800-348-4266) UK: 44/(0) 1489-566300 Vicon Industries Inc. does not warrant that the functions contained in this equipment will meet your requirements or that the operation will be entirely error free or perform precisely as described in the documentation. This system has not been designed to be used in life-critical situations and must not be used for this purpose.
-
Page 3: Table Of Contents
Technical Information Vicon Standard Equipment Warranty Vicon, ViconNet, and their logos are registered trademarks of Vicon Industries Inc. Windows is a registered trademark of Microsoft Corporation. Other company and brand products and service names are trademarks or registered trademarks of their respective holders... -
Page 4: General
ViconNet VN-NVR Shadow Installation and Configuration Guide General This manual provides information for installing and setting up the ViconNet® VN-NVR Shadow with internal RAIDs. The NVR Shadow is a high-capacity Network Video Recorder that can simultaneously capture, view and store high-quality, high-resolution voice, video and data. -
Page 5: Hardware Installation
Code ANSI/NFPA 70, state and local wiring codes. These units meet requirements for an FCC Class A computing device and CE. The rack-mount VN-NVR Shadow is a 2 RU (8- bay; 24-bay units are 4 RU) unit that installs into a standard 19-inch racking system. -
Page 6: Unpacking And Inspection
Remove the accessory kit and the VN-NVR Shadow from the box and place them on a large, flat working surface. Open the accessory kit and verify the contents against the list in Table 1. -
Page 7: Unit Components
ViconNet VN-NVR Shadow Installation and Configuration Guide Unit Components This section describes the VN-NVR Shadow front and rear panels. Front Panel Controls and Connections Note On the 24-bay unit, the bays are counted down the columns, 1-6 down on the left side through 19-24 down the right side. - Page 8 ViconNet VN-NVR Shadow Installation and Configuration Guide Rear Panel Controls and Connections NIC 1 Monitor Power Note Rear panels change often but should be similar. • Power Receptacle: Used to connect the provided power cable. • Serial Port: Used to connect system serial devices.
-
Page 9: Mounting
ViconNet VN-NVR Shadow Installation and Configuration Guide Mounting Rack The NVR Shadow was designed to be mounted in a standard 19-inch (483 mm) wide vertical rack. A rail kit is installed onto the NVR to connect it to the rack. Hardware and installation instructions on how to use this kit are provided with the rail kit. -
Page 10: Installing The Vn-Nvr Shadow
Secure the arm back into place. Caution Make sure that the serial number on the tray matches the serial number on the VN-NVR Shadow. Each tray has a label indicating the serial number and the bay number. - Page 11 ViconNet VN-NVR Shadow Installation and Configuration Guide Step 2: Connecting the Hardware This procedure describes the various hardware connections that must be performed in order to operate the system. 1. Perform the following connections: (refer to Rear Panel diagram). 1.1 Locate the keyboard on a flat surface near the unit. Connect the keyboard by inserting its connector into the correct port.
- Page 12 ViconNet VN-NVR Shadow Installation and Configuration Guide Step 2: Connecting the Power Supply To ensure that the unit is protected during a power failure and that no important data is lost, it must be connected to an uninterruptible power source (UPS) before use.
-
Page 13: Operation
ViconNet VN-NVR Shadow Installation and Configuration Guide Operation Powering On the Unit To power on the system: With the unit set up as shown in Installation, press the front panel pushbutton Power Switch. Important Do not press any keyboard buttons at this time. -
Page 14: Using Viconnet
ViconNet VN-NVR Shadow Installation and Configuration Guide Using ViconNet The NVR Shadow is delivered with the ViconNet application preloaded. Accessing the Configuration Functions The configuration functions are performed via the System Settings window applicable to a selected site. The Shadow must first be registered before the storage database drives can be configured. - Page 15 ViconNet VN-NVR Shadow Installation and Configuration Guide 2. Select the VN-NVR Shadow site to configure and click . The System Settings window is displayed. Note The System Settings window has the following options: When the function is not supported, the associated button is disabled (grayed...
-
Page 16: Registering Your Unit
The VN-NVR Shadow is delivered registered and ready for use. The following registration instructions are supplied as reference. Note The full functionality of the VN-NVR Shadow is available only after it is registered. Before the registration procedure is performed, it will function with limited "Viewer" functionality only. -
Page 17: Connecting To The Network
Connecting to the Network Next the VN-NVR Shadow has to be added to the network. In this step, you will configure the IP address of this site in the network. -
Page 18: Setting Up The Storage Database
ViconNet VN-NVR Shadow Installation and Configuration Guide 4. In the Nucleus Settings area, deselect the This Site is the Master Nucleus checkbox. 5. In the Nucleus Settings area, select the Nucleus IP radio button and enter the IP address. 6. Click . - Page 19 ViconNet VN-NVR Shadow Installation and Configuration Guide 2. Click the button. 3. In the Add Video-Audio Storage Disk area, select the next drive letter from the Select Disk dropdown list. In the Directory Size field, enter the same number displayed in the Maximum available size field. Click Apply. As a drive is configured, it is added to the list at top.
- Page 20 7. After reboot the following screen might display. This is normal and just let the restart continue. 8. ViconNet can now be used as required The VN-NVR Shadow will function as any other Workstation. Refer to the ViconNet manual, XX113,...
-
Page 21: Monitoring The Raid System
ViconNet VN-NVR Shadow Installation and Configuration Guide Monitoring the RAID System The hard drives are run by an internal RAID controller that handles the entire hot-swappable drives array. This controller can be monitored. 1. From the desktop, double click the icon. - Page 22 ViconNet VN-NVR Shadow Installation and Configuration Guide Highlight the unit and click the Login button or double click the unit. The Login screen will display. The default Login is User Name vii with no password. From Login Mode dropdown, select Full Access or View Only.
- Page 23 ViconNet VN-NVR Shadow Installation and Configuration Guide Physical Screen Dashboard, Physical and Logical Tabs The list of drives is displayed on the left. There is no further need for any action at this time. A red mark ( ) next to any of the drives indicates that the drive has failed.
-
Page 24: Replacing A Bad Database Drive
ViconNet VN-NVR Shadow Installation and Configuration Guide Replacing a Bad Database Drive When one of the RAID drive fails, the Shadow will beep to announce that a drive has failed. 1. Log in to the Web Console as previously described. - Page 25 ViconNet VN-NVR Shadow Installation and Configuration Guide 6. Once the drive has been physically located, press the button to release the drive arm (handle) and remove it from the bay. Insert a new drive. 7. The “Rebuilding” process begins. The drive icon next the drive that is rebuilding will look different.
-
Page 26: Replacing The Os Hard Drive
ViconNet VN-NVR Shadow Installation and Configuration Guide Replacing the OS Hard Drive If there is a problem with the OS hard drive, contact Vicon Technical Support, 1-800-34-VICON (1-800-348-4266). After Vicon has verified that the OS hard drive needs to be replaced, a replacement drive and all necessary software will be sent. - Page 27 ViconNet VN-NVR Shadow Installation and Configuration Guide 8. When the NVR Shadow restarts, from the desktop, double click the icon. The Intel RAID Web Console 2 will load. 9. Highlight the unit and click the Login button or double click the unit. The...
- Page 28 ViconNet VN-NVR Shadow Installation and Configuration Guide 10. The Web Console screen will display. Verify that all the hard drives are displayed and there are no failures. Defining a Name 1. Right click on Start and choose the “Explore” option.
- Page 29 ViconNet VN-NVR Shadow Installation and Configuration Guide Change Network Settings 1. Right click on Start and choose the “Explore” option. 2. Right click on “My Network Places” and choose “Properties.” 3. Right click on the “Local Area Connection” icon and choose ''Properties.”...
-
Page 30: Shipping Instructions
Shipping Instructions Use the following procedure when returning a unit to the factory: 1. Call or write Vicon for a Return Authorization (R.A.) at one of the locations listed below. Record the name of the Vicon employee who issued the R.A. -
Page 31: Technical Information
ViconNet VN-NVR Shadow Installation and Configuration Guide Technical Information Electrical Characteristics Input Voltage 105 - 240 VAC ±10%, 50/60 Hz nominal. NOTE: Vicon requires the use of uninterruptible power supply systems (UPS) to prevent voltage fluctuations that can affect operation and cause damage to the equipment. - Page 32 ViconNet VN-NVR Shadow Installation and Configuration Guide Mechanical Characteristics Application Indoor Mounting Standard 19 in. (483 mm) rack mount and stackable, 8-Bay: 2 RU height; 24-Bay: 4 RU height Dimensions Height (H): 8-Bay: 3.5 in. (89 mm); 24-Bay: 7 in. (178 mm) Width (W): 19.0 in.
-
Page 33: Vicon Standard Equipment Warranty
“autopan” or “tour” modes of operation. Such continuous operation is outside the scope of this warranty. Any product sold as “special” or not listed in Vicon’s commercial price list: One year from date of original retail purchase. - Page 34 Vicon Industries Inc. For office locations, visit the website: www.vicon-security.com...
Need help?
Do you have a question about the VN-NVR Shadow and is the answer not in the manual?
Questions and answers