Panasonic Lumix DMC-TZ70 Operating Instructions Manual
Hide thumbs
Also See for Lumix DMC-TZ70:
- Operating instructions for advanced features (305 pages) ,
- Basic operating instructions manual (44 pages) ,
- Operating instructions manual (305 pages)

Related Manuals for Panasonic Lumix DMC-TZ70


Summary of Contents for Panasonic Lumix DMC-TZ70
-
Page 1: Operating Instructions
Operating Instructions for advanced features Digital Camera DMC-TZ70/DMC-ZS50 Model No. Please read these instructions carefully before using this product, and save this manual for future use. SQW0215 M0115KZ0... -
Page 2: Table Of Contents
Contents Preparations Basics Before use ..........8 Sequence of operations ...... 30 Standard Accessories ......10 Using the control ring/control dial ..33 Using Quick menu ........34 Names and Functions of Main Parts ..........11 Taking pictures with automatic settings Viewfinder (LVF) ..........14 [Intelligent Auto] Mode ...... - Page 3 Contents Using the [Setup] menu ...... 63 Application (Record) [Clock Set] ...........63 [World Time] ..........63 Switching the display of recording [Travel Date] ..........63 information, etc........77 [Airplane Mode] ...........63 Taking pictures with the [Beep] ............64 composition determined [Cust.Set Mem.] ..........65 [Composition Guide] ......
- Page 4 Contents Taking pictures by setting the Taking pictures according aperture value to the scene [Scene Mode] ....124 [Aperture-Priority] Mode ....107 [Portrait] .............125 [Soft Skin] ..........125 Taking pictures by setting the [Scenery] ...........125 shutter speed [Shutter-Priority] Mode ..... 108 [Sports] ............126 [Night Portrait] ...........126 Taking pictures by setting the...
- Page 5 Contents Using the [Rec] menu ......141 Application (View) [Aspect Ratio] ..........141 [Picture Size] ..........141 Changing the picture information [Quality] .............142 display, etc......... 159 [Sensitivity] ..........143 Viewing the group picture ....160 [ISO Limit Set] ...........144 Different playback methods [White Balance] .........145 [Playback Mode] ........
- Page 6 Operating the camera using a smartphone/tablet ......193 About the “LUMIX CLUB” ......237 Installing the smartphone/tablet app Transferring pictures automatically “Panasonic Image App” ......193 [Smart Transfer] ......... 242 Connecting to a smartphone/tablet ...194 Setting [Smart Transfer] ......244 Connecting to a smartphone/tablet [Auto Transfer] ...........245...
- Page 7 Contents Connecting with other devices Others Viewing on TV screen ....... 261 List of LCD monitor/Viewfinder displays ..........279 VIERA Link (HDMI) (HDAVI Control™) ..263 Viewing 3D still pictures ......265 In recording ..........279 In playback ..........282 Storing recorded still pictures and motion pictures in the recorder ..
-
Page 8: Preparations
Preparations Before use ■ Camera handling Keep the camera away from excessive vibration, force, or pressure. ● Avoid using the camera under the following conditions, which may damage the lens, LCD monitor, viewfinder, or camera body. This may also cause the camera to malfunction or prevent recording. - Page 9 Preparations Before use ■ Always take a test shot first Before important events when you will use the camera (at weddings, for example), always take a test shot to make sure that pictures and sound record correctly. ■ No compensation for missed shots We cannot compensate for missed shots if technical problems with the camera or card prevent recording.
-
Page 10: Standard Accessories
Preparations Standard Accessories Check that all the accessories are supplied before using the camera. ● The accessories and their shape will differ depending on the country or area where the camera was purchased. For details on the accessories, refer to Basic Operating Instructions. ●... -
Page 11: Names And Functions Of Main Parts
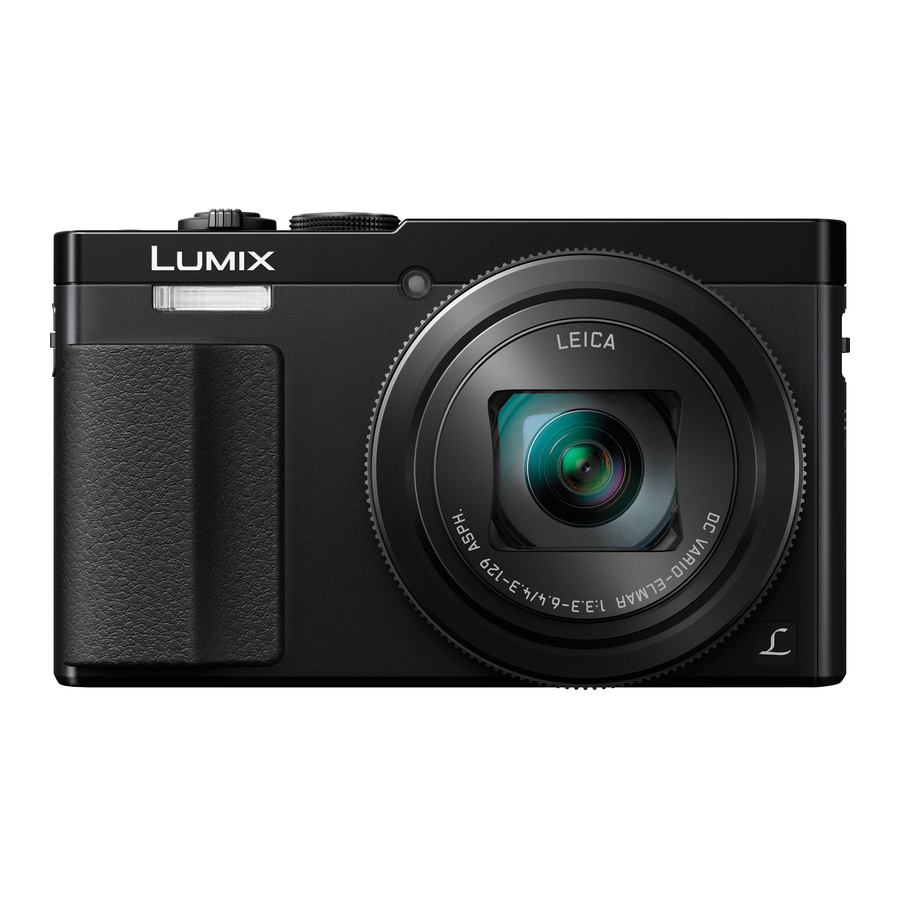
Preparations Names and Functions of Main Parts 1 Flash (→31, 86) 2 Self-timer indicator (→106) AF Assist Lamp (→152) Illuminates when the self-timer is set or when the Auto Focus is operated in dark locations. 3 Control ring (→33) Allows you to zoom and adjust settings when recording. - Page 12 Preparations Names and Functions of Main Parts 16 Viewfinder (LVF) (→14) In this manual, “viewfinder” is used to indicate the LVF. 17 Diopter adjustment dial (→15) Turn the dial to adjust the focus in the viewfinder. 18 Eye Sensor The display is automatically switched to viewfinder when your eye or an object moves close to the viewfinder.
- Page 13 Preparations Names and Functions of Main Parts 22 Strap eyelet (→16) 25 [Wi-Fi] antenna 26 NFC antenna (→201) 27 [Wi-Fi] button (→190) 28 Playback button Use this to select the recording mode or playback mode. 29 [Q.MENU/ ] / [ ] button You can display the Quick Menu (→34) and erase pictures (→59).
-
Page 14: Viewfinder (Lvf)
Preparations Names and Functions of Main Parts Viewfinder (LVF) When you use the viewfinder, you can check the view of the subject even if you are in a bright area. ■ Switching between the LCD monitor and viewfinder You can operate the [LVF]/[Fn2] button in two ways, using it [LVF] button either as the [LVF] button or as a function button [Fn2]. - Page 15 Preparations Names and Functions of Main Parts ■ Setting the sensitivity of the eye sensor or setting to switch the display between the viewfinder and monitor The sensitivity of the eye sensor can be set using [Eye Sensor] in the [Setup] menu. Select [Eye Sensor] from the [Setup] menu (→61) to select [Sensitivity] or [LVF/Monitor Switch] and press [MENU/SET]...
-
Page 16: [Menu/Set] Button / Cursor Button / Control Dial
Preparations Names and Functions of Main Parts [MENU/SET] button / Cursor button / Control dial [MENU/SET] button • Use this button to display the menus, enter the settings, etc. (→61) Cursor button This button is used to move the cursor on the menu screens and for other functions. -
Page 17: Charging Battery
To ensure that safe products are used we recommend that a genuine Panasonic battery pack is used. ■ Power supply... -
Page 18: Inserting The Battery
To remove battery Move the lever in the card/battery compartment in the direction of the arrow. ● Always use genuine Panasonic batteries. ● If you use other batteries, we cannot guarantee the quality of this product. ● To remove the battery, turn the camera off and wait until the LUMIX indicator on the screen goes off. -
Page 19: Charging The Battery
Preparations Charging battery Charging the battery We recommend charging in a location where the ambient temperature is between 10 °C and 30 °C (50 °F to 86 °F) (same for the battery temperature). Make sure that the camera is turned off. AC adaptor (supplied) USB connection Computer... - Page 20 Preparations Charging battery ● If the computer enters sleep mode during charging, charging may be stopped. ● If a notebook computer that is not connected to an electrical outlet is connected to the camera, the battery of the notebook computer will be depleted. Do not leave the camera and notebook connected for a long period of time.
- Page 21 Charging battery ● Do not use any other USB connection cables except the supplied one or a genuine Panasonic USB connection cable (DMW-USBC1: optional). Doing so may cause malfunction of the camera. ● Do not use any other AC adaptors except the supplied one.
-
Page 22: Remaining Battery
• [Program AE] Mode • Temperature: 23 °C (73.4 °F)/Humidity: 50%RH when LCD monitor is on. • Using a Panasonic SDHC Memory Card. • Using the supplied battery. • Starting recording 30 seconds after the camera is turned on (when [Stabilizer] is set to [ON]). - Page 23 Preparations Charging battery ■ Recording motion pictures (When using LCD monitor) [Rec Format] [AVCHD] [MP4] [Rec Quality] [FHD/50p] [FHD/50i] [FHD/25p] Available recording time Approx. 75 min Approx. 80 min Approx. 90 min Actual available recording time Approx. 30 min Approx. 35 min Approx.
-
Page 24: Inserting And Removing The Card (Optional)
Preparations Inserting and removing the card (optional) • Make sure that the camera is turned off. Slide the release lever to the [OPEN] [LOCK] [OPEN] position and open the card/ battery door Release lever Insert the card all the way •... -
Page 25: Saving Your Pictures (Cards And Built-In Memory)
The access time for the built-in memory may be longer than the access time for a card. ■ Compatible memory cards (optional) The following SD standard-based cards (Panasonic brand recommended) can be used. Type of Card Capacity Notes SD Memory Cards 8 MB –... -
Page 26: Estimated Recording Capacity (Number Of Pictures/Recording Time)
Preparations Saving your pictures (cards and built-in memory) Estimated recording capacity (number of pictures/recording time) The number of pictures you can take and the recording time vary in proportion to card capacity (and depending on recording conditions and type of card). Estimated remaining pictures or recording time capacity (switch with [Remaining Disp.] (→69)) Displayed when no card is inserted... - Page 27 Preparations Saving your pictures (cards and built-in memory) ■ Recording time capacity (motion pictures) ([h], [m] and [s] indicate “hour”, “minute” and “second”.) When [Rec Format] is [AVCHD] [Rec Quality] 8 GB 32 GB 64 GB [FHD/50p] 37m00s 2h31m00s 5h07m00s [FHD/50i] / [HD/50p] 1h01m00s 4h10m00s...
-
Page 28: Setting The Clock
Preparations Setting the clock The clock is not set when the camera is shipped. • Disconnect the unit from the AC adaptor (supplied). Press the Camera [ON/OFF] button The camera is turned on. If the language select screen is not displayed, proceed to step Press [MENU/SET] while the message is displayed Press to select the language, and press [MENU/SET]... -
Page 29: Changing Time Settings
Preparations Setting the clock When [Please set the home area] is displayed, press [MENU/SET] Press to set your home area and press [MENU/SET] Current time City or area name Difference from GMT (Greenwich Mean Time) ● If the clock is not set, the correct date cannot be printed when you order a photo studio to print the picture, or when you stamp the date on the pictures with [Date Stamp] or [Text Stamp]. -
Page 30: Basics
Basics Sequence of operations Press the Camera [ON/OFF] button to turn on the camera Set to the desired recording mode Align the mode dial correctly to → the mode that you want to use. [Intelligent Auto] Mode Take pictures with automatic settings. (→35) Take pictures with automatic shutter [Program AE] Mode... -
Page 31: Recording Motion Pictures
Basics Sequence of operations Aim the camera and shoot ■ Taking still pictures Press the shutter button halfway to focus Press the shutter button fully to take the picture Press halfway Press fully (press lightly to focus) (press the button all the way to record) ■... - Page 32 Basics Sequence of operations Play back pictures Press the Playback button Press or turn the control dial to select the picture to be displayed ■ Viewing motion pictures Select a picture with the motion picture icon, and press Press the Camera [ON/OFF] button to turn off the camera - 32 - SQW0215...
-
Page 33: Using The Control Ring/Control Dial
Basics Using the control ring/control dial The “Control Ring/Control Dial” is an easy and convenient way to adjust several settings, depending on the camera mode selected. You can use the control ring ( )/control dial ( ) to change the settings of the unit. (In [Intelligent Auto] Mode) Setting indication Items that can be set by the control ring/control dial vary depending on recording modes. -
Page 34: Using Quick Menu
Basics Using the control ring/control dial Using Quick menu During recording, you can easily call some of the menu items and set them. Press [Q.MENU/ ] button Press to select menu items • The menu items and setting items that are displayed differ depending on the recording mode. -
Page 35: Taking Pictures With
Basics Taking pictures with automatic settings [Intelligent Auto] Mode ■ Recording mode: This mode is recommended for those who want to point and shoot or beginners as the camera optimises settings to match the subject and recording environment. Set mode dial to [ ([Intelligent Auto] Mode) Take a picture Press halfway... -
Page 36: Automatic Scene Detection
Basics Taking pictures with automatic settings [Intelligent Auto] Mode Automatic Scene Detection Camera reads scene when pointed at subject, and makes optimum settings automatically. When taking pictures [i-Portrait] [i-Night Portrait] (Only when [ ] is selected) [i-Baby] [i-Scenery] [i-Night Scenery] [i-Sunset] [i-Handheld Night Shot] [i-Food]... -
Page 37: Defocusing The Background
Basics Taking pictures with automatic settings [Intelligent Auto] Mode Defocusing the background You can also use [Intelligent Auto] Mode to adjust background defocusing easily, as with in [Aperture-Priority] mode. Press Turn the control ring or control dial to adjust background defocusing Defocus background Defocus the background... -
Page 38: [Motion Deblur]
Basics Taking pictures with automatic settings [Intelligent Auto] Mode ● When you record motion pictures, the camera performs aperture control within the appropriate exposure range, and the background defocusing may not change for some subject brightness. ● You can use [Intelligent Auto Plus] Mode to adjust brightness and colouring. (→42) ●... -
Page 39: [Ihandheld Night Shot]
Basics Taking pictures with automatic settings [Intelligent Auto] Mode [iHandheld Night Shot] If a night scene is detected automatically while the unit is being handheld, [iHandheld Night Shot] can record a still picture with less jitter and less noise without using a tripod by combining a burst of pictures. -
Page 40: [Ihdr]
Basics Taking pictures with automatic settings [Intelligent Auto] Mode [iHDR] When there is, for example, strong contrast between the background and the subject, [iHDR] records multiple still pictures with differing exposures and combines them to create a single still picture rich in gradation. It is preset to [ON] with this unit. -
Page 41: Af Tracking
Basics Taking pictures with automatic settings [Intelligent Auto] Mode AF Tracking This function enables the camera to continue to focus on the subject and adjust the exposure of the subject even when the subject is moving. Press to set [AF Mode] to AF Tracking •... -
Page 42: [Intelligent Auto Plus] Mode
Basics Taking pictures with automatic settings [Intelligent Auto] Mode [Intelligent Auto Plus] Mode When [Intelligent Auto Plus] (iA+) Mode is selected, you can easily adjust the brightness and colouring, in addition to the background defocusing, without compromising the user- friendly operation of the [Intelligent Auto] Mode. ■... - Page 43 Basics Taking pictures with automatic settings [Intelligent Auto] Mode ■ Adjusting brightness, colouring, and background defocusing Press Press to select an item to adjust Adjusts brightness. Adjusts background defocusing. Adjusts colouring. • [AUTO] is displayed in the icon during automatic adjustment. Turn the control ring or control dial to adjust Brightness Underexposure (dark)
-
Page 44: About [Intelligent Auto] Setting Items
Basics Taking pictures with automatic settings [Intelligent Auto] Mode About [Intelligent Auto] setting items Only the menu items which are displayed in the [Intelligent Auto] Mode can be set. The settings selected in the [Program AE] or other modes will reflect on the menu items in the [Setup] menu that are not displayed. -
Page 45: Taking Pictures With Your Own Settings [Program Ae] Mode
Basics Taking pictures with your own settings [Program AE] Mode ■ Recording mode: Take pictures with automatic shutter speed and aperture value settings. Using the [Rec] menu to change settings and set up your own recording environment. Set mode dial to [ ([Program AE] Mode) Take a picture Press halfway... -
Page 46: Programme Shift
Basics Taking pictures with your own settings [Program AE] Mode Programme Shift The function for maintaining the same exposure (brightness) while changing the shutter speed and aperture value combination is called “Programme Shift”. You can use “Programme Shift” to take pictures by adjusting the shutter speed and aperture value even in [Program AE] Mode. - Page 47 Basics Taking pictures with your own settings [Program AE] Mode ● When the camera is turned off, Programme Shift is cancelled. ● Programme Shift is cancelled if more than 10 seconds pass after Programme Shift is activated. However, the Programme Shift setting is memorised. ●...
-
Page 48: Adjusting Focus
Basics Adjusting focus When [AF Mode] is set to [ ] (1-area-focusing), focus on the AF area in the centre of the picture. If a subject you want to record is not in the centre, follow the steps below. Adjust focus according to subject Align the AF area Focus display with the subject... -
Page 49: Recording Motion Pictures
Basics Recording motion pictures ■ Recording mode: You can record motion pictures with audio (stereo). • You can record a motion picture to the built-in memory only in [MP4] using the [VGA] setting. Press the motion picture button to start recording Microphones [Rec Format] (→155)/ [Rec Quality]... - Page 50 Basics Recording motion pictures ■ About the recording format for recording motion pictures This unit can record motion pictures in either AVCHD or MP4 formats. AVCHD: You can record high definition quality images with this format. It is suitable for viewing motion pictures on a high-resolution TV or for saving them to a disc.
- Page 51 Basics Recording motion pictures ● If the surrounding temperature is high, or a motion picture is recorded continuously, [ ] is displayed and recording may be stopped halfway through to protect the camera. ● When using zoom while recording motion pictures, it may take some time to focus. ●...
-
Page 52: Taking Still Pictures While A Motion Picture Is Being Recorded
Basics Recording motion pictures Taking still pictures while a motion picture is being recorded Still pictures can be recorded even while a motion picture is being recorded. Press the shutter button fully during the motion picture recording Still pictures can be taken while a motion picture is being recorded. [Still Picture Size] (→156) Maximum number of pictures... -
Page 53: Viewing Your Pictures
Basics Viewing your pictures When a card is in the camera, pictures are played back from the card. Without a card, pictures are played back from the built-in memory. Press the Playback button • By holding down the Playback button while the camera is off, you can turn the camera on in playback mode. -
Page 54: Zooming In And Viewing "Playback Zoom
Basics Viewing your pictures Zooming in and viewing “Playback Zoom” Move the zoom lever toward T side Current zoom position • Each time you move the zoom lever toward the T side, the magnification increases through four levels: 2x, 4x, 8x, and 16x. (The picture quality displayed becomes successively lower.) •... -
Page 55: Viewing A List Of Pictures "Multi Playback
Basics Viewing your pictures Viewing a list of pictures “Multi Playback” Move the zoom lever toward W side Picture no./Total no. Motion pictures Panorama pictures • Move the zoom lever toward the W side and you can switch the display methods in the following order: 1-picture screen (full-screen) →... -
Page 56: Searching And Viewing Pictures By Their Recording Date [Calendar]
Basics Viewing your pictures Searching and viewing pictures by their recording date [Calendar] Move the zoom lever toward W side several times to select recording date and press [MENU/SET] • Pictures are displayed in Multi Playback (30-picture screen). The cursor will appear on the first picture taken on the selected date. -
Page 57: Viewing Motion Pictures
Basics Viewing motion pictures This unit was designed to play motion pictures using the AVCHD, MP4 and QuickTime Motion JPEG formats. Select a picture with the motion picture icon, and press Playback now starts. Motion picture recording time Example: After 29 minutes and 30 seconds: [29m30s] •... -
Page 58: Capturing Still Pictures From Motion Pictures
Basics Viewing motion pictures Capturing still pictures from motion pictures Save a scene from a motion picture as a still picture. Display the picture that you want to capture as a still picture by pausing a motion picture during playback Press [MENU/SET] •... -
Page 59: Deleting Pictures
Basics Deleting pictures Pictures will be deleted from the card if the card is inserted, or from the built-in memory if the card is not inserted. (Deleted pictures cannot be recovered.) However, pictures will not be deleted in the following cases: •... -
Page 60: To Delete Multiple (Up To 100)/To Delete All Pictures
Basics Deleting pictures To delete multiple (up to 100)/To delete all pictures A picture group (→160) is handled as 1 picture. (All the pictures in the selected picture group are deleted.) Press [ ] button while viewing a picture to select [Delete Multi]/[Delete All] and press [MENU/SET] •... -
Page 61: Setting The Menu
Basics Setting the menu Refer to the procedure below for an example on how to operate the menus. Example: Changing [AF Mode] in the [Rec] menu in [Program AE] Mode Press [MENU/SET] Press or turn the control dial to select the [Rec] menu, and press [MENU/SET] Press or turn the control dial to select [AF Mode], and... -
Page 62: Menu Type
Basics Setting the menu Menu type ● ● In recording mode In playback mode [Rec] You can perform settings such as tones, Sensitivity, Aspect Ratio, and Picture Size. [Motion Picture] You can select the recording format and picture quality and other settings. -
Page 63: Using The [Setup] Menu
Basics Using the [Setup] menu [Clock Set] and [Economy] are important for clock setting and battery life. Please check these before use. • For the setting procedures of the menu. (→61) ● In [Intelligent Auto] Mode, only [Clock Set], [World Time], [Airplane Mode], [Beep], [Composition Guide] and [Language] are set. -
Page 64: [Beep]
Basics Using the [Setup] menu • For the setting procedures of the menu. (→61) [Beep] Change or mute the beep/shutter sounds. ● [Beep Level] ■ Settings: ([Low]) / ([High]) / ([OFF]) ● [Beep Tone] ■ Settings: ● [Shutter Vol.] ■ Settings: ([Low]) / ([High]) /... -
Page 65: [Cust.set Mem.]
Basics Using the [Setup] menu • For the setting procedures of the menu. (→61) [Cust.Set Mem.] Register the current camera settings. (→132) [Fn Button Set] Register frequently used functions from the [Rec] menu, [Setup] menu or other menus to the function buttons for faster operation. (→134) [Zoom Lever Set] Switches the zoom lever operation setting. -
Page 66: [Live View Mode]
Basics Using the [Setup] menu • For the setting procedures of the menu. (→61) [Live View Mode] Sets the display speed and picture quality of the screen (Live View screen) when recording pictures using the LCD monitor or viewfinder. ■ Settings Picture quality has higher priority over display speed and pictures are displayed at 30 fps. -
Page 67: [Monitor Luminance]
Basics Using the [Setup] menu • For the setting procedures of the menu. (→61) [Monitor Luminance] Make LCD monitor easier to see. ■ Settings The brightness is adjusted automatically depending on how bright it is around the camera. [Auto Power Monitor] The brightness becomes higher than usual for easy viewing outdoors. -
Page 68: [Histogram]
Basics Using the [Setup] menu • For the setting procedures of the menu. (→61) [Histogram] Displays distribution of brightness in picture – e.g. (Example) if the graph peaks at the right, this means there are several bright areas in the picture. A peak in the centre represents correct brightness (correct exposure). -
Page 69: [Remaining Disp.]
Basics Using the [Setup] menu • For the setting procedures of the menu. (→61) [Remaining Disp.] Switch the display between the remaining number of still pictures you can take or the remaining recording time of a motion picture that you can record for the available card or built-in memory. -
Page 70: [Economy]
Basics Using the [Setup] menu • For the setting procedures of the menu. (→61) [Economy] Turn off the camera or make the LCD monitor go dark while not using the camera to minimise battery consumption. ● [Auto Power Off] The camera is automatically turned off while not in use. ■... -
Page 71: [Auto Review]
Basics Using the [Setup] menu • For the setting procedures of the menu. (→61) [Auto Review] Automatically display still pictures immediately after taking them. ■ Settings Displays the playback screen for the set time before automatically returning to [1SEC] / [2SEC] the recording screen. -
Page 72: [No.reset]
Basics Using the [Setup] menu • For the setting procedures of the menu. (→61) [No.Reset] Reset picture file numbers. (The folder number is updated and the file number starts from 0001.) • To reset folder number to 100: First, format the built-in memory or card, and reset the file numbers using [No.Reset]. Then, select [Yes] on the folder number reset screen. -
Page 73: [Usb Mode]
Basics Using the [Setup] menu • For the setting procedures of the menu. (→61) [USB Mode] Select communication method for when connecting camera to a computer or printer with USB connection cable (supplied). ■ Settings Select communication method each time you connect to a computer or PictBridge-compatible printer. -
Page 74: [Rotate Disp.]
Basics Using the [Setup] menu ● [VIERA Link] Enable automatic linking with other VIERA Link-compatible devices, and operability with a VIERA remote control when connecting via an HDMI micro cable. (→263) ■ Settings Operations may be performed via the remote control of the VIERA Link-compatible device. -
Page 75: [Version Disp.]
Always format cards with this camera. ● Formatting the built-in memory may take several minutes. ● If the card cannot be formatted, please try another card before contacting Panasonic. [Language] Change display language. Set the language displayed on the screen. -
Page 76: Entering Text
Basics Entering Text Use the cursor button to enter names with the Face Recognition function and in Scene Modes [Baby] and [Pet], or to register locations in [Travel Date] etc. to select characters Press [MENU/SET] several times until the desired character is displayed Text is inserted at the cursor position. -
Page 77: Application (Record)
Application (Record) Switching the display of recording information, etc. You can also turn off the recording information (such as icons for various settings) and the level gauge (→80). You can switch the display, such as turning off the display of information for a simple display, for example when determining the composition. -
Page 78: Taking Pictures With The Composition Determined [Composition Guide]
Application (Record) Taking pictures with the composition determined [Composition Guide] ■ Recording mode: By using the viewfinder or LCD monitor to consider the placement of your subject (the composition), you can take more impressive still pictures. The following guidelines can be used. Composition Guideline Description... -
Page 79: Shutter Button
Application (Record) Taking pictures with the composition determined [Composition Guide] ■ How to select guidelines Press [Fn1] button to select the guideline to display and press [MENU/SET] • You can also select the guideline with the control dial. • Explanations and examples of the composition will be displayed in turn when you press the [DISP.] button. -
Page 80: Using The Level Gauge
Application (Record) Using the level gauge ■ Recording mode: If you want to make sure that the camera is not slanted or tilted, for example, when you take a picture of a landscape, use the level gauge indication as a reference. Press [DISP.] button to switch the display Press the button to switch the display. -
Page 81: Using Zoom
Application (Record) Using Zoom ■ Recording mode: You can adjust the area of a picture to be taken using zoom. Move the zoom lever Capture a wider area Enlarge the subject (wide-angle) (telephoto) • The zoom speed can be set to one of 2 levels using the angle at which the zoom lever is moved. -
Page 82: Zoom Types And Use
Application (Record) Using Zoom ● If you are not holding the camera while using zoom, such as during self-timer recording (→106), [Time Lapse Shot] recording (→150), or remote recording (→203), the camera could tilt when the lens barrel extends, so be sure to secure the camera in place on a tripod or by other means. - Page 83 Application (Record) Using Zoom To increase the zoom ratio further, the following zoom can be used in combination. ■ [i.Zoom] You can use the camera’s Intelligent Resolution technology to increase the zoom ratio up to 2x higher than the original zoom ratio with limited deterioration of picture quality. Set the [i.Zoom] in the [Rec] menu to [ON].
-
Page 84: [Step Zoom]
Application (Record) Using Zoom [Step Zoom] You can set the zoom operation to allow easy visualisation of the angle of view (picture angle) for the focal length of a regular fixed focal length lens (as with a 35 mm film camera). - Page 85 Application (Record) Using Zoom ● When using [Step Zoom], the focal length displayed is an estimate. It is based on the [Aspect Ratio] setting of 4:3. ● The focal length will change in the following cases: • When [iHandheld Night Shot] is set to [ON] •...
-
Page 86: Taking Pictures With Flash
Application (Record) Taking pictures with flash ■ Recording mode: Press [ ] button ( ) to select the desired type and press [MENU/SET] Type, operations Uses [Auto] Normal use • Automatically judges when to use flash [Auto/Red-Eye] Taking pictures of subjects in dark •... - Page 87 Application (Record) Taking pictures with flash ● Do not put your hands over the light-emitting area of the flash (→11) or look at it from close range. Do not use the flash at close distances to other subjects (heat/light may damage subject).
- Page 88 Application (Record) Taking pictures with flash ■ Available types in each mode (○: Available, –: Not available, : Default setting) [Scene Mode] – ○ ○ ○ ○ ○ ○ ○ ○ – – – – – ○ ○ ○ ○ –...
-
Page 89: Taking Pictures With Auto Focus
Application (Record) Taking pictures with Auto Focus ■ Recording mode: When Auto Focus is enabled, press the shutter button halfway to focus. Focusing methods differ depending on recording mode and [AF Mode] setting. Press [ ] button ( ) to select [AF] and press [MENU/SET] ■... -
Page 90: Taking Front-On Pictures Of People (Face Detection)
Application (Record) Taking pictures with Auto Focus Taking front-on pictures of people (Face Detection) Recognises faces (up to 15 people) and adjusts exposure and focus accordingly. AF area Yellow: When the shutter button is pressed halfway, the frame turns green when the camera is focused. White: Displayed when more than one face is detected. -
Page 91: Automatically Locking The Focus On A Moving Subject (Af Tracking)
Application (Record) Taking pictures with Auto Focus Automatically locking the focus on a moving subject (AF Tracking) Align the AF Tracking frame with the subject and press the shutter button halfway AF Tracking frame When the subject is recognised, the AF Tracking frame changes from white to yellow, and the subject is automatically kept in focus. -
Page 92: Subject Not Centred In Picture (23-Area-Focusing)
Application (Record) Taking pictures with Auto Focus Subject not centred in picture (23-area-focusing) Focuses on the subject in the wide range area (up to 23-area-focusing) on the recording screen. ● Focus is fixed to [ ] (1-area-focusing) during motion picture recording. ●... - Page 93 Application (Record) Taking pictures with Auto Focus ■ Changing the position and size of the AF area ([Focus Area Set]) When [AF Mode] is set to [ ] (1-area-focusing), you can move the position or size of the AF area at the centre. Select [AF Mode] from the [Rec] menu and press [MENU/SET] (→61)
-
Page 94: Taking Close-Up Pictures (Macro Recording)
Application (Record) Taking close-up pictures (Macro recording) ■ Recording mode: When you want to enlarge the subject, setting to [AF Macro] ([ ]) enables you to take pictures at an even closer distance than the normal focus range (up to 3 cm (0.098 feet) for max. -
Page 95: Focus Range
Application (Record) Taking close-up pictures (Macro recording) Focus range When a subject is too close to the camera, the picture may not be properly focused. ■ Shortest recording distance The shortest recording distance is the distance from the lens front to the subject. This distance changes gradually depending on the zoom position. -
Page 96: [Macro Zoom]
Application (Record) Taking close-up pictures (Macro recording) [Macro Zoom] ■ Recording mode: To take even larger images of the subject, setting to [Macro Zoom] ([ ]) enables the subject to appear even larger than when using [AF Macro] ([ Press [ ] button ( ) to select [Macro Zoom] ([ ]) and press [MENU/SET] Adjust the magnification with the zoom lever... -
Page 97: Taking Pictures With Manual Focus
Application (Record) Taking pictures with Manual Focus ■ Recording mode: Manual Focus is convenient when you want to lock the focus to take pictures or when it is difficult to adjust focus using Auto Focus. Press [ ] button ( ) to select [MF] and press [MENU/SET] Turn the control ring to adjust focus Focus range indication... - Page 98 Application (Record) Taking pictures with Manual Focus ■ 1 Shot AF When [1 Shot AF] is registered to a function button (→134), press this button once to temporarily turn on Auto Focus and focus on a subject. • First use [1 Shot AF] to focus on an area close to the subject. This makes it easier to adjust the focus with the control ring.
- Page 99 Application (Record) Taking pictures with Manual Focus ■ [Peaking] Peaking If [Peaking] is set to [ON] in the [Setup] menu, colour is added to the portions of the image that are in focus. ● To change the [Detect Level] or [Display Color] settings Select [Peaking] from the [Setup] menu (→61) to select [SET] and press [MENU/SET]...
-
Page 100: [Af/Ae Lock]
Application (Record) Taking pictures by locking the focus and/or exposure [AF/AE Lock] ■ Recording mode: The AF/AE Lock function is convenient, for example, when there is too much contrast with the subject and you cannot get appropriate exposure (AE Lock) or when you want to take a still picture composed with the subject outside the AF area (AF Lock). -
Page 101: Taking Pictures With Exposure Compensation
Application (Record) Taking pictures with Exposure Compensation ■ Recording mode: Corrects the exposure when there is a backlight or when the subject is too dark or too bright. Press [ ] button ( ) Turn the control ring or control dial to select the compensation value and press [MENU/SET] •... -
Page 102: Recording While Exposure Is Changed Automatically ([Auto Bracket])
Application (Record) Taking pictures with Exposure Compensation Recording while exposure is changed automatically ([Auto Bracket]) ■ Recording mode: Records 3 pictures in continuous succession while exposure is changed automatically. After exposure adjustment, the adjustment value is set as the standard. Press [ ] button ( ) to select [Auto Bracket] and press [MENU/SET]... -
Page 103: Burst Function
Application (Record) Burst function ■ Recording mode: A burst of still pictures can be recorded while the shutter button is pressed fully. Press [ ] button ( ) to select [Burst] and press [MENU/SET] • To change the burst setting, press the [DISP.] button and select a setting with No. -
Page 104: Take A Picture
Application (Record) Burst function No. of Setting Speed Description pictures Approx. 10 • Focus, exposure and White Balance are fixed in pictures/sec. the first picture. • Focus, exposure and White Balance are fixed in Approx. 40 the first picture. pictures/sec. •... - Page 105 Application (Record) Burst function ● Pictures taken with the [ ] or [ ] setting are recorded together as a group (picture group). (→160) ● Depending on changes in the brightness of the subject, the second and subsequent pictures may be recorded brighter or darker when using the burst function at the [ ], [ ] or [ ] setting.
-
Page 106: Taking Pictures With Self-Timer
Application (Record) Taking pictures with self-timer ■ Recording mode: We recommend using a tripod. This is also effective for preventing jitter when pressing the shutter button, by setting the self-timer to 2 seconds. Press [ ] button ( ) to select [Self Timer] and press [MENU/SET] •... -
Page 107: [Aperture-Priority] Mode
Application (Record) Taking pictures by setting the aperture value [Aperture-Priority] Mode ■ Recording mode: When recording, you can control the aperture value to meet your recording purposes. Shutter speed is automatically adjusted to be appropriate for the set aperture value. Set mode dial to [ Turn the control ring or control dial to select the aperture value... -
Page 108: [Shutter-Priority] Mode
Application (Record) Taking pictures by setting the shutter speed [Shutter-Priority] Mode ■ Recording mode: When recording, you can control the shutter speed to meet your recording purposes. Aperture is automatically adjusted to be appropriate for the set shutter speed. Set mode dial to [ Turn the control ring or control dial to select the shutter speed About the exposure meter •... -
Page 109: Taking Pictures By Setting The Aperture Value And Shutter Speed
Application (Record) Taking pictures by setting the aperture value and shutter speed [Manual Exposure] Mode ■ Recording mode: Determine the exposure by manually setting the aperture value and the shutter speed. The Manual Exposure Assistance appears on the lower portion of the screen to indicate the exposure. - Page 110 Application (Record) Taking pictures by setting the aperture value and shutter speed [Manual Exposure] Mode ■ Manual exposure assist (estimate) Shows pictures with standard brightness (appropriate exposure). Shows brighter pictures. For the appropriate exposure, either use a faster shutter speed or increase aperture value. Shows darker pictures.
-
Page 111: [Creative Control] Mode
Application (Record) Taking Pictures with different picture effects [Creative Control] Mode ■ Recording mode: You can select your own settings from various effects and take pictures while confirming these effects on the screen. Set mode dial to [ to select an effect, and then press [MENU/SET] •... - Page 112 Application (Record) Taking Pictures with different picture effects [Creative Control] Mode ● The flash is set to [ ] ([Forced Flash Off]). ● The display of a picture reflecting a selected effect in the preview screen or recording screen may differ from the actual recorded pictures. ●...
-
Page 113: [Expressive]
Application (Record) Taking Pictures with different picture effects [Creative Control] Mode For the [Creative Control] menu setting procedures. (→111) [Expressive] This effect emphasises the colour to make a pop art picture. ■ Items that can be set (→112) Underexposure Overexposure Brightness (darker) (brighter) -
Page 114: [High Key]
Application (Record) Taking Pictures with different picture effects [Creative Control] Mode For the [Creative Control] menu setting procedures. (→111) [High Key] This effect adds a bright, airy and soft feel to the overall image. ■ Items that can be set (→112) Underexposure Overexposure... -
Page 115: [Dynamic Monochrome]
Application (Record) Taking Pictures with different picture effects [Creative Control] Mode For the [Creative Control] menu setting procedures. (→111) [Dynamic Monochrome] This effect gives a higher contrast to create an impressive black and white picture. ■ Items that can be set (→112) Underexposure Overexposure... -
Page 116: [Cross Process]
Application (Record) Taking Pictures with different picture effects [Creative Control] Mode For the [Creative Control] menu setting procedures. (→111) [Cross Process] This effect gives your photo a dramatic colour look. ■ Items that can be set (→112) Underexposure Overexposure Brightness (darker) (brighter) Degree of... -
Page 117: [Miniature Effect]
Application (Record) Taking Pictures with different picture effects [Creative Control] Mode For the [Creative Control] menu setting procedures. (→111) [Miniature Effect] This effect blurs peripheral areas to give the impression of a diorama. ■ Items that can be set (→112) Underexposure Overexposure Brightness... -
Page 118: [Soft Focus]
Application (Record) Taking Pictures with different picture effects [Creative Control] Mode For the [Creative Control] menu setting procedures. (→111) [Soft Focus] This effect blurs the overall image to produce a soft feel. ■ Items that can be set (→112) Underexposure Overexposure Brightness (darker) -
Page 119: [One Point Color]
Application (Record) Taking Pictures with different picture effects [Creative Control] Mode For the [Creative Control] menu setting procedures. (→111) [One Point Color] This effect leaves one selected colour to emphasise impressiveness. ■ Items that can be set (→112) Underexposure Overexposure Brightness (darker) (brighter) -
Page 120: Recording Panorama Pictures [Panorama Shot] Mode
Application (Record) Recording panorama pictures [Panorama Shot] Mode ■ Recording mode: You can easily record a panorama picture by panning the camera towards the direction you want to record, and automatically combining the burst of pictures taken during that time. •... - Page 121 Application (Record) Recording panorama pictures [Panorama Shot] Mode Press the shutter button fully and pan the camera in a small circular motion to the recording direction to start recording • Taking pictures from left to right 2 sec. 3 sec. 1 sec.
- Page 122 Application (Record) Recording panorama pictures [Panorama Shot] Mode ■ Changing the recording direction or picture effects Press to select the recording direction and press [MENU/SET] to select the picture effect and press [MENU/SET] ■ Tips • Pan the camera in the recording direction as steadily as possible. If the camera shakes too much, it may not be able to take pictures or may end up creating a narrow (small) panorama picture.
-
Page 123: About Panorama Playback
Application (Record) Recording panorama pictures [Panorama Shot] Mode ● The zoom position is fixed to the W end. ● The focus, exposure and White Balance are all fixed to optimal values for the first picture. If the focusing or brightness of pictures recorded as part of a Panorama picture after the first picture are significantly different from those of the first picture, the Panorama picture as a whole (when all pictures are stitched together) may not have consistent focus and brightness. -
Page 124: Taking Pictures According To The Scene [Scene Mode]
Application (Record) Taking pictures according to the scene [Scene Mode] ■ Recording mode: Using [Scene Mode] enables you to take pictures with optimum settings (exposure, colouring, etc.) for given scenes. Set mode dial to [ to select the scene and press [MENU/SET] ■... -
Page 125: [Portrait]
Application (Record) Taking pictures according to the scene [Scene Mode] • How to select a scene (→124) [Portrait] Improves the skin tone of subjects for a healthier appearance in bright daylight conditions. ■ Tips • The more the zoom is drawn towards T side and a distant background is selected, the greater the effect will be. -
Page 126: [Sports]
Application (Record) Taking pictures according to the scene [Scene Mode] • How to select a scene (→124) [Sports] Takes pictures of scenes with fast movement, e.g. sports. ■ Tips • Stand at least 5 m (16 feet) away. ● Shutter speed may slow down up to 1 second. [Night Portrait] Takes pictures of people and nightscapes with close to actual brightness. -
Page 127: [Handheld Night Shot]
Application (Record) Taking pictures according to the scene [Scene Mode] • How to select a scene (→124) [Handheld Night Shot] Takes clear still pictures of night scenes with less jitter and less noise by combining a burst of still pictures. ■... -
Page 128: [Baby]
Application (Record) Taking pictures according to the scene [Scene Mode] • How to select a scene (→124) [Baby] This takes pictures of a baby with a healthy complexion. When you use the flash, the light from it is weaker than usual. ■... -
Page 129: [High Sens.]
Application (Record) Taking pictures according to the scene [Scene Mode] • How to select a scene (→124) [High Sens.] Prevents blurring of subject in dark, indoor conditions. to select the aspect ratio, and then press [MENU/SET] ■ Settings: [3M] / [2.5M] / [2M] / [2.5M]... -
Page 130: [High Speed Video]
Application (Record) Taking pictures according to the scene [Scene Mode] • How to select a scene (→124) [High Speed Video] Motion pictures are recorded by greatly increasing frames per second, so movement can be displayed in slow motion during playback. to select motion picture quality (frame rate), then press [MENU/SET] Picture size... -
Page 131: [3D Photo Mode]
Application (Record) Taking pictures according to the scene [Scene Mode] • How to select a scene (→124) [3D Photo Mode] Pictures are recorded continuously while moving the camera horizontally, and two pictures selected automatically are combined to make a single 3D picture. To view 3D pictures, a television that supports 3D is required. -
Page 132: Registering Your Own Settings And Recording [Custom] Mode
Application (Record) Registering your own settings and recording [Custom] Mode Registering your preferred recording mode, [Rec] menu settings, etc. to [Cust.Set Mem.] and setting the mode dial to [ ] / [ ] allows you to switch quickly to those settings. [Cust.Set Mem.] ■... -
Page 133: [Custom]
Application (Record) Registering your own settings and recording [Custom] Mode [Custom] ■ Recording mode: Settings registered in [Cust.Set Mem.] can be quickly called up by setting the mode dial to ] / [ Set mode dial to [ ] / [ ([Custom] mode) •... -
Page 134: Registering Preferred Functions To The Function Button
Application (Record) Registering preferred functions to the function button ■ Recording mode: Register frequently used functions from the [Rec] menu, [Setup] menu or other menus to the [Fn1] button or [Fn2] button for faster operation. • The [Fn1] button is set to [Composition Guide] and [Fn2] button is set to [LVF/Monitor Switch] at the time of purchase. -
Page 135: Changing The Settings Assigned To The Control Ring/Control Dial
Application (Record) Changing the settings assigned to the control ring/control dial ■ Recording mode: Changes the settings assigned to the control ring/control dial. Select [Ring/Dial Set] from [Setup] menu and press [MENU/SET] (→61) to select [ ] (control ring) or [ ] (control dial) and press [MENU/SET] to select the setting and press [MENU/SET]... -
Page 136: Recording With The Face Recognition Function [Face Recog.]
Application (Record) Recording with the Face Recognition function [Face Recog.] ■ Recording mode: • Default [Face Recog.] setting is [OFF]. • When the face pictures are registered, the setting will be [ON] automatically. ■ How the Face Recognition function works During recording •... -
Page 137: Registering Face Pictures
Application (Record) Recording with the Face Recognition function [Face Recog.] Registering face pictures Up to 6 people’s face pictures can be registered along with such information as name and birthdate. You can facilitate Face Recognition by the way you register faces: for example, register multiple face pictures of the same person (up to 3 pictures in one registration). -
Page 138: Editing Or Deleting Information About Registered Persons
Application (Record) Recording with the Face Recognition function [Face Recog.] ■ Recording tips when registering face pictures • Make sure the subject’s eyes are open and mouth closed; have the subject face the camera directly, and make sure the outline of the face, the eyes and eyebrows are not hidden by hair. -
Page 139: Useful Features For Travel
Application (Record) Useful features for travel [Travel Date] If you set your travel schedule and record pictures, the day of your trip on which the picture was taken will be recorded. Select [Travel Date] from the [Setup] menu (→61) to select [Travel Setup] and press [MENU/SET] to select [SET] and press [MENU/SET] to select the departure date and press [MENU/SET]... -
Page 140: [World Time]
Application (Record) Useful features for travel [World Time] Set the recording date and time with the local time at your destination. • Set [Home] when you use the camera for the first time after purchasing it. You can set [Destination] after setting [Home]. Select [World Time] from the [Setup] menu (→61) to select [Destination] or [Home] and press... -
Page 141: Using The [Rec] Menu
Application (Record) Using the [Rec] menu You can perform settings such as tones, Sensitivity, Aspect Ratio, and Picture Size. • For the setting procedures of the menu. (→61) [Aspect Ratio] ■ Recording mode: Set the aspect ratio of still pictures. ■... -
Page 142: [Quality]
Application (Record) Using the [Rec] menu ● Mosaic effect may appear depending on subject and recording conditions. ● Cannot be set in the following cases: • Scene Modes ([High Sens.], [3D Photo Mode]) • When [Quality] is set to [ •... -
Page 143: [Sensitivity]
Application (Record) Using the [Rec] menu • For the setting procedures of the menu. (→61) [Sensitivity] ■ Recording mode: Set ISO Sensitivity (sensitivity to lighting) manually. We recommend higher settings to take clear pictures in darker locations. ■ Settings: [AUTO] / [ ] / [80] / [100] / [200] / [400] / [800] / [1600] / [3200] / [6400] Setting guide [Sensitivity]... -
Page 144: [Iso Limit Set]
Application (Record) Using the [Rec] menu • For the setting procedures of the menu. (→61) [ISO Limit Set] ■ Recording mode: You can set the upper limit of ISO Sensitivity when [Sensitivity] is set to [AUTO] or [ ■ Settings: [AUTO] / [200] / [400] / [800] / [1600] / [3200] / [6400] ●... -
Page 145: [White Balance]
Application (Record) Using the [Rec] menu • For the setting procedures of the menu. (→61) [White Balance] ■ Recording mode: Adjust the colour depending on the light source to ensure natural colour. ■ Settings AWB (automatic white balance) Automatic adjustment in accordance with the light source. Adjust to the colour under a clear sky. - Page 146 Application (Record) Using the [Rec] menu ■ White Balance fine adjustment (excluding [AWB]) White Balance settings can be individually fine-tuned if colours still do not appear as anticipated. Select the White Balance to be fine-tuned, and press the [DISP.] button to display the [WB Adjust.] screen Turn the control ring or the control dial to the right if red is strong and to the left if blue is strong...
-
Page 147: [Af Mode]
Application (Record) Using the [Rec] menu • For the setting procedures of the menu. (→61) [AF Mode] ■ Recording mode: For details (→89). [Quick AF] ■ Recording mode: The focus is automatically adjusted when camera blurring is small even when the shutter button is not pressed. -
Page 148: [Metering Mode]
Application (Record) Using the [Rec] menu • For the setting procedures of the menu. (→61) [Metering Mode] ■ Recording mode: You can change the position for measuring brightness when correcting exposure. ■ Settings [Metering Mode] Brightness measurement position Conditions Normal usage Whole screen (produces balanced pictures) [Multi Metering]... -
Page 149: [Min. Shtr Speed]
Application (Record) Using the [Rec] menu • For the setting procedures of the menu. (→61) [Min. Shtr Speed] ■ Recording mode: Sets the minimum value for the shutter speed. We recommend using slower shutter speeds to take brighter pictures in dark locations. ■... -
Page 150: [Time Lapse Shot]
Application (Record) Using the [Rec] menu • For the setting procedures of the menu. (→61) [Time Lapse Shot] ■ Recording mode: You can preset the recording start time, the recording interval, and the number of pictures to take still pictures automatically. This setting is convenient for taking pictures of landscape scenes, observation of the gradual changes in animals/plants etc., and other applications from a fixed point. - Page 151 Application (Record) Using the [Rec] menu Press to select [Start Shooting] and press [MENU/SET] Press the shutter button fully • The recording starts automatically. • If the recording interval is set to 40 seconds or more, this camera will turn off automatically while in recording standby.
-
Page 152: [Af Assist Lamp]
Application (Record) Using the [Rec] menu • For the setting procedures of the menu. (→61) [AF Assist Lamp] ■ Recording mode: Illuminates lamp when dark to facilitate focus alignment. ■ Settings [ON] Lamp illuminated with halfway press of shutter button. ([ ] appears.) [OFF] Lamp is not illuminated. -
Page 153: [Motion Deblur]
Application (Record) Using the [Rec] menu • For the setting procedures of the menu. (→61) [Motion Deblur] ■ Recording mode: For details (→38). [iHandheld Night Shot] ■ Recording mode: For details (→39). [iHDR] ■ Recording mode: For details (→40). [Stabilizer] ■... -
Page 154: [Date Stamp]
Application (Record) Using the [Rec] menu • For the setting procedures of the menu. (→61) [Date Stamp] ■ Recording mode: Still pictures can be taken with the recording date and time stamped on the still picture. ■ Settings: [W/O TIME] / [WITH TIME] / [OFF] ●... -
Page 155: Using The [Motion Picture] Menu
Application (Record) Using the [Motion Picture] menu You can select the recording mode and picture quality and other settings. • For the setting procedures of the menu. (→61) [Rec Format] ■ Recording mode: Sets the data format of the motion picture that is recorded. ■... -
Page 156: [Still Picture Size]
Application (Record) Using the [Motion Picture] menu ■ About motion picture icon [Rec Format] Picture size ● What is bit rate Bit rate is the volume of data for a definite period of time, and the quality becomes higher when the number gets bigger. This unit uses the “VBR” recording method. “VBR”... -
Page 157: [Continuous Af]
Application (Record) Using the [Motion Picture] menu • For the setting procedures of the menu. (→61) [Continuous AF] ■ Recording mode: Either allow the focus to be constantly adjusted during motion picture recording, or fix the focus position at the start of recording. ■... -
Page 158: [Wind Cut]
Application (Record) Using the [Motion Picture] menu • For the setting procedures of the menu. (→61) [Wind Cut] ■ Recording mode: Automatically detects wind sounds (wind noise) captured by the microphones and suppresses the sound if the wind is blowing too strongly. ■... -
Page 159: Application (View)
Application (View) Changing the picture information display, etc. You can disable the display of picture information (file number, etc.) and recording information (settings used for recording, etc.) when a picture is played back. Press [DISP.] button to change display Has picture information Has recording information (recording date and time, etc.) ([Flash], [Sensitivity] etc.) -
Page 160: Viewing The Group Picture
Application (View) Viewing the group picture You can consecutively play back multiple pictures in a group or play back group pictures one by one. ]: Group pictures recorded consecutively by setting [Burst] to [ ] or [ (→103) ]: Group pictures recorded using [Time Lapse Shot] (→150) A representative picture (the first picture in a group) is displayed when it is displayed together with other still pictures or with motion pictures. - Page 161 Application (View) Viewing the group picture ■ Playing back group pictures one by one Select a picture with the group picture icon ([ ] or [ ]), and press to scroll through the pictures • Press again to return to the normal playback screen. •...
- Page 162 Application (View) Viewing the group picture ● If only one still picture is left over in a picture group after deletion or other operations, it will not be formed into a group. ● Burst pictures will not be grouped if recorded without setting the clock. ●...
-
Page 163: Different Playback Methods [Playback Mode]
Application (View) Different playback methods [Playback Mode] Recorded pictures can be played back in a variety of ways. To change the playback mode, refer to and perform the following steps. Press [MENU/SET] in playback mode The menu selection screen is displayed. to select [Playback Mode] menu and press [MENU/SET] to select the playback mode and press [MENU/SET]... -
Page 164: Selecting Pictures To Play Back [Filtering Play]
Application (View) Selecting pictures to play back [Filtering Play] You can narrow down the pictures to be displayed with set filters, such as recording dates, categories, or favourite pictures. Select [Filtering Play] from the [Playback Mode] menu (→163) to select the filtering method and press [MENU/SET] [Picture Only] Play back still pictures. -
Page 165: Narrowing Down By Selecting Picture Type
Application (View) Selecting pictures to play back [Filtering Play] Narrowing down by selecting picture type Select picture type, such as still pictures only or motion pictures only, then play them back. Select [Picture Only] / [Video Only] / [3D Play] in [Filtering Play] and press [MENU/SET] (→164) Play back still pictures. -
Page 166: Narrowing Down By Selecting Picture Category Or A Person In The Picture
Application (View) Selecting pictures to play back [Filtering Play] Narrowing down by selecting picture category or a person in the picture Play back pictures that have been narrowed down by category, such as Scene Mode. Also, from among the pictures recorded using the Face Recognition function (→136), select a person in the picture and play back. -
Page 167: Narrowing Down By Selecting Recording Date
Application (View) Selecting pictures to play back [Filtering Play] Narrowing down by selecting recording date Select the recorded date, and play the pictures back. Select [Select Date] in [Filtering Play] and press [MENU/SET] (→164) to select recording date and press [MENU/SET] ■... -
Page 168: Playing Back Pictures In Order Automatically [Slide Show]
Application (View) Playing back pictures in order automatically [Slide Show] Automatically play pictures in order. Recommended when viewing on TV screen. Select [Slide Show] from the [Playback Mode] menu (→163) to select [Start] and press [MENU/SET] ■ To select pictures for automatic play back If you have previously selected the pictures to display in [Filtering Play] of the [Playback Mode] menu, the Slide Show will play back the same pictures. - Page 169 Application (View) Playing back pictures in order automatically [Slide Show] ■ Operations during Slide Show ● Cursor button The operation guide appears on the bottom right on the screen. Pause/Play Volume down Volume up Previous Next Stop • If you do not perform any operation for approx. 2 seconds, the operation guide is turned off.
-
Page 170: Searching By Recording Date [Calendar]
Application (View) Searching by recording date [Calendar] You can search for pictures by the date they were recorded. Select [Calendar] from the [Playback Mode] menu (→163) to select recording date to display • Only months when pictures were taken are shown on the calendar screen. -
Page 171: Retouching Pictures
Application (View) Retouching pictures [Auto Retouch] You can adjust the colour and brightness of a still picture to bring them into balance. • New pictures are created after editing pictures with [Auto Retouch]. Before starting to edit, make sure that there is enough free space in the built-in memory or on the memory card. -
Page 172: [Creative Retouch]
Application (View) Retouching pictures [Creative Retouch] You can retouch recorded still pictures by selecting the effect that you want to apply. • New pictures are created after editing pictures with [Creative Retouch]. Before starting to edit, make sure that there is enough free space in the built-in memory or memory card. - Page 173 Application (View) Retouching pictures Setting Effect [Miniature Effect] This effect blurs peripheral areas to give the impression of a diorama. [Soft Focus] This effect blurs the overall image to produce a soft feel. [Star Filter] This effect transforms pin-points of light into a star effect. [One Point Color] This effect leaves one selected colour to emphasise impressiveness.
-
Page 174: Using The [Playback] Menu
Application (View) Using the [Playback] menu You can specify picture protection, cropping, print settings, and other settings for pictures you have taken. • For the setting procedures of the menu. (→61) • The setting methods vary depending on the menu item. ●... - Page 175 Application (View) Using the [Playback] menu ■ Abort writing location information Press [MENU/SET] while location information is being written • [ ] is displayed for the period of the abort operation. If selected again while [ ] is displayed, writing location information will resume where it left off.
-
Page 176: [Title Edit]
Application (View) Using the [Playback] menu • For the setting procedures of the menu. (→61) [Title Edit] You can give titles, etc. to your favourite still pictures. to select [SINGLE] or [MULTI] and press [MENU/SET] Select a still picture ● ●... -
Page 177: [Text Stamp]
Application (View) Using the [Playback] menu • For the setting procedures of the menu. (→61) [Text Stamp] You can stamp the recording date and time, names, travel destination, travel dates, etc. on the recorded still pictures. to select [SINGLE] or [MULTI] and press [MENU/SET] Select a still picture ●... -
Page 178: [Retouch]
Application (View) Using the [Playback] menu ■ Items that can be stamped [Shooting Date] [W/O TIME]: Stamp recording date [WITH TIME]: Stamp recording date and time [Name] : Stamp name registered in Face Recognition : Stamp name registered in [Baby] or [Pet] [Location] Stamp location registered in [Setup] menu’s [Travel Date] [Travel Date]... -
Page 179: [Video Divide]
Application (View) Using the [Playback] menu • For the setting procedures of the menu. (→61) [Video Divide] A single motion picture can be split into 2 parts. This function is convenient when you are travelling, for example, and you just want to keep necessary scenes, or you wish to delete unnecessary scenes to free up space on the built-in memory or your card. -
Page 180: [Time Lapse Video]
Application (View) Using the [Playback] menu • For the setting procedures of the menu. (→61) [Time Lapse Video] You can create a motion picture from the pictures in a group that was recorded using [Time Lapse Shot]. The motion picture you created is saved in the MP4 recording format. Press to select group pictures you want to use to create a motion picture and then press [MENU/SET]... -
Page 181: [Resize]
Application (View) Using the [Playback] menu • For the setting procedures of the menu. (→61) [Resize] Picture size can be reduced to facilitate e-mail attachment and use in web pages, etc. (Still pictures recorded at the smallest recording pixel level cannot be further reduced.) ■... - Page 182 Application (View) Using the [Playback] menu ■ [MULTI] to select [MULTI] and press [MENU/SET] to select size and press [MENU/SET] to select a still picture and press [DISP.] button (up to 100 pictures) • To cancel Number of pixels before/after →...
-
Page 183: [Cropping]
Application (View) Using the [Playback] menu • For the setting procedures of the menu. (→61) [Cropping] Enlarge your still pictures and crop unwanted areas. to select a still picture and press [MENU/SET] Select area to crop and press [MENU/SET] Expand Change position •... -
Page 184: [Favorite]
Application (View) Using the [Playback] menu • For the setting procedures of the menu. (→61) [Favorite] By labelling your favourite pictures with a star ( ), you can play back your favourite pictures only, or you can delete all pictures except your favourites. Up to 999 pictures can be set as favourites. -
Page 185: [Print Set]
Application (View) Using the [Playback] menu • For the setting procedures of the menu. (→61) [Print Set] Picture/picture no./date printing settings can be made for when printing with DPOF print- compatible shops or printers. (Ask at the shop to check for compatibility.) to select [SINGLE] or [MULTI] and press [MENU/SET] to select picture and press [MENU/SET] to set number of pictures and press [MENU/SET]... -
Page 186: [Protect]
Application (View) Using the [Playback] menu • For the setting procedures of the menu. (→61) [Protect] Set protection to disable picture deletion. Prevents deletion of important pictures. to select [SINGLE] or [MULTI] and press [MENU/SET] to select picture and press [MENU/SET] ●... -
Page 187: [Face Rec Edit]
Application (View) Using the [Playback] menu • For the setting procedures of the menu. (→61) [Face Rec Edit] Edit or delete the recognition information for pictures with mistaken Face Recognition. to select [REPLACE] or [DELETE] and press [MENU/SET] to select picture and press [MENU/SET] to select a person and press [MENU/SET] •... -
Page 188: [Copy]
The following settings are not copied. Set them again after copying. • [Print Set] • [Protect] • [Favorite] ● Only pictures from Panasonic digital cameras (LUMIX) may be copied. ● Motion pictures recorded in [AVCHD] format cannot be copied. - 188 - SQW0215... -
Page 189: Wi-Fi/Nfc
LAN devices, ensure that the appropriate measures are taken for safety designs and defects for the systems used. Panasonic will not take any responsibility for any damage that arises when using the camera for any purpose other than as a wireless LAN device. - Page 190 Wi-Fi/NFC Wi-Fi ® Function and NFC Function ■ About the Wi-Fi connection lamp Wi-Fi connection lamp Lit blue: When the Wi-Fi function is ON Blinking blue: When sending data ■ About the [Wi-Fi] button ● If you press the [Wi-Fi] button before a Wi-Fi connection is established, you can connect a smartphone/tablet directly to this unit.
-
Page 191: [Airplane Mode]
Wi-Fi/NFC Wi-Fi ® Function and NFC Function ● The camera cannot be used to connect to a public wireless LAN connection. ● Use a IEEE802.11b, IEEE802.11g or IEEE802.11n compatible device when using a wireless access point. ● We recommend that you use a fully charged battery when you send pictures. ●... -
Page 192: What You Can Do With The Wi-Fi Function
Wi-Fi/NFC What you can do with the Wi-Fi function Operating the camera using a smartphone/tablet Taking pictures via a smartphone/tablet (remote recording) (→203) Playing back pictures in the camera on a smartphone/tablet (→204) Saving pictures in the camera to the smartphone/tablet (→204) Sending pictures in the camera to social networking services (→207) -
Page 193: Operating The Camera Using A Smartphone/Tablet
The “Panasonic Image App” (hereafter “Image App”) must be installed on your smartphone. Installing the smartphone/tablet app “Panasonic Image App” The “Image App” is an application provided by Panasonic that allows your smartphone to perform the following operations of a Wi-Fi-compatible LUMIX. For Android™ apps For iOS apps Supported OS Android 2.3.3 or later... -
Page 194: Connecting To A Smartphone/Tablet
Wi-Fi/NFC Operating the camera using a smartphone/tablet Connecting to a smartphone/tablet You can easily establish a Wi-Fi connection on this unit without entering a password on your smartphone. [Wi-Fi Password] is set to [OFF] at the time of purchase. In [OFF] state, a third party can tap into the Wi-Fi transmission and steal transmitted data. - Page 195 Wi-Fi/NFC Operating the camera using a smartphone/tablet Operate the smartphone • When a connection is established, a message indicating the successful connection will be displayed on the smartphone screen. (It may take some time after the operation for the connection to be established.) •...
-
Page 196: Setting A Password
Wi-Fi/NFC Operating the camera using a smartphone/tablet <Using an Android device> Start “Image App” (→193) Select [ Select the SSID displayed on this unit • When the connection confirmation screen appears on this unit, select [Yes] and press [MENU/SET]. (Only when making a connection for the first time.) ■... - Page 197 Wi-Fi/NFC Operating the camera using a smartphone/tablet Install the profile The message is displayed in the Web browser. • If a passcode is required to unlock the smartphone, you will have to input the passcode. Press the home button to close the Web browser Turn on the Wi-Fi function in the setting menu of the smartphone Select the SSID displayed on the screen of this unit Return to the home screen and start “Image App”...
- Page 198 Wi-Fi/NFC Operating the camera using a smartphone/tablet <Using an Android device> ● When reading a QR Code to connect Start “Image App” (→193) Select [ Read the QR Code displayed on this unit with “Image App” • The smartphone camera may not be able to read the QR code successfully depending on its quality.
- Page 199 Wi-Fi/NFC Operating the camera using a smartphone/tablet ■ Changing the connection method Press [Wi-Fi] button Press [DISP.] button Select [New Connection] and press [MENU/SET] Select [Remote Shooting & View] and press [MENU/SET] Press [DISP.] button When [Wi-Fi Password] When [Wi-Fi Password] is [OFF].
- Page 200 Wi-Fi/NFC Operating the camera using a smartphone/tablet ■ Closing the connection After use, close the connection with the smartphone. When the connection is cancelled, you will be able to record and play back pictures on the camera as normal. (On the camera) Press [Q.MENU/ ] button •...
-
Page 201: Connecting To A Smartphone/Tablet Using Nfc Function
Wi-Fi/NFC Operating the camera using a smartphone/tablet Connecting to a smartphone/tablet using NFC function Using the NFC (Near Field Communication) function, the camera and a smartphone can easily exchange the information needed to establish a Wi-Fi connection. Compatible models: This function can be used with NFC compatible devices with Android (2.3.3 or above). (Not available in certain models) •... - Page 202 Wi-Fi/NFC Operating the camera using a smartphone/tablet Start “Image App” on your smartphone Hold the smartphone close to the [ ] on this unit • It may take some time to complete the connection. • When the connection is complete, live images captured by the camera will be displayed on your smartphone.
-
Page 203: Taking Pictures Via A Smartphone/Tablet (Remote Recording)
Wi-Fi/NFC Operating the camera using a smartphone/tablet ● You can register up to 20 smartphones. If the number of registered smartphones exceeds 20, registrations will be deleted starting from the smartphone touched first. ● If you perform [Reset Wi-Fi Settings], smartphone registration will be deleted. ●... -
Page 204: Playing Back Pictures In The Camera On A Smartphone/Tablet
Wi-Fi/NFC Operating the camera using a smartphone/tablet Playing back pictures in the camera on a smartphone/tablet Connect to a smartphone (→194) Select [ ] from “Image App” • The images captured by the camera are displayed on the smartphone. • When the picture is touched, it is played back at a larger size. Saving pictures in the camera to the smartphone/tablet Connect to a smartphone (→194) -
Page 205: Easily Transferring Pictures In The Camera
Wi-Fi/NFC Operating the camera using a smartphone/tablet ■ Easily transferring pictures in the camera You can establish a Wi-Fi connection using the NFC function and easily transfer over Wi-Fi the picture on display simply by holding the smartphone close to the camera. Pictures can be transferred as soon as they are recorded, so you can easily transfer them to your friends’... - Page 206 Wi-Fi/NFC Operating the camera using a smartphone/tablet On the camera, play back the picture you wish to transfer to a smartphone Start “Image App” on the smartphone you are transferring the picture to Hold the smartphone close to the [ ] on this unit •...
-
Page 207: Sending Pictures In The Camera To Social Networking Services
Wi-Fi/NFC Operating the camera using a smartphone/tablet Sending pictures in the camera to social networking services Connect to a smartphone (→194) Select [ ] from “Image App” • The images captured by the camera are displayed on the smartphone. Press and hold the picture and drag it to send it to the social networking service, etc. -
Page 208: Adding Location Information To A Picture In The Camera That Is Being Played Back
Wi-Fi/NFC Operating the camera using a smartphone/tablet Adding location information to a picture in the camera that is being played back You can use the NFC function to write location information obtained with your smartphone to a picture that is being played back. Ends location information recording Sending and writing location... - Page 209 Wi-Fi/NFC Operating the camera using a smartphone/tablet ■ Writing location information to a picture Preparations: (On the camera) Set [NFC Operation] to [ON] (→259) (On your smartphone) Start “Image App” Select [ Select [ Play back the recorded pictures (→53) Hold the smartphone close to the [ ] on this unit •...
- Page 210 Wi-Fi/NFC Operating the camera using a smartphone/tablet ● Caution: Be sure to pay special attention to the privacy, the likeness rights, etc. of the subject when you use this function. Use at your own risk. ● You cannot add location information to the following pictures: •...
-
Page 211: Adding Location Information To Pictures In The Camera
Wi-Fi/NFC Operating the camera using a smartphone/tablet Adding location information to pictures in the camera You can write the location information acquired on your smartphone to a picture recorded in the camera on the same date/time using the Wi-Fi function. Ends location information recording Sends and writes the location... - Page 212 Wi-Fi/NFC Operating the camera using a smartphone/tablet ■ Writing location information to a picture Preparations: (On the camera) Connect to a smartphone (→194) Operate the smartphone Start “Image App” Select [ Select [ Select [ ] • Follow the messages on the screen to perform the operation. •...
-
Page 213: Operating The Camera To Send Pictures To A Smartphone Or Tablet
Wi-Fi/NFC Operating the camera using a smartphone/tablet Operating the camera to send pictures to a smartphone or tablet ■ Sending method, and pictures that can be sent JPEG AVCHD Sending a picture each time one is recorded ○ – – –... - Page 214 Wi-Fi/NFC Operating the camera using a smartphone/tablet ■ Sending a picture each time one is recorded ([Send Images While Recording]) Select [New Connection] in the [Wi-Fi] menu, and press [MENU/SET] (→61) Use cursor button to select [Send Images While Recording] and press [MENU/SET] Use cursor button to select [Smartphone] and press [MENU/SET]...
- Page 215 Wi-Fi/NFC Operating the camera using a smartphone/tablet Select [Via Network] or [Direct] and press [MENU/SET] ● When connecting with [Via Network] (On the camera) Connect the camera to a wireless access point (→250) (On your smartphone) Set Wi-Fi function to “ON” Select the wireless access point you connected to the camera, and set Start “Image App”...
- Page 216 Wi-Fi/NFC Operating the camera using a smartphone/tablet ■ Sending selected pictures ([Send Images Stored in the Camera]) Select [New Connection] in the [Wi-Fi] menu, and press [MENU/SET] (→61) Use cursor button to select [Send Images Stored in the Camera] and press [MENU/SET] Use cursor button to select [Smartphone] and press [MENU/SET] (Continued on the next page)
- Page 217 Wi-Fi/NFC Operating the camera using a smartphone/tablet Select [Via Network] or [Direct] and press [MENU/SET] ● When connecting with [Via Network] (On the camera) Connect the camera to a wireless access point (→250) (On your smartphone) Set Wi-Fi function to “ON” Select the wireless access point you connected to the camera, and set Start “Image App”...
-
Page 218: Displaying Still Pictures On A Tv
Wi-Fi/NFC Displaying still pictures on a TV You can display still pictures on a TV that is compatible with a DLNA certified digital media renderer (DMR) function. Preparations: Set the TV to DLNA waiting Mode. • Read the operating instructions for your TV. Select [New Connection] in the [Wi-Fi] menu, and press [MENU/SET] (→61) -
Page 219: Wireless Printing
Wi-Fi/NFC Wireless printing You can send still pictures to a compatible printer and print them wirelessly. ■ Sending method, and pictures that can be sent JPEG AVCHD Sending selected pictures ○ – – – – [Send Images Stored in the Camera] •... -
Page 220: Sending Pictures To Av Equipment
Wi-Fi/NFC Sending pictures to AV equipment Still pictures and motion pictures can be sent to AV equipment in the home (home AV equipment), such as DLNA compatible recorders. You can make a setting so that pictures in the camera can be sent to AV equipment automatically while the camera battery is charging. - Page 221 Wi-Fi/NFC Sending pictures to AV equipment ■ Sending a picture each time one is recorded ([Send Images While Recording]) Select [New Connection] in the [Wi-Fi] menu, and press [MENU/SET] (→61) Use cursor button to select [Send Images While Recording], and then press [MENU/SET] Use cursor button to select [AV device], and then press [MENU/SET] Select [Via Network] or [Direct] to connect...
- Page 222 Wi-Fi/NFC Sending pictures to AV equipment ■ Sending selected pictures ([Send Images Stored in the Camera]) Select [New Connection] in the [Wi-Fi] menu, and press [MENU/SET] (→61) Use cursor button to select [Send Images Stored in the Camera], and then press [MENU/SET] Use cursor button to select [AV device], and then press [MENU/SET] Select [Via Network] or [Direct] to connect...
-
Page 223: Sending Pictures To A Pc
Wi-Fi/NFC Sending pictures to a PC Still pictures and motion pictures recorded by the camera can be sent to a PC. You can make a setting so that pictures in the camera can be sent to a PC automatically while the camera battery is charging. ([Smart Transfer] (→242)) ■... - Page 224 Wi-Fi/NFC Sending pictures to a PC ■ To create a folder that receives images • Create a PC user account (account name (up to 254 characters) and password (up to 32 characters)) consisting of alphanumeric characters. An attempt to create a receive folder may fail if the account includes non-alphanumeric characters.
- Page 225 Wi-Fi/NFC Sending pictures to a PC ■ Sending a picture each time one is recorded ([Send Images While Recording]) Select [New Connection] in the [Wi-Fi] menu, and press [MENU/SET] (→61) Use cursor button to select [Send Images While Recording] and press [MENU/SET] Use cursor button to select [PC] and press [MENU/SET] Select [Via Network] or [Direct] to connect (→249)
- Page 226 Wi-Fi/NFC Sending pictures to a PC ■ Sending selected pictures ([Send Images Stored in the Camera]) Select [New Connection] in the [Wi-Fi] menu, and press [MENU/SET] (→61) Use cursor button to select [Send Images Stored in the Camera], and then press [MENU/SET] Use cursor button to select [PC] and press [MENU/SET] Select [Via Network] or [Direct] to connect (→249)
- Page 227 Wi-Fi/NFC Sending pictures to a PC ● Folders sorted by the sent date are created in the specified folder, and pictures are saved in those folders. ● If the screen for a user account and password entry appears, enter the one you set on your PC.
-
Page 228: Using Web Services
Wi-Fi/NFC Using WEB services Through “LUMIX CLUB”, you can send still pictures and motion pictures to social networking services, etc. By selecting the setting to automatically transfer still pictures and motion pictures to [Cloud Sync. Service], you can receive the transferred still pictures and motion pictures on a PC or a smartphone. -
Page 229: When Sending Images To Web Service
Wi-Fi/NFC Using WEB services When sending images to WEB service ■ Sending method, and pictures that can be sent JPEG AVCHD Sending a picture each time one is recorded ○ – – – ○ [Send Images While Recording] Sending selected pictures ○... - Page 230 When uploading images to the WEB service, do not delete images from this camera, even after they have finished sending, until you have checked that they have been properly uploaded to the WEB service. Panasonic assumes no responsibility for the damages resulting from the deletion of images stored in this unit.
- Page 231 WEB services will send images to all services simultaneously. • Check the “FAQ/Contact us” on the following site for compatible WEB services. http://lumixclub.panasonic.net/eng/c/lumix_faqs/ Preparation: Make sure that you have created an account on the WEB service you want to use, and have the login information available.
- Page 232 Wi-Fi/NFC Using WEB services ■ Sending a picture each time one is recorded ([Send Images While Recording]) Select [New Connection] in the [Wi-Fi] menu, and press [MENU/SET] (→61) Use cursor button to select [Send Images While Recording], and then press [MENU/SET] Use cursor button to select [Web service], and then press [MENU/SET] Select [Via Network] and connect...
- Page 233 Wi-Fi/NFC Using WEB services ■ Sending selected pictures ([Send Images Stored in the Camera]) Select [New Connection] in the [Wi-Fi] menu, and press [MENU/SET] (→61) Use cursor button to select [Send Images Stored in the Camera], and then press [MENU/SET] Use cursor button to select [Web service], and then press [MENU/SET] Select [Via Network] and connect...
-
Page 234: When Sending Images To [Cloud Sync. Service]
Wi-Fi/NFC Using WEB services When sending images to [Cloud Sync. Service] ■ Sending method, and pictures that can be sent JPEG AVCHD Sending a picture each time one is recorded ○ – – – ○ [Send Images While Recording] Sending selected pictures ○... - Page 235 Wi-Fi/NFC Using WEB services ■ Sending a picture each time one is recorded ([Send Images While Recording]) Select [New Connection] in the [Wi-Fi] menu, and press [MENU/SET] (→61) Use cursor button to select [Send Images While Recording], and then press [MENU/SET] Use cursor button to select [Cloud Sync.
- Page 236 Wi-Fi/NFC Using WEB services ■ Sending selected pictures ([Send Images Stored in the Camera]) Select [New Connection] in the [Wi-Fi] menu, and press [MENU/SET] (→61) Use cursor button to select [Send Images Stored in the Camera], and then press [MENU/SET] Use cursor button to select [Cloud Sync.
-
Page 237: Using "Lumix Club
• You can set the same “LUMIX CLUB” login ID for this unit and a smartphone. (→240) Refer to the “LUMIX CLUB” site for details. http://lumixclub.panasonic.net/eng/c/ Please note; • The service may be suspended due to regular maintenance or unexpected problems, and service contents may be changed or added to, without prior notice to the users. - Page 238 Wi-Fi/NFC Using “LUMIX CLUB” Select the method for connecting to a wireless access point, and set • For details (→250). • The settings screen will only appear during the first connection. Connection methods set on this unit are stored and will be used for subsequent connections. If you want to change the wireless access point to connect to, press the [DISP.] button, then change the connecting destination.
- Page 239 Wi-Fi/NFC Using “LUMIX CLUB” ■ Using a previously acquired login ID/confirming and changing login ID and password ([Set Login ID]) Preparation: To use a previously acquired login ID, confirm your ID and password. To change the “LUMIX CLUB” password on the camera, access the “LUMIX CLUB” website from your smartphone or PC and change the “LUMIX CLUB”...
- Page 240 Wi-Fi/NFC Using “LUMIX CLUB” ■ To set the same login ID for the camera and the smartphone/tablet • Setting the same login ID on this unit and your smartphone is convenient for sending images on this unit to other devices or WEB services. ■...
- Page 241 Wi-Fi/NFC Using “LUMIX CLUB” ■ Delete your login ID and account from the “LUMIX CLUB” Delete the login ID from the camera when transferring it to another party or disposing of it. You can also delete your “LUMIX CLUB” account. Select [Wi-Fi Setup] in the [Wi-Fi] menu, and press [MENU/SET] (→61)
-
Page 242: Transferring Pictures Automatically [Smart Transfer]
Wi-Fi/NFC Transferring pictures automatically [Smart Transfer] [Smart Transfer] automatically transfers pictures from your camera to your PC, AV equipment or Cloud Folder. [Auto Transfer] automatically transfers pictures while charging the camera, and [Transfer Now] transfers the recorded pictures immediately. Example: [Auto Transfer] AC adaptor [Auto Transfer] (supplied) - Page 243 When [Auto Transfer] is set to [ON], the camera automatically uploads recorded pictures. For this reason pictures may be uploaded unintentionally if, for example, you share this unit with other people. Panasonic assumes no responsibility for any damages caused by uploaded images.
-
Page 244: Setting [Smart Transfer]
Wi-Fi/NFC Transferring pictures automatically [Smart Transfer] Setting [Smart Transfer] The first time you use [Smart Transfer], follow the steps below to make settings. For the second and subsequent times, you can change the settings with [Set Destination] (→247). Select [Wi-Fi Setup] in the [Wi-Fi] menu, and press [MENU/SET] (→61) Use cursor button to select [Smart Transfer] and press... -
Page 245: [Auto Transfer]
Wi-Fi/NFC Transferring pictures automatically [Smart Transfer] [Auto Transfer] Automatically transfer pictures during charging. Preparation: Set [Smart Transfer]. (→244) Turn off the camera (When using a power outlet) Connect the AC adaptor (supplied) and the camera using the USB connection cable (supplied), and plug the AC adaptor (supplied) into the electrical outlet (When using a PC) Connect the camera to a computer using the USB connection... -
Page 246: [Transfer Now]
Wi-Fi/NFC Transferring pictures automatically [Smart Transfer] [Transfer Now] Transfer pictures to the preset destination immediately. Preparation: Set [Smart Transfer]. (→244) Connect the AC adaptor (supplied) and the camera using the USB connection cable (supplied), and plug the AC adaptor (supplied) into the electrical outlet •... -
Page 247: [Set Destination]
Wi-Fi/NFC Transferring pictures automatically [Smart Transfer] [Set Destination] Changes transfer destination of pictures and settings. Select [Wi-Fi Setup] in the [Wi-Fi] menu, and press [MENU/SET] (→61) Use cursor button to select [Smart Transfer] and press [MENU/SET] Use cursor button to select [Set Destination] and press [MENU/SET] Use cursor button to select an item and press [MENU/SET] Item... -
Page 248: [Charge Priority]
Wi-Fi/NFC Transferring pictures automatically [Smart Transfer] [Charge Priority] Set priority to charge or picture transfer. Select [Wi-Fi Setup] in the [Wi-Fi] menu, and press [MENU/SET] (→61) Use cursor button to select [Smart Transfer] and press [MENU/SET] Use cursor button to select [Charge Priority] and press [MENU/SET] Use cursor button to select an item and press [MENU/SET] Item... -
Page 249: About Connections
Wi-Fi/NFC About connections After selecting the Wi-Fi function and sending destination, select the connection method. If you are out and unable to use your wireless access point, or temporarily connecting to equipment you do not ordinarily use, or in a similar situation, it is convenient to make a direct connection. -
Page 250: [Via Network] Connecting Via A Wireless Access Point
Wi-Fi/NFC About connections [Via Network] Connecting via a wireless access point Select a connection method to the wireless access point. • WPS refers to a function that allows you to easily configure the settings related to the connection and security of wireless LAN devices. - Page 251 Wi-Fi/NFC About connections ■ If you are not sure about the WPS compatibility (connecting by [From List]) Search for available wireless access points. • Confirm encryption key of the selected wireless access point if the network authentication is encrypted. • When connecting by [Manual Input], confirm SSID, network authentication type, encryption type, encryption key of the wireless access point you are using.
- Page 252 Wi-Fi/NFC About connections ■ When connecting with [Manual Input] On the screen of step of “If you are not sure about the WPS compatibility (connecting by [From List])”, select [Manual Input] (→251) Enter the SSID of the wireless access point you are connecting to, then select [Set] •...
-
Page 253: [Direct] Connecting Directly
Wi-Fi/NFC About connections [Direct] Connecting directly You can select the connection method to your equipment. Select a connection method with which your equipment is compatible. • To connect this unit with [Wi-Fi Direct], Android OS 4.0 or above is required and the device must be compatible with Wi-Fi Direct™. -
Page 254: Connecting Quickly With The Same Settings As Used Previously ([History Connection] / [Favorite Connection])
Wi-Fi/NFC About connections Connecting quickly with the same settings as used previously ([History Connection] / [Favorite Connection]) The camera keeps a History of times you used the Wi-Fi function. You can register items in the History to Favourite. You can easily connect with the same settings as used previously by connecting from History or Favourite. - Page 255 Wi-Fi/NFC About connections ■ Registering History items to Favourite Select [History Connection] from the [Wi-Fi] menu (→61) Select the item you wish to register and press Enter a registration name • For details on how to enter characters, refer to “Entering Text” (→76). •...
- Page 256 Wi-Fi/NFC About connections ■ Editing items registered in Favourite Select [Favorite Connection] from the [Wi-Fi] menu (→61) Select the Favourite item you wish to edit and press Select item Item Description [Remove from Favorite] — [Change the Order in Select the destination. Favorite] •...
-
Page 257: Settings For Sending Pictures
Wi-Fi/NFC About connections Settings for sending pictures When sending pictures, first select [New Connection], then select the method of sending pictures. After you have completed connecting, you can also change the sending settings, such as the size of pictures to be sent. ■... -
Page 258: Changing The Settings For Sending Images
Wi-Fi/NFC About connections ■ Changing the settings for sending images After you have completed connecting, you can change the sending settings, such as the size of pictures to be sent, by pressing the [DISP.] button. Item Description Resize the image to send. [Original]/[Auto] /[Change] •... -
Page 259: [Wi-Fi Setup] Menu
Wi-Fi/NFC [Wi-Fi Setup] menu Configure the settings required for the Wi-Fi function. [Wi-Fi Setup] cannot be changed when connected to Wi-Fi. (excluding [Network Address]) • For details on how to select the [Setup] menu settings, refer to (→61). Select [Wi-Fi Setup] in the [Wi-Fi] menu Use cursor button to select item, and press [MENU/SET] Item Description... - Page 260 Wi-Fi/NFC [Wi-Fi Setup] menu • For details on how to select the [Setup] menu settings, refer to (→61). Item Description [Wi-Fi Function Lock] Setting a password will automatically display the password input To prevent incorrect operation screen when the Wi-Fi function is used. or use of the Wi-Fi function [Setup]: by a third party and to protect...
-
Page 261: Connecting With Other Devices
Connecting with other devices Viewing on TV screen You can view pictures on a TV screen by connecting your camera to your TV with the HDMI micro cable or AV cable (optional). ● Also consult TV operating manual. Preparation: • Set [TV Aspect] to connect your camera to a TV using the AV cable (optional) (→73). •... - Page 262 When you insert a card into the SD card slot in a television or a DVD recorder, you can play back recorded still pictures. • AVCHD motion pictures can be played back on Panasonic televisions (VIERA) displaying the AVCHD logo.
-
Page 263: Viera Link (Hdmi) (Hdavi Control™)
CEC-compatible devices. Refer to your product manual to verify compatibility with VIERA Link (HDMI). ● This camera supports VIERA Link (HDMI) Version 5. This is the Panasonic standard that also supports previous Panasonic VIERA Link devices. ● Use a “High Speed HDMI micro cable” with the HDMI logo. Cables that do not comply with the HDMI standards will not work. - Page 264 Viewing on TV screen Preparation: Set [VIERA Link] to [ON] (→74). Connect the camera to a VIERA Link (HDMI)-compatible Panasonic television (VIERA) with an HDMI micro cable (→261) Turn on the camera and press the Playback button • By holding down the Playback button while the camera is turned off, you can turn the camera on in playback mode.
-
Page 265: Viewing 3D Still Pictures
Display still pictures recorded in 3D • When the [VIERA Link] setting on the camera is set to [ON] and the camera is connected to a VIERA Link (HDMI)-compatible Panasonic television (VIERA), the television automatically switches its input and the playback screen is displayed. - Page 266 TV.) ● During 3D playback, the [Wi-Fi] menu, [Setup] menu, [Playback] menu, Playback Zoom, and delete operation cannot be used. ● You can store 3D still pictures on a computer or Panasonic recorder. (→267, 268) - 266 - SQW0215...
-
Page 267: Storing Recorded Still Pictures And Motion Pictures In The Recorder
Follow the correct method for your device. Copying by inserting the card into the recorder You can copy pictures using Panasonic equipment (such as Blu-ray disc recorders) with support for each file format. • See the instruction manual for the recorder for details for copying and playing back. -
Page 268: Storing Recorded Still Pictures And Motion Pictures On Your Pc
(Do not format the card. This will erase recorded pictures.) If the card is not recognised, refer to the following support website. http://panasonic.net/avc/sdcard/information/SDXC.html ■ Computer specifications You can connect the camera to a computer that can detect a mass storage device (device that stores a large volume of data). -
Page 269: About Supplied Software
Connecting with other devices Storing recorded still pictures and motion pictures on your PC About supplied software The supplied CD-ROM contains the following software. Install the software on your computer before using. ■ PHOTOfunSTUDIO 9.6 PE You can capture still pictures or motion pictures to your PC, or organise captured pictures by categorising by recording date, model name of the digital camera used to record, etc. -
Page 270: Installing Supplied Software
Connecting with other devices Storing recorded still pictures and motion pictures on your PC ■ LoiLoScope 30 day full trial version (Windows 8.1 / 8 / 7 / Vista) LoiLoScope is a video editing software that draws out the full power of your PC. Creating videos is as easy as organising cards on top of a desk. -
Page 271: Downloading Silkypix Developer Studio Se
Connecting with other devices Storing recorded still pictures and motion pictures on your PC Downloading SILKYPIX Developer Studio SE This software develops and edits RAW file pictures. Edited pictures can be saved in a file format such as JPEG or TIFF that can be displayed on a PC, etc. ■... -
Page 272: Copying Still Pictures And Motion Pictures
Connect camera to computer • Do not use any other USB connection cables except the supplied one or a genuine Panasonic USB connection cable (DMW-USBC1: optional). Using cables other than the above may cause a malfunction. to select [PC] and press [MENU/SET] Use “PHOTOfunSTUDIO”... - Page 273 Connecting with other devices Storing recorded still pictures and motion pictures on your PC ■ Copying to your computer without using “PHOTOfunSTUDIO” (except AVCHD motion pictures) You can save pictures to use on your computer by dragging and dropping folders and files into separate folders on your computer.
- Page 274 Connecting with other devices Storing recorded still pictures and motion pictures on your PC ■ For PTP mode The camera can be connected to your computer even if [USB Mode] (→73) is set to [PictBridge(PTP)]. • Only picture output can be performed. •...
-
Page 275: Printing
Connect camera to printer • Do not use any other USB connection cables except the supplied one or a genuine Panasonic USB connection cable (DMW-USBC1: optional). Using cables other than the above may cause a malfunction. to select [PictBridge(PTP)] and press [MENU/SET]... - Page 276 Connecting with other devices Printing ● The group pictures are displayed one by one instead of all pictures at the same time. ● Turn off the camera before inserting or removing memory cards. ● Disconnect USB connection cable (supplied) after printing. ●...
-
Page 277: Printing Multiple Pictures
Connecting with other devices Printing Printing multiple pictures Multiple pictures are printed at one time. Press to select [Multi Print] in step (→275) to select the item and press [MENU/SET] • [Multi Select]: Scroll between pictures with cursor button, select pictures to print with the [DISP.] button. -
Page 278: Making Print Settings On The Camera
Connecting with other devices Printing Making print settings on the camera Setting options include the number of printed pictures and their size. Make settings before selecting [Print start]. to select the item and press [MENU/SET] Item Settings [Print with Date] [ON] / [OFF] [Num.of prints] Set number of pictures (up to 999 pictures) -
Page 279: List Of Lcd Monitor/Viewfinder Displays
Others List of LCD monitor/Viewfinder displays Screens shown here are only examples. The actual display may vary. In recording Recording mode (→30) Backlight Compensation (→36, 40) Rec Format (→155) Rec Quality (→155) Aspect Ratio (→141) Picture Size (→141) Quality (→142) Flash Mode (→86) AF area... - Page 280 Others List of LCD monitor/Viewfinder displays Brightness (→43, 112, 120) Exposure Compensation (→101) Manual Exposure Assistance (→110) AF Tracking (→41, 91) AF Assist Lamp (→152) Metering Mode (→148) AE Lock (→100) Defocus background condition (→37, 43, 112) Programme Shift (→46) F5.9 Aperture value (→45, 107, 109)
- Page 281 Others List of LCD monitor/Viewfinder displays Destination settings (→139) Travel elapsed days (→139) Name (→128, 137) Age in years/months (→128, 137) Current date/time (→140) World time (→140) Focus range (→95) Zoom (→81) - 281 - SQW0215...
-
Page 282: In Playback
Others List of LCD monitor/Viewfinder displays In playback Playback mode (→163) Protected picture (→186) Favourites (→184) Date/text stamped display (→154, 177) Retouched picture (→171, 172) Aspect Ratio (→141) Picture Size (→141) Quality (→142) Remaining battery (→22) Rec Format (→155) Rec Quality (→155) Motion picture recording time (→57) - Page 283 Others List of LCD monitor/Viewfinder displays Folder/File number (→53, 273) Picture number/Total pictures (→53) Elapsed playback time (→57) Recording date/time World time (→140) Name (→128, 137) Age in years/months (→128, 137) Title (→176) Destination settings (→139) Travel elapsed days (→139) Print settings (→185) With location information...
-
Page 284: Message Displays
Others Message displays The following explains the meaning of major messages displayed on the LCD monitor or viewfinder, and how to respond to them. [This memory card cannot be used] ● Not compatible with the camera. Use a compatible card. [Some pictures cannot be deleted] [This picture cannot be deleted] ●... - Page 285 → Message disappears when cable is also connected to another device. [This battery cannot be used] ● Use a genuine Panasonic battery. ● Battery cannot be recognised as terminal is dirty. → Wipe any dirt away from the battery terminal.
- Page 286 Others Message displays [Failed to connect wireless access point] / [Connection failed] / [No destination found] ● Check following regarding the wireless access point. → The wireless access point information set on this unit is wrong. Check the authentication type, encryption type, and encryption key.
- Page 287 Others Message displays [Unavailable. Please set Login settings on LUMIX CLUB web site.] ● Login to the “LUMIX CLUB” from your smartphone or PC, and set the login details of the destination WEB service. [Both picture and video sharing service cannot be selected together] ●...
- Page 288 Performing [Reset] in the [Setup] menu may resolve the issue (→72). (Note that except for some items such as [Clock Set], all settings are returned to their values at the time of purchase.) Also, see the Panasonic support site for the latest support information. http://panasonic.jp/support/global/cs/dsc/ (This site is available in English only.) Battery, power The charging lamp is flashing.
-
Page 289: Q&A Troubleshooting
Others Q&A Troubleshooting Recording Cannot record pictures. ● Built-in memory/card is full. → Free space by deleting unwanted pictures (→59). Recorded pictures look white. ● Lens is dirty (fingerprints, etc.). → Turn the camera on to extract lens barrel, and clean lens surface with a soft, dry cloth. ●... - Page 290 Others Q&A Troubleshooting Recording (continued) Brightness or colouring of recorded picture different from real life. ● When recording under fluorescent or LED lighting fixture etc., increasing the shutter speed may introduce slight changes to brightness and colour. These are a result of the characteristics of the light source and do not indicate a malfunction.
- Page 291 Others Q&A Troubleshooting LCD monitor/Viewfinder The monitor/viewfinder is turned off although the camera is turned on. ● When a hand or object is close to the eye sensor, the monitor display mode could be switched to viewfinder display mode without your knowledge. (→12) Pictures do not show on the LCD monitor.
- Page 292 Others Q&A Troubleshooting Playback Pictures have been rotated. ● [Rotate Disp.] is activated. (→74) Cannot view pictures. There are no recorded pictures. ● No pictures in built-in memory or card (pictures played from card if inserted, from built-in memory if not).
- Page 293 I have forgotten the login ID or password for the “LUMIX CLUB”. ● Check the information in the login screen of “LUMIX CLUB”. http://lumixclub.panasonic.net/eng/c/ I do not have a wireless access point at my home, but I would like to perform service user registration of the “LUMIX CLUB”.
- Page 294 Others Q&A Troubleshooting About the Wi-Fi function (continued) The camera cannot be connected to Mac computer/Windows PC via Wi-Fi connection. → Please confirm login name and password are correctly typed. → When the system time of Mac computer or Windows PC connected to a camera differs severely from that of the camera, the camera cannot be connected to the computer or PC in some OSs.
- Page 295 Others Q&A Troubleshooting About the Wi-Fi function (continued) I cannot display or delete the images uploaded to the WEB service by this unit. ● The images uploaded to the WEB service cannot be displayed or deleted by this unit. → Perform the task using a smartphone or a PC. Your “LUMIX CLUB”...
- Page 296 Others Q&A Troubleshooting TV, computer, printer No image appears on TV. Image blurred or not coloured. ● Not connected correctly (→261). ● The television has not been switched to auxiliary input. The display on the TV and on the camera do not match. ●...
- Page 297 Computer does not recognise card. (When using an SDXC Memory Card) → Check whether your computer is compatible with SDXC Memory Cards. http://panasonic.net/avc/sdcard/information/SDXC.html → A message prompting you to format the card may appear when you connect it. Do not format the card.
- Page 298 Others Q&A Troubleshooting Others Menu not displayed in desired language. ● Change [Language] setting (→75). Camera rattles if shaken. ● This sound is made by the lens movement and is not a fault. Red lamp illuminated when pressing shutter button halfway in dark locations. ●...
-
Page 299: Usage Cautions And Notes
Others Usage cautions and notes When in use ● Camera may become warm if used for long periods of time, but this is not a fault. ● Keep this unit as far away as possible from electromagnetic equipment (such as microwave ovens, TVs, video games etc.). - Page 300 Others Usage cautions and notes When not using for a while ● Turn off the camera before removing battery and card (ensure that battery is removed to prevent damage through over-discharge). ● Do not leave in contact with rubber or plastic bags. ●...
- Page 301 Others Usage cautions and notes Battery ● The battery is a rechargeable lithium ion battery. If the temperature is too high or too low, the operating time of the battery will become shorter. ● The time required for charging varies depending on conditions of battery usage. Charging takes longer at high or low temperatures and when the battery has not been used in some time.
- Page 302 • Data containing personal information can be altered or lost due to malfunction, static electricity, accidents, breakdowns, repairs, or other operations. Panasonic will not be liable for any damage that occurs, direct or indirect, as a result of the alteration or loss of data containing personal information.
- Page 303 HDMI Licensing LLC in the United States and other countries. • HDAVI Control™ is a trademark of Panasonic Corporation. • “AVCHD”, “AVCHD Progressive” and the “AVCHD Progressive” logo are trademarks of Panasonic Corporation and Sony Corporation.
- Page 304 Others Usage cautions and notes • The Wi-Fi CERTIFIED™ Logo is a certification mark of Wi-Fi Alliance ® • The Wi-Fi Protected Setup™ Identifier mark is a certification mark of Wi-Fi Alliance ® • “Wi-Fi ” and “Wi-Fi Direct ” are registered trademarks of Wi-Fi Alliance ®...
- Page 305 This product incorporates the following software: (1) the software developed independently by or for Panasonic Corporation, (2) the software owned by third party and licensed to Panasonic Corporation, and/or (3) open source software The software categorised as (3) is distributed in the hope that it will be useful, but WITHOUT ANY WARRANTY, without even the implied warranty of MERCHANTABILITY or FITNESS FOR A PARTICULAR PURPOSE.
Need help?
Do you have a question about the Lumix DMC-TZ70 and is the answer not in the manual?
Questions and answers