Table of Contents
Advertisement
Quick Links
Advertisement
Chapters
Table of Contents

Related Manuals for Docomo N-01F


Summary of Contents for Docomo N-01F
- Page 1 N-01F ’13.11 INSTRUCTION MANUAL...
- Page 2 Thank you for choosing "N-01F". Before use, be sure to thoroughly read this manual to ensure that you use N-01F correctly. About manual of N-01F 使 い か た ガ イ ド The operations of N-01F are also described in "...
-
Page 3: Table Of Contents
Contents FOMA Terminal ......2 Precautions (Always follow Introduction Part Names and Functions ..3 these directions)......5 Waterproof/Dustproof Function... 16 Before Using ......20 Sound/Screen Setting ....33 Basic Operation Screen Explanation ....24 Lock/Security ......38 p.20 Character Entry ......31 Connect Call Telephone ......43 Phonebook .......55 p.43 Mail ..........51 Search... -
Page 4: Foma Terminal
SSL/TLS. In the event that the user shall sustain damage or loss due to the use of SSL/TLS, neither DOCOMO nor the certifier shall be responsible for any damage or loss. Certifier: VeriSign Japan K.K., Cybertrust Japan Co., Ltd., GlobalSign K.K., EMC Japan Corp., SECOM Trust Systems Co., Ltd., Comodo CA Ltd., Entrust Limited and Go Daddy Group, Inc. -
Page 5: Part Names And Functions
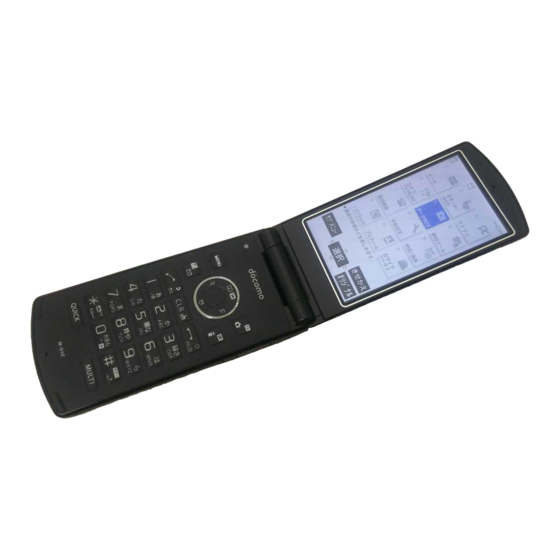
Part Names and Functions * The 1Seg antenna is built-in and the FOMA terminal itself works as an antenna. <Using Earphone> Stereo Earphone/Microphone 01 for External Connect an external-connector-terminal- connector terminal (optional) connection example compatible earphone (optional). To use The AC adapter (for charging) and the Stereo Earphone/Microphone 01 an incompatible earphone, connect an (earphone/microphone terminal) use the same slot. - Page 6 Earpiece Quick key Hear other party's voice from here. Activate a function selected in "Quick button set". Display Multi key Illuminance sensor Display the TASK MENU screen. Detect brightness. Do not cover with hand or put sticker on it. Mouthpiece/Microphone Multi-function keys Charging terminal : Up/Down key...
-
Page 7: Precautions (Always Follow These Directions)
Precautions (Always follow these directions) To ensure that you use your FOMA terminal Indicates that it is an instruction- correctly, read "Precautions" carefully before use. based compulsory conduct (must Keep this manual after reading for future reference. be acted). The precautions must be observed at all times since they contain information intended to Indicates that you must unplug prevent the bodily injury or damage to property. - Page 8 Doing so may cause fire, burns, injury or electric shock. CAUTION Use the options specified by NTT DOCOMO Do not leave the devices on a slope or for the FOMA terminal. unstable surface.
- Page 9 Make sure to hold the FOMA terminal at a 2. Precautions for the FOMA terminal safe distance from your ear when you use the handsfree mode or the ring tone WARNING sounds. Also, when you play games or music, etc. with an earphone/microphone Do not direct the infrared data port etc.
- Page 10 When viewing the display, keep a proper CAUTION distance between your eyes and it in a bright place. Do not swing the FOMA terminal by its strap or other parts. Failure to observe this precaution may impair The terminal may strike you or others around your vision.
-
Page 11: Desktop Holder
Don't the terminals of used battery pack and return Do not short-circuit the charging terminals it to a docomo Shop or Service Counter, or when the adapter is plugged into the dispose of the battery pack in accordance with your local regulations. - Page 12 When plugging/unplugging the AC Always grasp adapter when adapter into/from the power outlet, unplugging the plug from the power make sure that no metallic straps or outlet or cigarette lighter socket. Do not Don't other metallic objects are caught pull the cord itself. between the plug and the socket.
-
Page 13: Material List
If there is a chance that the distance from 6. Precautions for Use Near a person may become less than 15 cm Electronic Medical Devices such as when you are unable to freely move around, set the FOMA terminal to WARNING not emit radio waves in advance (by setting Self mode, turning the power off,... - Page 14 Parts Material Coating Outer side Polycarbonate resin UV coating Back cover Polycarbonate resin, − Inner side Silicon rubber External connector Polycarbonate resin, Polyester UV coating External connector terminal cap thermoplastic elastomer terminal cap Water stop Silicon rubber Silicon coating Charging terminal Brass Gold plating Metal parts: Stainless alloy...
-
Page 15: Handling Precautions
Rubbing the display of the FOMA terminal with you have registered in your FOMA terminal. a dry cloth may scratch the display surface. Please be aware that DOCOMO bears no obligation or The display surface may be stained if moisture responsibility in the event that data is altered or lost. - Page 16 Depending on the usage condition, the battery Please be aware that DOCOMO bears no obligation pack may inflate slightly when the battery life or responsibility in the event that data is altered or is almost over.
- Page 17 To preserve the environment, bring discarded Be careful when using the FOMA terminal miniUIM to a docomo Shop or Ser vice while driving. Counter. A penalty may be imposed for holding a mobile phone while driving. However, exceptions are ...
-
Page 18: Waterproof/Dustproof Function
*1 : IPX5 means that the N-01F continues to function as a phone after being sprayed from all directions with 12.5 liters of water per minute from a 6.3 mm diameter nozzle for at least 3 minutes, from a distance of approx. 3 meters. - Page 19 Opening/closing the external connector terminal cap ■ ■ Opening Closing Hook your finger on the slot and open the Align the tab on the back of the cap with the cap in the direction of arrow. concave of the FOMA terminal, then close the cap by pressing securely in direction of arrow.
-
Page 20: Important Notices
Do not apply water flow stronger than allowed ( p.16) (e.g., such water flow that gives you pain when applied to your skin directly from a faucet or shower head). Doing so may cause malfunction though N-01F is waterproof to IPX5 standard. - Page 21 Draining water when the FOMA terminal gets wet When the FOMA terminal gets wet, drain the water following the steps below. ・ If water adheres to the mouthpiece/microphone, earpiece or speaker, the volume of the other party's voice or melody may be decreased or sound quality may deteriorate. In such a case, drain the water following the steps below and dry the FOMA terminal in open air to recover the function.
-
Page 22: Before Using
The miniUIM is an IC card that contains private information such as your phone number. ・ This FOMA terminal only supports the miniUIM. If you have a UIM or UIM (FOMA card), check with a docomo Shop Service Counter for a replacement. ❶ → Remove the back cover ( p.17) - Page 23 Charging → For the charging time and continuous talk time, refer to "Main specifications" ( p.92). ・ The battery pack, AC adapter and provided desktop holder are not waterproof/ dustproof. Never charge the battery with the FOMA terminal left wet. ・...
- Page 24 Turning power ON/Configuring default setting ❶ (1 second or longer) ■ If Initial setting screen appears When you turn the power on for the first time after purchase, Initial setting screen appears. If you select "YES", screens for initial settings such as "Auto time", "Change security code"...
-
Page 25: Checking Your Own Phone Number
Enter your security code <Mail address> "Acquire Automatically" Connect to i-mode to enter your mail address to <Mail address> field automatically (Finish). ・ To change your mail address, refer to NTT DOCOMO website. Switching between Japanese and English ❶ 本体設定 文字表示 入力 "... - Page 26 Screen Explanation Viewing display/icon Symbols ( , , , etc.) displayed on the screen are referred to as icons. Icons indicate the status of such as the FOMA terminal and signal reception. ■ Icons indicating the status of the FOMA terminal At the top of the screen, icons indicate the status of the FOMA terminal.
- Page 27 ■ Desktop icons and shortcut icons In the middle of the screen, desktop icons indicate the status of new arrivals. You can paste shortcut icons, with which you can launch functions. Desktop icons (examples) : Missed call : Record message :...
- Page 28 Checking missed calls/new mail ■ Checking missed calls Press to view "received date/time/caller's name (phone number)", etc. ■ Checking new mail Press to view "sender/received date and time/subject", etc. You need to set "Mail" under "Sub-display setting" to "ON". "Setting" "Screen/Display"...
-
Page 29: Key Operation
■ Changing the design of the main menu You can change the design of the main menu (background, icon, etc.). Choose from "Standard", "Colourful", "neco", "Simple", "Original theme" and "Kisekae Tool". ❶ (Kisekae) Select a design Key operation The soft keys (Function display) corresponding to , and the direction icons corresponding to are displayed on the screen. -
Page 30: Menu Operation
Menu operation You can select various functions of the FOMA terminal from the main menu, which appears when you press on the standby screen. ❶ to move the highlight, then (Select) Select the displayed menu sequentially ・ If no key is pressed for 15 seconds or longer while the main menu is displayed, the main menu ends and the previous screen reappears. -
Page 31: Docomo Palette Ui
Palette UI You can switch from the standby screen to the MyFACE and shortcut list, and easily access various functions or services. In addition, you can freely customize this new function. Using MyFACE ■ Activating MyFACE ❶ On the standby screen, ■... - Page 32 Using shortcuts ■ Activating a shortcut 5 or more shortcut icons are registered by default. ❶ On the standby screen, ❷ to select a shortcut icon, then (Select) ■ Creating a shortcut ❶ On the screen for which you want to create a shortcut, (Submenu) "Create shortcut"...
-
Page 33: Screen Explanation
Character Entry Entering characters When entering information to save to the phonebook, or creating mails or schedules, enter text. ① ② ③ Switching entry modes Entering characters Converting entered text Pre s s (C h rc t ) o n Press a dial key several times Convert entered text to the text entry screen... - Page 34 Let's enter text. 秋のキャンプ <Example : entering " (Autumn camp)"> Enter Hiragana once twice あ き 5 times twice to move the cursor to the target conversion の き candidate and then to select the candidate once once や (Select) to lower case 3 times 3 times...
-
Page 35: Sound/Screen Setting
Sound/Screen Setting Changing ring tone Changing the ring tone for calls ❶ "Setting" "Sound/Vib./Manner" "Select ring tone" "Phone" "Select ring tone" "Melody" Select ring tone ・ Other options such as a melody, i-motion, Chaku-Uta®, or Chaku-Uta-Full® can be set to ring tones. - Page 36 Using manner mode Set the FOMA terminal not to play ring tones or keypad sound through the speaker with a single key operation. Even in manner mode, the camera shutter sound, the auto focus lock sound or the start/end/pause sound of a moving picture recording or a voice recorder plays.
- Page 37 Making display hard to see from people around Privacy angle makes it difficult for others to see the display. When Privacy angle is set, is displayed on the standby screen. ❶ (1 second or longer) ■ To release the setting (1 second or longer) ・...
- Page 38 Setting Kisekae Tool Set various FOMA terminal designs such as screens and ring tones at once. ❶ "Setting" "Screen/Display" "Kisekae Tool setting" Select a folder ❷ Highlight an item (Set all) "YES" ・ When you use Kisekae Tool to change the menu display design, the structures of some menus may change in accordance with the frequency of use.
- Page 39 Checking missed calls or new mail with illumination Set whether to keep the illumination flashing or to stop flashing. Setting illumination ❶ "Setting" "Backlight/Illum." "Illumination setting" "Illumination in call" "Missed info" "ON" or "OFF" Checking with illumination When there is a missed call or new mail (i-mode mail, Message R/F, Area Mail or SMS), notification is made with the illumination, which keeps flashing.
-
Page 40: Lock/Security
Any code is set at time of subscription A 4-digit number is required to verify your identity when you subscribe to some services お客様サポート at a docomo Shop, docomo Information Center and " " (User support) (in Japanese only), or when you use network services. - Page 41 Your PIN unblocking key (PUK) is written on application form (copy for customer), which a docomo Shop gives you at time of subscription. If you have subscribed at a retailer other than the docomo Shop, please bring your miniUIM and official documents that verify your identity, such as a driver's license, to a docomo Shop Service Counter, or contact "General Inquiries"...
-
Page 42: Various Lock Functions
(in Japanese only) card function of Osaifu- * Unavailable from part of IP phones. Keitai only by contacting * My docomo is also available to set/release Omakase Lock via PC, etc. (in Japanese only) DOCOMO. Lock functions that use To activate: "Setting"... - Page 43 Setting incoming call restriction Rejecting calls without caller ID Set whether to accept or reject voice/videophone calls from unidentified numbers by configuring the setting for each reason. ❶ "Setting" "Lock/Security" "Call rejection set." ❷ Enter your security code Select any item from "User unset" to "Unknown"...
- Page 44 Resetting to default Resetting the function settings to default Reset the function settings to default. For the function that can be reset, see "Menu → list" ( p.88). "Initialize" and "Reset settings" are different. Do not mix them up. If you perform "Initialize", you will lose all data you have stored. ❶...
-
Page 45: Call Telephone
Making a call/videophone call The image sent to the other party during a videophone call is the substitute image (Chara-den) or rear camera image because the N-01F does not have a front camera. Making a call by entering the phone number ❶... - Page 46 Using Koe-no-Takuhaibin This is a service to record a voice message and deliver it to the other party. ❶ Enter the other party's phone number, then (Koetaku) ❷ Follow the operation guidance and record a message The other party will be notified that a message is waiting. ■...
-
Page 47: Adjusting Earpiece Volume
Adjusting earpiece volume ❶ "TEL function" "Dial/Receive setting" "In-call setting" "Volume" Adjust with (Set) ・ During a call, you can adjust the volume with When you can not answer a call Setting record message When you cannot answer a voice or videophone call, the FOMA terminal can record a voice or videophone message. - Page 48 The network services are not available when you are outside the service area or in a place where the signal is weak. ・ For details, refer to NTT DOCOMO website. ・ For the application and inquiries, please contact "General Inquiries" on the back cover of this manual.
-
Page 49: Select An Item
Setting voice mail service ❶ "TEL function" "Voice mail service" Select an item Setting call waiting ❶ "TEL function" "Other network serv." "Call waiting" Select an item Setting call forwarding ❶ "TEL function" "Other network serv." "Call forwarding" Select an item Emergency call Emergency call Phone number... -
Page 50: Using Overseas
3G850 MHz. Check available areas. ■ Before overseas use, refer to the following: - "Mobile Phone User's Guide [International Services]" - DOCOMO "International Services website" ■ Information ・ For a country code, international call access code, universal number international prefix, available countries and overseas operators, refer to "Mobile Phone User's Guide [International Services]"... - Page 51 Available services overseas Main communication services GSM/GPRS ○ ○ × MyFACE ○ ○ ○ Voice call ○ × × Videophone call ○ ○ ○ ○ ○ × i-mode ○ ○ × i-mode mail ○ ○ × i-channel *4 *5 ○ ○...
- Page 52 Making a call to outside the country you stay in ❶ On the standby screen, (1 second or longer) to enter + Country code Area code (City code) The other party's phone number (voice call) / (V.phone) ❷ After the call ends, ・...
-
Page 53: Mail
Decome-Anime, which is Flash movie with messages and images. ・ For details on i-mode mail, refer to NTT DOCOMO website. Sending i-mode mail ❶ (New mail) Enter each of the "... - Page 54 Sending Deco-mail/Decome-Anime ■ ■ Deco-mail Decome-Anime Deco-mail is a service that Decome-Anime is a service a l l ows yo u to d e co rate that allows you to compose i-mode mail by changing d e c o r a t i v e m a i l u s i n g the character color/size and animation templates with background color, waving...
-
Page 55: Compose Message
❶ "Inbox" Select a folder Select an i-mode mail Replying to i-mode mail ❶ On Received mail list screen/Received mail detail screen Compose message (Send) ・ To quote the received message to reply, press ) for 1 second or longer. Checking new i-mode mail You can receive the i-mode mails and messages stored at the i-mode center by checking with the center. -
Page 56: Using Sms
This service allows you to exchange SMS between mobile phones, or with subscribers to overseas operators. ・ For countries and overseas operators, refer to "Mobile Phone User's Guide [International Services]" or the DOCOMO "International Services website". Sending SMS ❶ "Compose new SMS"... -
Page 57: Phonebook
Phonebook Adding phonebook entries FOMA terminal has two types of phonebooks: FOMA terminal phonebook that various functions can be set to and miniUIM phonebook whose entries are available even in another terminal. Adding phone numbers, mail addresses, etc. An entry cannot be stored unless you fill in the "Name" field. ❶... -
Page 58: I-Mode/Full Browser
Note that communications charges may be high if large volumes of data are transmitted by viewing websites containing many image data or downloading files. ・ For details on packet communications charges, refer to NTT DOCOMO website. ・ Up to 1.5 MB per page can be viewed with the Full Browser. -
Page 59: Displaying Web Pages Designed For Pc
Browsing i-mode site ❶ http://docomo.xxxx.xxxxx " " flashes while communicating, and " " flashes while receiving i-mode services (during i-mode). ❷ Connected screen Scroll down to the bottom of the iMenu screen to select "English" Displaying web pages designed for PC ❶... -
Page 60: Saving Site Contents
Storing frequently accessed sites ❶ Website displayed using i-mode or Full Browser (Submenu) "Bookmark" "Add bookmark" "OK" Select a folder "OK" ■ To view bookmarked site "i-mode/web" "Bookmark" Select a folder Select a bookmark Saving site contents ❶ Website displayed using i-mode or Full Browser (Submenu) "Screen Memo"... -
Page 61: I-Channel
Japan. * i-channel requires a subscription and is a fee based service (i-mode subscription is required). ・ For details on i-channel, refer to NTT DOCOMO website. The i-channel service is only available in Japanese. Displaying i-channel If you have subscribed to i-channel, the ticker on the standby screen shows information when it is delivered to your terminal. -
Page 62: Map
Viewing map Start the i- ppli to display a map. α ❶ "Map/Overseas" "Map" Setting Map 地図アプリ Select the i- ppli you want to set from the Map Appli list. " " (Map Appli) is α set by default. ❶ "Map/Overseas"... -
Page 63: Camera
Camera Viewing and operating shooting screen Viewing and operating shooting screen ① ⑫ ① ② ② ⑬ ⑧ ⑧ ③ ⑨ ⑭ ⑩ ⑮ ④ ⑪ ⑩ ⑤ ⑤ ⑪ * Description is ⑥ ⑥ based on a QVGA ⑦ ⑦... - Page 64 Shooting still images/moving pictures Shooting still images ❶ Frame the shot, then (Shoot) (Save) The image is automatically saved when using Quick Shot. Shooting moving pictures ❶ Frame the shot, then (Record) To stop shooting, (Stop) (Save) ・ Do not leave the camera lens exposed to direct sunlight. Doing so may discolor or burn the components of the camera.
- Page 65 Viewing still images/moving pictures after shooting Still images are saved in "My picture", and moving pictures are saved in "i-motion/movie" under Data box. Still images/moving pictures can be set to the standby screen, etc. Viewing still images/moving pictures in Data box ❶...
-
Page 66: 1Seg
1Seg Using 1Seg 1Seg service is provided by broadcasting companies (broadcasters). Communications charges do not apply to receive video and voice data. For details on NHK receiving fees, contact NHK. * Packet communications charges apply to view data broadcast site and i-mode site. Information charges may apply for some sites (i-mode pay sites). -
Page 67: Setting Channels
Setting channels When you use 1Seg for the first time or move to another area, set the channels. ❶ "CAMERA/TV/MUSIC" "1Seg" "Channel setting" "Auto channel setting" "YES" "YES" Enter title ■ To select an area and register a channel list "CAMERA/TV/MUSIC"... -
Page 68: Music
Music Playing music data You can play Chaku-Uta-Full® downloaded with i-mode Browser or Full Browser, as well as WMA data (without DRM). ・ 使いかたガイド For details on WMA data, refer to " " (Guide) (Japanese). 便 利 ツ ー ル 使... - Page 69 Viewing and operating MUSIC Player screen ① Image ② Track ③ Title ① ④ Artist name ⑤ Elapsed time (minutes : seconds)/Total playback time (minutes : seconds) ② ⑥ Repeat status/Sound quality (Equalizer), etc. ⑦ ⑦ ③ Sound effect applied ④...
-
Page 70: I- Α Ppli/I-Widget
When i-Widget screen is displayed, multiple Widget Appli may be connected to network. ・ Detailed content will be subject to packet communications charges. ・ For details on i- ppli and i-Widget, refer to NTT DOCOMO website. α Packet communications charges incurred overseas differ from those in Japan. Activating i- ppli α... -
Page 71: I-Motion/Movie
* When downloading/streaming movies, the received file size may become very large. Note that packet communications charges may be high when large files such as streaming type with no file size restriction are received. ・ For details on packet communications charges and billing plans, refer to NTT DOCOMO website. Downloading i-motion/movie ❶... -
Page 72: Osaifu-Keitai
Keitai service supporting the backup service. ・ Please be aware that DOCOMO is not responsible for loss or alteration of the IC card data, any monetary losses incurred while using Osaifu-Keitai services under any circumstance such as malfunction or changing your model. - Page 73 Using Osaifu-Keitai By holding the mark printed on the FOMA terminal over the reader unit, you can make payments with e-money or utilize as tickets. ・ Even when the power is turned off, or the battery is running out, the IC card function is available by holding the mark over the reader.
-
Page 74: I-Concier
To use i-concier overseas, overseas use setting for i-concier is required. ・ Packet communications charges apply to automatically update i-schedule/Memo/ToruCa/Phonebook, etc. ・ For details on i-concier, refer to NTT DOCOMO website. Receiving information Icon When you receive information, " " appears at the top of the screen. -
Page 75: Convenient Tools
Convenient Tools Using Shabette-Kensaku Say the keyword in Japanese to use i-mode search. ❶ "Tool" "Shabette-Kensaku" When using for the first time, select "Use" on the usage guide screen. ❷ Within 10 seconds, say the keyword into the mouthpiece/microphone when the vibrator vibrates and "Speak keyword in Japanese"... -
Page 76: Using Alarm
Using schedule Save a schedule to notify you of the saved content with an alarm sounding at the specified date and time, a message and animation appearing. ❶ "Tool" "Schedule" Select the date (Submenu) "New" Enter each item (Finish) Using alarm ❶... -
Page 77: Data Management
This FOMA terminal supports commercially available microSD cards of up to 2 GB and microSDHC cards of up to 32 GB (as of November, 2013). ・ Make sure to format microSD card on N-01F. You may not be able to use microSD card formatted on another terminal or PC. ・... - Page 78 ❸ Insert the microSD card straight and slowly along the rails Rail with the metal contacts facing you To remove the microSD card, hold the microSD card and Rail slowly pull it out along the rails. ❹ Close the metal holder and slide it in the direction of arrow "LOCK"...
- Page 79 Copying data to FOMA terminal <Example: To copy a phonebook to the FOMA terminal> ❶ "Tool" "microSD" "Refer microSD data" "Phonebook" Highlight a file (Submenu) "Add to phone" or "OVR to phone" Select a copying method Enter your security code "YES"...
-
Page 80: Connecting To A Pc
"DOCOMO Connection Manager" enables simplification of appropriate setting on PC depending on the subscription. The fare counter function is also available for checking an indication of the data traffic or usage amount. For details, refer to NTT DOCOMO website. http://www.nttdocomo.co.jp/support/utilization/application/service/connection_manager/... - Page 81 ・ If you are still unable to identify the problem after checking the points, please contact "Repairs" on the back cover of this manual (in Japanese only) or a repair counter specified by DOCOMO. The power will not turn on ●...
- Page 82 Battery life is very short ● Is the FOMA terminal left outside the service area for a long time? In a place outside the service area, the terminal searches the radio waves for communication and the battery is consumed more quickly. ●...
- Page 83 Cannot make a call by pressing the dial keys ● → Is Original Lock for "Keypad dial" under "Dial/sending mail" set? p.40 ● → Is Auto-key lock set? p.40 ● Is Restrict dialing set? ● → Is Dial lock set? p.40 ●...
- Page 84 If, after contacting DOCOMO, you are informed that your FOMA terminal needs repairs Bring it to a repair counter specified by DOCOMO. The repair counter is only open during business hours. Depending on the malfunction, repairs may take some time.
-
Page 85: Error Info Send Set
- Put stickers, etc. on the display or keys - Decorate the FOMA terminal using adhesives, etc. - Replace the external parts, etc. with non-DOCOMO components ・ If malfunction or damage occurs as a result of modification, charges will apply even if the FOMA terminal is still under warranty. -
Page 86: Updating Software
・ When software is updated, the unique information (model, serial number, etc.) of your FOMA terminal is automatically transmitted to the server at DOCOMO. We do not use the transmitted information for any purposes other than Software Update. ・... -
Page 87: Scanning Function
Running software update by selecting the icon Select the icon (Update icon) on the standby screen to update software. ❶ Select the Update icon "Yes" Enter your security code Your FOMA terminal is checked if it needs an update. ❷ The check result appears ■... - Page 88 Scanning results display ■ Scanned problems display A list of up to 5 problems detected by the Scanning function appears, Following problems were detected starting with the highest-level problem. Problem element1 Problem element2 If 6 or more problems are detected, the names of the 6th and Problem element3...
-
Page 89: Options And Related Devices
・ Carry Case 02 : To connect to N-01F, the Earphone Plug Adapter P001 or Earphone Plug Adapter 01 for External connector terminal is required. : To connect to N-01F, the Earphone Plug Adapter 01 for External connector terminal is required. - Page 90 Appendix Menu list settings are reset to default by "Reset settings". ・ Some functions that cannot be reset to default settings (or default states) may be included in settings. Main item Sub item Branch item Main item Sub item Branch item Mail Inbox mode/web...
- Page 91 Medias viewer Store word 1Seg Activate 1Seg Download dictionary Program guide Voice quick start TV timer list Shabette-Kensaku Timer recording list Contact DOCOMO Recording result TEL function Phonebook Search phonebook TVlink Add to phonebook Channel list UIM operation Channel setting Phonebook set./...
- Page 92 Main item Sub item Branch item Main item Sub item Branch item Auto redial as voice Setting Screen/Display TEL function Videophone Information setting display Ntfy switch-mode Hands-free switch Sound/Vib./ Ring volume Manner Select ring tone V.phone while packet Other sound setting Vibrator setting Call duration/ Call duration/...
- Page 93 Main item Sub item Branch item Main item Sub item Branch item Setting Other setting Self mode Osaifu-Keitai IC card content Memory refresh DCMX Reset settings ToruCa Initialize IC card lock IC card lock setting IC lock(power-off) Software Update Error info send set. Auto lock setting Quick search URL Setting...
-
Page 94: Main Specifications
Main specifications Phone Product name N-01F Size (When folded) Height approx. 110 mm x Width approx. 51 mm x Thickness approx. 14.4 mm (Thickest : Approx. 17.4 mm) Weight Approx. 118 g (Battery pack attached) Continuous standby time [FOMA/3G] Stationary ("AUTO"... - Page 95 Capacity Chaku-Uta®/Chaku-Uta-Full® Approx. 210 MB *8*9 *1 : Switch networks in "3G/GSM setting". *5 : Varies depending on the broadcaster and *2 : Size = VGA V. (480 x 640), Quality = Normal (File program. size = 95 KB) *6 : File format = AAC *3 : Varies depending on the size.
- Page 96 Specific absorption rate (SAR) of mobile phone Specific Absorption Rate (SAR) of Mobile Phones This model N-01F mobile phone complies with Japanese technical regulations and international guidelines regarding exposure to radio waves. This mobile phone was designed in observance of Japanese technical regulations regarding...
- Page 97 Radio Frequency (RF) Signals THIS MODEL PHONE MEETS THE U.S. GOVERNMENT'S REQUIREMENTS FOR EXPOSURE TO RADIO WAVES. Your wireless phone contains a radio transmitter and receiver. Your phone is designed and manufactured not to exceed the emission limits for exposure to radio frequency (RF) energy set by the Federal Communications Commission of the U.S.
- Page 98 This equipment generates, uses and can radiate radio frequency energy and, if not installed and used in accordance with the instructions, may cause harmful interference to radio communications. However, there is no guarantee that interference will not occur in a particular installation; if this equipment does cause harmful interference to radio or television reception, which can be determined by turning the equipment off and on, the user is encouraged to try to correct the interference by one or more of the following measures: ・...
-
Page 99: Export Administration Regulations
Important Safety Information : Warning To prevent possible hearing damage, do not listen to high volume levels for long periods. Export Administration Regulations The product and accessories are subject to the Foreign Exchange and Foreign Trade Control Law and other applicable export/import laws and regulations of Japan. You shall obtain licenses, permissions, and consents required thereunder at your own expense and on your own responsibility. -
Page 100: Intellectual Property Right
・ Twitter is either registered trademark or trademark of are trademarks or registered trademarks of NTT Twitter, Inc. in the United States and/or other countries. DOCOMO, INC. ・ All other company names and product names ・ "Catch Phone (Call waiting service)" is a registered... - Page 101 THIS PRODUCT IS LICENSED UNDER THE AVC PATENT ・ Manufactured under license PORTFOLIO LICENSE FOR THE PERSONAL USE OF A from Audyssey Laboratories. U.S. CONSUMER OR OTHER USES IN WHICH IT DOES NOT and foreign patents pending. RECEIVE REMUNERATION TO (i) ENCODE VIDEO IN Audyssey Premium Mobile is a trademark of COMPLIANCE WITH THE AVC STANDARD ("AVC VIDEO") Audyssey Laboratories.
- Page 102 SIM card. NOT LIMITED TO, PROCUREMENT OF SUBSTITUTE GOODS OR SERVICES; ・ SIM lock can be removed at any docomo Shop. LOSS OF USE, DATA, OR PROFITS; OR BUSINESS INTERRUPTION) HOWEVER CAUSED AND ON ANY THEORY OF LIABILITY, WHETHER IN CONTRACT, ・...
-
Page 103: Index
Index Desktop icon ............25 Dial lock ..............40 AC adapter..............21 docomo Palette UI........... 29 Adapter ................9 Download After-Sales Service ..........82 i-motion .................69 Alarm ................. 74 ppli ................68 α Area Mail ..............53 Movie ................69 Auto receive mail ............ 52 Widget Appli ..............68... - Page 104 i-mode mail Change menu display ..........35 Attach file ..............51 Viewing main menu...........26 Manner mode setting ..........34 Check ................53 Map ................60 Deco-mail ..............52 Decome-Anime ............52 Material list .............. 11 Receive ................52 Menu list ..............88 Reply ................53 microSD card Send ................51 Insert/Remove .............75 i-mode password .............
- Page 105 Phonebook Specifications Add entries ..............55 Battery pack ..............93 Delete entries ..............55 Numbers of stored/registered/protected items ...93 Edit entries ..............55 Phone ................92 PIN code (PIN1/PIN2) ..........39 Stand-by display ............. 34 PIN unblocking key (PUK) ........39 Play Terminal security code ........... 38 i-motion .................69 ToruCa ...............
-
Page 106: User Support
* Packet communications charges do not apply to use via i-mode. Charges will apply if using the service from overseas. * "docomo ID/password" are required to use this site from a PC. * Please contact "General Inquiries" on the back cover of this manual if you forget or do not have "Network security code"... - Page 107 * You are charged a call fee to Japan when calling from a land-line phone, etc. ※ If you use N-01F, you should dial the number +81-3-6832-6600 (to enter '+', press and hold the '0' key for at least one second).
- Page 108 About Manual for PC Connection This manual describes necessary information for data communication using the FOMA terminal and how to install "FOMA communication setting file" and "DOCOMO Connection Manager". The procedures or screens may vary depending on your environment. ・The words which represent the FOMA terminal model name, such as driver names and modem names, are referred to as "【model name】".
-
Page 109: Data Communication
You can also access a corporate LAN connected to the FOMA network. Use an access point that supports FOMA packet communication, such as DOCOMO Internet connection service “mopera U”. For packet communication, connect the FOMA terminal to a PC using FOMA USB Cable with Charge Function 02 (optional), Bluetooth communication* or Wi-Fi connection, or to a PDA using a dedicated cable. - Page 110 64K data communication is charged according to the length of time the line is connected, regardless of the amount of data. Use an access point that supports FOMA 64K data communication, such as DOCOMO Internet connection service “mopera U”, or ISDN synchronized 64K access point.
- Page 111 Internet. These fees must be paid directly to the Internet service provider in addition to service fees of FOMA service. Contact your Internet service provider for details. DOCOMO Internet connection service "mopera U" is available. "mopera U" is a pay service for which you need to apply.
-
Page 112: Before Using
*1: The proper operations on the upgraded, added or modified OS are not guaranteed. *2: The required memory and necessary hard disk space may differ depending on the PC's system configuration. d For the latest information on the operating environment, visit the DOCOMO website. NOTE d This FOMA terminal is not compatible with Remote Wakeup function. -
Page 113: Checking The Procedure
Installing the FOMA communication setting file embeds each driver into Windows. Using DOCOMO Connection Manager, you can easily set up packet communication and 64K data communication and create a dial-up connection. Flow chart for completing the data communication setup ■... - Page 114 "DOCOMO Connection Manager"> Manager"> Download "DOCOMO Connection Manager" from the DOCOMO website, and install it to PC a Enables you to use DOCOMO Connection Manager. "Installing DOCOMO Connection Manager"→ p.17 Set up Set up a mopera U a Set up communication not using "DOCOMO Connection a Other providers Manager"...
- Page 115 Setting the USB mode to "Communication mode" d Set the mode before connecting to PC. d Setting is not required when using Bluetooth connection or Wi-Fi connection. MENU key"Setting""External connection""USB mode" "Communication mode"...
-
Page 116: Installing The Foma Communication Setting File (Drivers)
To close software that resides on task bar, click an icon on the task bar and click " 閉じる" (Close) or "終了 " (Finish). Access the FOMA communication setting file (drivers) download page on DOCOMO website Access http://www.nttdocomo.co.jp/support/utilization/application/foma/com_set/driver/index.html (in Japanese only) Go to the driver download page for the in-use model Upon confirming the user agreement, click "同意する"... - Page 117 When this screen appears, click “OK” The title bar display differs depending on the in- use OS. Turn on the FOMA terminal, then connect the FOMA USB Cable with Charge Function 02 (optional) to your FOMA terminal For connecting the FOMA terminal and FOMA USB Cable with Charge Function 02, refer to the Instruction Manual for the FOMA terminal.
-
Page 118: Control Panel
Checking the installed driver Check that the FOMA communication setting file (drivers) has been correctly installed. This section describes an example using Windows 7. " → "コントロールパネル" (Control Panel) Select " For Windows 8 From the Start screen, open the " デスクトップ " (Desktop), and then move the mouse cursor to the top right corner of the screen to display the Charm Bar →... - Page 119 Uninstalling the FOMA communication setting file (drivers) If necessary (when updating the drivers, etc.), uninstall the drivers as follows. The procedure for uninstalling from a Windows 7 or Windows Vista machine is described as an example. d Uninstallation is not available while connecting the FOMA terminal with PC. d When uninstalling FOMA communication setting file, be sure to log on as Administrator.
-
Page 120: Preparing Bluetooth Communication
Preparing Bluetooth Communication Perform data communication by connecting a Bluetooth communication compatible PC to the FOMA terminal wirelessly. Register and connect the PC to the FOMA terminal To connect a PC to the FOMA terminal for the first time, register the PC to the FOMA terminal. MENU key"Tool""Bluetooth""Accept dialup devices"... - Page 121 Check the modem setting Before setting communication, confirm the modem name and the COM port number for the dial-up connection. " → "コントロールパネル" (Control Panel) Select " For Windows 8 From the Start screen, open the " デスクトップ " (Desktop), and then move the mouse cursor to the top right corner of the screen to display the Charm Bar →...
-
Page 122: Connecting To A Wi-Fi-Compatible Pc
Connecting to a Wi-Fi-compatible PC Packet communication is possible by setting the FOMA terminal as an access point and connecting the FOMA terminal and a Wi-Fi-compatible PC via Wi-Fi. d Set the FOMA terminal to Access point mode beforehand. Refer to the Instruction Manual for the FOMA terminal for how to set to Access point mode and details for Access point mode settings. -
Page 123: Docomo Connection Manager
DOCOMO Connection Manager DOCOMO Connection Manager is a useful software for performing the flat-rate data communications and the measured-rate data communications. "DOCOMO Connection Manager" enables simplification of mopera U subscription, or appropriate setting on PC depending on the subscription. The fare counter function is also available for checking an indication of the data traffic or usage amount. - Page 124 Log on as a user who uses DOCOMO Connection Manager When installing DOCOMO Connection Manager, be sure to log on as a user with Administrator privilege. If you attempt to install the software with another account, an error may occur.
-
Page 125: Installing Docomo Connection Manager
Other connection software than DOCOMO Connection Manager d DOCOMO Connection Manager provides the same functions as the ones included in other connection software listed below, and this is all you need. Disable or uninstall the following software, if necessary. - Page 126 For Windows 7 For Windows Vista Click "次へ" (Next) Confirm the precautions and click " 次へ" (Next) Upon confirming the user agreement, click "使用許諾契約の 条項に同意します" (Agree) to agree to it, and click "次へ" (Next)
- Page 127 Select the installation location and click "次へ" (Next) If you want to change the location, click " 変更 " (Change), specify the location and click " 次へ " (Next). Click "インストール" (Install) Click "完了" (Finish) Installation is completed.
-
Page 128: Executing Set Data Communication
Starting DOCOMO Connection Manager Start DOCOMO Connection Manager Open " " or " スタート " (Start) → " すべてのプログラム " (All programs) → "NTT DOCOMO" → " ド コモ コネクションマネージャ " (DOCOMO Connection Manager) → " ドコモ コネクションマネー ジャ " (DOCOMO Connection Manager) For Windows 8, click "ドコモ... - Page 129 Just closing the browser or mailer on your PC does not disconnect the communication line. When you do not perform data communication, be sure to disconnect by the following procedure: Click " 切断する " (Disconnect) on the DOCOMO Connection Manager screen Click "OK" NOTE d With Windows OS, software will be automatically updated if set to do so, and you may incur high packet communications charges without knowing you are doing so.
-
Page 130: Setting Up Dial-Up Network
Setting up Dial-up Network This section describes how to set up a dial-up connection for packet communication / 64K data communication without using DOCOMO Connection Manager. The flow of operation is described below. d It is unnecessary to set up the dial-up network for 64K data communication. Go on to "Setting up Dial- up"... - Page 131 Click the "モデム" (Modem) tab to confirm the COM port of the "接続 先" (Access point) column of the in- use FOMA terminal, and click "OK" When connecting wirelessly using Bluetooth communication, confirm the COM port number of the in-use Bluetooth linked standard modem or Bluetooth modem provided by a Bluetooth device maker in the "...
- Page 132 d To check the COM port on Windows Vista Open " "→ "コントロールパネル" (Control Panel) Open "ハードウェアとサウンド" (Hardware and Sound) → "電話とモデム のオプション" (Telephone and modem options) in Control Panel If the "所在地情報" (Address information) screen is displayed, enter "市外局 番/エリアコード"...
- Page 133 Open "電話とモデムのオプション" (Telephone and modem options) from "プリンタとその他のハード ウェア" (Printers and other hardware) in Control Panel If the "所在地情報" (Address information) screen is displayed, enter "市外局 番/エリアコード" (Area code) and click "OK" Click the "モデム" (Modem) tab to confirm the COM port of the "接続 先"...
- Page 134 Data to be registered Phone number Memory number of Phonebook Other party's name ─ How to register Register using PC Available (DOCOMO Connection Available (Dedicated software Manager, etc.) required) Register using Mobile phone Unavailable (Cannot even check) Available How to use...
- Page 135 Click "スタート" (Start) → "すべてのプログラム" (All programs) → "アクセ サリ" (Accessories) → "通信" (Communication) → "ハイパーターミナル" (Hyper terminal) to start Hyper terminal Select the "今後、このメッセージを表示しない" (Do not display this message again) checkbox and then click "はい" (Yes) Enter any name in the "名前" (Name) column and click "OK"...
- Page 136 Enter the access point (APN) and press Enter in the format of AT+CGDCONT=<cid>, "PDP_type", "APN" <cid>: Enter any number between 5 and 10. Please be cautious because if cid has been already set, the setting will be overwritten. "PDP_type": Enter "PPP" or "IP". "APN":...
- Page 137 イル" (File) menu NOTE d The Caller ID needs to be set to "Notify" to use DOCOMO's internet connection service mopera U. About 186 (Notify)/184 (Not notify) in Dial-up Network You can attach 186/184 to the access point number in the Dial-up network settings as well.
-
Page 138: Setting Up Dial-Up
Setting up Dial-up d This section takes accessing mopera U by packet communication for example. d To connect using packet communication, enter " *99 ***3#" as the number of access point for mopera U. To connect using 64K data communication, enter "*8701" as the number of access point for mopera U. - Page 139 Click “閉じる” (Close) Click“ ネットワークとインターネット” (Network and Internet) → “ ネットワークに接続” (Connect to a network) on Control Panel Right-click the name created for the dial-up and click "接続プロパティの表示" (View connection properties) Confirm the settings on the "全般" (General) tab If two or more modems are connected to the When connecting using the FOMA USB Cable with Charge Function 02, confirm that only the in-use FOMA terminal is checked in the "接続...
- Page 140 Click the "ネットワーク" (Network) tab and set up each setting Check only " インターネット プロトコル バー ジョン4(TCP/IPv4)" (Internet Protocol version 4 (TCP/IPv4)) in the " この接続は次の項目を使用 します " (Use the following items for this connection). Click the "オプション" (Options) tab and click "PPP設定" (PPP Settings) Clear all the boxes and click "OK"...
- Page 141 If the modem selection screen appears, click the in-use FOMA terminal When connecting wirelessly using Bluetooth communication, click the in-use Bluetooth linked standard modem or Bluetooth modem provided by a Bluetooth device maker. The modem selection screen appears only if there are multiple modems.
- Page 142 Confirm the settings on the "全般" (General) tab If two or more modems are connected to the When connecting using the FOMA USB Cable with Charge Function 02, confirm that only the in-use FOMA terminal is checked in the "接続 の方法...
-
Page 143: Access Point
Setting up dial-up on Windows Vista " → "接続先" (Access point) Open " Click "接続またはネットワークをセットアップします" (Set up the connection or network) Select "ダイヤルアップ接続をセットアップします" (Set up dial-up connection) and click "次へ" (Next) If the modem selection screen appears, click the in-use FOMA terminal When connecting wirelessly using Bluetooth communication, click the in-use Bluetooth linked... - Page 144 Right-click the icon created for the dial-up and click "プロパティ " (Properties) Confirm the settings on the "全般" (General) tab If two or more modems are connected to the When connecting using the FOMA USB Cable with Charge Function 02, confirm that only the in-use FOMA terminal is checked in the "接続...
- Page 145 Clear all the boxes and click "OK" Click "OK" Setting up dial-up on Windows XP Open "スタート" (Start) → "すべてのプログラム" (All programs) → "アクセ サリ" (Accessories) → "通信" (Communication) → "新しい接続ウィザード" (New connection wizard) When the "新しい接続ウィザード" (New Connection Wizard) screen appears, click "次へ"...
- Page 146 Enter any name you want in the "ISP 名 " (ISP Name) and click "次へ " (Next) Enter the number of the access point in the "電話番号" (Telephone Number) column and click "次へ" (Next) This screen is an example of accessing mopera U by packet communication.
- Page 147 Select the icon created for the dial- up and open "プロパティ " (Properties) in the "ファイル" (File) menu Confirm the settings on the "全般" (General) tab If two or more modems are connected to the When connecting using the FOMA USB Cable with Charge Function 02, confirm that only the in-use FOMA terminal is checked in the "接続...
-
Page 148: Connect To Internet
When the Step 14 screen reappears, click "OK" Running dial-up connection This section describes how to make a dial-up connection for packet communication by using the dial- up setting. <Example: Using the FOMA USB Cable with Charge Function 02 on Windows 7> Connect the FOMA terminal to the PC with the FOMA USB Cable with Charge Function 02 (optional) "... - Page 149 <The Connecting screen appears> While this screen appears, the log-on process such as confirmation of the user name and password is performed. <Completion of the connection> When the connection is complete and a screen indicating the completion of the connection appears, click "...
-
Page 150: At Command List
AT Command List AT commands available on FOMA terminal d The following abbreviations are used in the AT command list; [&F] : Command of which setting is initialized by AT&F command. [&W] : Command of which setting is saved by AT&W command. The setting can be retrieved by ATZ command. - Page 151 AT command Outline Parameter/description Command execution example AT&W Stores the current settings. Only = 0 can be specified (can be omitted). AT&W0 AT&W AT&W? ERROR AT&W=? ERROR AT*DANTE Displays the FOMA terminal AT* DANTE 0: FOMA terminal signal reception level is displayed as *...
- Page 152 AT command Outline Parameter/description Command execution example AT+CBC Displays the battery status Result: +CBC:<bcs>,<bcl> AT+CBC of the FOMA terminal. bcs: +CBC:0,70 0 : FOMA terminal is powered by the battery. 1 : FOMA terminal is not powered by the battery. AT+CBC? 2 : FOMA terminal is not connected to the battery.
- Page 153 AT command Outline Parameter/description Command execution example AT+CLIP= Displays the other party's = 0 : Not display the result (initial value) AT+CLIP=0 Caller ID on a PC when a = 1 : Display the result 64K data communication call is received. AT+CLIP? AT+CLIP? +CLIP:0,1...
- Page 154 AT command Outline Parameter/description Command execution example AT+COPS Selects the network Format : AT+COPS=<mode>,2,<oper> AT+COPS=0 operator to connect. mode=0 : automatic (searches the network AT+COPS? and switches the network operator +COPS:0 automatically) mode=1 : manual (connects to the network AT+COPS=? operator specified in <oper>) +COPS:(2,,,"44F001"), mode=2 : Disconnects the connection to the...
- Page 155 AT command Outline Parameter/description Command execution example AT+CPIN Enters the PIN code in the Format: AT+CPIN="<pin>","<newpin>" (The status in which FOMA terminal. +CPIN: READY is This command is to enter the PIN1, answered when PIN2, or PUK code - depending on +CPIN? is entered) the state of the result code returned AT+CPIN="1234"...
- Page 156 AT command Outline Parameter/description Command execution example AT+CREG= Specifies whether the result = 0 : Not informed (initial value). AT+CREG=1 screen is present regarding = 1 : Informed. the inside/outside the (Set to informed) Informed when switching between service area information "Inside the service area"...
- Page 157 = 0 : Disconnect the line (can be omitted). (During packet for the FOMA terminal. communication) NO CARRIER Displays the ID code. = 0 : Displays "NTT DoCoMo". ATI0 NTT DoCoMo = 1 : Displays the product name (same with +GMM). ATI1 = 2 : Displays the version of the FOMA FOMA 【model name】...
- Page 158 AT command Outline Parameter/description Command execution example ATS0= Specifies how many times = 0 : No automatic answer (initial value). ATS0=0 the FOMA terminal rings = 1- 255: A call is automatically answered before it automatically ATS0? after the specified number of receives a call.
- Page 159 AT command Outline Parameter/description Command execution example ATS104= Sets the calling sub address = 0 : # ATS104=0 character. = 1 : % (initial value) = 2 : & ATS104? ATS104=? [&F] ERROR Specifies whether the result = 0 : Returns the result code in numeral ATV1 code is returned in numerals value.
- Page 160 d Supplementary explanation of AT command ■ Commands which do not function The following commands do not generate errors but will not function as a command: ・ ATT (Tone setting) ・ ATP (Pulse setting) ■ Command name: +CGDCONT=[parameter] ・Outline Sets the access point name (APN) for packet origination. Though this command is a setting command, it will not be recorded in non-volatile memory written by [&W], nor reset by [&F] or [Z].
- Page 161 ・Command execution example Only the following 4 patterns can be set. (1) is set as an initial value to each cid. Command for permitting all speeds of both uplink and downlink (when cid is 5) AT+CGEQMIN=5 Command for permitting only the speed of uplink 5,760kbps and downlink 7,232kbps (when cid is 6) AT+CGEQMIN=6,,5760,7232 Command for permitting uplink 5,760kbps and all speeds of downlink (when cid is 7) AT+CGEQMIN=7,,5760...
-
Page 162: Result Codes
Result codes ■ Result codes related with data communication Number Character indication Description indication Successfully executed. CONNECT Connected. RING Incoming call. NO CARRIER Line disconnected. ERROR Command not acceptable. NO DIALTONE Unable to detect dialing tone. BUSY Busy tone detected. NO ANSWER Time out in connection completing. - Page 163 Result code display example ■ When ATX0 is set Regardless of the AT¥V n command (p.49) setting, only CONNECT appears when the connection is completed. Character indication example: ATD * 99 *** 1# CONNECT Number indication example: ATD * 99 *** 1# ■...
- Page 164 Kuten Code List...
-
Page 165: Kuten Code List
Kuten Code List <Guide to the kuten code table> First enter “digits 1-3 of the kuten code” then “digit 4”. d Some kuten codes in the table here may look different from what actually appear on screens. First to third First to third First to third Fourth digit of Kuten codes... - Page 166 First to third First to third First to third Fourth digit of Kuten codes Fourth digit of Kuten codes Fourth digit of Kuten codes digits of digits of digits of Kuten codes Kuten codes Kuten codes 糊 袴 股 胡 菰 虎 誇 跨 鈷 雇 宕...
- Page 167 First to third First to third First to third Fourth digit of Kuten codes Fourth digit of Kuten codes Fourth digit of Kuten codes digits of digits of digits of Kuten codes Kuten codes Kuten codes 偃 假 會 偕 偐 偈 做 偖 偬 偸 愴...
- Page 168 First to third First to third First to third Fourth digit of Kuten codes Fourth digit of Kuten codes Fourth digit of Kuten codes digits of digits of digits of Kuten codes Kuten codes Kuten codes 燹 燿 爍 爐 爛 爨 爭 爬 爰 艝...
Need help?
Do you have a question about the N-01F and is the answer not in the manual?
Questions and answers