Sony CDX-601 Service Manual
Hide thumbs
Also See for CDX-601:
- Operating instructions (2 pages) ,
- Limited warranty (1 page) ,
- Operating instructions (3 pages)
Table of Contents
Advertisement
SERVICE MANUAL
MICROFILM
CDX-601/636
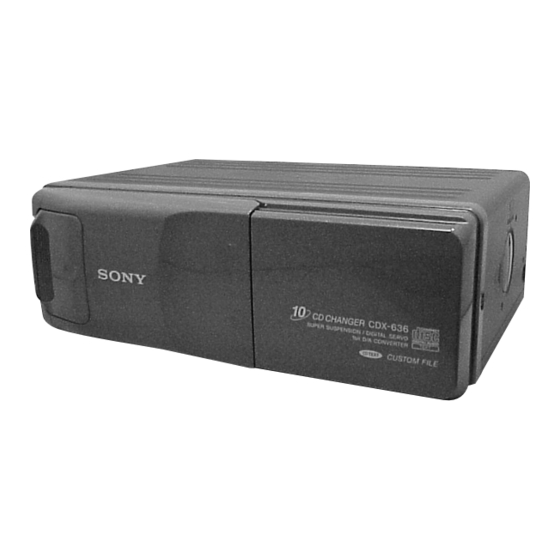
Photo: CDX-636
Model Name Using Similar Mechanism
CD Drive Mechanism Type
Optical Pick-up Name
SPECIFICATIONS
System
Compact disc digital audio system
Frequency response
10 – 20,000 Hz
Wow and flutter
Below the measurable limit
Signal-to-noise ratio
94 dB
Outputs
BUS control output (8 pins)
Analog audio output (RCA pin)
Current drain
800 mA (during CD playback)
800 mA (during loading or ejecting a disc)
Operating temperature
–10°C to +55°C
Approx. 262 × 90 × 181.5 mm
Dimensions
(w/h/d) not incl. projecting parts and
controls
Mass
Approx. 2.1 kg
Power requirement
12 V DC car battery (negative ground)
Supplied accessories
Disc magazine (1)
Parts for installation and connections
(1 set)
Design and specifications are subject to change without notice.
Canadian Model
AEP Model
COMPACT DISC CHANGER
US Model
CDX-601/636
UK Model
CDX-601
E Model
CDX-636
NEW
MG-251A-137
KSS-720A/K1NP
Advertisement
Table of Contents

Related Manuals for Sony CDX-601


Summary of Contents for Sony CDX-601
- Page 1 CDX-601/636 SERVICE MANUAL US Model Canadian Model CDX-601/636 AEP Model UK Model CDX-601 E Model CDX-636 Photo: CDX-636 Model Name Using Similar Mechanism CD Drive Mechanism Type MG-251A-137 Optical Pick-up Name KSS-720A/K1NP SPECIFICATIONS System Compact disc digital audio system Frequency response 10 –...
-
Page 2: Table Of Contents
OPERATION. REPLACE THESE COMPONENTS WITH DE FONCTIONNEMENT. NE REMPLACER CES COM- SONY PARTS WHOSE PART NUMBERS APPEAR AS POSANTS QUE PAR DES PIÈCES SONY DONT LES SHOWN IN THIS MANUAL OR IN SUPPLEMENTS PUB- NUMÉROS SONT DONNÉS DANS CE MANUEL OU LISHED BY SONY. -
Page 3: Servicing Notes
With the arrow side facing up Labeled surface up • To listen to an 8 cm CD, use the separately sold Sony CD adapter CSA-8. Be sure to always use Note: Take out the magazine only when the tray is completely within the... -
Page 4: Installation
• Antes de hacer los orificios de ø 3,5 mm, compruebe que no haya nada en el kan ta skada när du borrar hålen (ø 3,5 mm). Sistema de audio de automóvil compatible con BUS Sony otro lado de la superficie de montaje. -
Page 5: Disassembly
SECTION 3 DISASSEMBLY Note: Follow the disassembly procedure in the numerical order given. COVER (UPPER T), FRONT PANEL ASS’Y 1 screw (PTT2.6 × 6) 1 screw (PTT2.6 × 6) 3 lever (FLT) 2 cover (upper T) 1 screw (PTT2.6 × 6) 3 lever (FLT) 1 screw (PTT2.6 ×... - Page 6 JACK BOARD Remove the jack board of the arrow. 1 ground point screw (PTT2.6 × 6) 2 jack board MAIN BOARD, SLIDE VARIABLE RESISTOR (ELEVATOR HEIGHT SENSOR) (RV202) 1 main flexible board (CNJ101) 5 two screws (FP) 5 screw (FP) 6 main board 2 Remove two solders of the elevator motor leads (M104).
- Page 7 ELJ MOTOR ASS’Y (ELEVATOR) (M104) 1 screw (PTT2 × 4) 2 bracket (EVM.S) 3 ELJ motor ass’y (elevator) (M104) ESCUTCHEON (T) 3 two claws 2 Remove the claw in the direction of the arrow A. 4 Remove the ditch in the direction of the arrow B. 5 Remove the escutcheon (T) in the direction of the arrow C.
- Page 8 CHASSIS (U.S) SUB ASS’Y 3 Remove the edge in the direction 1 three screws of the arrow A. (PTT2 × 4) 1 two screws (PTT2 × 4) 4 Remove the chassis (U.S) sub ass’y in the direction of the arrow B. 1 screw (PTT2 ×...
- Page 9 RF BOARD 3 two screws (PS2 × 4) 4 RF board 3 two screws (PS2 × 4) 2 Remove four solders of the LSW board leads and spindle motor leads (M102). 2 Remove two solders of the sled motor leads 1 OP flexible board (CN102).
- Page 10 LSW BOARD, SPINDLE MOTOR (S) SUB ASS’Y (M102) 8 two precision screws (P1.7 × 2.2) 3 spring (chucking) 6 retainer (disc) 1 precision screw (P2 × 2.5) 4 precision screw (P2 × 2.2) 5 bracket (CP) 2 LSW board 9 Remove the spindle motor (S) sub ass’y (M102) in the direction of the arrow.
-
Page 11: Mechanism Deck Assembly
SECTION 4 MECHANISM DECK ASSEMBLY Note: Follow the assembly procedure in the numerical order given. OPTICAL PICK-UP COMPLETE ASS’Y 1 Move the lever (LOCK 3A) in the direction of the arrow A, and return it a little in the direction of arrow B from the position where the chuck plate is moved chuck plate down to the lower limit. - Page 12 OPERATION CHECK 1 Confirm that the slider moves in the direction of the arrow C to move down the chuck plate if the gear (LOAD 1) is rotated in the direction of the arrow A or the chuck plate moves up and the slider moves in the direc- tion of the arrow D if the gear is rotated in the direction of the arrow B .
-
Page 13: Mechanical Adjustment
7. After adjustment at addresses 5 to 6 is finished, check all op- erations from addresses 1 to 10 with the set placed vertically CDX-601/636 and horizontally respectively to confirm that the elevator shaft positions in a range between comb teeth A to B. -
Page 14: Electrical Check
SECTION 6 ELECTRICAL CHECK Note: • TRACKING OFFSET CHECK Power supply voltage: DC14.4 V (more than 3 A). – RF BOARD – • FOCUS BIAS CHECK (Component Side) – RF BOARD – (Component Side) oscilloscope oscilloscope – TP (VC) – IC101 TP (VC) IC101... -
Page 15: Diagrams
CDX-601/636 SECTION 7 DIAGRAMS 7-1. BLOCK DIAGRAM – RF SERVO/DA CONVERTER Section – FILTER CN901 (1/2) 63 66 65 RF AMP, AUDIO OUT FOCUS/TRACKING ERROR AMP EMPHI IC101 AOUT2 LOUT AIN2 DETECTOR SERIAL PCMD PCMDI DIGITAL FILTER, GND-ISOLATION & BUFFER... -
Page 16: Block Diagram - Bus Control/Power Supply Section
CDON 8 RESET SIGNAL RESET GENERATOR IC303 B. UP +5V CN901 (2/2) CONTROL BUS +5V REGURATOR B. UP Q303 D308 BUS INTERFACE (FOR SONY BUS) S-RAM IC302 IC202 DATA DATA RAMCE SCLK RAMWE BUSON OUT BUSON BUSON OUT BUSON IN BUSON... -
Page 17: Note For Printed Wiring Boards And Schematic Diagrams
• Circuit boards Location 7-3. NOTE FOR PRINTED WIRING BOARDS AND SCHEMATIC DIAGRAMS Note on Printed Wiring Boards: Note on Schematic Diagram: • X : parts extracted from the component side. • All capacitors are in µF unless otherwise noted. pF: µµF •... -
Page 18: Printed Wiring Boards - Rf Section
CDX-601/636 7-4. PRINTED WIRING BOARDS – RF Section – • See page 17 for Circuit Boards Location. • Semiconductor Location Ref. No. Location IC101 IC201 Q101 (Page 20) -
Page 19: Schematic Diagram - Rf Section
CDX-601/636 7-5. SCHEMATIC DIAGRAM – RF Section – • See page 25 for for Waveforms. • See page 26 for IC Block Diagrams. (Page 22) The components identified by mark 0 or dotted Les composants identifiés par une marque 0 sont line with mark 0 are critical for safety. -
Page 20: Printed Wiring Boards - Main Section (1/2)
CDX-601/636 7-6. PRINTED WIRING BOARDS – MAIN Section (1/2) – • See page 17 for Circuit Boards Location. • Semiconductor Location Ref. No. Location D301 D302 D303 D304 D305 D306 D307 D308 D309 D310 D311 D312 IC101 IC201 IC202 IC203... -
Page 21: Printed Wiring Board - Main Section (2/2)
CDX-601/636 7-7. PRINTED WIRING BOARD – MAIN Section (2/2) – • See page 17 for Circuit Boards Location. • Semiconductor Location Ref. No. Location IC304 IC305 (Page 24) -
Page 22: Schematic Diagram - Main Section (1/2)
CDX-601/636 7-8. SCHEMATIC DIAGRAM – MAIN Section (1/2) – • See page 25 for Waveforms. • See page 27 for IC Block Diagram. (Page 19) -
Page 23: Schematic Diagram - Main Section (2/2)
CDX-601/636 7-9. SCHEMATIC DIAGRAM – MAIN Section (2/2) – • See page 25 for Waveform. • See page 27 for IC Block Diagrams. (Page 24) (Page... -
Page 24: Printed Wiring Boards - Jack/Switch Section
CDX-601/636 7-10. PRINTED WIRING BOARDS – JACK/SWITCH Section – 7-11. SCHEMATIC DIAGRAM – JACK/SWITCH Section – • See page 17 for Circuit Boards Location. (Page 23) (Page 20) (Page 23) (Page 21) - Page 25 • Waveforms – RF Board – – MAIN Board – 1 IC101 qh (RFO) (play mode) 1 IC101 uj (LRCK), uk (LRCKI) (play mode) 1.4 ± 0.3 Vp-p 5.6 Vp-p 22.8 µs 2 IC101 qf (FE) (play mode) 2 IC101 ia (BCK), is (BCKI) (play mode) 5.7 Vp-p Apporx.
- Page 26 • IC Block Diagrams – RF Board – IC101 CXA2596M-T6 24 VCC HOLD LC/PD LD ON AGCVTH APC LD HOLD SW APC PD AGCCONT COMPARATOR RF BOT RFTC COMPARATOR RF I RF SUMMING RF EQ FOCUS ERROR F I-V AMP TRACKING ERROR E I-V AMP...
-
Page 27: Main Board
– MAIN Board – IC101 CXD2598Q 79 78 77 76 75 74 73 72 71 70 69 68 67 66 65 64 63 61 60 59 54 53 52 51 CLOCK GENERATOR BCKI ENPH EMPHI OP AMP ANALOG XVDD CONVERTER SWITCH SERIAL-IN DIGITAL... - Page 28 IC203 BR24C16FJ-E2 (CDX-636) IC301 LB1930M-TLM BUFFER START OUT1 MOTOR STOP CONTROL DRIVE LOGIC CIRCUIT SERIAL CIRCUIT OUT2 H.V. PUMP/TIMING CONTROL LOGIC BUFFER 8 VCC LOAD S-GND P-GND COMP DEVICE DATA RECOVERY ADDRESS COMPARATOR LOAD INC DATA WORD PROM ADDR/COUNTER Y DEC SERIAL MUX /ACK LOGIC...
-
Page 29: Ic Pin Function Description
“L”: active RAMCE CDX-601: Not used (open) System reset signal input from the SONY bus interface (IC302) and reset signal generator (IC303) RESET “L”: reset For several hundreds msec. after the power supply rises, “L” is input, then it changes to “H”... - Page 30 Input of signal for the fine adjustment (elvator height (address) adjustment; RV201) of elevator position (A/D input) — Not used (open) BUSON Bus on/off control signal input from the SONY bus interface (IC302) “H” bus on EJECT Eject switch (SW801) input terminal “H” active MAGSW Magazine in/out detect switch input Not used (open)
- Page 31 *1 chucking motor (M103) control LOAD Mode STOP SAVE BRAKE Terminal CHUCKING CH.F (pin ua) “H” “H” “L” “L” CH.R (pin us) “H” “L” “H” “L” *2 elevator motor (M104) control Mode ELEVATOR ELEVATOR STOP BRAKE Terminal DOWN ELVF (pin uf) “H”...
-
Page 32: Exploded Views
Description Remark Ref. No. Part No. Description Remark 3-022-011-01 DAMPER (250T) 3-039-239-11 PANEL (T), FRONT (CDX-601) 3-036-546-41 COVER (LOWER T) 3-022-007-02 BUTTON (EJT) (Z) 3-024-065-01 CUSHION (EJECT-T) 3-041-218-11 ESCUTCHEON (T) X-3375-357-1 ARM (FLT) ASSY * 16 3-022-012-01 HEAT SINK (T) - Page 33 (2) MECHANISM DECK SECTION-1 (MG-251A-137) Ref. No. Part No. Description Remark Ref. No. Part No. Description Remark X-3378-091-1 CHASSIS (U. S) SUB ASSY 3-011-997-01 SPRING (STOPPER. LOWER) 3-024-161-01 SPRING (SUT)
- Page 34 (3) MECHANISM DECK SECTION-2 (MG-251A-137) M104 Ref. No. Part No. Description Remark Ref. No. Part No. Description Remark 3-024-170-01 SPRING (SB), TENSION X-3378-092-1 CHASSIS (D. S) SUB ASSY * 102 3-040-790-01 BRACKET (EVM. S) M104 A-3301-123-A ELJ MOTOR ASSY (ELEVATOR)
- Page 35 (4) MECHANISM DECK SECTION-3 (MG-251A-137) M103 Ref. No. Part No. Description Remark Ref. No. Part No. Description Remark * 151 3-024-150-01 RETAINER (CHM) 3-010-252-01 ROLLER (CRE) * 152 X-3378-080-1 BRACKET (CHM. D) ASSY 3-010-268-01 SPRING (DH), TENSION 3-010-270-01 COVER (CHM) * 161 A-3290-194-K MAIN ASSY, CHASSIS (EVY) 3-321-813-01 WASHER, COTTER POLYETHYLENE...
- Page 36 (5) MECHANISM DECK SECTION-4 (MG-251A-137) not supplied M102 not supplied M101 The components identified by Les composants identifiés par une mark 0 or dotted line with marque 0 sont critiques pour la mark 0 are critical for safety. sécurité. Replace only with part num- Ne les remplacer que par une pièce ber specified.
-
Page 37: Electrical Parts List
1-164-156-11 CERAMIC CHIP 0.1uF C305 1-162-964-11 CERAMIC CHIP 0.001uF ************************************************************** C306 1-162-968-11 CERAMIC CHIP 0.0047uF 10% A-3294-788-A MAIN BOARD, COMPLETE (CDX-636) A-3294-822-A MAIN BOARD, COMPLETE (CDX-601) C307 1-165-112-11 CERAMIC CHIP 0.33uF C308 1-125-837-11 CERAMIC CHIP 6.3V ********************* C309 1-164-156-11 CERAMIC CHIP 0.1uF... - Page 38 MAIN Ref. No. Part No. Description Remark Ref. No. Part No. Description Remark C318 1-164-156-11 CERAMIC CHIP 0.1uF R121 1-216-853-11 METAL CHIP 470K 1/16W C401 1-162-962-11 CERAMIC CHIP 470PF R122 1-216-853-11 METAL CHIP 470K 1/16W C402 1-162-962-11 CERAMIC CHIP 470PF R123 1-216-833-11 RES-CHIP 1/16W...
- Page 39 MAIN SWITCH Ref. No. Part No. Description Remark Ref. No. Part No. Description Remark < SWITCH > R201 1-216-826-11 METAL CHIP 2.7K 1/16W R202 1-216-833-11 RES-CHIP 1/16W SW201 1-572-688-11 SWITCH, PUSH (1 KEY) (MAGAZINE DETECT) R203 1-216-833-11 RES-CHIP 1/16W R204 1-216-842-11 METAL CHIP 1/16W <...
- Page 40 CDX-601/636 Ref. No. Part No. Description Remark Ref. No. Part No. Description Remark 7-627-553-37 PRECISION SCREW +P 2X3 TYPE 3 ************************************************************ ACCESSORIES & PACKING MATERIALS ******************************* 3-867-910-11 MANUAL, INSTRUCTION (ENGLISH, FRENCH, SPANISH, CHINESE) (US, Canadian, E) 3-867-910-21 MANUAL, INSTRUCTION (ENGLISH, SPANISH,...
Need help?
Do you have a question about the CDX-601 and is the answer not in the manual?
Questions and answers