
Subscribe to Our Youtube Channel
Related Manuals for Hark TEXAS PRO-PIT HK0527


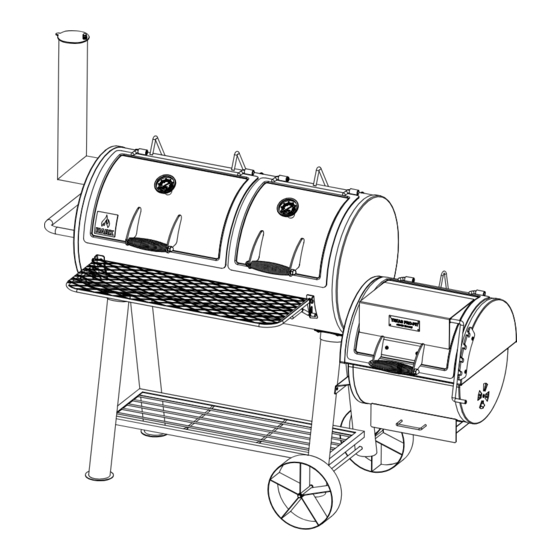
Summary of Contents for Hark TEXAS PRO-PIT HK0527
- Page 1 TEXAS PRO-PIT Owner’s Manual ASSEMBLY, CARE & SAFETY INSTRUCTIONS Product Code: HK0527...
- Page 3 • It is recommended that you keep your sales receipt, as Hark Enterprises Pty Ltd requires proof of purchase for any warranty claims. The benefits conferred by this warranty are in addition to all rights and remedies in respect of the product that the consumer has under the Competition and Consumer Act 2010 and similar state and territory laws.
- Page 4 - Never operate this smoker under any overhead for commercial use. roof covering, awning or overhang. - Accessories and cookware not supplied by Hark ® are not recommended. Never use glassware, - Keep your hands, hair and face away from any naked flame.
-
Page 5: Table Of Contents
A. PARTS LIST Name Name Name Cap Nut Front Shelf Brackets (1set) Fixture Plate Spring Wheels (2) Firebox Base Smoke Stack Damper Firebox Bracket Air Damper Large Lid Baffle B (2) Firebox Charcoal Grate Large Warming Shelf Baffle C Firebox Cooking Grills (2) Smoke Stack Wheel Axle Firebox Top... -
Page 6: Spring
B. HARDWARE PACK Name M6-15mm Bolts M6 Nuts (Black) Flat Washers M6 Lock Nut (Silver) M12 Lock Nuts M6 Spring Washers... - Page 7 C. ASSEMBLY INSTRUCTIONS STEP 1 — Remove hinge locking screw from left hand hinge of cooking chamber large lid (4) and slide lid off the hinge pins. — Remove hinge locking screw from left hand hinge of cooking chamber small lid (39) and slide lid off the hinge pins.
- Page 8 STEP 3 — Fit the long legs (13) to the bottom wire rack (20) by inserting the location pins on the bottom wire rack (20) into the holes on the bottom of the long legs (13). Bolt the legs to the cooking chamber (9) using 8-M6x15mm bolts, 8-Flat washers and 8-M6 nuts.
-
Page 9: Smoke Stack Damper
STEP 5 — Attach the smoke stack (6) to the end of the cooking chamber (9) by fitting the sealing gasket (7) and using 4-M6x15mm bolts and 4-M6 nuts. — Attach side handle (8) to the same end of the cooking chamber (9) using 4-M6x15mm bolts and 4/M6 nuts as per fig. - Page 10 STEP 8 — Fit the firebox bracket (16) to the wheel legs (22) using 2-M6x15mm bolts. fig. 8 STEP 9 — On the firebox top (32) fit the firebox lid stop (25) into the slot near the opening and bolt to lid using 1-M6x15 bolt &...
- Page 11 STEP 11 — Fit the air damper (29) to the end of the firebox base (28) using 1-M6x15mm bolt and 1-M6 lock nut. fig. 11 STEP 12 — Turn the firebox top (32) upside down and fit the firebox base (28) to it using 6-M6x15mm bolts.
- Page 12 STEP 14 — At the end of the cooking chamber (9) with the elliptical hole, fit the Firebox unit locating the 2-M6 bolt heads through the keyhole slots and resting against the firebox bracket (16). Secure using 4-M16x15MM bolts into the cooking chamber (9) and 2-M6x15 bolts & 2-M6 nuts into the firebox bracket (16).
- Page 13 STEP 15 — Slide the ash drawer (23) into the firebox ash drawer bracket (26). fig. 15 STEP 16 — Fit 4 shelf brackets (2 pairs) to the cooking chamber (9) using 8-M6x15 bolts. fig. 16 STEP 17 — Fit the front shelf brackets (14) onto the cooking chamber using 4-M6x15 bolts & 4-M6 nuts. —...
- Page 14 STEP 18 — Fit the 3 charcoal grates (12) into the bottom of the cooking chamber (9) as shown in fig. 18 below. — Fit baffles (11, 17 & 18) above the charcoal grates (12) in the cooking chamber (9). —...
-
Page 15: Large Lid
STEP 20 — Refit large lid (4) and small lid (39) to cooking chamber (9) and secure with hinge locking screws (supplied). fig. 20 STEP 21 — Fit firebox lid handle (34) to firebox lid (38) using 2-M6x15 mm bolts at the top and 2-M6 nuts below fig. - Page 16 STEP 22 — Fit adjustable shaft (36) onto the firebox lid (38) by screwing the threaded end into the hole at the side of the firebox lid (38). fig. 22 STEP 23 — Fit the 2 thermometers (24) into the cooking chamber large lid (4) and the cooking chamber small lid (39).
- Page 17 — A can must be in place under the grease hole at all times. Once the unit and the can have fully cooled after use, remember to empty or replace the can as required. fig. 24 Assembly of your Hark Texas Pro-Pit is now complete. fig. 25 below shows how the assembled unit should look. fig. 25...
-
Page 18: Smoke Stack
Chamber (STEP 24). A tin must be placed under the grease hole at all times and will need to be checked regularly to ensure it is not full. Always wait until the smoker has fully cooled before emptying or replacing the can. — Your Hark Texas Pro-Pit is now ready for use. - Page 19 E CARE OF YOUR TEXAS PRO-PIT ASH AND RUSTING The Texas Pro-Pit’s heavy duty steel construction will help extend the smoker’s life span. The inside of the smoker should be treated like a cast iron skillet by applying cooking oil to any rust should it appear (remembering not to coat the cooking grills).
-
Page 20: Ash Drawer
F. LIGHTING YOUR FIRE Lighting your fire directly on the charcoal grates — Remember, patience is a virtue! Cooking with charcoal and wood is more complicated than using gas but you will get a much better result. Always allow plenty of time to prepare the fire prior to cooking. -
Page 21: Direct Grilling
Avoid burning pine cones too as they are highly flammable. Hark recommends the use of “Cowboy” brand of 100% natural wood chips and wood chunks. - Page 22 You can experiment using these baffles to regulate the temperature as desired. If your Hark Texas Pro-Pit ever becomes too hot, simply close down the Air Damper to the fire. Alternatively, you can open the cooking chamber lid to allow excess heat to escape.
-
Page 23: Replacement Parts
For enquiries regarding service or spare parts, please call (03) 9873 2711; 1300 799 787 or email service@hark.com.au. RECIPES AND COOKING INSTRUCTIONS For detailed instructions on how to cook with your Texas Pro-Pit and to obtain tailored recipes, visit our website at www.hark.com.au. Made in China Imported by: Hark Enterprises Pty Ltd... - Page 24 Hark Enterprises Pty Ltd Unit 11, 41-49 Norcal Rd, Nunawading, VIC 3131 T: 1300 799 787 E: service @ hark.com.au W: www.hark.com.au...
Need help?
Do you have a question about the TEXAS PRO-PIT HK0527 and is the answer not in the manual?
Questions and answers