TomTom GO Reference Manual
Hide thumbs
Also See for GO:
- User manual ,
- Quick start manual (151 pages) ,
- Reference manual (118 pages)
Table of Contents
Advertisement
Quick Links
Advertisement
Table of Contents

Related Manuals for TomTom GO


Summary of Contents for TomTom GO
- Page 1 TomTom GO Reference Guide...
-
Page 2: Table Of Contents
TomTom MyDrive App for iOS or Android ..............11 Connect to TomTom services using your smartphone ............. 12 Reconnect to TomTom services using your smartphone ..........12 Connect to TomTom services using a different smartphone ..........13 Deleting phones ....................13 Unable to get a connection ..................13 What's on the screen The map view..................... - Page 3 Syncing TomTom MyDrive About TomTom MyDrive ..................31 Logging into your MyDrive account ................31 Setting a destination using MyDrive ................31 Showing a planned destination in My Drive ..............32 Clearing a MyDrive destination ................32 Deleting a MyDrive destination from My Places ............32 Finding and syncing locations using MyDrive ..............
- Page 4 Voice control (Speak & Go) About voice control....................73 Starting voice control ................... 73 Making your own wake-up phrase ................73 The voice control screen ..................74 Some tips for using voice control ................75 What you can use voice control for................75 Saying commands in different ways ................
- Page 5 Language and Units ....................97 System ......................98 Help ........................ 98 Getting Help Help ....................... 100 Product certification Finding product certification information on your device ..........101 Updating using MyDrive Connect About MyDrive Connect ..................102 MyTomTom account .................... 102 Setting up MyDrive Connect ...................
-
Page 6: Welcome To Navigation With Tomtom
This covers installation, switching on, setting up and planning your first route. After that, you will probably want to connect to TomTom services, which you can read all about in Connecting to TomTom services chapter. To help avoid traffic delays and get you to your destination quicker, you can even use TomTom services on the routes you drive every day. -
Page 7: What's New
Any changes you make on MyDrive to your destinations or favorites are immediately sent to your TomTom device. To make this happen, you need to be logged in with the same account on both your device and MyDrive.*... -
Page 8: Get Going
6. Turn the rubber grip near the base of the mount in a clockwise direction until you feel it lock. 7. If your holder is not integrated into your GO, place your GO in the holder, making sure that it clicks into place. -
Page 9: Setting Up
Language and Units in the Settings menu. When you first switch on your TomTom GO, you have to answer a few questions to set it up. Answer the questions by touching the screen. GPS reception When you first start your TomTom GO, it may need a few minutes to determine your position. In the future, your position will be found much faster. -
Page 10: Memory Card Slot
MyDrive using a computer. When your GO is up to date, you can use a memory card as extra storage space to add extra maps, tracks or routes to your device. Maps can be purchased from tomtom.com. Device not starting In rare cases, your TomTom GO may not start correctly or may stop responding to your taps. -
Page 11: Connecting To Tomtom Services
TomTom service please read the details about how each service uses your information. On your GO, tap Yes to allow your information to be shared. If you don't agree to share your information the service will not work. -
Page 12: Connect To Tomtom Services Using Your Smartphone
Your GO will remember your phone and will find it automatically when you are in range of your navigation device. If you have a valid TomTom services subscription, the service will start automatically. The Bluetooth icon at the top of the Main Menu screen on your GO shows the status of the Bluetooth connection:... -
Page 13: Connect To Tomtom Services Using A Different Smartphone
To check your connection status to the internet, select Connected Services in the Main Menu. If your connection status is shown as offline, select Offline and follow the instructions. If your GO cannot connect to your phone, or you have no internet connection, also check the following: Your phone is shown on your TomTom navigation device. - Page 14 Your phone's Bluetooth is turned on. The TomTom MyDrive app is started on your phone. Your data plan with your mobile services provider is active, and you can access the internet on your phone.
-
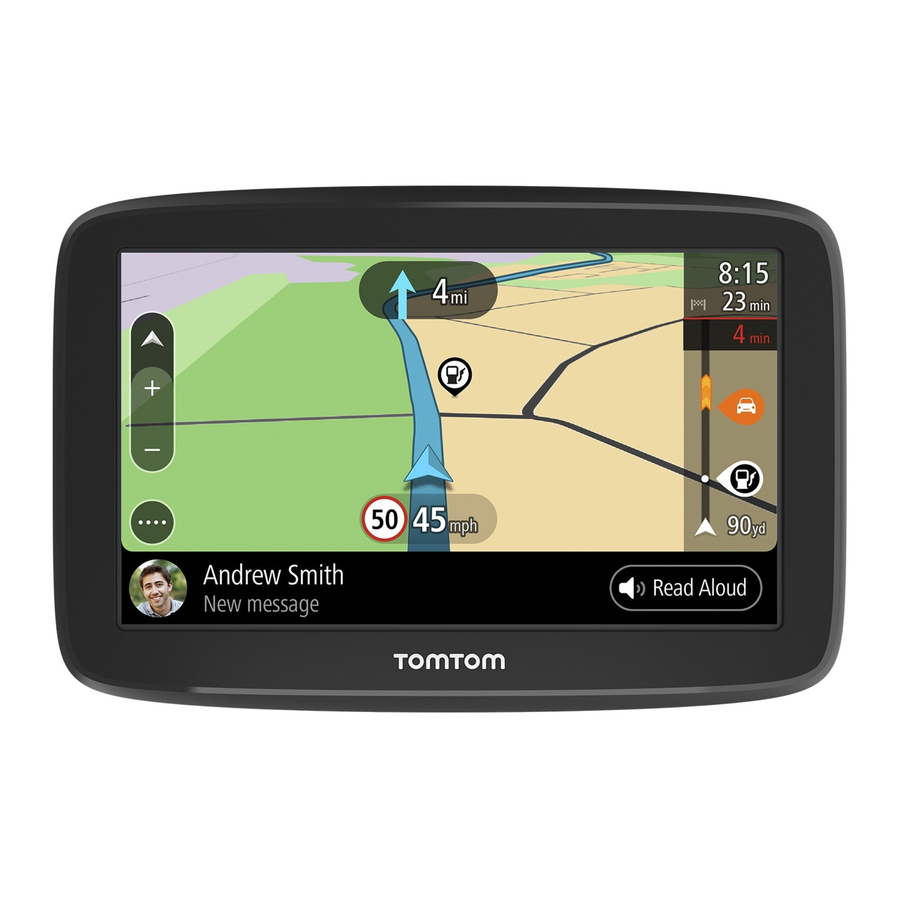
Page 15: What's On The Screen
The map view is shown when you have no planned route. Your actual location is shown as soon as your GO has found your GPS location. You can use map view in the same way as you might look at a traditional paper map. You can move around the map using gestures, and zoom using the zoom buttons. -
Page 16: The Guidance View
4. Current location. This symbol shows your current location. Select it to add it to My Places or search near your current location. Note: If your GO cannot find your location using GPS or other methods, the symbol appears gray. - Page 17 When your GO starts after sleeping and you have a route planned, you are shown the guidance view with your current location. 1. Switch view button. Select the switch view button to change between the map view and the guidance view.
-
Page 18: The Route Bar
7. Current location. This symbol shows your current location. Select the symbol or the speed panel to open the quick menu. Note: If your GO cannot find your location using GPS or other methods, the symbol appears gray. 8. Route bar. The route bar is shown when you have planned a route. -
Page 19: Distances And The Route Bar
shown on top of another symbol, selecting the symbols zooms in on the route bar to show each symbol separately. You can then select a symbol. The total time delay due to traffic jams, weather, and other incidents on your route, including information provided by IQ Routes, is shown above the symbols. - Page 20 Select this button to drive to your home location. If this button is not Drive Home included in your main menu, go to My Places to set up your home location. Select this button to drive to your work location. If this button is not...
-
Page 21: Other Buttons
Select this button to open the Help Menu. The Help Menu contains help for using Voice control if supported by your device, together with other information about your GO, for example, map version, device serial number and legal information. Select this button to reorder the buttons in the Main Menu. - Page 22 This symbol shows the status of the Bluetooth connection when you use a smartphone to connect to TomTom services. This symbol shows the power level of the battery in your GO. This symbol shows that your GO is connected to TomTom services.
-
Page 23: Volume Control
Example of when to use this: Zooming in and out on the map. Tip: Pinch to zoom isn't available on all devices. If pinch to zoom isn't available on your GO, use the zoom buttons to zoom in and out. -
Page 24: Changing The Text And Button Size
Tap or select Tap a single finger on the screen. Example of when to use this: Selecting an item in the Main Menu. Tip: To open a pop-up menu for an item on the map, select and hold the item until the menu opens. Changing the text and button size You can change the size of the text and the buttons you see on the screen, for example to make the text easier to read and the buttons easier to use. -
Page 25: Traffic
Your TomTom GO regularly receives information about the changing traffic conditions. If traffic jams, heavy rain, snow or other incidents are found on your current route, your GO will offer to replan your route to try and avoid any delays. -
Page 26: Looking At Traffic On The Map
You can choose the information you see on the arrival information panel. Traffic status - if your GO isn't receiving any traffic information, a symbol showing traffic with a cross appears underneath the arrival information panel. The bar uses symbols to show the following information:... -
Page 27: Looking At Traffic On Your Route
Note: If your GO isn't receiving any traffic information, a symbol showing traffic with a cross appears underneath the arrival information panel. -
Page 28: Traffic Incidents
For a complete list of incident types, see Traffic incidents. Select the back button to go back to the guidance view. Traffic incidents Traffic incidents and warnings are shown in the map view and in the route bar. Symbols shown in a circle are traffic incidents. -
Page 29: Advanced Lane Guidance
Unknown incident Road work Lane closure Road closure Advanced Lane Guidance Note: Lane guidance is not available for all crossings or in all countries. Advanced Lane Guidance helps you prepare for highway exits and crossings by showing the correct driving lane for your planned route. As you approach an exit or crossing, the lane you need is shown on the screen and in the instruction panel. - Page 30 Important: The speed limit shown in the speed panel is only an indication. You must always obey the actual speed limit for the road you are on and the conditions you are driving in.
-
Page 31: Syncing Tomtom Mydrive
Important: To use TomTom MyDrive you need a compatible navigation device. Use TomTom MyDrive to do the following: Find a destination on the MyDrive map and send it to your GO. You can drive to the destination and it is also saved in My Places and in Recent Destinations in the Main Menu. -
Page 32: Showing A Planned Destination In My Drive
Showing a planned destination in My Drive When you plan a route on your GO, the destination is synced with your MyDrive account. You can see the destination when you are logged into MyDrive in a web browser or when using the MyDrive app. -
Page 33: Syncing My Places Locations With Mydrive
Deleting a community POI list You can only delete an uploaded POI list from your GO using MyDrive in a web browser. To delete a POI list, do the following: 1. In a web browser, log into your MyDrive account. - Page 34 All imported POI place lists. Tip: MyDrive also syncs your locations in My Places with your MyDrive account. You can see your My Places locations and the POI place lists you have imported in MyDrive in a web browser or on the MyDrive app.
-
Page 35: Using Quick Search
Using Quick Search About search You use search to find a wide range of places and then navigate to them. You can search for the following: A specific address, for example, 335 Madison Avenue, New York. A partial address, for example, Madison Ave NY. A type of place, for example, gas station or restaurant. - Page 36 Tip: If you press and hold a letter key on the keyboard, you get access to extra characters if they are available. For example, press and hold the letter "e" to access characters 3 e è é ê ë and more. You can search for a POI (Point of Interest) type, such as a restaurant or tourist attraction.
-
Page 37: Planning A Route To A Poi Using Online Search
Important: In the interest of safety and to avoid distractions while you are driving, you should always plan a route before you start driving. Note: Searching online is only available on connected devices. To search online on your GO, you must be connected to TomTom services. - Page 38 The search results are shown in two columns. 2. Select Search Places Online. 3. Use the keyboard to enter the name of the POI you want to find, then press the Search button on the keyboard. Tip: If you press and hold a letter key on the keyboard, you get access to extra characters if they are available.
-
Page 39: Entering Search Terms
5. To see more information about the POI, select the POI on the map and then select the pop-up menu button. Select More Information on the pop-up menu. You see more information about the POI such as the phone number, full address, and email. 6. - Page 40 5. 123?! button. Select this button to use numbers and symbols on your keyboard. Select the =\< button to toggle between the numbers and more symbols. Select the ABC button to go back to the general keyboard. 6. Keyboard layout button.
-
Page 41: Working With Search Results
8. Show/hide keyboard. Select this button to show or hide the keyboard. Tip: Select the Shift key once to make the next letter you type upper case. Double tap the Shift key to use Caps-Lock where all the letters you type are upper case. Select the Shift key once to quit Caps-Lock. -
Page 42: About Zip Codes
Every location on Earth, including those in the sea, like islands and oil rigs, can be represented by a mapcode. Mapcodes are short, and easy to recognize, remember and communicate. They are precise to a few meters, which is good enough for every-day use. Go to mapcode.com for instructions on how to find the mapcode for a location. - Page 43 Court house Legal - Attorneys Bank Legal - other services Food services Convenience store Fast food restaurant Restaurant Chinese restaurant Accommodation Hotel or motel Luxury hotel Campground Economy chain hotel Emergency services Hospital or clinic Dentist Police station Veterinarian Doctor Fire station Car-related services Outside parking...
- Page 44 Rental car facility Electric/hybrid car charging point(s) Rental car parking Car repair facility Other services Embassy Pet services Government office Telecommunication Company Community service Post office Pharmacy Shopping center Beauty services Tourist information office Shop Education College or university School Library Convention center Leisure...
- Page 45 Concert hall Amusement park Museum Exhibition center Opera Cultural center Nightlife Leisure center Sport Sports Park Swimming pool Mountain peak Water sports Beach Tennis court Park or recreation area Ice skating rink Yacht basin or marina Sports center Stadium Golf course Religion Church Place of worship...
- Page 46 Ferry terminal ZIP code Note: Not used in all countries. Border crossing Residential area Bus station Gas station Toll plaza Electric/hybrid car charging stations Rest area Truck stop City center...
-
Page 47: Planning A Route
Planning a route Planning a route to an address using search Important: In the interest of safety and to avoid distractions while you are driving, you should always plan a route before you start driving. To plan a route to an address using search, do the following: 1. - Page 48 Towns and roads are shown on the left, POIs are shown on the right. Tip: To see more results, hide the keyboard or swipe the results list to scroll it. Tip: You can switch between seeing the results on the map or in a list by selecting the list/map button: 5.
-
Page 49: Planning A Route To A City Center
Planning a route to a city center Important: In the interest of safety and to avoid distractions while you are driving, you should always plan a route before you start driving. To plan a route to a city center using search, do the following: 1. -
Page 50: Planning A Route To A Poi Using Search
5. Select the city in the left-hand column. The city name is shown in the right side of the search input box, and the city center POI is shown below in the right-hand column. 6. Select the city center POI. The city center location is shown on the map. - Page 51 2. Select Search. The search screen opens with the keyboard showing. 3. Use the keyboard to enter the name of the place you want to plan a route to. Tip: If you press and hold a letter key on the keyboard, you get access to extra characters if they are available.
-
Page 52: Planning A Route To A Poi Using Online Search
Important: In the interest of safety and to avoid distractions while you are driving, you should always plan a route before you start driving. Note: Searching online is only available on connected devices. To search online on your GO, you must be connected to TomTom services. - Page 53 The search results are shown in two columns. 2. Select Search Places Online. 3. Use the keyboard to enter the name of the POI you want to find, then press the Search button on the keyboard. Tip: If you press and hold a letter key on the keyboard, you get access to extra characters if they are available.
-
Page 54: Planning A Route Using The Map
5. To see more information about the POI, select the POI on the map and then select the pop-up menu button. Select More Information on the pop-up menu. You see more information about the POI such as the phone number, full address, and email. 6. -
Page 55: Planning A Route Using My Places
2. When you have found your destination on the map, select it by pressing and holding the screen for about one second. A pop-up menu shows the nearest address. 3. To plan a route to this destination, select the drive button: A route is planned and then guidance to your destination begins. - Page 56 2. Select My Places. A list of all your Places opens. 3. Select the Place you want to navigate to, for example Home. Your chosen Place is shown on the map with a pop-up menu. 4. To plan a route to this Place, select the drive button: A route is planned and then guidance to your destination begins.
-
Page 57: Planning A Route Using Coordinates
W 73 59.15 Note: The bar below the coordinates turns red if you enter coordinates that are not recognized by your GO. 6. As you type in the coordinates, suggestions are shown based on what you have entered. You can continue typing or select a suggestion. -
Page 58: Planning A Route Using A Mapcode
8. To plan a route to this destination, select the drive button: A route is planned and then guidance to your destination begins. As soon as you start driving, guidance view is shown automatically. Tip: If your destination is in a different time zone, you see a plus (+) or a minus (-) sign and the time difference in hours and half hours in the arrival information panel. -
Page 59: Finding An Alternative Route
Any route that is 50% longer in time than the original route is not shown. 5. Select your chosen route by tapping on the time balloon. 6. Select Let's go. 7. Guidance to your destination begins. As soon as you start driving, the... - Page 60 Your route is planned using your chosen starting point and destination. The estimated time of arrival is shown at the top of the route bar. Tip: If you don't want to use search to choose your starting point and destination, go to the map view and press and hold to select a location.
-
Page 61: Finding A Parking Lot
A pop-up menu shows a list of options. 3. Select Remove Starting Point. Your route is replanned with your current location as the starting point. Changing the starting point into a stop 1. Select the starting point on the route in the map view. 2. - Page 62 The map opens showing the locations of parking lots. If a route is planned, the map shows parking lots near your destination. If a route isn't planned, the map shows parking lots near your current location. You can change the screen to show a list of parking lots by pressing this button: You can select a parking lot from the list to locate it on the map.
-
Page 63: Finding A Gas Station
A pop-up menu opens on the map showing the name of the parking lot. 4. To plan a route to your chosen parking lot, select the drive button: A route is planned and then guidance to your destination begins. As soon as you start driving, the guidance view is shown automatically. - Page 64 If a route is planned, the map shows gas stations along your route. If a route isn't planned, the map shows gas stations near your current location. You can change the screen to show a list of gas stations by pressing this button: You can select a gas station from the list to locate it on the map.
- Page 65 4. To plan a route to your chosen gas station, select the drive button: A route is planned and then guidance to your destination begins. As soon as you start driving, the guidance view is shown automatically. Tip: You can add a gas station as a stop on your route by using the pop-up menu. A gas station that is a stop on your route has a blue icon.
-
Page 66: Changing Your Route
Changing your route The Current Route Menu When you have planned a route or track, select the Current Route button in the Main Menu to open the Current Route Menu. The following buttons are available in the menu: Clear Route or Select this button to clear the currently planned route or track. -
Page 67: Avoiding A Blocked Road
Add Stop to Route Select this button to add a stop to your currently planned route. You can also add a stop to your route directly from the map. Add to My Routes If you plan a new route that has not already been saved, you see this button. -
Page 68: Types Of Route
Note: It may not be possible to find an alternative route around the blocked road if none exists. 3. Select the new route by selecting the time balloon. 4. Select Let's go. Guidance to your destination resumes avoiding the blocked road. As soon as you start driving, the guidance view is shown automatically. -
Page 69: Adding A Stop To Your Route Using The Map
Zoom in on the map, then press and hold to select a location. In the pop-up menu, select Add to Current Route. Select Search and search for a location. When you have found a location, select the Add Stop to Route button. -
Page 70: My Routes
My Routes About My Routes My Routes provides an easy way to create saved routes with optional stops, sometimes known as an itinerary. You can use My Routes to save, retrieve and edit routes. You may want to use My Routes in one or more of the following situations: While working - Your job involves driving several routes with multiple stops on a daily basis. -
Page 71: Navigating Using A Saved Route
Navigating using a saved route To navigate using a previously saved route, do the following: 1. In the Main Menu, select My Routes. 2. Select a route from your list. The route is shown on the map view. 3. To navigate to the start of the saved route, select Drive. The starting point of the saved route is converted to your first stop and then the route is planned. -
Page 72: Deleting A Route From My Routes
3. Select the pop-menu button to open the menu. 4. Select Manage Stops. 5. Select Add Stop to Route. 6. Select your new stop on the map. Tip: If you know the name of your new stop, you can use Search to select your stop instead of using the map. -
Page 73: Voice Control (Speak & Go)
Alternatively, you can select Voice Control in the Main Menu: When voice control is ready to use, you see the voice control screen and your GO says "I'm listening." Speak when you hear the beep. Note: If the... -
Page 74: The Voice Control Screen
Orange means your phrase might work. Green means your phrase is good. 4. Select Hear it to listen to your wake-up phrase. 5. Select Done then Yes to save your wake-up phrase. Your new wake-up phrase is ready to use. Start Voice Control and try it. -
Page 75: Some Tips For Using Voice Control
Some tips for using voice control You can help your GO understand what you are saying by following these tips: Mount your GO about an arm's length in front of you, away from speakers or air vents. Reduce background noise such as voices or the radio. If there is excessive road noise, you may ... -
Page 76: Saying Commands In Different Ways
If the state is incorrect, say "No" and repeat the name of the state after you hear "I'm listening." 6. Say the address or location without the state name. You can also say the name of a place or a city centre. Your GO repeats what you say and asks for confirmation. -
Page 77: Going Home Using Voice Control
1. In map view or guidance view, say the wake-up phrase to start voice control. The voice control screen is shown and your GO says "I'm listening." When voice control is ready to listen, you see a microphone icon in the bottom left corner and you hear a beep. - Page 78 3. If the command is correct, say "Yes." If the command is incorrect, say "No" and repeat the command after you hear "I'm listening." The volume on your GO changes to 50%. Tip: To stop voice control, say "Cancel." To go back one step, say "Back."...
-
Page 79: Map Share
Mark a location and create the correction report later. To send your map correction reports to TomTom, you must connect your GO to your computer and use MyDrive. All map corrections reported by TomTom users are verified by TomTom. These verified corrections are then sent back to your own GO as part of the next map update. -
Page 80: Creating A Map Correction Report From A Marked Location
6. Select Report. 7. Connect your GO to MyDrive to send your map correction report to TomTom and receive map corrections from other TomTom users. Creating a map correction report from a marked location If you see a map error while you are driving, you can mark the location so you can report the error later. -
Page 81: Types Of Map Correction
Note: If you want to report a map correction of a type not described below, use the Map Share Reporter at tomtom.com. For all map corrections described below, you need to connect your GO to MyDrive to send your map correction report to TomTom and receive map corrections from other TomTom users. - Page 82 5. Enter the correct street name. 6. Select Report. Turn Restriction Select this option to report incorrect road turn restrictions. 1. Press and hold to select the location of the map correction on the map view. 2. Select the pop-up menu button to open the menu. 3.
-
Page 83: Safety Cameras
Note: TomTom services are not available on all GO devices. Note: TomTom services are not available in all countries or regions, and not all services are available in all countries or regions. For more information on available services in each region, go to tomtom.com/services. - Page 84 Symbol shown on Symbol shown in Description route bar Speed trap - this type of camera checks the speed of passing vehicles and can be moved to different locations. Speed trap hotspots - this type of warning shows places where speed traps are often used. Average speed safety cameras - these types of cameras measure your average speed between two points.
-
Page 85: Changing The Way You Are Warned
You see a message thanking you for adding the camera. Tip: If you make a mistake when reporting a camera, select Cancel in the message. The safety camera is saved on your GO automatically and also sent to other users. Using the Main Menu to report a safety camera... -
Page 86: Confirm Or Remove A Speed Trap
You see a message thanking you for adding the camera. Tip: If you make a mistake when reporting a camera, select Cancel in the message. The safety camera is saved on your GO automatically and also sent to other users. Confirm or remove a speed trap You can confirm the presence of a speed trap or remove a speed trap if it is no longer present. -
Page 87: My Places
My Places provides an easy way to select a location without the need to search for the location each time. You can use My Places to create a collection of useful or favorite addresses. Tip: The terms "favorite" and "place" mean the same thing - favorites are places that you go to often. -
Page 88: Changing Your Home Location
Zoom in on the map at the location you want to select. Press and hold to select the loca- tion, then select the home or work location symbol. Select the Search button and search for a location. Select a location to set as home or work. ... -
Page 89: Adding A Location From My Places
1. Open the pop-up menu and select Add to My Places. 2. In the name bar, enter the name "Home". Note: "Home" must have a capital letter H. 3. Select Add. Your home location is changed to the new location. Adding a location from My Places 1. -
Page 90: Adding A Location To My Places Using Search
Adding a location to My Places using search 1. In the Main Menu, select Search. 2. Search for a location. 3. Select the location then select Show on map. 4. When the map view shows the location, select the pop-up menu button. 5. -
Page 91: Settings
Automatic map view switching By default, automatic changing of views is on. This means, for example, that your GO shows the map view when an alternative route is being suggested, along with several other sets of circum- stances. Also, for example, that your GO shows the guidance view when you start driving and you start to accelerate. -
Page 92: Route Bar
Note: This feature is only available on devices with a 6 inch / 15 cm or larger screen. Drag the slider to change the text and button size to small, medium or large, then select Apply this change. Your GO restarts and applies the change. Route Bar Select Settings in the Main Menu, then select Appearance. -
Page 93: Guidance View
Arrival information Select Arrival information to change the following settings: Show remaining distance Select this setting to show the remaining distance left to travel in the arrival information panel during navigation. Show remaining time Select this setting to show the remaining time left to travel in the arrival information panel during navigation. -
Page 94: Voices
Select Automatic zoom to change settings for the automatic zoom in Guidance view when you approach a turn or a junction. Zooming in can make the turn or junction easier to drive. Zoom in to next turn All the turns and junctions on your route are shown zoomed in to the maximum level. Based on road type ... -
Page 95: Voice Control
You can choose from maps stored either in internal memory or memory cards if your GO has a memory card slot. Note: Although you can store more than one map on your GO, you can only use one map at a time for planning and navigation. -
Page 96: Sounds And Warnings
Avoid on every route You can choose to avoid ferries and car shuttle trains, toll roads, carpool lanes, and unpaved roads. Set how your TomTom should manage each of these road features when the device calculates a route. Carpool lanes are sometimes known as High Occupancy Vehicle Lanes (HOV) and are not present in every country. -
Page 97: Screen Touch Sounds
You can see your currently selected language on this screen. Select this setting to change the language used for all buttons and messages that you see on your GO. When you change the language setting, the voice automatically changes and units are set to automatic. -
Page 98: System
This is an information screen rather than a setting and shows you information about your TomTom GO. You may be asked to go to this screen during a call to TomTom Customer Support or you may need to enter information taken from this screen when using the TomTom Shop. - Page 99 Which commands can I say? About See System. More help You can get further help by going to tomtom.com/support. For warranty and privacy information, go to tomtom.com/legal.
-
Page 100: Getting Help
How to use voice control Tips for using voice control Which commands can I say? About See System. More help You can get further help by going to tomtom.com/support. For warranty and privacy information, go to tomtom.com/legal. -
Page 101: Product Certification
To find product certification information, such as the ICASA-approved certification number, do the following on your GO: 1. Select Settings in the Main Menu. 2. Select System. 3. Select About. 4. Select Legal information. 5. Select Certificates. 6. You then see the relevant product certification information for your GO, for example, ICASA. -
Page 102: Updating Using Mydrive Connect
TomTom GO. For example, you can use MyDrive Connect to get map and software updates or manage your MyTomTom account. It is a good idea to frequently connect your GO to MyDrive Connect to ensure you always have the latest updates. - Page 103 USB hub or USB port on a keyboard or monitor. 5. Enter the requested information for account creation, including your country. When set-up is complete, a MyTomTom account is created and your GO is linked to that ac- count. You can now access MyDrive Connect from the notification area on your desktop.
-
Page 104: Addendum
Safety messages Use with care Use of TomTom products while driving still means that you need to drive with due care and attention. Your device is intended to serve as a driving aid and is not a substitute for driving with due care and attention. - Page 105 TomTom, Inc. bears no responsibility for and hereby disclaims all liability for any fines, penalties or damage incurred by a driver for violations of the law. While driving in any state with windshield mounting restrictions, TomTom recommends using the supplied Adhesive Mounting Disk or purchasing an alternative mounting system (e.g.
- Page 106 ACCORDING TO THE LOCAL LAWS AND REGULATIONS AND ALWAYS KEPT SEPARATE FROM HOUSEHOLD WASTE. BY DOING THIS YOU WILL HELP CONSERVE THE ENVIRONMENT. USE YOUR TOMTOM DEVICE ONLY WITH THE SUPPLIED DC POWER CORD (CAR CHARGER/BATTERY CABLE), AC ADAPTER (HOME CHARGER), IN AN APPROVED CRADLE OR USING THE SUPPLIED USB CABLE TO CONNECT TO A COMPUTER FOR BATTERY CHARGING.
- Page 107 TomTom, the FCC may withdraw the user’s right to operate the equipment. For customers in the USA, the following booklet prepared by the Federal Communications Commission may be of help: "How to Identify and Resolve Radio-TV Interference Problems."...
- Page 108 8 inches (20 cm) during normal operation. Model names 4FB40, 4FA50, 4FA60, 4FL50, 4FL60, 4FC64, 4FC54, 4FC54A, 4FC43 Rating: 5VDC, 1.2A Additional information Responsible party in North America TomTom, Inc., 24 New England Executive Park, Suite 410, Burlington, MA 01803 Tel: 866 486-6866 option 1 (1-866-4-TomTom)
- Page 109 For updated and additional information, please visit the TomTom website at tomtom.com. TomTom shall not be liable for technical or editorial errors or omissions contained herein, nor for incidental or consequential damages resulting from the performance or use of this document.
-
Page 110: Copyright Notices
TomTom or its suppliers. The use of this material is subject to the terms of a license agreement. Any unauthorized copying or disclosure of this material will lead to criminal and civil liabilities.
Need help?
Do you have a question about the GO and is the answer not in the manual?
Questions and answers