Viessmann VITOCROSSAL 300 Installation Instructions Manual
Vitocrossal 300
cu3a series 26 to 57
floor mounted, gas-fired condensing boiler with matrix gas burner and lambda pro control
for operation with natural gas and liquid propane gas
heating input 19 to 199 mbh
5.6 to 58 kw
Hide thumbs
Also See for VITOCROSSAL 300:
- Service instructions manual (164 pages) ,
- Service instructions for contractors (148 pages) ,
- Service manual (108 pages)
Table of Contents
Advertisement
Quick Links
Installation Instructions
for use by heating contractor
Vitocrossal 300
CU3A Series 26 to 57
Floor mounted, gas-fired condensing boiler with MatriX gas burner and Lambda Pro control
For operation with natural gas and liquid propane gas
Heating input
19 to 199 MBH
5.6 to 58 kW
VITOCROSSAL 300
5673 648 - 04
08/2015
H
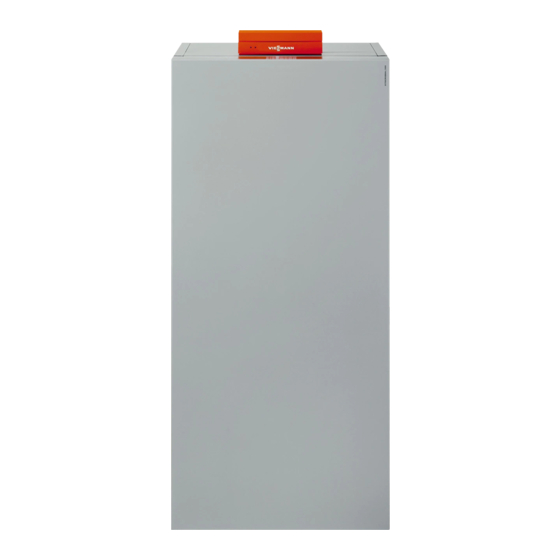
Product may not be exactly as shown
IMPORTANT
Read and save these instructions
for future reference.
Please file in Service Binder
Advertisement
Table of Contents

Related Manuals for Viessmann VITOCROSSAL 300


Summary of Contents for Viessmann VITOCROSSAL 300
-
Page 1: Installation Instructions
Installation Instructions for use by heating contractor Vitocrossal 300 CU3A Series 26 to 57 Floor mounted, gas-fired condensing boiler with MatriX gas burner and Lambda Pro control For operation with natural gas and liquid propane gas Heating input 19 to 199 MBH 5.6 to 58 kW... -
Page 2: Safety, Installation And Warranty Requirements
Safety Vitocrossal 300 CU3A 26 to 57 Installation Safety, Installation and Warranty Requirements Please ensure that these instructions are read and understood before commencing installation. Failure to comply with the instructions listed below and details printed in this manual can cause product/property damage, severe personal injury, and/or loss of life. -
Page 3: About These Installation Instructions
Safety Vitocrossal 300 CU3A 26 to 57 Installation Safety, Installation and Warranty Requirements Suppliers of fiberglass wool products recommend the Fiberglass wool and ceramic fiber materials following precautions be taken when handling these materials: WARNING - Avoid breathing fiberglass dust and contact with skin and eyes. -
Page 4: Table Of Contents
Table of Contents Vitocrossal 300 CU3A 26 to 57 Installation Page Safety Safety, Installation and Warranty Requirements....2 Product documentation..........2 Warranty..............2 Licensed professional heating contractor....2 Contaminated air............2 Advice to owner............2 Carbon monoxide.............2 Fresh air..............2 Equipment venting...........2 About these Installation Instructions......3 General Information Important Regulatory and Installation Requirements..6... - Page 5 Table of Contents Vitocrossal 300 CU3A 26 to 57 Installation Page Control Connections Accessing the Control Electrical Connections Box..24 External Cable Connection.........24 Temperature Sensors Overview........26 Accessing the X3 Plug..........27 Connecting the Outdoor Temperature Sensor....27 Connecting the Low-loss Header Sensor.....28 Connecting the DHW Sensor........28 Installing the LON Communication Module....30...
-
Page 6: Important Regulatory And Installation Requirements
General Information Vitocrossal 300 CU3A 26 to 57 Installation Important Regulatory and Installation Requirements Codes The installation of this unit shall be in accordance with The following topics must be covered: local codes or, in the absence of local codes, use CAN/ Proper system operation sequence. - Page 7 CSD-1 Field Testing of High Limit Switches for Vitocrossal 300 CU3A boilers – where required by law. VIESSMANN IS NOT RESPONSIBLE FOR ANY DAMAGES THAT THE FOLLOWING TEST PROCEDURE MAY RESULT IN BY OVERHEATING THE SYSTEM.
-
Page 8: Applicability
General Information Vitocrossal 300 CU3A 26 to 57 Installation Applicability CAUTION The boiler serial number must be provided when ordering replacement parts. IMPORTANT When ordering replacement parts, provide either the 16-digit boiler serial number (on the bar code label) located underneath boiler front enclosure panel. -
Page 9: Mechanical Room
General Information Vitocrossal 300 CU3A 26 to 57 Installation Mechanical Room During the early stages of designing a new home, we recommend that proper consideration be given to constructing a separate mechanical room dedicated to the gas- or oil-fired heating equipment and domestic hot water storage tank(s). -
Page 10: Before Set-Up
(spraying, splashing, etc.) during boiler operation and service. Minimum Clearances Note: The Vitocrossal 300 CU3A series boiler conforms to the zero inches vent clearance to combustibles testing requirements dictated by the boiler Harmonized Standard ANSI Z21.13. CSA/4.9... -
Page 11: Connections
To prevent equipment damage, install all pipework free of load and torque stresses. Connecting power The Vitocrossal 300 CU3A boiler has external accessories connection modules installed behind the front cover, which requires a 120VAC power supply from a wall receptacle. Refer to the wiring diagram (see page 50). -
Page 12: Dimensions
Boiler Connections Vitocrossal 300 CU3A 26 to 57 Installation Connections (continued) Dimensions Legend A Overall boiler height (boiler control open) B Overall boiler height (boiler control closed) C Safety header connection D Boiler supply E Gas connection F Boiler return... -
Page 13: Installation Fittings
Boiler Connections Vitocrossal 300 CU3A 26 to 57 Installation Connections (continued) Installation fittings Safety Header A Pressure relief valve ¾”, 30 psig B Nipple ¾” x 1b” C Street elbow ¾” D Air vent E Bushing ¾” to e” F Tee, ¾”... -
Page 14: Siting And Levelling The Boiler
Boiler Connections Vitocrossal 300 CU3A 26 to 57 Installation Connections (continued) Siting and levelling the boiler Gas shut-off valve connection 1. Make gas connections in accordance with codes IMPORTANT CAN/CSA B149.1 and .2 or National Fuel Gas Code ANSI Z223.1/NFPA 54, as well as local codes. -
Page 15: Gas Connection And Piping
Boiler Connections Vitocrossal 300 CU3A 26 to 57 Installation Connections (continued) See Vitocrossal 300, CU3A Service Instructions for applicable system coding changes. WARNING The gas supply piping must be leak tested before placing the boiler in operation. CAUTION Ensure that gas piping is large enough for all appliances in the residence. -
Page 16: Installing Boiler Safety Devices
Boiler Connections Vitocrossal 300 CU3A 26 to 57 Installation Connections (continued) Installing boiler safety devices 1. Apply sufficient amount of pipe sealant to both ends of all pipe fittings B,D,F and G and install onto coupling A and tees C. -
Page 17: Heating Water Connections
Boiler Connections Vitocrossal 300 CU3A 26 to 57 Installation Connections (continued) Typical connection Heating water connections with supplied; 1. Thoroughly flush heating system (particularly before - reducing tee 1a” x connecting the boiler to an existing system). 1a” x b”... -
Page 18: Pressure Drop (Heating Water Side)
Legend A Boiler models CU3A 26 to 35 kW B Boiler models CU3A 45 to 57 kW The Vitocrossal 300 is only suitable for fully pumped hot water heating systems. ∆T = 20ºF (10 K) ∆T = 30ºF (15 K) ∆T = 40ºF (20 K) -
Page 19: Installing Drain Valve
Boiler Connections Vitocrossal 300 CU3A 26 to 57 Installation Connections (continued) Installing drain valve CAUTION To prevent equipment damage, install all pipework free of load and torque stresses. Install drain valve assembly as shown in the diagram. IMPORTANT Apply sufficient amount of thread sealant when making the connections. -
Page 20: Filling The Heating System
Boiler Connections Vitocrossal 300 CU3A 26 to 57 Installation Filling the Heating System CAUTION Unsuitable fill water increases the level of deposits and corrosion, and may lead to damage to the equipment. H Thoroughly flush the entire heating system prior to filling with water. -
Page 21: Combustion Air Connection
Boiler Connections Vitocrossal 300 CU3A 26 to 57 Installation Combustion Air Connection CAUTION To prevent equipment damage, install all pipework free of load and torque stresses. We recommend fitting an on-site support immediately downstream of the boiler flue connection. Connect the flue outlet to the flue pipe via the shortest possible run, with a slight rise (min. -
Page 22: Condensate Siphon
B Gasket C Siphon Condensate Connection The Vitocrossal 300 CU3A boiler comes with a built-in condensate trap. An external trap is not required when connecting the field drain to the P-trap. Discharge tubing (field supplied) must be ¾ in. diameter. Use CPVC, PVC or other material approved by code listed below. - Page 23 The amount of condensate to be expected during the operation of the boiler and can be read from the chart. If the condensate outlet of the Vitocrossal 300 CU3A boiler is lower than the drain, a condensate pump must be installed. Select a pump which is approved for condensing boiler applications.
-
Page 24: Control Connections
Control Connections Vitocrossal 300 CU3A 26 to 57 Installation Accessing the Control Electrical Connections Box 1. Remove the screws from the top panel and set aside. 2. Slide the top panel to the rear of the boiler and lift up. - Page 25 Control Connections Vitocrossal 300 CU3A 26 to 57 Installation External Cables Connection (continued) Applying strain relief On-site cables 1. Cut the tip from the rubber cable restraint. 2. Feed the cable through the rubber cable restraint. 3. Install the cable restraint with cable into the connection housing.
-
Page 26: Temperature Sensors Overview
Control Connections Vitocrossal 300 CU3A 26 to 57 Installation Temperature Sensors Overview Control base - External sensor connections Note: See wiring diagram on page 50 for connection to the external accessory connection box. Route cables through the openings provided at the top... -
Page 27: Accessing The X3 Plug
Control Connections Vitocrossal 300 CU3A 26 to 57 Installation Accessing the X3 Plug 1. Remove the X3 plug from the control board. Attach sensors and reinsert the X3 plug. Refer to the following sensor information. 2. Reinstall the control cover. -
Page 28: Connecting The Low-Loss Header Sensor
Control Connections Vitocrossal 300 CU3A 26 to 57 Installation Connecting the Low-loss Header Sensor 1. Connect the low-loss header sensor (if used) to terminals X3.4/X3.5 on the boiler control board. 2. Route the sensor to the low loss header and install into the sensor well. - Page 29 DHW storage tank information The DHW water tank sensor % is required when using a stand-alone DHW storage tank with the Vitocrossal 300 CU3A heating boiler. It comprises the sensor only required for the connection of a stand-alone tank. All other required piping connections are field supplied.
-
Page 30: Installing The Lon Communication Module
Control Connections Vitocrossal 300 CU3A 26 to 57 Installation Installing the LON Communication Module Boiler LON communication module The boiler comes with a LON communication module pre-installed. Connecting the LON module cable Refer to the Vitocrossal 300 CU3A Service Instructions for details on LON connections. -
Page 31: Connections
Control Connections Vitocrossal 300 CU3A 26 to 57 Installation Connections External accessory connection overview Note: See wiring diagram on page 50 for connection to the control base. Legend A Integrate EA1 module B Power/Pump connection interface... -
Page 32: Routing Power/Pump Accessory Cables
Control Connections Vitocrossal 300 CU3A 26 to 57 Installation Connections (continued) Routing power/pump accessory cables Route cables from the accessory connection modules underneath through the boiler frame and out the openings in the back of the jacketing. Note: Connecting cables will be damaged if they touch hot components. - Page 33 Control Connections Vitocrossal 300 CU3A 26 to 57 Installation Connections (continued) 1. Connect the external 0-10V signal to plug 0-10V located in the extension module EA1. 2. Ensure correct polarity. 3. See chart for maximum possible boiler water Extension Module EA1 temperature and required signal.
- Page 34 Control Connections Vitocrossal 300 CU3A 26 to 57 Installation Connections (continued) Function The aBJ output is a programmable function output and may be coded for only one of the following functions; - alarm output - DHW recirculation pump - field pump Refer to the Vitocrossal 300 CU3A Service Instructions for applicable coding.
-
Page 35: Multi Connection
Control Connections Vitocrossal 300 CU3A 26 to 57 Installation Connections (continued) Multi connection Normally closed safety connection A. Remove jumper (not shown) to install a field supplied normally closed relay. IMPORTANT The relay must be rated for 120VAC 5 FLA... -
Page 36: Pump Connection
Control Connections Vitocrossal 300 CU3A 26 to 57 Installation Connections (continued) Pump connection Note: See wiring diagram on page 50 for connection to the control base. Note: Maximum pump draws 2 FLA each. All 120VAC outputs must not exceed 6 FLA. -
Page 37: Pump Modulation Connection
Control Connections Vitocrossal 300 CU3A 26 to 57 Installation Connections (continued) Pump modulation connection (0-10VDC) Relevant Coding Address Pump modulation signal can only be applied to output 20 A3 Heating circuit pump logic based on outdoor temp. when used as heating circuit pump A1. -
Page 38: Boiler Power Supply Connection
Control Connections Vitocrossal 300 CU3A 26 to 57 Installation Connections (continued) Boiler power supply connection Note: See wiring diagram on page 50 for connection to the control base. Power/pump connection interface WARNING If system components are not grounded, serious injury from electric current can result if an electrical fault occurs. -
Page 39: Fitting The Top Panels
Control Connections Vitocrossal 300 CU3A 26 to 57 Installation Fitting the Top Panels 1. Place the control cover on the control connection housing and slide into place. 2. Install previously removed nuts onto the threaded studs. 3. Place the top jacket panel on the top of the boiler and slide in place. -
Page 40: Installation Examples
They further do not display all system varieties, safety devices, or concepts possible. Specific If a DHW storage tank other than a Viessmann Vitocell system layouts may be further discussed with the local 100 or 300 tank is used, the installer must verify proper Viessmann sales representative office. -
Page 41: System Layout 1
Installation Examples Vitocrossal 300 CU3A 26 to 57 Installation System Layout 1 Vitocrossal 300 CU3A with a direct-connected heating circuit Legend A Vitocrossal 300 CU3A boiler with Installation of ... Vitotronic 200, KW6B outdoor reset control radiator heating circuit (high-temp. circuit) ■... -
Page 42: System Layout 2
Installation Examples Vitocrossal 300 CU3A 26 to 57 Installation System Layout 2 Vitocrossal 300 CU3A with... - DHW storage tank - one heating circuit with mixing valve and system separation Installation of ... Legend Vitocrossal 300 CU3A boiler with underfloor heating circuit with 3-way mixing valve ■... -
Page 43: System Layout 3
Installation Examples Vitocrossal 300 CU3A 26 to 57 Installation System Layout 3 Vitocrossal 300 CU3A with... - DHW storage tank - one direct-connected heating circuit - two heating circuit with a mixing valve Legend Installation of different heating circuits... Vitocrossal 300 CU3A boiler with radiator heating circuit (high-temp. -
Page 44: System Layout 4
Installation Examples Vitocrossal 300 CU3A 26 to 57 Installation System Layout 4 Vitocrossal 300 CU3A with... - direct-connected heating circuit - one heating circuit with system separation Installation of different heating circuits... Legend radiator heating circuit (high-temp. circuit) ■ Vitocrossal 300 CU3A boiler with Vitotronic 200, under floor heating circuit with 3-way mixing valve ■... -
Page 45: System Layout 5
- low-loss header - multiple heating circuits with mixing valves - one heating circuit without mixing valve When designing a system as illustrated above, please contact your local Viessmann Sales Representative for assistance. Legend Vitocrossal 300 CU3A boiler with Vitotronic *1 Contact your local Sales Representative for details. -
Page 46: System Layout 6
Installation Examples Vitocrossal 300 CU3A 26 to 57 Installation System Layout 6 Multiple (up to eight) Vitocrossal 300 CU3A with... - multiple heating circuits with mixing valves - low-loss header When designing a multiple Vitocrossal 300 CU3A system Legend as shown above, please reference applicable multiple... -
Page 47: System Layout 7
Installation Examples Vitocrossal 300 CU3A 26 to 57 Installation System Layout 7 Multiple (up to eight) Vitocrossal 300 CU3A with... - system pump - boiler isolation valves Legend When designing a multiple Vitocrossal 300 CU3A system Vitocrossal 300 CU3A boiler... -
Page 48: Boiler In Heating And Cooling
Installation Examples Vitocrossal 300 CU3A 26 to 57 Installation Boiler in Heating/Cooling Boiler in heating/cooling application Legend A Heating/Cooling unit The boiler, when used in connection with a refrigeration B Spring-loaded flow check valve system, must be installed ensuring the chilled medium... -
Page 49: Boiler With Low Water Cut-Off
Installation Examples Vitocrossal 300 CU3A 26 to 57 Installation Boiler with Low Water Cut-off Boiler with low water cut-off (remote-mounted, field supplied) A low water cut-off may be required by local codes. If boiler is installed above radiation level, a low water... -
Page 50: Additional Information
If the gas supply pressure exceeds the maximum gas supply pressure value, a separate gas pressure regulator must be installed upstream of the heating system. Note: For high altitude installation at 10,000 ft. the input for model Vitocrossal 300 CU3A will have an altitude de-ration of 18%. - Page 51 Based on maximum input rate. For side wall vent installations (coaxial system): Do not exceed max. equivalent length specified in the Installation Instructions of the Vitocrossal 300 CU3A Venting System. Do not attempt to common-vent Vitocrossal 300 CU3A with any other appliance.
-
Page 52: Electrical Connections
Additional Information Vitocrossal 300 CU3A 26 to 57 Installation Electrical Connections CAUTION WARNING DISCONNECT POWER BEFORE Label all wires prior to disconnection SERVICING BOILER. when servicing controls. Wiring errors can cause improper and dangerous operation. Verify proper operation If any of the original wires as after servicing. - Page 53 Additional Information Vitocrossal 300 CU3A 26 to 57 Installation Electrical Connections (continued) Legend Outdoor Temperature Sensor Supply Temperature Sensor/Low Loss Header Boiler Temperature Sensor #1 Boiler Temperature Sensor #2 DHW Temperature Sensor Ionization Electrode Flue Gas temperature Sensor Boiler Pump...
-
Page 54: Power Supply Connection Of Accessories
Additional Information Vitocrossal 300 CU3A 26 to 57 Installation Electrical Connections (continued) Power supply connection of accessories Cabling required for: The power supply connection of accessories can be made H outdoor temperature sensor directly at the control. The connection is activated and H Vitotronic 200-H, HK1B mixing valve control deactivated with the system on/off switch. -
Page 55: Lighting And Operating Instructions
Additional Information Vitocrossal 300 CU3A 26 to 57 Installation Lighting and Operating Instructions FOR YOUR SAFETY READ BEFORE OPERATING W A R N I N G: If you do not follow these instructions exactly, a fire or explosion may result causing property damage, personal injury or loss of life. - Page 56 Vitocrossal 300 CU3A 26 to 57 Installation...
Need help?
Do you have a question about the VITOCROSSAL 300 and is the answer not in the manual?
Questions and answers