Sony F65 Operation Manual
Digital motion picture camera
Hide thumbs
Also See for F65:
- Operation manual (121 pages) ,
- Operation manual (112 pages) ,
- Operation manual (28 pages)
Table of Contents
Advertisement
Quick Links
Download this manual
See also:
Operating Manual
Advertisement
Table of Contents

Related Manuals for Sony F65


Summary of Contents for Sony F65
- Page 1 DIGITAL MOTION PICTURE CAMERA OPERATION MANUAL [English] 1st Edition (Revised 3)
- Page 2 : Pulsmodulering (commercial and light industrial), E3 (urban outdoors), E4 Afgivet lasereffekt : 4 mW/kanal (maks.) (controlled EMC environment, ex. TV studio). Standard : IEC60825-1 (2007) The manufacturer of this product is Sony Corporation, 1-7-1 Konan, Minato-ku, Tokyo, 108-0075 Japan.
- Page 3 (commercial et industrie légère), E3 (urbain extérieur) et E4 (environnement EMC contrôlé, ex. studio de télévision). Le fabricant de ce produit est Sony Corporation, 1-7-1 Konan, Minato-ku, Tokyo, 108-0075 Japon. Le représentant autorisé pour EMC et la sécurité des produits est Sony Deutschland GmbH, Hedelfinger Strasse 61, 70327 Stuttgart, Allemagne.
- Page 4 (Wohnbereich), E2 (kommerzieller und in beschränktem Maße industrieller Bereich), E3 (Stadtbereich im Freien) und E4 (kontrollierter EMV-Bereich, z.B. Fernsehstudio). Der Hersteller dieses Produkts ist Sony Corporation, 1-7-1 Konan, Minato-ku, Tokyo, 108-0075 Japan. Der autorisierte Repräsentant für EMV und Produktsicherheit ist Sony Deutschland GmbH, Hedelfinger Strasse 61, 70327 Stuttgart, Deutschland.
-
Page 5: Table Of Contents
Table of Contents Chapter 1 Overview 1-1 Features ................7 1-2 Example of System Configuration ........9 1-2-1 SR-R4 Docking System ..........10 1-3 Locations and Functions of Parts .......11 Chapter 2 Installation and Preparations 2-1 Mounting the SR-R4 .............16 2-2 Attaching a Filter ............17 2-3 Attaching a Lens ............18 2-4 Attaching a Viewfinder ..........20 2-5 Mounting the Camera on a Tripod ......21... - Page 6 3-4 VF Menu Basic Operation ........... 33 3-5 Setting the Shooting Mode ......... 35 3-6 Setting the Output Signal ..........36 3-6-1 Selecting the Output Video Signal ......... 36 3-7 Viewing and Setting the Viewfinder Display ..... 37 3-7-1 Viewing the Basic Status Display ........37 3-7-2 Setting the Marker Display ..........37 3-7-3 Setting the Voltage Warning Values ......
-
Page 7: Chapter 1 Overview
The F65 is a digital motion picture camera equipped with S-LOG gamma and 709(800%) gamma for a Super 35-mm type CMOS sensor array with a total of 20 monitors Megapixels. -
Page 8: Other Features
The existing assets. camera uses these functions to support adjustment of VF/ The F65 is equipped with one 12 V DC and connector one SDI output gain, black level, tone, and saturation. The 24 V DC... -
Page 9: Example Of System Configuration
For more information about the fittings, connections, or for use of this camera. use of additional equipment and accessories, see “Chapter This manual assumes the use of an optional Sony HD 2 Installation and Preparations” (page 16) as well as the Electronic Viewfinder. -
Page 10: Sr-R4 Docking System
1-2-1 SR-R4 Docking System An SR-R4 recorder can be docked on the rear of the camera head. The SR-R4 power source is supplied via the camera’s DC IN connector. HDVF-C30WR SR-R4 12 V DC power Example of System Configuration... -
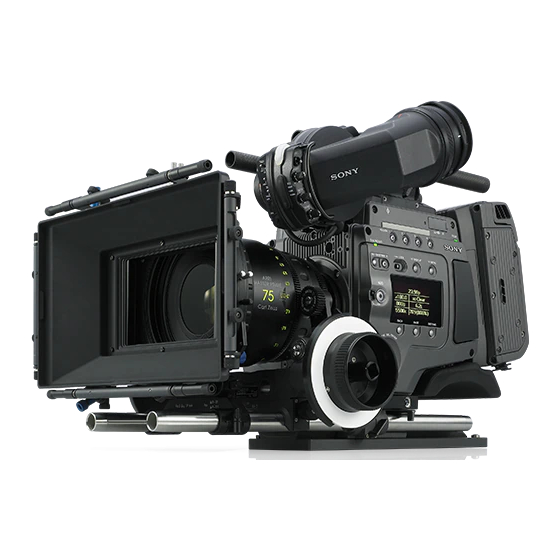
Page 11: Locations And Functions Of Parts
1-3 Locations and Functions of Parts Front panel c Viewfinder shoe (Network) connector d VF connector Lens mount e Lens fixing lever Shutter emergency open screw (page 60) f Hot shoe b Ventilation holes (intake) (Network) connector (RJ-45 type, 10BASE-T/ Kabel, um Fehlfunktionen aufgrund von Störungen zu 100BASE-TX) vermeiden. -
Page 12: Left Panel
Left panel i Handle j Measure hook/ focus reference mark k SDI OUT2 connector a USB connectors l AUX b Accessory receptacles m Ventilation holes (exhaust) c CAM POWER switch h EXT. I/O connector g LENS connector f Wrench box e DC OUT 24V 4A connector d DC OUT 12V 4A connector a USB connectors... -
Page 13: Right Panel
Messages” (page 58). If the red or flashing red indication continues, consult your f “Memory Stick”/SD memory card section local Sony representative. Slots for a “Memory Stick PRO Duo” and an SD memory c LOCK switch card are provided behind the rubber cap. The access lamp Locks operation of the side panel (excluding the REC and turns red when a “Memory Stick PRO Duo”... - Page 14 Settings Change mode or when about replacing the optical module, consult your local displaying the menu in the viewfinder or on a monitor. Sony representative. g MENU SEL (selection)/ENTER dial Turn the dial to select items and press to enter when the...
-
Page 15: Rear Panel
Rear panel a Recorder connector b REC indicator c GENLOCK IN connector d SHUTTER connector e HD-Y OUT connector f SDI OUT1 connector g REMOTE connector h DC IN indicator i DC IN connector j Cable clamp screw holes a Recorder connector i DC IN connector (LEMO 8-pin) Connects signal and power with the SR-R4 docked on the Connects to a power cable with the supplied power cable... -
Page 16: Chapter 2 Installation And Preparations
Installation and Preparations Chapter • When mounting the SR-R4, fix the camera head on a 2-1 Mounting the SR-R4 tripod in advance to keep the camera head stable. For tripod mounting, see “2-5 Mounting the Camera on a Tripod” (page 21). The SR-R4 docks on the rear of the camera head. -
Page 17: Attaching A Filter
Align the notch on the filter mount with the protrusion 2-2 Attaching a Filter on the filter holder, insert the mounting tool onto the filter mount, and then turn clockwise until it clicks into place. You can mount commercially available gel filters in the supplied filter holder and then attach them to the camera if you wish to use an ND filter in F65RAW-HFR mode or wish to use a filter other than those built into the camera. -
Page 18: Attaching A Lens
Align the lens’ alignment pin with the notch in the For information about replacing shims, consult your local upper part of the lens mount and insert the lens into the Sony representative. mount. While supporting the lens, rotate the lens fixing lever... - Page 19 Insert the replacement shim using the shim slit to clear Part number Thickness the wiring, and align the camera screw holes and shim 4-260-711-63 0.08 mm (0.0032 inch) alignment pins. 4-260-711-73 0.09 mm (0.0036 inch) Shim alignment pins 4-260-711-83 0.10 mm (0.0040 inch) To change a shim Note Exercise care not to damage the internal wiring of the...
-
Page 20: Attaching A Viewfinder
Slide the viewfinder mounting plate forward/backward 2-4 Attaching a into position, and then turn the lever to lock it into position. Viewfinder Caution When the viewfinder is attached, do not leave the camera with the eyepiece facing the sun. Direct sunlight can enter through the eyepiece, be focused in the viewfinder and cause fire. -
Page 21: Mounting The Camera On A Tripod
For information about obtaining the Wi-Fi mounting bracket, consult your local Sony representative. Attach the Wi-Fi mounting bracket onto the camera using the supplied +B3 × 5 screws. M3 × 5 (+B3 × 5 screws) (supplied) -
Page 22: Preparing The Power Supply
(LEMO 8-pin) on the camera. For details on connector pin assignments, see “Connector Pin Assignments” (page 65) in the Appendix. For details on the pin connections, consult your local Sony representative. Notes • Use of a power supply with 150 W or higher supply capacity is recommended to safely drive the camera. -
Page 23: Setting The Date And Time
Turn the MENU SEL/ENTER dial to set the date (year, 2-8 Setting the Date and month, day). Turning the MENU SEL/ENTER dial moves to the Time next digit. Select the day, then press the MENU SEL/ ENTER dial to confirm the setting. When the camera is used for the first time, the menu for Turn the MENU SEL/ENTER dial to select Time, then press the MENU SEL/ENTER dial. -
Page 24: Chapter 3 Basic Adjustments And Settings
Basic Adjustments and Settings Chapter dynamic range decreases but the noise in the dark areas 3-1 Basic Operation of also decreases. the Camera Custom mode This mode allows camera gain to be adjusted and black/ white level to be adjusted from the camera menu or optional remote control unit (RM) while shooting. -
Page 25: Camera Settings
3-2 Camera Settings 3-3 Basic Settings using the Subdisplay The camera can be configured from the following devices. Basic settings of the camera can be easily performed using Subdisplay the subdisplay. The items set on the subdisplay can also be You perform the basic setup configuration using the set using the VF menu. -
Page 26: Setting The Video Format
Select screen (e.g. shutter value) 1 Video format 2 Shutter value 3 ND filter 4 Sensitivity (EI value) 5 Highlight latitude 6 Color temperature 7 Look-up table (LUT) On this screen, turn the MENU SEL/ENTER dial to select Settings page 2 an item. -
Page 27: Setting The Shutter Value
F65RAW-HFR mode: Camera image VF connector SDI OUT connector 23.98pForPB, 29.97pForPB, 24pForPB, 25pForPB, output output S119.88p (23.98p), S119.88p (29.97p), S120p (24p), 59.94p 59.94i* 59.94i* S120p (25p) S59.94p 59.94i* 59.94i* The mode can be switched between F65RAW mode, HD S60p 60i* 60i* mode, and F65RAW-HFR mode on the <System Format>... -
Page 28: Selecting An Nd Filter
Settings page 1 Shutter value Turn the MENU SEL/ENTER dial to select the shutter value. Select [Step], then press the MENU SEL/ENTER dial. You do not need to press the MENU SEL/ENTER dial to set a value. The shutter value changes are reflected on the Turn the MENU SEL/ENTER dial to select the shutter camera as the MENU SEL/ENTER dial is turned. -
Page 29: Setting The Sensitivity (Ei Value) (Cine Mode)
Turn the MENU SEL/ENTER dial to select the EI Filter density Description value, then press the MENU SEL/ENTER dial. 1/16 optical transmittance 1/32 optical transmittance 1/64 optical transmittance Select the ND filter on settings page 1, and press the MENU SEL/ENTER dial. Settings page 1 To set using the VF menu ND filter... -
Page 30: Setting The Color Temperature
Setting Description 3-3-7 Setting the Color Temperature HG8009G40 Outputs a signal using hypergamma with 800% dynamic range, 109% The color temperature can be set to 3200K (tungsten), white limit, and 40% video output for 4300K (tungsten), or 5500K (daylight) to match the 18% gray card reflection. -
Page 31: Checking The Voltage
3-3-10 Checking the Voltage Setting Fan operation Auto1 The fans are automatically controlled The voltage of the power supplies connected to the camera according to the internal temperature, can be checked on settings page 2 on the subdisplay. regardless of whether recording or not. Auto2 (default) The fans are automatically controlled Settings page 2... -
Page 32: Assigning Functions To The Assign Buttons
Settings page 2 Menu indication Function Mag Position Selects the position of the image that is magnified by the Mag function. There are nine points on the screen that can act as the center point of the magnified image. This function sets the position of the magnified image as an area centered on one of these points. -
Page 33: Adjusting The Subdisplay Brightness
To set using the VF menu 3-4 VF Menu Basic Set on the <Switch Assign> page in the Config menu (page 49). Operation 3-3-14 Adjusting the Subdisplay Brightness Detailed settings that cannot be configured on the subdisplay are set in the VF menu displayed in the viewfinder or on a monitor. - Page 34 Screen Example (List) Turn the MENU SEL/ENTER dial to select a category, then press the MENU SEL/ENTER dial. The page select screen appears. Items within the selected page and the current values of those items are displayed. You can check the items and their values on each page by turning the MENU SEL/ENTER dial.
-
Page 35: Setting The Shooting Mode
When Encode is set to Lite or SQ, 10-bit recording is 3-5 Setting the Shooting selected. When set to HQ, 12-bit recording is selected. Mode Encode Selects the recording mode. In F65RAW mode, “F65RAW-SQ” or “F65RAW-Lite” can be selected. The shooting mode can be set to RAW mode or HD mode. In HD mode, “SR-HQ”... -
Page 36: Setting The Output Signal
Image Invert Select 3-6 Setting the Output Selects the type of image inversion. Off: No inversion Signal Vertical Horizontal Vertical & Horizontal 3-6-1 Selecting the Output Video Signal The type of video signals to be output on the SDI OUT and VF connectors can be selected. -
Page 37: Viewing And Setting The Viewfinder Display
g Look-up table (LUT) 3-7 Viewing and Setting Displays the file name of the look-up table currently selected. the Viewfinder Display h Recording status indicator Displays “z” when the SR-R4 docked on the camera is recording. Besides the video image, the viewfinder can display text i Media remaining and messages showing the camera settings and operation Displays the approximate number of minutes remaining... -
Page 38: Setting The Voltage Warning Values
3-7-3 Setting the Voltage Warning Item Setting Values [Status/Menu] VF Sets whether to display status information in the VF connector signal. The Near End and End values used to issue battery voltage Sets whether to display status warnings when the supply voltage drops are set on the information in the SDI OUT <Battery Alarm>... -
Page 39: Restoring The Factory Default Settings
Notes 3-8 Restoring the factory • The magnified display returns to normal 30 seconds after pressing the ASSIGN button. Also, the display returns to default settings normal when power is applied and when recording starts. • If the image is magnified by 4 when using the Anamorphic Unsqueeze x2 function, the image is Settings can be restored to their factory default values by magnified in the vertical dimension by 4, but the... -
Page 40: Subdisplay Menu List
Menu Configuration and Detailed Settings Chapter 4-1 Subdisplay Menu List This section describes the menu list displayed on the subdisplay. Item Default Set or display value Remarks Settings page 1 Video format S59.98p, S60p: 1 to 60 S119.88p, S120p: 1 to 120 Frame rate 23.98p F65RAW mode:... - Page 41 Item Default Set or display value Remarks ND filter Clear F65RAW mode, HD mode: Close: Filter closed (display only) Clear, 0.9, 1.2, 1.5, 1.8, Close, Mainte: Maintenance mode, with no Mainte filter deployed (display only). F65RAW-HFR mode: Switched using the VF menu. Clear(HFR), Close, Mainte Sensitivity (Cine mode: EI Cine mode:...
-
Page 42: Vf Menu List
4-2 VF Menu List This section describes the VF menu items displayed in the viewfinder or on a monitor. Note The items displayed in a web browser or on a tablet device are basically the same as the VF menu, with one exception. The item not displayed on these devices is noted in the following table. -
Page 43: Camera Menu
4-2-1 Camera Menu Page Configuration Default Settings Remarks item <System RAW/HD F65RAW F65RAW, HD, Sets the recording mode. Format> F65RAW-HFR Signal format Frame Rate 23.98p F65RAW mode: Sets the frame rate. settings 23.98p, 24p, 29.97p, 25p, 50p, 59.94p, S59.94p (23.98p), S59.94p (29.97p), S60p (24p), S60p (25p) HD mode (4:4:4 RGB):... - Page 44 Page Configuration Default Settings Remarks item <Base Setting> Shoot Mode Cine Cine, Custom Basic settings Color Space S-Gamut S-Gamut, F900 Selects the colors reproducibility. It is fixed to S-Gamut in F65RAW mode. S-Gamut: This mode enables recording with wide color space comparable to film cameras.
- Page 45 Page Configuration Default Settings Remarks item <Shutter Step 1 360.0 4.2 to 360.0 Registers the shutter angles for each Assign> step. Step 2 270.0 Shutter step settings Step 3 180.0 Step 4 172.8 Step 5 150.0 Step 6 144.0 Step 7 90.0 Step 8 45.0...
-
Page 46: Vf/Sdi Menu
4-2-2 VF/SDI Menu Page Configuration Default Settings Remarks item <VF/SDI Tone & LUT/ASC CDL On, Off Sets whether to apply an LUT or ASC Color> CDL (LUT can be applied in HD mode LUT. ICT, and when Gamma is set to Special, F65RAW color space mode, or F65RAW-HFR mode only). -
Page 47: Display Info Menu
Page Configuration Default Settings Remarks item <VF/SDI Signal> Effective Area 4096:2160 4096:2160, 3840:2160, Selects the video for output (F65RAW, Output signal Anamorphic Unsqueeze F65RAW-HFR only). settings Color Color Color, R, G, B Selects the output RGB channels. Scan Type (Over Interlace Interlace, Frame Drop Selects whether to output video with... - Page 48 Page Configuration Default Settings Remarks item <Status2> Battery DC IN 12V On, Off Turns the 12 V supply voltage display Status indicator On/Off. display item Battery DC IN 24V On, Off Turns the 24V supply voltage display On/ settings Off. Message On, Off Turns the message display On/Off.
-
Page 49: Config Menu
4-2-4 Config Menu Page Configuration Default Settings Remarks item <Switch Assign> Assign 1 Off, Mag, Mag Position, Off: No function is allocated. ASSIGN button Hi/Lo Key, Fan Mode, Mag: Displays a magnified image in the Assign 2 Mag Position function Rec Review viewfinder and on the SDI OUT assignment... - Page 50 Page Configuration Default Settings Remarks item <Fan Mode> Fan Mode Auto2 Auto1, Auto2, Min, Max Auto1: Automatic control, according to Fan operating the internal temperature. mode select Auto2: Automatic control, according to the internal temperature, and maintains quiet operation when recording.
-
Page 51: File Menu
4-2-5 File Menu Page Configuration Default Settings Remarks item <Gamma File> Sets imported user gamma file created Gamma file using CVP File Editor. Name 709(800%) (Up to 12 characters), -- settings A preset value of 709(800%) gamma is Comment Preset entry stored in configuration item 1 as the default gamma value. -
Page 52: Network Menu
• Gamma File and LUT File in the File menu <Media Format> M.S./SD Format Execute by Enter. Initializes the media and creates folders Formatting for the F65. media 4-2-6 Network Menu This menu is not displayed in web browsers or on tablet devices. Page Configuration... - Page 53 Page Configuration Default Settings Remarks item <Wi-Fi Setting> Wi-Fi Disabled Enabled, Disabled Enables/disables the Wi-Fi settings. Wi-Fi settings Enable for connection. Wi-Fi Status No connectivity Excellent, Good, Weak, Displays the communication/connection No connectivity status. SSID (Blank) (Blank), String of up to 32 Displays the network name.
-
Page 54: Diagnosis Menu
AT PLD V X.xxy-yy AT CPU V X.xxy-yy Update Execute by Enter. Updates the system. Consult your local Sony representative if you need to update the system. <Maintenance> APR (Auto Pixel Execute by Enter. Automatically adjusts the image sensor. Maintenance... -
Page 55: Appendix
Appendix Metadata The camera and lens metadata is output on the master output, and is recorded on the SR-R4. The output metadata is comprised by metadata in format based on SMPTE RDD18 and non-realtime metadata in proprietary format. Slate information entered using the F65Remote application on a tablet device is output in non-realtime metadata. - Page 56 Aspect ratio of the effective frame. Aspect Ratio For example, the aspect ratio for 90% area of 4096 × 2160 is expressed as 3686/1944. Camera Process Uint16 E1.03 For F65 internal use only (F65RAW mode output Discrimination only). Code Rotary Shutter Boolean E1.04 Mechanical rotary shutter mode.
-
Page 57: Non-Realtime Metadata
Item name Data type Length (bytes) Local tag Meaning UDAM Set AUID E0.00 Cooke Protocol Lens metadata set identifier. Identifier Cooke Protocol UInt8 E2.03 Lens data distance unit. Calibration Type 0: mm 1: 0.1 inch Cooke Protocol Data Stream Variable E2.01 Lens position data in binary format defined by Cooke Binary Metadata... -
Page 58: Warning/Error Messages
Consult your local Sony representative. DIAGNOSIS: Sync Error Sync Error A sync error occurred. Flashing red If the error continues, consult your local Sony representative. DIAGNOSIS: Lit red Optical Level Care Optical Level Care The optical level of the Recorder connector has reduced DOCK: Lit yellow to caution level. - Page 59 Indicator Subdisplay Self diagnostics Meaning field indication – Unsupported device Unsupported device Unsupported USB device is connected to the USB connector. – Hubs not supported Hubs not supported The camera does not support USB hubs. Warning/Error Messages...
-
Page 60: Precautions
To forcibly open the shutter Always turn off the power. Should the shutter to control incoming light to the image sensor not open, immediately consult your local Sony Use and storage locations representative. Store in a level, ventilated place. Avoid using or storing the... -
Page 61: Cleaning The Recorder Connector
Cleaning the Recorder About “Memory Stick Connector Duo” Supported types of “Memory Stick” Note You can use “Memory Stick Duo” or “Memory Stick PRO Before cleaning the recorder connector, always check that Duo.” the power supply is disconnected before proceeding. The camera operations have been checked using “Memory Stick”... - Page 62 —Very humid or subject to corrosive substances • To prevent data loss, make backups of data frequently. In no event will Sony be liable for any loss of data. • Unauthorized recording may be contrary to the provisions of copyright law. When you use a “Memory Stick Duo”...
-
Page 63: Specifications
Always verify that the unit is operating properly before 24 V: 3-pin (1), 24 V DC, 4 A maximum use. SONY WILL NOT BE LIABLE FOR DAMAGES (The usable current may be limited OF ANY KIND INCLUDING, BUT NOT LIMITED... - Page 64 Dimensions Unit: mm (inches) 19 ( Ø 52 (2 104 (4 109.4 (4 144 (5 88 (3 194.7 (7 147 (5 79.7 (3 13.5 254.5 (10 226.7 (9) 3/8-16UNC 104.5 (4 Weight: Camera head 5 kg (11 lb) With accessories 6.5 kg (14 lb 5 oz) Specifications...
-
Page 65: Connector Pin Assignments
Signal Specifications Connector Pin IRIS CONT +3.4 V (F16) to +6.2 V (F2.8) Assignments UNREG +10.5 V to +17 V 500 mA (MAX) IRIS +3.4 V (F16) to +6.2 V REMOTE (8-pin female) POSITION (F2.8) — — Not used — —... - Page 66 DC IN (8-pin male) Signal Specifications — — (External View) Signal Specifications 1 2 3 4 UNREG_GND — GND for +12 V (External View) UNREG_GND — GND for +12 V Signal Specifications UNREG_GND (24 — GND for +24 V VBUS 5 V dc, 500 mA (max) IN/OUT UNREG_24 V_IN IN...
-
Page 67: Menu Operation Using A Web Browser
DC OUT 24 V (3-pin female) Menu Operation using a Web Browser The settings menus of this camera can be controlled from a computer using a Web browser. (External View) Supported OS Windows XP, Windows Vista, Windows 7 Signal Specifications Mac OS X UNREG_GND (24 —... -
Page 68: Operation Using A Tablet Device
Supported devices iPad, iPad2, iPad (third generation) iOS 5.0 or later Android devices Android 3.2 1) Use of iPad2 or iPad (third generation) or later is recommended. 2) Operation tested on Sony tablet S devices only. Operation using a Tablet Device... - Page 69 Camera and Tablet Device Connections There are two modes supported for connecting devices. Infrastructure mode Access point F65 + CBK-WA01 Tablet device Ad-hoc mode Tablet device F65 + CBK-WA01 Infrastructure mode • Some tablet devices are not equipped with the necessary hardware for ad-hoc mode.
-
Page 70: Color Space According To The Color Space Settings
Color Space According to the COLOR SPACE Settings (Rw, Gw, Bw): RGB values for the original color space for S-GAMUT (R, G, B): Values after being converted to the color space for conventional cameras The color space of the camera main signal, recorded by the SR-R4 when connected, is S-GAMUT mode. -
Page 71: Notice Concerning Software Governed By The Gnu Gpl/Lgpl
Notice Concerning Software Governed by the GNU GPL/LGPL This product includes software to which the GNU General Public License (“GPL”) or GNU Lesser General Public License (“LGPL”) applies. Under the terms of the GPL/LGPL, of which a copy is attached, you have the right to obtain, modify, and distribute copies of the source code of this software. - Page 72 To obtain information on the source code and/or the source code for this software. Consult your nearest Sony Service. The GNU General Public License (GPL) Version 2, June 1991 Copyright (C) 1989, 1991 Free Software Foundation, Inc.
- Page 73 The precise terms and conditions for copying, distribution and modification follow. TERMS AND CONDITIONS FOR COPYING, DISTRIBUTION AND MODIFICATION 0. This License applies to any program or other work which contains a notice placed by the copyright holder saying it may be distributed under the terms of this General Public License.
- Page 74 3. You may copy and distribute the Program (or a work based on it, under Section 2) in object code or executable form under the terms of Sections 1 and 2 above provided that you also do one of the following: a) Accompany it with the complete corresponding machine-readable source code, which must be distributed under the terms of Sections 1 and 2 above on a medium customarily used for software interchange;...
- Page 75 author/donor to decide if he or she is willing to distribute software through any other system and a licensee cannot impose that choice. This section is intended to make thoroughly clear what is believed to be a consequence of the rest of this License. 8.
- Page 76 This program is free software; you can redistribute it and/or modify it under the terms of the GNU General Public License as published by the Free Software Foundation; either version 2 of the License, or (at your option) any later version. This program is distributed in the hope that it will be useful, but WITHOUT ANY WARRANTY;...
- Page 77 When we speak of free software, we are referring to freedom of use, not price. Our General Public Licenses are designed to make sure that you have the freedom to distribute copies of free software (and charge for this service if you wish); that you receive source code or can get it if you want it;...
- Page 78 TERMS AND CONDITIONS FOR COPYING, DISTRIBUTION AND MODIFICATION 0. This License Agreement applies to any software library or other program which contains a notice placed by the copyright holder or other authorized party saying it may be distributed under the terms of this Lesser General Public License (also called “this License”).
- Page 79 Thus, it is not the intent of this section to claim rights or contest your rights to work written entirely by you; rather, the intent is to exercise the right to control the distribution of derivative or collective works based on the Library. In addition, mere aggregation of another work not based on the Library with the Library (or with a work based on the Library) on a volume of a storage or distribution medium does not bring the other work under the scope of this License.
- Page 80 a) Accompany the work with the complete corresponding machine-readable source code for the Library including whatever changes were used in the work (which must be distributed under Sections 1 and 2 above); and, if the work is an executable linked with the Library, with the complete machine-readable “work that uses the Library”, as object code and/or source code, so that the user can modify the Library and then relink to produce a modified executable containing the modified Library.
- Page 81 11. If, as a consequence of a court judgment or allegation of patent infringement or for any other reason (not limited to patent issues), conditions are imposed on you (whether by court order, agreement or otherwise) that contradict the conditions of this License, they do not excuse you from the conditions of this License. If you cannot distribute so as to satisfy simultaneously your obligations under this License and any other pertinent obligations, then as a consequence you may not distribute the Library at all.
- Page 82 OPERATE WITH ANY OTHER SOFTWARE), EVEN IF SUCH HOLDER OR OTHER PARTY HAS BEEN ADVISED OF THE POSSIBILITY OF SUCH DAMAGES. END OF TERMS AND CONDITIONS How to Apply These Terms to Your New Libraries If you develop a new library, and you want it to be of the greatest possible use to the public, we recommend making it free software that everyone can redistribute and change.
- Page 83 3. All advertising materials mentioning features or use of this software must display the following acknowledgement: This product includes software developed by the University of California, Berkeley and its contributors. 4. Neither the name of the University nor the names of its contributors may be used to endorse or promote products derived from this software without specific prior written permission.
- Page 84 modify, merge, publish, distribute, sublicense, and/or sell copies of the Software, and to permit persons to whom the Software is furnished to do so, subject to the following conditions: The above copyright notice and this permission notice shall be included in all copies or substantial portions of the Software. THE SOFTWARE IS PROVIDED “AS IS”, WITHOUT WARRANTY OF ANY KIND, EXPRESS OR IMPLIED, INCLUDING BUT NOT LIMITED TO THE WARRANTIES OF MERCHANTABILITY, FIT-NESS FOR A PARTICULAR PURPOSE AND NONINFRINGEMENT.
- Page 85 Original SSLeay License Copyright (C) 1995-1998 Eric Young (eay@cryptsoft.com) All rights reserved. This package is an SSL implementation written by Eric Young (eay@cryptsoft.com). The implementation was written so as to conform with Netscapes SSL. This library is free for commercial and non-commercial use as long as the following conditions are aheared to. The following conditions apply to all code found in this distribution, be it the RC4, RSA, lhash, DES, etc., code;...
- Page 86 THE SOFTWARE IS PROVIDED “AS IS” AND ISC DISCLAIMS ALL WARRANTIES WITH REGARD TO THIS SOFTWARE INCLUDING ALL IMPLIED WARRANTIES OF MERCHANTABILITY AND FITNESS. IN NO EVENT SHALL ISC BE LIABLE FOR ANY SPECIAL, DIRECT, INDIRECT, OR CONSEQUENTIAL DAMAGES OR ANY DAMAGES WHATSOEVER RESULTING FROM LOSS OF USE, DATA OR PROFITS, WHETHER IN AN ACTION OF CONTRACT, NEGLIGENCE OR OTHER TORTIOUS ACTION, ARISING OUT OF OR IN CONNECTION WITH THE USE OR PERFORMANCE OF THIS SOFTWARE.
- Page 87 NO WARRANTY BECAUSE THE PROGRAM IS LICENSED FREE OF CHARGE, THERE IS NO WARRANTY FOR THE PROGRAM, TO THE EXTENT PERMITTED BY APPLICABLE LAW. EXCEPT WHEN OTHERWISE STATED IN WRITING THE COPYRIGHT HOLDERS AND/OR OTHER PARTIES PROVIDE THE PROGRAM “AS IS” WITHOUT WARRANTY OF ANY KIND, EITHER EXPRESSED OR IMPLIED, INCLUDING, BUT NOT LIMITED TO, THE IMPLIED WARRANTIES OF MERCHANTABILITY AND FITNESS FOR A PARTICULAR PURPOSE.
- Page 88 This code is hereby placed in the public domain. THIS SOFTWARE IS PROVIDED BY THE AUTHORS “AS IS” AND ANY EXPRESS OR IMPLIED WARRANTIES, INCLUDING, BUT NOT LIMITED TO, THE IMPLIED WARRANTIES OF MERCHANTABILITY AND FITNESS FOR A PARTICULAR PURPOSE ARE DISCLAIMED. IN NO EVENT SHALL THE AUTHORS OR CONTRIBUTORS BE LIABLE FOR ANY DIRECT, INDIRECT, INCIDENTAL, SPECIAL, EXEMPLARY, OR CONSEQUENTIAL DAMAGES (INCLUDING, BUT NOT LIMITED TO, PROCUREMENT OF SUBSTITUTE GOODS OR SERVICES;...
- Page 89 Portable OpenSSH additionally includes code from the following copyright holders, also under the 2-term BSD license: Ben Lindstrom Tim Rice Andre Lucas Chris Adams Corinna Vinschen Cray Inc. Denis Parker Gert Doering Jakob Schlyter Jason Downs Juha Yrjölä Michael Stone Networks Associates Technology, Inc.
- Page 90 c) Compatibility code (openbsd-compat) Apart from the previously mentioned licenses, various pieces of code in the openbsd-compat/ subdirectory are licensed as follows: Some code is licensed under a 3-term BSD license, to the following copyright holders: Todd C. Miller Theo de Raadt Damien Miller Eric P.
- Page 91 Free Software Foundation, Inc. Permission is hereby granted, free of charge, to any person obtaining a copy of this software and associated documentation files (the “Software”), to deal in the Software without restriction, including without limitation the rights to use, copy, modify, merge, publish, distribute, distribute with modifications, sublicense, and/or sell copies of the Software, and to permit persons to whom the Software is furnished to do so, subject to the following conditions: The above copyright notice and this permission notice shall be included in all copies or substantial portions of...
- Page 92 John Bowler Kevin Bracey Sam Bushell Magnus Holmgren Greg Roelofs Tom Tanner libpng versions 0.5, May 1995, through 0.88, January 1996, are Copyright (c) 1995, 1996 Guy Eric Schalnat, Group 42, Inc. For the purposes of this copyright and license, “Contributing Authors” is defined as the following set of individuals: Andreas Dilger Dave Martindale Guy Eric Schalnat...
- Page 93 Permission to use, copy, modify, and distribute this software for any purpose with or without fee is hereby granted, provided that the above copyright notice and this permission notice appear in all copies. THE SOFTWARE IS PROVIDED “AS IS”, WITHOUT WARRANTY OF ANY KIND, EXPRESS OR IMPLIED, INCLUDING BUT NOT LIMITED TO THE WARRANTIES OF MERCHANTABILITY,FITNESS FOR A PARTICULAR PURPOSE AND NONINFRINGEMENT OF THIRD PARTY RIGHTS.
- Page 94 This product includes software lighttpd to which the license below applies. Please note that we cannot respond to inquiries regarding the content of the source code. Copyright (c) 2004, Jan Kneschke, incremental All rights reserved. Redistribution and use in source and binary forms, with or without modification, are permitted provided that the following conditions are met: - Redistributions of source code must retain the above copyright notice, this list of conditions and the following disclaimer.
- Page 95 This product includes software freetype to which the license below applies. Please note that we cannot respond to inquiries regarding the content of the source code. The FreeType Project LICENSE 2006-Jan-27 Copyright 1996-2002, 2006 by David Turner, Robert Wilhelm, and Werner Lemberg Introduction The FreeType Project is distributed in several archive packages;...
- Page 96 The FreeType Project is copyright (C) 1996-2000 by David Turner, Robert Wilhelm, and Werner Lemberg. All rights reserved except as specified below. 1. No Warranty THE FREETYPE PROJECT IS PROVIDED ‘AS IS’ WITHOUT WARRANTY OF ANY KIND, EITHER EXPRESS OR IMPLIED, INCLUDING, BUT NOT LIMITED TO, WARRANTIES OF MERCHANTABILITY AND FITNESS FOR A PARTICULAR PURPOSE.
- Page 97 Our home page can be found at http://www.freetype.org This product includes software usagi-tool to which the license below applies. Please note that we cannot respond to inquiries regarding the content of the source code. Copyright (C) 2007 USAGI/WIDE Project. All rights reserved. Redistribution and use in source and binary forms, with or without modification, are permitted provided that the following conditions are met: 1.
- Page 98 The following notices are required to satisfy the license terms of the software that we have mentioned in this document: This product includes software developed by Adam Glass. This product includes software developed by Bill Paul. This product includes software developed by Brini. This product includes software developed by Causality Limited.
- Page 99 This product includes software PHP5.3.5 to which the license below applies. Please note that we cannot respond to inquiries regarding the content of the source code. -------------------------------------------------------------------- The PHP License, version 3.01 Copyright (c) 1999 - 2012 The PHP Group. All rights reserved. -------------------------------------------------------------------- Redistribution and use in source and binary forms, with or without modification, is permitted provided that the following conditions are met:...
- Page 100 For more information on the PHP Group and the PHP project, please see <http://www.php.net>. PHP includes the Zend Engine, freely available at <http://www.zend.com>. Notice Concerning Software Governed by the GNU GPL/LGPL...
- Page 101 The material contained in this manual consists of information that is the property of Sony Corporation and is intended solely for use by the purchasers of the equipment described in this manual. Sony Corporation expressly prohibits the duplication of any...
- Page 102 Sony Corporation F65 (SY) 4-415-383-04(1) © 2011...
Need help?
Do you have a question about the F65 and is the answer not in the manual?
Questions and answers