Table of Contents
Advertisement
Quick Links
Advertisement
Table of Contents

Related Manuals for Sony FS5


Summary of Contents for Sony FS5
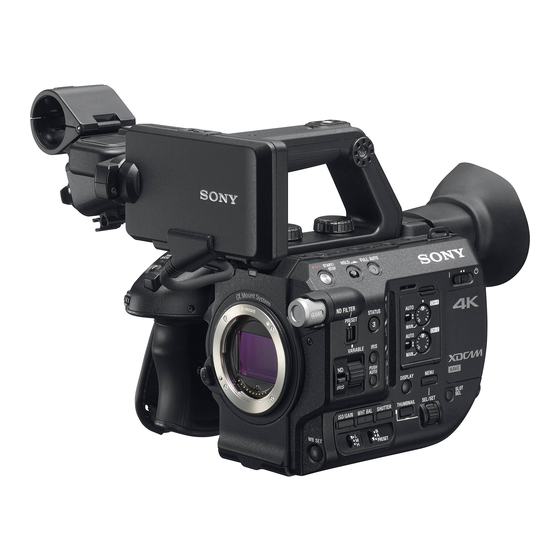
- Page 1 Sony FS5 Quick Start Guide...
- Page 2 This is a professional HD and 4K camera with broadcast quality codecs. The 4K RAW upgrade is coming next year!
- Page 3 Sony FS5 Kit Camera and Lens Batteries and Chargers Condenser Microphone There are two BPU 60 and one BPU 30 battery.
- Page 4 About this guide • This guide explains the basic functions of the camera. • For more detailed information consult the Sony User Manual. • You must read this guide to borrow the Sony FS5 camera from the CDA equipment depot. • You will be asked several skill testing questions based on this guide to confirm your ability to use the camera. • The camera can be borrowed for 72 hours.
- Page 5 Important: • The whole kit (camera, lens, microphone, batteries, and SD cards) is worth about $9000. • The camera is not waterproof. It must be protected from rain and snow. • When shooting in cold weather, keep the camera in the bag for (at least) 30 minutes when you come indoors. This will avoid condensation on the camera and electronics.
- Page 6 Sony FS5 Quick Start Guide Basic Operation...
- Page 7 Power Button...
- Page 8 Using the LCD or the Viewfinder • By default, the viewfinder is off when the LCD is on. • The power switch for the LCD is on the top of the LCD.
- Page 9 SD Card Slots 2 X 128 GB class 10 SDXC cards (95 MB/s) • 4K QFHD 100 Mbps 150 mins. per card • XAVC HD 1080 50 Mbps 280 mins. per card...
- Page 10 Slot Select Button: to determine which card to record to...
- Page 11 Making Menu Selections: Menu button and SEL/SET wheel...
- Page 12 Menu: first important settings: • Go to System Menu/ Media Format and format both SD cards – this will erase all data from the previous user Go to System Menu/Initialize to – this sets all menu items back to • the factory presets...
- Page 13 Three Recording Formats: XAVC HD, XAVC QFHD 4K, AVCHD • XAVC HD 4:2:2 MPEG 4 Long Profile (10 bit) • HD 1920x1080 60p, 30p, 24p at 50 mbps • Slow motion HD up to 960p • XAVC QFHD 4K UHD 3840x2160 • 4:2:0 MPEG 4 Long Profile (8 Bit) • 4K UHD 30p,34p at 100 mbps • AVCHD- lower quality HD format...
- Page 14 Menu: Choosing a Recording Format • Rec/Out Set Menu/ Rec Set • Choose the 50Mbps option for XAVC HD...
- Page 15 Menu: Choosing a Recording Format • Choose the 100Mbps option for 4K UHD...
- Page 16 Menu: Card Recording Options • Relay Rec will allow you to record between card A and B seamlessly (without gaps) • Simultaneously Rec will record to both cards at once or you can assign different record buttons on the camera to each card...
- Page 17 Sony FS5 Audio Controls...
- Page 18 Audio Inputs The camera has a built-in stereo microphone on the handle. It has also has two XLR inputs and a hot shoe. Use the condenser microphone included in the camera kit (side pocket of the bag). The built-in microphone. It will pick up room noise.
- Page 19 Attaching the Microphone • The condenser microphone attaches to XLR INPUT 2. Choose the setting MIC +48V • There is a clip for the cable underneath the XLR input...
- Page 20 Second XLR Input (Input 1) If you have other microphones, the second XLR input is on the back of the camera behind the hand grip. You may have to move the grip in order to set the LINE/MIC level for the input. This button adjusts the grip position.
- Page 21 Menu: Choosing Audio Input When the external condenser microphone is plugged in choose: Audio Set Menu/ CH2 Input Select/Input 2. CH1 Input Select can remain on Internal Mic if there is no other microphone– this is the stereo microphone on the handle. You don’t have to use this channel.
- Page 22 Audio Controls- Auto or Manual Flip down the little door to adjust the audio volume levels manually. The AUTO level should be sufficient however.
- Page 23 Headphone Output Headphone level is controlled in the Audio Set menu.
- Page 24 Sony FS5 Auto Exposure Controls...
- Page 25 FULL AUTO • Although the camera has many controls, you can operate it in FULL AUTO mode with AUTO exposure, AUTO white balance and AUTO focus.
- Page 26 Full Auto Exposure: Full Auto Button Toggle this button to go from Full Manual Exposure to Auto Exposure. FULL AUTO will tend to adjust the ISO and IRIS settings but keep the SHUTTER setting constant. Normally the shutter should be kept at double the frame rate. FULL AUTO also adjusts white balance automatically but slowly.
- Page 27 Full Auto exposure in Display • Notice the “A” symbol next to the IRIS, ISO and Shutter speed in the display. • Keep an eye on these settings when in FULL AUTO mode • If your ISO goes above 3200, you may have noise in the image. Don’t confuse 3200 ISO with 32000 ISO! 1/60 of a second is the correct shutter speed for 30p video.
- Page 28 AE Shift The AE SHIFT menu item controls automatic exposure compensation. If you are shooting with regular Rec.709 gamma, normal HD video with no picture profile or picture profile 4, then there should be no AE Shift ( 0 EV). Check this in the LCD display or menu setting. If you are shooting in SLOG 2 or 3 with auto exposure, then the AE SHIFT should be set to 1.5 EV. AE SHIFT level indicator...
- Page 29 Sony FS5 Focus Controls...
- Page 30 Manual Focus: Auto/Manual Focus Focus Magnification button on Handle Control Focus with the smaller width ring. Toggle on Camera Side...
- Page 31 Auto Focus: For continuous Auto Focus, move the switch to AUTO In Manual Focus, you can get an auto focus momentarily by pressing the PUSH AUTO button below. Focus Peaking is available if you need it, in the DISPLAY SET/ PEAKING menu.
- Page 32 Sony FS5 About the Lens...
- Page 33 Sony E PZ 18-105mm f/4 G OSS Lens This is the kit lens. Other lenses will require a Sony E Mount adapter...
- Page 34 Steady Shot (Stabilization) • This is for lenses that support Steady Shot (like the Sony E Mount lens on the camera). • Keep Steady Shot on Normal • Turn off Steady Shot when the camera is on a tripod • CAMERA/PAINT MENU /STEADYSHOT...
- Page 35 Sony FS5 Slow Motion Recording...
- Page 36 Slow and Quick (slow motion) In the above settings there are two slow motion presets: one for shooting 1080 60p but stamped at 30p, the other for shooting at 1080 120p but stamped at 30p. The camera can shoot up to 960p. See the manual for possible shot durations. The more space on the SD card, the longer the possible recording.
- Page 37 Super Slow Motion Trigger You must set the Rec Timing for Super Slow motion Frame Rates (frame rates above 60p). High Frame Rates are not possible for long durations. Set the REC TIMING menu item for when to trigger the recording. START TRIGGER begins recording once you press the record button.
- Page 38 Slow and Quick Shooting Press the S&Q button to toggle between normal frame rate, slow motion frame rate and super slow motion frame rate. The frame rate will appear in the LCD display. You cannot record sound in S&Q mode.
- Page 39 Sony FS5 Manual Exposure Controls...
- Page 40 Manual Exposure Settings • Manual exposure relies on the following things: • White Balance • Iris • Shutter Speed • ISO • And possibly ND filter settings...
- Page 41 Manual White Balance The camera will White Balance in FULL AUTO Mode but Manual White Balance is preferable. The WHT BAL button toggles between manual and auto white balance. To do a manual white balance, set the WHIT BAL switch on the side of the camera to either A or B (you can store two manual WB settings). Point the camera at a white card with light falling on it. Press the WB SET button on the front of the camera. The Preset Switch is controlled by the Camera Menu: CAMERA PAINT/WB PRESET. There are indoor/outdoor and color temperature presets. Manual White Balance does not work in SLOG. The white balance is set in the SLOG Picture Profile settings.
- Page 42 White Balance Menu Settings On the WB toggle switch on the side of the camera, the last setting PRESET is determined by the WB TEMP SET in the CAMERA/PAINT menu.
- Page 43 Manual Exposure • In complete manual exposure there is no “A” Symbol next to ISO, IRIS or SHUTTER. • The ISO, WB and SHUTTER buttons will toggle between AUTO and Manual. • Always keep the Shutter on Manual and at twice the frame rate, unless you want a motion effect.
- Page 44 ISO/Gain Setting: Manual ISO control The ISO/Gain switches can be set to control either ISO or GAIN presets. I prefer ISO presets. There are three presets (L, M and H) set in the Camera/Paint menu under ISO/GAIN SEL. So you can have three ISO settings to switch between. If properly exposed there is no image noise on HD video at 3200 ISO and very little at 6400 ISO.
- Page 45 Manual IRIS adjustments There are two wheels to adjust the IRIS. To use the wheel on side of the camera, select the IRIS switch next to the wheel. Or use the wheel on the hand grip. Switch to IRIS...
- Page 46 Histogram • Keep the Histogram in the Display to judge overall contrast and whether areas are over or underexposed. • Display Set Menu/ HISTOGRAM...
- Page 47 Zebra Stripes • Zebra Stripes are useful but distracting. • Assign a Zebra Stripe level to judge overexposure (a level of 100) or at another level to determine exposure for a specific feature (like flesh tone highlights). • Display Set Menu/ ZEBRA...
- Page 48 Assigning Zebra Stripes to a Button • It helps to assign Zebra Stripes to a button on the camera (button 5 on the Handle) so they can be easily toggled ON and OFF System Menu/Assign Button...
- Page 49 ND filter ND Filters cut light (make the image darker). By default the ND filter knob should always be in the CLEAR position.
- Page 50 Using ND filter Presets The ND filter knob functions like a normal ND preset toggle switch when the switch below is set to PRESET. You can set three ND levels in the CAMERA/PAINT menu.
- Page 51 Using the Variable ND filter Move the ND filter knob to the highest (darkest) preset, turn the switch below to VARIABLE and then turn the switch below that to ND. The wheel will then adjust the ND level variably. The variable ND is useful if you want to maintain a consistent f stop (IRIS) in variable light conditions. It is a simple way to adjust exposure without affecting depth of field. Switch to Variable Switch to ND...
- Page 52 Manual Shutter Control Press the SHUTTER button to toggle between manual and auto shutter. In manual, move the SEL/SET wheel to adjust shutter speed and then press the SEL/SET wheel to maintain that speed. If the shutter speed falls below twice the frame rate, you will have motion blur. The faster the shutter speed the more staccato the motion. Don’t adjust shutter unless you want a motion effect. Keep it at twice the frame rate.
- Page 53 Sony FS5 Picture Profiles...
- Page 54 Picture Profiles • Picture Profiles determine the look of the image: they are presets that determine image contrast, color and dynamic range. They are similar to Picture Styles in a Canon DSLR camera, but more complex. • The Picture Profiles may be OFF. You do not have to choose one. However, it is recommended. • Picture Profiles also determine whether you are shooting in HD (Rec.709 gamut) or SLOG (High Dynamic Range). • There are nine to choose from. • There is a button on the camera that takes you directly to the Picture Profile choices.
- Page 55 Selecting Picture Profiles in the Camera Paint Menu...
- Page 56 HD Video Picture Profiles • When shooting HD video, Picture Profile 3 and 4 are the most neutral and will give you colors faithful to the HD color space These are some of the details of Picture Profile 4. The Gamma is set to ITU 709, the HD color space. The settings can be modified.
- Page 57 SLOG Picture Profiles • Picture Profile 7 is for shooting SLOG 2 and Picture Profile 8 and 9 is for SLOG 3 (more on this later). These are for High Dynamic Range video. Here are some of the details of Picture Profile 8. Notice that the Gamma indicates S-Log 3.
- Page 58 Sony FS5 Backing Up Your Media...
- Page 59 Copying Data from the SD Cards If you shot with the XAVC codec as suggested your clips will be in the XDROOT/Clip folder. The clips are in a MXF container. XAVC clips play back natively in Adobe Premiere, you do not need to change the codec or container. 4K clips are of course more difficult to play back at full resolution. Back up the MXF files to your hard drive and then batch rename the clips (see next slide). Please erase the media from the SD cards using the camera menu when you are finished.
- Page 60 Batch Renaming Video Files • The FS5 does not support custom file names. • This can create a problem with duplicated file names if you shoot on multiple occasions with the camera. • Duplicate file names will cause problems in Adobe Premiere if your video files go offline. • Always rename the MXF files using Adobe Bridge: Tools/Batch Rename. • You can also use Bridge to batch delete the XML files before batch renaming the MXF files. • Always batch rename before you import into Premiere. Rename Box in Adobe Bridge...
- Page 61 Sony FS5 High Dynamic Range (SLOG)
- Page 62 Why High Dynamic Range? • Shooting in High Dynamic range solves one persistent difficulty of video imaging since it’s creation: how to maintain image detail in the shadows and highlights simultaneously. • Although it can be more complicated to expose correctly, High Dynamic Range video is useful for situations of high contrast. • High Dynamic range video uses logorithmic sampling. Sony calls their version of this: SLog.
- Page 63 Exposure Using Linear Sampling Linear sampling does not provide enough detail to reproduce the luminance range that the eye can perceive. So it discards highlight information. Any video camera that cannot shoot in high dynamic range, discards this information. Diagrams from: Digital Compositing for Film and Video, Third Edition: Steve Wright, Focal Press 2010.
- Page 64 Log sampling varies the luminance distance between samples. There are greater jumps between samples in the highlight areas where we perceive less variation. Log: perceptually consistent Linear: mathematically consistent Diagrams from: Digital Compositing for Film and Video, Third Edition: Steve Wright, Focal Press 2010.
- Page 65 Exposure Using Log Sampling Log sampling is capable of reproducing the entire perceived range of luminance. High dynamic range cameras also use a higher bit rate codec. In this chart we have 10 bit sampling (1024 variations). The Sony FS5 uses 10 bits in HD only. Diagrams from: Digital Compositing for Film and Video, Third Edition: Steve Wright, Focal Press 2010.
- Page 66 What is Image Noise? • Image noise occurs when there are not enough samples to accurately reproduce the variations of light and color. • We get noise in the shadow areas of the image when shooting because reproducing low light requires a high sampling rate. • One solution to eliminate noise is to eliminate this shadow area from our sample range. • Push the image information up into the lower mids and highlights in the histogram where the sampling rate is more sufficient for a greater amount of light.
- Page 67 SLOG exposure • Keep your picture information in the mid and highlight area. • You never want to be in the situation of having to raise your shadow areas in post production- this creates noise. • You always want to lower the mids and highlights in post production when “normalizing” the shot (making the contrast seem correct on a computer display).
- Page 68 The website of Alister Chapman, cinematographer, has two videos on the FS5 with information on how to shoot with SLOG picture profiles. I recommend this site. The following recommendations are based on Mr.Chapman’s but adjusted with my own experience.
- Page 69 When to use SLOG • When you have a situation with shadows and bright highlights and you want to preserve this dynamic range, shoot in SLOG. • Do not use SLOG Picture Profiles when there are no highlights. • If the situation is dark, shadows and mids only, shoot with standard REC.709 picture profiles like PP 3 or PP4. • SLOG has twice the dynamic range of Rec.709 Gamut but it favors highlight information. • It is much easier to shoot in SLOG with the FS5 in HD 1080p than 4K. • This is because HD is a 10 bit 4.2.2 image and 4K is an 8 Bit 4.2.0 image...
- Page 70 Shooting SLOG • SLOG is Sony’s High Dynamic Range setting • Shoot with Picture Profile 7 (PP7) for SLOG 2 and PP9 for SLOG3 • SLOG 3 is easier to normalize. • SLOG 2 is easier to look at in the LCD monitor (it has more contrast). • I prefer SLOG 3 (PP9) even though the image looks very washed out in the LCD.
- Page 71 SLOG: White Balance • When shooting in SLOG, the white balance must be set in the Picture Profile settings/COLOR MODE • Set the correct color temperature for the correct S-GAMUT setting • For SLOG 2 use a S-Gamut setting plus temp. for SLOG 3 use a S-Gamut3.Cine setting plus temp.
- Page 72 Common Color Temperature Settings • LCD Monitor: 6500K • Daylight: 5500 K • Florescent Indoor: 4300K • Tungsten Indoor Light or a Street at Night: 3200K • Incandescent Indoor Light: 2500K...
- Page 73 SLOG: Gamma Display Assist • Sony has a provided a Gamma Display Assist to normalize the LCD image when shooting in SLOG • Don’t use it. Turn it off. • Because you are overexposing, the image in the LCD will look washed out. • Use the Histogram and the Zebra Stripes to judge exposure. • The FS5 cannot import LUTs.
- Page 74 SLOG and ISO settings • The higher ISO, the more the dynamic range is reduced. • ISO 3200 in SLOG gives you the maximum dynamic range. • Changing ISO to AUTO will cause it to change so keep exposure on manual at 3200 ISO if possible.
- Page 75 Shooting SLOG: OVEREXPOSE You must overexpose for SLOG shooting. Ideally you will have no important information in the shadow areas of your image. The easiest way to overexpose properly is to use Auto IRIS and set the AE shift to 1.5 EV. This will overexpose the image by 1.5 stops. You cannot use FULL AUTO when shooting SLOG. Use manual exposure control but AUTO IRIS.
- Page 76 SLOG: Zebra Stripes • If you want to manually expose using SLOG consider using the Zebra Stripes as a reference. • Set the Zebra Level to 70 • Use this a reference for flesh tone highlights.
- Page 77 SLOG: Manual Exposure • Use the histogram when exposing SLOG • Push all the information into the mids and highlights on the histogram. • Keep all important information above 30 IRE (one third of the way up on your histogram). • Think that all your image information will be shifted towards the shadow areas later on. So you must leave some room. • You can overexpose by 1.5 to 2.5 stops. • 2 Stops over seems ideal. Darker skin tone areas will be at 70 IRE, your zebra stripe level. • At 3 stops of overexposure you lose too much color information.
- Page 78 S LOG and Overexposure • You never want to underexpose with SLOG but you can overexpose. • Generally the overexposed highlights will blow out more gradually than in Rec.709. You may want this effect. • You will be able to recover some detail in slightly overexposed areas.
- Page 79 Thank you for reading this guide! You must answer several skill testing questions based on this guide before you can borrow the camera from the CDA depot.
Need help?
Do you have a question about the FS5 and is the answer not in the manual?
Questions and answers