Advertisement
Quick Links
Download this manual
See also:
Setup Manual
4K RAW up to 60p
4K RAW burst up to 120p
4K RAW to 4K Apple ProRes 422 (HQ) up to 30p
4K RAW to UHD Apple ProRes 422 (HQ) up to 30p
2K RAW up to 240p
4K RAW to 2K Apple ProRes 422 (HQ) up to 60p
4K RAW to HD Apple ProRes 422(HQ) up to 60p
1080p video to Apple ProRes 422(HQ) up to 60p
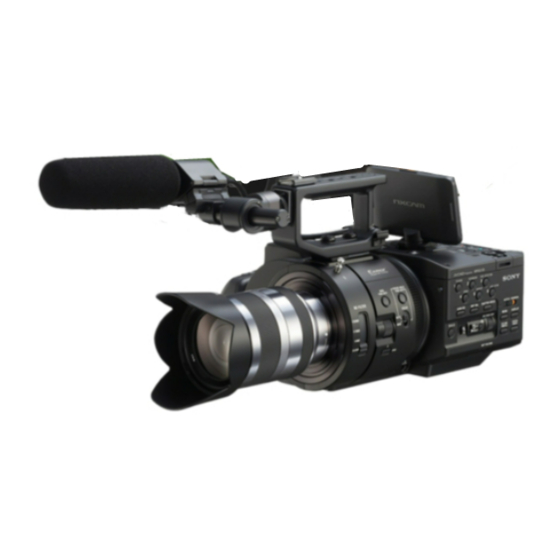
SONY FS700
Updated December 19, 2014 | Firmware Release v4.10.100
SETUP GUIDE
Odyssey7Q
Odyssey7Q+
Advertisement

Subscribe to Our Youtube Channel
Related Manuals for Sony FS700


Summary of Contents for Sony FS700
- Page 1 SONY FS700 SETUP GUIDE Odyssey7Q Odyssey7Q+ 4K RAW up to 60p 4K RAW burst up to 120p 4K RAW to 4K Apple ProRes 422 (HQ) up to 30p 4K RAW to UHD Apple ProRes 422 (HQ) up to 30p 2K RAW up to 240p...
- Page 2 FS RAW RECORDING CAPABILITIES RECORDING TIMES Maximum record time in minutes, recording to two 512G SSDs (1TB) RECORD TIME FRAMES PER SECOND 155 Takes** 155 Takes** 4K RAW 2K RAW 4K to 4K ProRes 4K to HD ProRes 4K to 2K ProRes 4K2HD HD ProRes * Two SSDs are required to capture...
- Page 3 29.97p, 50p, 59.94p, 100p, 120p 2K RAW 2K RAW 2048 x 1080 12-Bit 200p, 240p CinemaDNG 200p / 240p * FS700 RECORDING OPTION REQUIRED (Activation key can be purchased through website) NOTE: When recording RAW, S-LOG2 Picture Profile must be used.
- Page 4 4K/2K RAW RECORDING FS700 CONFIGURATION 1. SET UP THE FS700 FOR RAW RECORDING MENU » REC/OUT SET » REC SET » RAW SET Select any of the following frames rates that you wish to record on Odyssey7Q: 4096x2096/24p 4096x2096/30p NTSC...
- Page 5 The Odyssey7Q also has the ability of recording the buffered 4K 100/120 p from the FS700. If you wish to record this set the camera to 4K RAW, and enable S&Q. Then the Odyssey7Q will record 4K100/120, for up to a 4 second burst.
- Page 6 2. CONNECT ODYSSEY7Q TO FS700 Connect FS700 3G-SDI output to Odyssey7Q SDIA input NOTE Use only 3G-SDI rated cables from FS700 to Odyssey7Q. Using a 1.5G SDI cable in not recommended and may cause issues. 3. SET DATE & TIME TO MATCH FS700 ☼...
- Page 7 7. CONNECT TO CAMERA AND VERIFY STATUS INPUT Connect FS700 3G-SDI output to Odyssey7Q SDIA input Note: Use only 3G-SDI rated cables from FS700 to Odyssey7Q. Using a 1.5G SDI cable in not recommended and may cause issues. The status on your Odyssey7Q will display your camera’s output.
- Page 8 SSD RAID CONFIGURATION RECORDING ACROSS TWO SSDS SSD1 SSD2 1, 3, 5, 7… 0, 2, 4, 6… 4K 23.98p to 30p rates = Single Drive 2K 23.98p to 120p rates = Single Drive 4K 50/59p = RAID (two drives) 2K 200/240p = RAID (two drives) RAID is set up automatically upon detecting the input signal - no setup is required.
- Page 9 Odyssey7Q can only detect which profile is set, not the individual attributes. 4. CONNECT FS700 TO ODYSSEY7Q Connect FS700 3G-SDI output to Odyssey7Q SDIA input NOTE: Use only 3G-SDI rated cables from FS700 to Odyssey7Q. Using a 1.5G SDI cable in not recommended and may cause issues.
- Page 10 Connect FS700 3G-SDI output to Odyssey7Q SDIA input NOTE Use only 3G-SDI rated cables from FS700 to Odyssey7Q. Using a 1.5G SDI cable in not recommended and may cause issues. The status on your Odyssey7Q will display your camera’s output.
- Page 11 1080/50p NOTE 1080/100p, 1080/120p are not supported. 2. SET UP RECORD TRIGGER (FS700 REC BUTTON) MENU » REC/OUT SET » VIDEO OUT » SDI/HDMI COMMAND » ON 3. SET UP FS700 OUTPUT RESOLUTION MENU » REC/OUT SET » VIDEO OUT » SDI/HDMI/COMPONENT » 1080P/480P 4.
- Page 12 Connect FS700 3G-SDI output to Odyssey7Q SDIA input NOTE Use only 3G-SDI rated cables from FS700 to Odyssey7Q. Using a 1.5G SDI cable in not recommended and may cause issues. The status on your Odyssey7Q will display your camera’s output.
- Page 13 1080/25p 1080/50p Note: 1080/100p, 1080/120p are not supported. 2. SET UP RECORD TRIGGER (FS700 REC BUTTON) MENU » REC/OUT SET » VIDEO OUT » SDI/HDMI COMMAND » ON 3. SET UP FS700 OUTPUT RESOLUTION MENU » REC/OUT SET » VIDEO OUT » SDI/HDMI/COMPONENT » 1080p/480p 4.
- Page 14 Connect FS700 3G-SDI output to Odyssey7Q SDIA input NOTE Use only 3G-SDI rated cables from FS700 to Odyssey7Q. Using a 1.5G SDI cable in not recommended and may cause issues. The status on your Odyssey7Q will display your camera’s output.
-
Page 15: Off-Loading Data
OFF-LOADING DATA COPYING FILES TO YOUR COMPUTER 1. CONNECT SSD DRIVE TO ADAPTER Connect the Convergent Design 2.5” Premium SSD Media to any off-the-shelf 2.5” SATA adaptor (example: Seagate GoFlex Thunderbolt Adaptor or USB 3.0 Adaptor) 2. CONNECT ADAPTER TO COMPUTER The SSD will mount within 10-20 Seconds. -
Page 16: Post Production
FS700 RAW: DEALING WITH RAW FILES Note that FS700 RAW files are Linear, thus the files need a Gamma 2.2 correction in order to look correct. You may notice when you first import your files that they appear very dark before correction. - Page 17 3. Select navigate to File and select Import Media 4. Navigate to the Clips directory, and select the Clip Folder contain your FS700 RAW files. 5. At this point you can start correcting the files to a 2.2 Gamma using the Color Board.
- Page 18 POST PRODUCTION WORKING WITH RECORDED FILES There are numerous post systems and NLEs that can read natively the various file formats recorded by the Odyssey7Q. Some NLEs may require plug-ins in order to read certain file formats. Blackmagic Design Resolve software is available for free and can read all formats recorded by the Odyssey7Q.
- Page 19 © 2014 Convergent Design, Inc. - All Rights Reserved. All copyrights and trademarks remain the property of their respective owners. Updated December 19, 2014...
Need help?
Do you have a question about the FS700 and is the answer not in the manual?
Questions and answers