
Related Manuals for Magic Chef MCD1611ST


Summary of Contents for Magic Chef MCD1611ST
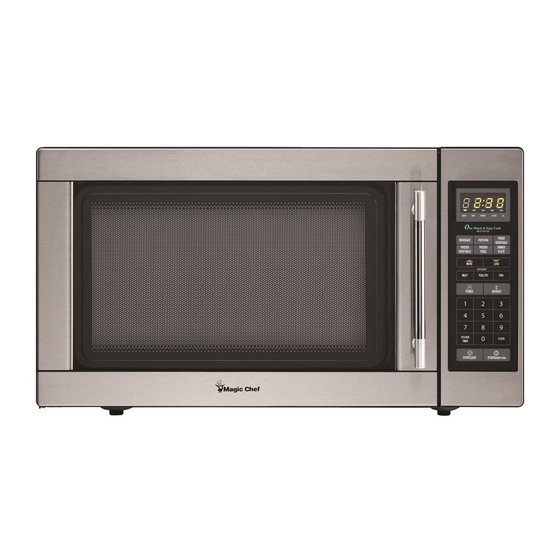
- Page 1 1.6 cu.ft. Microwave oven MCD1611ST INSTRUCTION MANUAL Before operating this oven, please read these instructions completely.
-
Page 2: Table Of Contents
TO STOP THE OVEN WHILE THE OVEN IS OPERATING ... 15 UTENSIL TEST ... 16 MICROWAVE UTENSILS ... 16 CARE OF YOUR MICROWAVE OVEN ... 17 USE YOUR MICROWAVE OVEN SAFELY ... 18 BEFORE YOU CALL FOR SERVICE ... 19... -
Page 3: Important Safety Instructions
Use extreme care when inserting a spoon or other utensil into the container. 18. Do not use this microwave oven to heat corrosive chemicals (for example, sulfides and chlorides). Vapors from such corrosive chemicals may interact with the contact and springs of the safety interlock switches thereby rendering them inoperable. -
Page 4: Federal Communications Commission Radio Frequency Interference Statement (U.s.a Only)
• Relocate the microwave oven with respect to the receiver. • Move the microwave oven away from the receiver. • Plug the microwave oven into a different outlet so that microwave oven and receiver are on different branch circuits. THE MANUFACTURER is not responsible for any radio or TV interference caused by UNAUTHORIZED MODIFICATION to this microwave oven. -
Page 5: Installation
6. Power supply. This microwave oven requires a power supply of approximately 15 Amperes, 120 Volts, 60Hz and a grounded outlet. A short power cord is provided to reduce the risk of the user becoming entangled in or tripping over a longer cord. Longer cord sets or extension cords are available and may be used if care is exercised. -
Page 6: Specifications
SPECIFICATIONS POWER SUPPLY POWER CONSUMPTION MICROWAVE OUTPUT POWER FREQUENCY OUTSIDE DIMENSIONS (W X H X D) CAVITY DIMENSIONS (W X H X D) NET WEIGHT TIMER POWER LEVELS * Specifications are subject to change without notice. 589 (23.2 in) 120V AC 60 Hz SINGLE PHASE WITH GROUNDING 1500 W 1100 W 2450 MHz... -
Page 7: Features Diagram
FEATURES DIAGRAM 1. Door latch - When the door is closed it will automatically lock shut. If the door is opened while the oven is operating, the magnetron will automatically shut off. 2. Door seal - The door seal maintains the microwave within the oven cavity and prevents microwave leakage. -
Page 8: Features Diagram
FEATURES DIAGRAM 1. Time set pad - Used to set the cooking time and present time. 2. Display - Cooking time, power level, indicators and present time are displayed. 3. One touch - Used to cook or reheat specific quantities of food. 4. -
Page 9: Operation Procedure
The glass tray and roller guide must always be in place during cooking. 3. Shut the door. Make sure that it is firmly closed. The oven light is on when the microwave oven is operating or the door is opened. -
Page 10: Controls
CONTROLS SETTING THE CLOCK When the oven is first plugged in, the display will flash ":0" and a tone will sound. If the AC power ever goes off, the display shows ":0" when the power comes back on. 1. Press CLOCK pad. This is a 12 hour clock system. -
Page 11: Weight Defrosting
WEIGHT DEFROSTING WEIGHT DEFROSTING lets you easily defrost food by eliminating guesswork in determining defrosting time. Follow the steps below for easy defrosting. 1. Press MEAT pad. MEAT 2. Select desired defrosting weight. 3. Press START pad. 1. Press POULTRY pad. POULTRY 2. -
Page 12: Cooking In One Stage
COOKING IN ONE STAGE 1. Press POWER pad. (Select desired power level.) POWER 2. Press the number pads for the cooking time. 3. Press START pad. When you press START pad, the M/W indicator starts blinking to show the oven is cooking. The display counts down the time to show how much cooking time is left. -
Page 13: Kitchen Timer Mode
KITCHEN TIMER MODE Timer operates as a minute timer, can be set to delay cooking and used as a hold setting after cooking. However delay cooking can not be programmed for defrost. Timer operates without microwave energy. HOW TO USE AS A MINUTE TIMER 1. -
Page 14: Speedy Cook
SPEEDY COOK SPEEDY COOK allows you to reheat for 30 seconds at 100% (full power) by simply pressing the SPEEDY COOK pad. By repeatedly pressing the SPEEDY COOK pad, you can also extend reheating time to 5 minutes by 30 second increments. 1. -
Page 15: One Touch Cooking
ONE TOUCH COOKING 1. Press BEVERAGE pad once for 1 cup, twice for 2 cups or BEVERAGE three times for 3 cups. * BEVERAGE * (200ml/cup) • 1 cup(mug) : PressBEVERAGE once. • 2 cups(mugs) : Press BEVERAGE twice within 1.5 seconds. •... -
Page 16: Less, More
LESS, MORE To alter one touch cooking or cooking time whilst oven is in operation, use LESS or MORE.(except for defrosting) Press LESS/MORE to decrease/increase the one touch cooking time in multiples of 10 seconds. The overall one touch cooking time can be increased to a maximum of 99 minutes 50 seconds. Press LESS/MORE to decrease/increase the cooking time in multiples of 1 minute. -
Page 17: Utensil Test
If you are not sure, try this utensil test to check. • Put the empty utensil in the microwave oven. • Put one cup of water in a glass measure next to the empty utensil. -
Page 18: Care Of Your Microwave Oven
Control Panel. If steam accumulates inside or around the outside of the oven door, wipe with a soft cloth. This may occur when the microwave oven is operated under high humidity conditions and in no way indicates malfunction of the unit. -
Page 19: Use Your Microwave Oven Safely
Do not hit or strike the control panel with hard objects. This can damage the oven. FOOD Never use your microwave oven for home canning. The oven is not designed for proper home canning. Improperly canned food may spoil and be dangerous to consume. -
Page 20: Before You Call For Service
* Q : Why do I have moisture in my microwave oven after cooking? A : The moisture on the side of your microwave oven is normal. It is caused by steam from cooking food hitting the cool oven surface. -
Page 21: Microwave Oven
Microwave Oven Warranty MC Appliance corp. warrants each new Microwave Oven to be free from defects in material and workmanship and agrees to remedy any such defect or to furnish a new part(s) (at the company’s option) for any part(s) of the unit that has failed during the warranty period. Parts and labor expenses are covered on this unit for a period of one year after the date of purchase.
Need help?
Do you have a question about the MCD1611ST and is the answer not in the manual?
Questions and answers