Table of Contents
Advertisement
Advertisement
Table of Contents

Subscribe to Our Youtube Channel
Related Manuals for Dymo XTL 300


Summary of Contents for Dymo XTL 300
- Page 1 User Guide...
- Page 2 QR Code used in this application is under the GNU Lesser General Public License 2.1. Trademarks DYMO and XTL are trademarks or registered trademarks in the US and other countries. All other trademarks are the property of their respective holders.
-
Page 3: Table Of Contents
Contents About Your New Label Maker Registering Your Label Maker Getting to Know Your Label Maker Connecting the Power Charging the Battery Removing and Replacing the Battery About Labels Inserting the Label Cartridge Removing the Label Cartridge Selecting a Label Cartridge Removing the Label Backing Using Your Label Maker Keypad... - Page 4 Setting the Default Barcode Restoring the Label Application Default Settings Restoring Factory Default Settings Connecting the Label Maker to your Computer ™ Downloading and Installing DYMO ID Software Connecting the Label Maker to your Computer About DYMO ID Software Transferring Files...
- Page 5 Environmental Information Safety Precautions ® User Guide...
-
Page 6: About Your New Label Maker
1/2”, 3/4”, or 1” (6 mm, 9 mm, 12 mm, 19 mm, or 24 mm). Labels are available in a full range of temperature, chemical, and UV-resistant materials, including continuous tape and pre-sized labels. Visit www.dymo.com for information on obtaining labels and accessories for your label maker. Registering Your Label Maker Visit www.dymo.com/register to register your label maker online. -
Page 7: Connecting The Power
The LiPo battery is designed to provide years of service. In the unlikely situation that you need to replace the battery, a replacement battery can be ordered from www.dymo.com. Make sure the power adapter and USB cable are disconnected before handling the LiPo battery. -
Page 8: About Labels
See Using the Label Applications on page 13 for information about the types of labels you can use with each label application. Visit www.dymo.com for information on obtaining labels for your label maker. Inserting the Label Cartridge A sensitive electronic chip is embedded in the... -
Page 9: Removing The Label Cartridge
To insert the label cartridge Press the label compartment release and lift the cover. See Figure 6. Press and lift Make sure the tape and ribbon are taut across the mouth of the label cartridge and that the tape passes between the label guides. -
Page 10: Removing The Label Backing
Removing the Label Backing ™ DYMO XTL continuous labels have an easy-to-peel split Remove split backing back for easy removal of the label backing. Does not apply to heat-shrink tubing or pre-sized labels. To remove the continuous label backing Locate the split on the label backing. -
Page 11: Using Your Label Maker
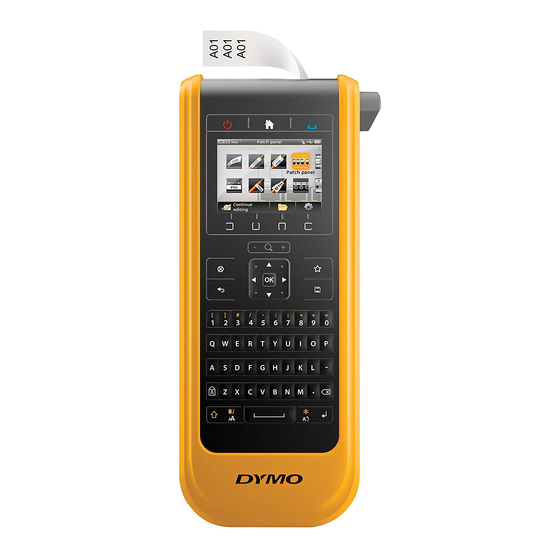
Using Your Label Maker Become familiar with the features and function keys on your label maker. Figure 9 1 On/Off (Cancel printing) Save 15 Shift 2 Home Number/Symbol keys 16 Caps lock 3 Print/Print options 10 Backspace/Delete 17 Navigation 4 LCD display 11 Return 18 Back 5 Function keys... - Page 12 You can change the amount of time the label maker remains in standby mode before automatically shutting off. See Changing the Auto Shut-off Time on page To turn power on Press To turn on the display when in s any key Pres once.
- Page 13 Opens the Style tool. See Changing the Text Style on Press page 24. Opens the Align tool. See Aligning the Text on page 25. Press key is also used with the navigation keys to select text in a text box. See Navigation Keys on page 9.
-
Page 14: Lcd Display
key makes a selection, such as choosing a label application, a label file, an image, a list item, or a setting. Throughout this user guide, using the instruction to “select” implies performing the step followed by pressing to complete the action. Navigation Keys The navigation keys operate as follows: In a text box... -
Page 15: Status Bar
Status Bar The status bar contains a number of indicators that show label information, label type, Caps lock, USB connection, and power status. Caps lock indicator Label type selected USB connection status Current label Power status type and width in label maker Power Status The power status is shown at the top right of the display and shows the current battery status. -
Page 16: Action Bar
The Home screen contains the following three actions: Continue editing Return to the label you were editing before pressing Open a previously saved label file. Open a saved label file Change the label maker settings. Settings Action Bar Four function keys are located below the LCD display. These keys are used to select actions that are available as you are editing labels. -
Page 17: Navigating Labels
Automatically fill panel labels, or automatically create a series of single labels. See Creating a Series of Labels on page 29. Serialize View a series of labels, one at a time. Only available when the current file contains more than one label. Also used to locate label errors. Go to Navigating Labels When a label file contain more than one label, you can view each label. -
Page 18: Using The Label Applications
Using the Label Applications The label maker includes a number of label applications that make it easy to create a label for your specific job. Label applications appropriate for the currently inserted label cartridge appear to the left of those label applications that are not compatible. -
Page 19: Quick Label
Quick Label The Quick label is a simple, text-only label. No properties need to be set to get started. As you add or delete text, the length of the label will change automatically to fit the text. A single text object is included on the label by default. Barcodes and images cannot be added, and you cannot create multiple labels using serialization. -
Page 20: Patch Panel Label
To create a general label From the Home screen, select General. Follow the steps to configure your label. Add text and formatting. Patch Panel Label The Patch Panel editor allows you to quickly create a label that can be applied to datacom and electrical panels. -
Page 21: Flag Label
To create a patch panel label manually From the Home screen, select Patch Panel. Follow the steps to configure your label. Add text and formatting. Flag Label The flag label is one of several cable management specific labels. The flag label consists of two matching segments that when wrapped around a cable form a flag allowing the user to see the same data from both sides. -
Page 22: Cable Wrap Label
Text size and style apply to all the text on a single line. You can apply different text sizes and styles to each line of text on the label. Laminated cable wrap labels can only be printed using pre-sized Laminated Wire/ Cable Wrap label cartridges. -
Page 23: 110-Block Label
One text object is automatically added to the label. You can add an image and a barcode object to heat-shrink tube labels. Text size and style apply to all the text on a single line. You can apply different text sizes and styles to each line of text on the label. -
Page 24: Horizontal Breaker Label
The label properties you can set are: Block type C4-4 pair - Data grade C4-4 pair - Voice grade C5-5 pair - Voice grade Separator lines Yes - Print a separator line between each block. (Default) No - Don’t print a separator line between each block. Label outline Yes - Show label outline. -
Page 25: Vertical Breaker Label
Vertical Breaker Label The vertical breaker label is one of two types of labels for use on a breaker box. See Horizontal Breaker Label on page 19. One text object is automatically added for each breaker. Barcodes and images cannot be added to vertical breaker labels. Text size and style apply to all breakers on the label and all labels in the file. -
Page 26: Asset Tracking Label
The label properties you can set are: Label orientation Portrait (Default) Landscape Changing the label orientation removes any content on the label, creating a new blank label. Terminal block Number of blocks. Maximum: 99 blocks dimensions Block height. Minimum: 5/32” (3.8 mm); Maximum: 20” (508 mm) Label outline Yes - Show label outline. -
Page 27: Distribution Panel Label
Distribution Panel Label Distribution panel labels are created by specifying the number of connectors and the center to center distance between each connector. One text object is automatically added for each connector. Barcodes and images cannot be added to distribution panel labels. Text size and style apply to all connectors on the label and all labels in the file. - Page 28 The label properties you can set are: Label outline Yes - Show label outline. No - Hide label outline. (Default) Leader/trailer Yes - Blank space is equal at the beginning and end of the label. match No - No blank space is added at the end of the label. (Default) Available only when a continuous label cartridge is selected.
-
Page 29: Editing And Formatting Text On Labels
Editing and Formatting Text on Labels This section describes the following: Changing text size and style Rotating and aligning the text Inserting punctuation, symbols, and special characters Creating a vertical label The following sections describe formatting text using the keypad. You can also access the formatting tools from Properties. -
Page 30: Rotating The Text
To change the text style. Select some text. To apply the style to all the text, select the text box. Press The Text Style tool appears. Use the function keys to select one or more styles. Rotating the Text The text on your label can appear horizontally or vertically. You can also rotate the text in 90 degree increments. -
Page 31: Inserting Symbols
The currently selected character is inserted at the cursor position and the Symbols tool disappears after a few seconds. Inserting Symbols Fractions and other symbols can be inserted on your label. Once inserted, the symbol becomes a character and is treated the same as text. You can apply bold and underline to most symbols. -
Page 32: Working With Objects On A Label
Working with Objects on a Label Depending on the label type, you can add text box, image, or barcode objects to design your label. See Using the Label Applications on page 13 for a description of which objects can be used on each label type. The label edit area is divided into five positions as shown: above, below, center, left, right. -
Page 33: Inserting A Barcode
A number of standard images are built into your label maker. You can also transfer images from your computer to the label maker for use on your labels. The image categories are: Warning Mandatory WHMIS Prohibit Electrical Fire and Exit ProAV First aid Arrows... -
Page 34: Deleting An Object
You can add a barcode to the following label types: general, flag, heat-shrink tube, and laminated cable wrap. If a barcode already exists on a template, the barcode can be edited. By default the barcode text appears below the barcode. You can choose to show the text above the barcode or hide the text. - Page 35 Select the characters to serialize. Set the increment: value to increase for each increment in the series. Set the count: number of times to increment the series which creates new cells or labels depending on the type of label you are creating. You can use serialization to: ...
-
Page 36: Using The Library
Using the Library You can save your labels to the label maker’s memory so that you can print them later or use them as a template for future labels of the same type. Saving Labels When you save labels, all content and formatting are saved, and you give the label file a unique name. - Page 37 Navigate to the desired label file and select Add to favorites. next to the file name is highlighted. To use a Favorite label or image Press and select Labels or Images. Select the item you want to use and press To remove a Favorite Press and select Labels or Images.
-
Page 38: Changing The Settings
Changing the Settings You can change the following settings: Changing the Language Changing the Units of Measure Changing the Screen Brightness Changing the Auto Shut-off Time Changing the Recall Data Setting Setting Print Options ... -
Page 39: Changing The Auto Shut-Off Time
Changing the Auto Shut-off Time To conserve power, the screen will dim after thirty seconds of inactivity and the label maker will enter standby mode after three minutes of inactivity. After ten more minutes of inactivity, the label maker automatically shuts off. You can change the amount of time the label maker remains in standby mode before automatically shutting off. - Page 40 As defaults through the Settings menu: the options will apply to all future print jobs. If you set defaults, you will still be able to change the print options individually for a specific label when needed. To change the default print options From the Home screen, select and then Print options.
-
Page 41: Setting The Default Barcode
A101 A101 A101 A102 A102 A102 A103 A103 A103 This setting is saved with your label file. To turn off collation Press and hold to display the print options menu. Select Collate and then select Don’t collate labels. Select Done and then press Mirror The mirror option allows you to print the contents of your label backwards, from right to left, as you would see the contents of... -
Page 42: Restoring The Label Application Default Settings
To change the default barcode From the Home screen, select Select Default settings and then Default barcode. Select the barcode type to be used as the default and then select Done. Restoring the Label Application Default Settings From within each label editor you can choose to set the current properties as the custom default properties for that label type. -
Page 43: Connecting The Label Maker To Your Computer
The label maker display will show Connected to PC and you will not be able to use the label maker keypad. ™ Each time you connect the label maker to the computer, DYMO ID software will automatically start. ™... -
Page 44: About Dymo Id Software
About DYMO ID Software ™ The following figure shows some of the major features available with DYMO ID software. Select a label maker to Select a label cartridge print or transfer labels Show or hide the Print a label Home screen... - Page 45 ™ Refer to the DYMO ID software online Help or user guide for information about label maker software or template updates.
-
Page 46: Caring For The Label Maker
Caring for the Label Maker Your label maker is designed to give you long and trouble-free service, while requiring only occasional maintenance. Clean your label maker from time to time to keep it working properly. A cleaning tool is located inside the label Cleaning tool compartment cover. -
Page 47: Cleaning The Sensors
Cleaning the Sensors Several sensors inside the label compartment need periodic cleaning to remove dust and other particles that may have accumulated. To clean the sensors Press the label compartment release and lift the cover. Remove the label cartridge. Remove the cleaning tool from inside Sensors the label compartment cover. -
Page 48: Troubleshooting
Troubleshooting Review the following if you encounter a problem with your label maker. Problem/Error Message Solution Poor print quality Attach the power adapter to the label maker to recharge the battery. See Charging the Battery on page 2. Clean the print head. - Page 49 Turn the label maker off and then on again. If this does not solve the problem, contact Customer Support at support.dymo.com. If you need further assistance, visit the Support section of the DYMO Web site at support.dymo.com. ® User Guide...
- Page 50 ® User Guide...
-
Page 51: Images And Symbols
DYMO assumes no liability to any party for any incidental or consequential loss or damage caused by using the data content integrated into this device. The marks integrated into this device can be subject to periodic revision without notice. -
Page 52: Ghs
Prohibit Fire and Exit First Aid ® User Guide... -
Page 53: Whmis
WHMIS The Hazard Symbols of WHMIS, http://www.hc-sc.gc.ca/ewh-semt/occup- travail/whmis-simdut/symbols-signaux-eng.php, Health Canada, 2011. Reproduced with the permission of the Minister of Public Works and Government Services Canada, 2012. Electrical Pro AV ® User Guide... -
Page 54: Arrows
Arrows Symbols ® User Guide... -
Page 55: Documentation Feedback
If you need more information on the collection, reuse, and recycling of this product, please contact your local or regional waste administration. You can also contact DYMO for more information on the environmental performance of our products. ® User Guide... -
Page 56: Safety Precautions
Danger of explosion if a battery is incorrectly handled, charged, disposed or DANGER replaced. Replace only with the same or equivalent type recommended by DYMO. When charging the battery, use only the power adapter provided and follow the instructions in this guide. - Page 57 While Discharging the Battery To reduce the risks associated with fire and explosion, which if not avoided, could result in serious injury or death and/or property damage: Use the battery only in the specified equipment. WARNING Do not discharge the battery close to fire or at extremely high temperatures over 140°F (60°C) (for example, a vehicle, strong direct sunlight).
- Page 58 ® User Guide...
Need help?
Do you have a question about the XTL 300 and is the answer not in the manual?
Questions and answers