Table of Contents
Advertisement
We advise you to read this manual carefully, which contains all the instructions for
maintaining the appliance's aesthetic and functional qualities.
For further information on the product: www.smeg.com
Contents
4
4
5
5
5
6
6
6
7
7
7
8
9
10
10
10
11
11
16
21
29
35
40
45
45
45
45
45
45
46
46
47
48
51
53
55
55
55
56
3
Advertisement
Table of Contents

Related Manuals for Smeg SFPA6395X


Summary of Contents for Smeg SFPA6395X
-
Page 1: Table Of Contents
4.11 Extraordinary maintenance 5 Installation 5.1 Electrical connection 5.2 Cable replacement 5.3 Positioning We advise you to read this manual carefully, which contains all the instructions for maintaining the appliance's aesthetic and functional qualities. For further information on the product: www.smeg.com... -
Page 2: Instructions
Instructions 1 Instructions • Do not try to repair the appliance yourself or without the intervention 1.1 General safety instructions of a qualified technician. • If the power supply cable is Risk of personal injury damaged, contact technical • During use the appliance and its support immediately and they will accessible parts become very hot. -
Page 3: Manufacturer Liability
Instructions For this appliance 1.4 Disposal This appliance must be disposed of • Ensure that the appliance is switched off separately from other waste before replacing the bulb. (Directives 2002/95/EC, 2002/ • Do not rest any weight or sit on the open 96/EC, 2003/108/EC). -
Page 4: Identification Plate
Instructions 1.7 How to read the user manual Our appliances are packed in non- polluting and recyclable materials. This user manual uses the following reading • Deliver the packing materials to the conventions: appropriate recycling facility. Instructions Plastic packaging General information on this user Danger of suffocation manual, on safety and final disposal. -
Page 5: Description
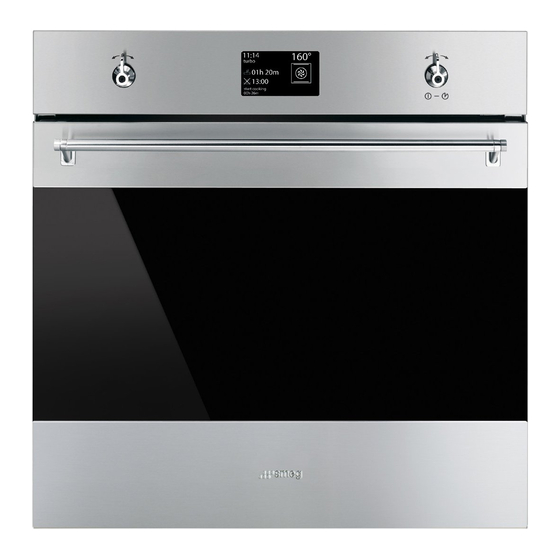
Description 2 Description 2.1 General Description 1 Control panel 5 Fan 2 Oven light 6 Rack/tray support frames 3 Seal 7 Pizza plate 4 Door Frame shelf 2.2 Control panel 1 Return knob 2 Display Using this knob you can return to the Displays the current time, the cooking appliance's previous menu item. -
Page 6: Other Parts
Description 3 Control knob Cooling fan This knob allows you to turn the appliance on and off and select the various available functions. Turn the knob right or left to change/select the required item. Press to confirm. Keep the knob pressed in for at least 5 seconds to immediately complete any cooking program. -
Page 7: Available Accessories
Description 2.4 Available accessories Oven tray Some models are not provided with all accessories. Rack Useful for collecting fat from foods placed on the rack above and for cooking sweets, biscuits, etc. Deep tray Useful for supporting containers with food during cooking. -
Page 8: Use
3 Use Improper use Risk of damage to enamelled 3.1 Instructions surfaces High temperature inside the oven • Do not cover the bottom of the oven during use cavity with aluminium or tin foil sheets. Danger of burns • If you wish to use greaseproof paper, place it so that it will not interfere with the •... -
Page 9: Using The Accessories
3.3 Using the accessories Tray rack The tray rack has to be inserted into the tray. Racks and trays In this way fat can be collected separately Racks and trays have to be inserted into the from the food which is being cooked. side guides until they come to a complete stop. - Page 10 Press the control knob to enter the settings 2. Hold the control knob down for a few menu, see “3.9 Settings”. seconds. The appliance language is set to “English” by default. When first connecting or after the power has been cut for a time it will be necessary to wait a few seconds before you can interact 3.
- Page 11 2. Turn the control knob to select the 4. When the preheating stage is over a required function. Press the knob to buzzer will sound to indicate that the confirm the selection. food can be placed inside the oven. 3. The appliance will begin automatic Interrupting a function preheating.
- Page 12 List of cooking functions Bottom Certain functions are not available The heat coming just from the on all models. bottom allows you to complete the cooking of foods that require a higher bottom temperature, without The combination of the fan and the affecting their browning.
- Page 13 Baker's function Supercook The combination of the fan with just The combination of fan-assisted the lower heating element allows cooking and traditional cooking cooking to be completed more allows different foods to be cooked rapidly. This system is on several levels extremely quickly recommended for sterilising or for and efficiently, without odours and finishing off the cooking of foods...
-
Page 14: Cooking Advice
3.5 Cooking advice Advice for cooking desserts and biscuits • Use dark metal moulds: they help to General advice absorb the heat better. • Use a fan-assisted function to achieve • The temperature and the cooking time consistent cooking at several levels. depend on the quality and consistency •... - Page 15 To save energy Timer during function • Stop cooking a few minutes before the This function only activates the time normally used. Cooking will buzzer, without stopping cooking. continue for the remaining minutes with the heat which has accumulated inside 1.
- Page 16 4. At the end of the cooking time “function Timed cooking ended” appears on the display and a Timed cooking is the function buzzer will sound that can be which allows a cooking operation deactivated by pressing the control to be started and then ended after knob.
- Page 17 Modifying the data set during timed 3. The symbol flashes. Turn the knob cooking right or left to set the end of cooking time. During operation, it is possible to modify 4. After a few seconds the timed cooking duration: symbols stop flashing.
- Page 18 7. At the end of the cooking time “function Modifying the data set during programmed cooking ended” appears on the display and a buzzer will sound that can be After modifying the cooking time, deactivated by pressing the control the end of cooking time must be re- knob.
-
Page 19: Special Functions
3.6 Special functions The special functions menu contains some Proving functions like the timer with the oven off, The proving function, using the heat defrost and cleaning functions. coming from the top, makes it possible to prove all types of dough, guaranteeing perfect results quickly. - Page 20 Timer 1. Turn the control knob to the right or left to ECO pyrolytic (on some models select timer from the “special functions” only) menu. Then press it to confirm. When this function is set, the oven executes a pyrolytic cycle at 500°C for a pre-set time.
- Page 21 3. If you leave the timer setting screen, the Defrost by weight symbol will be displayed at the top 1. Place the food inside the appliance. left, indicating that a minute minder timer 2. Turn the control knob to the right or left to is active.
- Page 22 5. Press the control knob to confirm the set Pre-set parameters: parameters. Type Weight (Kg) Time (min) Meat 0.1 to 1.1 01h 05m Fish 0.1 to 0.7 00h 05m Fruit 0.1 to 0.5 00h 35m 6. Press the control knob again to start Bread 0.1 to 0.5 00h 10m...
- Page 23 4. Press the control knob to confirm the Proving parameters then press it again to start For successful proving, a container defrosting. of water should be placed in the 5. While the function is in progress, it is bottom of the oven. possible to further modify the defrosting duration.
- Page 24 5. It will then proceed with the selected 7. At the end of the cooking time “function function. ended” appears on the display and a buzzer will sound that can be deactivated by pressing the control knob. 6. While the function is in progress, it is possible to set a timer for a maximum of 4 hours (see “Timer during function”), a proving duration (see “Timed cooking”)
- Page 25 2. Turn the control knob to the right or left to 6. While the function is in progress, it is select food warming from the “special possible to set a timer for a maximum of functions” menu. Then press it to confirm. 4 hours (see “Timer during function”), a warming duration (see “Timed cooking”) or a delayed warming (see “Delayed...
- Page 26 1. Turn the control knob to the right or left to Sabbath mode select sabbath mode from the “special The appliance follows some functions” menu. Then press it to confirm. specific behaviour when operating in this function: • Cooking can proceed indefinitely, it is not possible to set any cooking duration.
-
Page 27: Preset Programs
3.7 Preset programs 2. Select the sub-category of dish to cook and press the control knob to confirm. This mode allows you to select a pre-set food cooking program. The appliance will automatically calculate the optimum cooking parameters based on the weight entered. - Page 28 5. At this point it is possible to start the 7. A message will indicate when to place selected preset program, permanently the food in the oven and enable the start modify the settings or perform delayed of cooking. cooking. 8.
- Page 29 Ending a preset program Changing a preset program permanently 1. When the preset program has finished, 1. Inside the selected preset program, turn the appliance will warn the user with the control knob to the left or right to select change from the menu of the buzzers and the flashing symbol.
- Page 30 4. Turn the control knob to the right or left to 7. Pressing the control knob again will select the duration to associate with the return to point 2 of the change sequence. preset program. Press the control knob to You must press the return knob to save confirm.
- Page 31 Preset program table MEATS Weight Time Subcategory Cooking Function Level Temp. (°C) (Kg) (minutes) rare Fan forced Roast beef medium Fan forced well done Fan forced Pork loin Supercook medium Supercook Lamb well done Supercook Veal Fan assisted Pork spare ribs Fan grill Pork chops Fan grill...
- Page 32 DESSERTS/PASTRIES Weight Time Subcategory Cooking Function Level Temp. (°C) (Kg) (minutes) Ring cake Fan assisted Biscuits Supercook Muffins Fan forced Profiteroles Supercook Meringues Supercook Sponge cake Fan forced Strudel Convection Tarts Convection Brioche bread Fan assisted Croissants Fan forced BREAD Weight Time Subcategory...
-
Page 33: Personal Recipes
SLOW COOKING Weight Time Subcategory Cooking Function Level Temp. (°C) (Kg) (minutes) Veal Supercook rare Convection Beef well done Convection Pork Supercook Lamb Supercook 3.8 Personal recipes This menu allows you to enter a personal The cooking times in the table refer recipe with the parameters you wish to use. - Page 34 Adding a recipe 4. Turn the control knob to the right or left to select the duration to associate with the 1. Select add from the personal recipes recipe. Press the control knob to confirm. menu. 5. Turn the control knob to the right or left to 2.
- Page 35 7. Pressing the control knob again will 9. After entering the name of your recipe, return to point 2 of the change sequence. press the return knob to confirm or cancel You must press the return knob to save the information you have entered. Select the recipe.
- Page 36 Starting a personal recipe Changing a personal recipe 1. Turn the control knob to the right or left to 1. Turn the control knob to the right or left to select a previously stored personal select a previously stored personal recipe from the “personal recipes”...
- Page 37 Deleting a personal recipe 4. If you confirm the deletion, the display will show a confirmation message. 1. Turn the control knob to the right or left to select a previously stored personal recipe from the “personal recipes” menu (in the example, the recipe test has been stored).
-
Page 38: Settings
3.9 Settings 3. Turn the control knob to the right or left to select the cooking end time with the The product configuration can be set using this menu. control knob. The symbol flashes. 4. Press the control knob to confirm. Language Sets the interface language from those available. - Page 39 Clock Control lock Allows the appliance to lock the controls Sets the time displayed. automatically after one minute of normal operation without any intervention from the user. 1. Turn the control knob right or left to set the hour. 2. Press the control knob to move to To confirm activation of the control lock, changing the minutes.
- Page 40 Demo mode (for exhibitors only) Eco-Logic This mode allows the appliance to This mode allows the appliance to limit the deactivate all heating elements, while power used. Indicated for use of multiple keeping the control panel active. home appliances at the same time. If this option is enabled, the symbol will appear on the display.
- Page 41 Sound Keep warm Whenever one of the knobs is pressed, the This mode allows the appliance appliance beeps. This setting disables these to keep cooked food warm (at low sounds. temperatures) after cooking finishes with a cooking cycle for which a duration has been set (if this is not manually interrupted), without altering the taste and aromas...
- Page 42 Eco-Light Digital clock For greater energy savings, the light is Displays the time in digital format. automatically deactivated one minute after the start of cooking. To confirm activation of the digital clock, select YES. To confirm activation of the eco-light mode, select YES.
-
Page 43: Cleaning And Maintenance
Cleaning and maintenance 4 Cleaning and maintenance 4.4 Food stains or residues Do not use metallic sponges or sharp 4.1 Instructions scrapers as they will damage the surfaces. Use ordinary non-abrasive products with Improper use the aid of wooden or plastic utensils if Risk of damage to surfaces necessary. -
Page 44: Cleaning The Door Glazing
Cleaning and maintenance 4.7 Removing the internal glass panels For easier cleaning the door internal glass panels can be disassembled. 1. Remove the internal glass panel by pulling the rear part gently upwards, following the movement indicated by the arrows (1). 2. -
Page 45: Cleaning The Inside Of The Oven
Cleaning and maintenance 4. Clean the external glass panel and the 4.8 Cleaning the inside of the oven panels previously removed. Use For the best oven upkeep, clean it regularly absorbent kitchen roll. In case of after having allowed it to cool. stubborn dirt, wash with a damp sponge Take out all removable parts. -
Page 46: Vapour Clean (On Some Models Only)
Cleaning and maintenance 4.9 Vapour clean (on some models Removing racks/trays support frames only) Removing the guide frames enables the sides to be cleaned more easily. This Vapour Clean is an assisted operation should be performed each time cleaning procedure which the automatic cleaning cycle is used (on facilitates the removal of dirt. - Page 47 Cleaning and maintenance • Pour approx. 40 cl of water onto the Vapour Clean setting floor of the oven. Make sure it does not If the internal temperature is overflow out of the cavity. greater than that required for the Vapour clean function, the cycle will be stopped immediately and “Internal temperature unsafe,...
- Page 48 Cleaning and maintenance 3. Press the control knob twice to start the End of the Vapour Clean cycle cleaning cycle. 1. Open the door and wipe away the less stubborn dirt with a microfibre cloth. 2. Use an anti-scratch sponge with brass filaments on tougher encrustations.
-
Page 49: Pyrolytic (On Some Models Only)
Cleaning and maintenance 4.10 Pyrolytic (on some models only) Pyrolytic function setting 1. Turn the control knob to the right or left to Pyrolytic is an automatic high- select eco pyrolytic or pyrolytic from temperature cleaning procedure the “special functions” menu. Then press which causes dirt to dissolve. - Page 50 Cleaning and maintenance 2. At the end of the pyrolytic cycle, the door 3. Press the control knob. The symbol remains locked as long as the will now be lit solidly. The display shows temperature inside the oven returns to a warning to remove accessories from safety levels.
-
Page 51: Extraordinary Maintenance
Cleaning and maintenance Setting of programmed pyrolytic cycle 4.11 Extraordinary maintenance It is possible to program the pyrolytic cycle Live parts start time. Danger of electrocution 1. After selecting the pyrolytic cycle duration, press the control knob. The • Disconnect the oven power supply. display shows the current time and the symbol comes on. - Page 52 Cleaning and maintenance 5. Replace the lamp with one of the same After the automatic cleaning cycle (pyrolytic) it is not possible to select a type (40W). function: 6. Refit the cover correctly, so that the • Verify whether the door lock has moulded part of the glass is facing the deactivated.
-
Page 53: Installation
Installation 5 Installation Fixed connection Fit the power line with an omnipolar circuit 5.1 Electrical connection breaker in compliance with installation regulations. Power voltage The circuit breaker should be located near Danger of electrocution the appliance and in an easily reachable position. -
Page 54: Positioning
Installation 5.3 Positioning Fastening bushings Remove the bushing covers inserted on the Heavy appliance oven front. Danger of crush injuries • Place the appliance into the piece of furniture with the aid of a second person. Pressure on the open door Risk of damages to the appliance •... - Page 55 Installation Appliance overall dimensions (mm) (top view) (front view) (side view)
- Page 56 Installation Mounting under worktops (mm) Mounting into a column (mm) Make sure that the piece of furniture rear/bottom part has an opening of approx. 60 mm. Make sure that the piece of furniture top/rear part has an opening approx. 35-40 mm deep.
Need help?
Do you have a question about the SFPA6395X and is the answer not in the manual?
Questions and answers