Table of Contents
Advertisement
Advertisement
Table of Contents

Related Manuals for Creative Medical POD-1a


Summary of Contents for Creative Medical POD-1a
-
Page 2: User Manual
Fingertip Oximeter User Manual Shenzhen Creative Industry Co., Ltd. - Page 3 Instructions to User Dear Customers, Thank you for purchasing this quality product. Please read the manual very carefully before using this device. Failure to follow these instructions can cause measuring abnormality or damage to the Oximeter. The manual is published in English and we have the ultimate right to explain the Manual.
- Page 4 Instructions for Safe Operation Check the device to make sure that there is no visible damage that may affect user’s safety or measurement performance with regard to sensors and clips. It is recommended that the device should be inspected minimally before each use. If there is obvious damage, stop using the device.
- Page 5 Warnings Discomfort or pain may appear if using the Oximeter continuously on the same location for a long time, especially for patient with poor microcirculation. It is recommended that the Oximeter should not be applied to the same location for longer than 2 hours. If any abnormal condition is found, please change the position of Oximeter.
-
Page 6: Declaration Of Conformity
environment to a warm and humid environment, please do not use it immediately. Allow at least 15 minutes for Oximeter to reach ambient temperature. DO NOT operate the button on the front panel with sharp materials or sharp point. DO NOT use high temperature or high pressure steam disinfection on the Oximeter. -
Page 7: Table Of Contents
FCC Rules are specifically for PC-60NW This device complies with Part 15 of the FCC Rules. Operation is subject to the following two conditions: (1) this device may not cause harmful interference, and (2) this device must accept any interference received, including interference that may cause undesired operation. -
Page 8: Overview
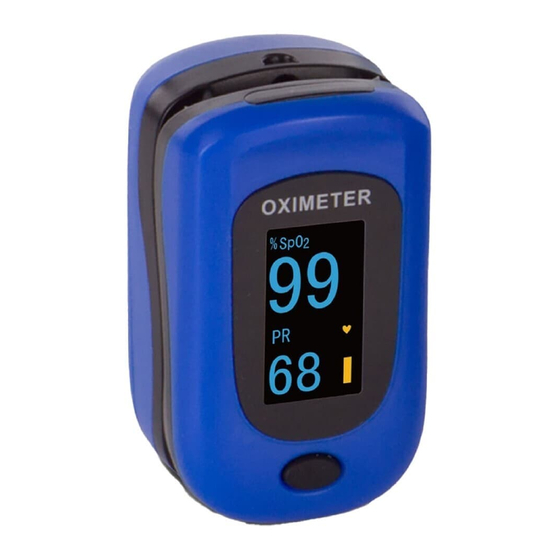
1 Overview 1.1 Appearance Rubber Cushions Display Key Display Screen Figure 1 Front View Nameplate Battery Cover Lanyard Hole Figure 2 Rear View... -
Page 9: Name And Model
1.2 Name and Model Name: Fingertip Oximeter Model: POD-1a/POD-2a/POD-3a/POD-1/POD-2/POD- 3/PC-60A/POD-1W/PC-60B/PC-60B1/PC-60B 2/PC-60B3/ PC-60B5/PC-60C/PC-60C1/PC-60C2/ PC-60D/PC-60D2/PC-60E/PC-60N/PC-60NW 1.3 Intended Use This Fingertip Oximeter is intended for measuring the pulse rate and functional oxygen saturation (SpO ) through a patient’s finger. It is applicable for spot-checking SpO and pulse rate of adult and pediatric patients in homes and medical clinics. - Page 10 PC-60D installs rechargeable button cell battery which could use many times after being charged by the charger. Configuration of PC-XXXX Fingertip Oximeters POD-1a POD-2a POD-3a POD-1 POD-2 POD-3 Model Function S-L-M S-L-D...
- Page 11 60B1 60B2 60B3 60B5 Model Function S-L-M S-L-M D-O-D D-O-M D-O-D D-L-D Display type √ √ √ √ √ √ √ √ √ √ √ √ √ √ √ √ √ PI(Perfusion index) √ √ √ √ Plethysmogram √ √ √...
- Page 12 Model 60C1 60C2 60D2 Function D-O-C D-O-C D-O-C D-O-C D-O-C D-O-C Display type √ √ √ √ √ √ PR, PI √ √ √ √ √ √ Plethysmogram √ √ √ √ √ √ Auto on & off √ √ √...
- Page 13 60NW 60NW 60NW Model POD-1 (Color) (Dual) (Monochrome) Function S-L-M D-O- D-O- D-O- S-L-M Display type √ √ √ √ PR, PI √ √ √ Plethysmogram √ √ √ √ Auto on √ √ √ √ √ Auto off √ √...
-
Page 14: Battery Installation
2 Battery Installation Figure 3 Battery Installation 1. Refer to Figure 3, insert two AAA size batteries into the battery compartment properly, and note the polarity markings. 2. Replace the cover. • Please make sure that the batteries are correctly installed. -
Page 15: External Spo 2 Probe Connection
3 External SpO Probe Connection Connect the external SpO probe to SpO sensor connector as shown below. Ensure the “Arrow” faces upwards. Figure 4 Probe Connection(For PC-60E, 60N, 60NW) Note: When the external SpO probe is connected, the built-in finger clip sensor will be disabled. The measurement is detected from the external SpO probe. -
Page 16: Operation
2. Next enter into data display screen: ① POD-1, POD-2 & POD-3 display screen are as shown in figure 6 Figure 6 Note: the display direction of POD-1a, POD-2a &POD-3a... - Page 17 is up and down. ② PC-60A & 60B display screen are as shown in figure Figure 7A ③ For PC-60B, short time press Display Key to turn on/off the backlight. Longtime press Display Key to display PI as shown in figure 7B, after 8 seconds, the screen will return to the screen as shown in figure Figure 7B PI display screen(for PC-60B) ④...
- Page 18 ⑤ For POD-1W, the display screen is as shown in figure Figure 8A Figure 8B Figure 8C Figure 8D Figure 8E Figure 8F Figure 8G Note: The PI% display will be shifted back to PR display automatically after 20 seconds even if no button operation. For the model PC-60B3, there is no plethysmogram display while the display direction is shifted to the right or left direction, as shown in figure 8D;...
- Page 19 The model PC-60B3 may have different options for manual switching display direction by button or automatic changing display direction by orientation sensor (similar to the model PC-60C1). For PC-60E, PC-60N and PC-60NW, when change display direction, PI value will automatically display on the device instead of PR value, PR value will restore after 20 seconds.
- Page 20 Menu setup: Short time press Display Key to choose the setting item;Longtime press Display Key to active the setting item, then short time press it to modify the setting parameter; Next, longtime press Display Key to confirm the modification and exit from this setting item. At last, move the setting item to “Save, exit menu”, and long time pressing Display Key to store the modification and exit from the setup menu.
- Page 21 “Wireless” function is enabled. Wireless icon of POD-1W (the number of lines indicates signal intensity ) Data transmission The user could effectively transmit the data to computer through the wireless function. Refer to the “Oximeter Data Manager” for detailed information. Attention to the operation The finger should be put into the sensor correctly.
- Page 22 because of not enough acceleration. Consequently the response of orientation detection would be delayed. Acceleration needs to be provided to the orientation-sensor for quick sensing the orientation change. Nail polish may affect the measuring accuracy, and too long fingernail may cause failure of measurement or inaccurate result.
- Page 23 Downloading the APP software for Android smart phone The terminal devices such as Android smart phone can be used to receive data from the Oximeter in real-time, and store the received data, review the stored data as well. You have to download the corresponding APP software on the smart phone.
- Page 24 Figure 9A is for Oximeter with bluetooth V2.x and Figure 9B is for Oximeter with bluetooth V4.0. That's to say, if your Oximeter is PC-60NW or PC-60B5, you need to scan at Figure 9A to download the corresponding APP software, while for POD-1W, you need to scan at Figure 9B.
-
Page 25: Technical Specifications
5. Technical Specifications A. SpO Measurement Transducer: dual-wavelength LED sensor with wavelength: Red light: 663 nm, Infrared light: 890 nm. Maximal average optical output power: ≤1.5mW measuring range: 35%~100% measuring accuracy: ≤ 2% for SpO range from 70% to 100% B. - Page 26 Default setting: 85% Pulse Rate: Low limit setting range: 30~60bpm; High limit setting range: 100~240bpm; Default setting: high: 120bpm; low: 50bpm Over-limit settings for PC-60E default low over-limit: For internal sensor: 90% For external sensor: 95% Pulse Rate: For internal sensor: High limit: 120bpm;...
- Page 27 I. Environmental Conditions: Operating Temperature: 5°C ~40°C Operating Humidity: 30%~80% Atmospheric pressure: 70kPa~106kPa J. Low Perfusion Performance: The accuracy of SpO and PR measurement still meet the precision described above when the modulation amplitude is as low as 0.6%. K. Ambient Light Interference: The difference between the SpO value measured in the condition of indoor natural light and that of darkroom...
-
Page 28: Repair And Maintenance
6 Repair and Maintenance 6.1 Maintenance The expected service life (not a warranty) of this device is 5 years. In order to ensure its long service life, please pay attention to the maintenance. Please change the batteries when the low-voltage indicator lightens. -
Page 29: Cleaning And Disinfecting Instruction
If it is necessary to verify the precision of the oximeter routinely, the user can do the verification by means of simulator, or it can be done by the local third party test house. Please note that the specific calibration curve (so called R-curve) should be selected when use of SpO simulator, e.g. -
Page 30: Troubleshooting
7 Troubleshooting Problem: 1. The SpO and Pulse Rate display instable 2. Can not turn on the device 3. No display direction doesn’t change or changes insensitively. Display 5. No display of the wireless icon “ ” Solution 1. Place the finger correctly inside and try again. 2. -
Page 31: Key Of Symbols
9 Key of Symbols Symbol Description Pulse oxygen saturation Pulse rate (beats per minute) Perfusion Index (%) Pulse Strength Bar Graph Low battery voltage CE mark Serial number Date of manufacture Authorised representative in the European community Manufacturer (including address) BF type applied part Attention ─... - Page 32 Shenzhen Creative Industry Co., Ltd. Tel: +86-755-2643 3514 Fax: +86-755-2643 0930 E-mail: info@creative-sz.com Website: www.creative-sz.com Address: 2/F, Block 3, Nanyou Tian'an Industry Town, 518054 Shenzhen, GD, P.R. China -25-...
Need help?
Do you have a question about the POD-1a and is the answer not in the manual?
Questions and answers