Table of Contents
Advertisement
Advertisement
Table of Contents

Related Manuals for Creative Medical POD-1a


Summary of Contents for Creative Medical POD-1a
- Page 1 Fingertip Oximeter User Manual Shenzhen Creative Industry Co., Ltd.
- Page 2 Fingertip Oximeter User Manual Instructions to User Dear Customers, Thank you for purchasing this quality product. Please read the manual very carefully before using this device. Failure to follow these instructions can cause measuring abnormality or damage to the Oximeter. The manual is published in English and we have the ultimate right to explain the Manual.
- Page 3 Fingertip Oximeter User Manual Revised date: April 13 , 2020 All rights reserved. 3502-3290076 Notes The contents contained in this manual are subject to change without notice. Information furnished by our company is believed to be accurate and reliable. However, no responsibility is assumed by us for its use, or any infringements of patients or other rights of third parties that may result from its use.
- Page 4 Fingertip Oximeter User Manual ambient temperature over 37°C, burning hurt may occur because of over-heating of the sensor at this situation. Necessary maintenance must be performed only by qualified service technicians. Users are not permitted to service this device. ...
- Page 5 Fingertip Oximeter User Manual same location for longer than 2 hours. If any abnormal condition is found, please change the position of Oximeter. DO NOT clip this device on edema or tender tissue. The light (the infrared light is invisible) emitted from the device is harmful to the eyes.
- Page 6 Fingertip Oximeter User Manual and humid environment, please do not use it immediately. Allow at least 15 minutes for Oximeter to reach ambient temperature. DO NOT operate the button on the front panel with sharp materials or sharp point. ...
- Page 7 Fingertip Oximeter User Manual Declaration of Conformity The manufacturer hereby declares that this device complies with the following standards: 60601-1: 2005 Medical electrical equipment-Part 1: General requirements for basic safety and essential performance; BS/EN/ISO 9919:2009 or the equivalent ISO 80601-2-61:2011 - Medical electrical equipment -- Part 2-61: Particular requirements for basic safety and essential performance of pulse Oximeter equipment.
- Page 8 Fingertip Oximeter User Manual FCC Rules are specifically for PC-60NW This device complies with Part 15 of the FCC Rules. Operation is subject to the following two conditions: (1) this device may not cause harmful interference, and (2) this device must accept any interference received, including interference that may cause undesired operation.
-
Page 9: Table Of Contents
Fingertip Oximeter User Manual Table of Contents 1 OVERVIEW..............1 ............. 1 1.1 A PPEARANCE ............2 1.2 N AME AND ODEL ............2 1.3 I NTENDED ............. 3 1.4 F EATURE 2 BATTERY INSTALLATION........... 12 PROBE CONNECTION....13 3 EXTERNAL SPO 4 OPERATION..............14 5 DOWNLOAD THE APP SOFTWARE......29 6 TECHNICAL SPECIFICATIONS........ - Page 10 Fingertip Oximeter User Manual 11 FREQUENTLY ASKED QUESTIONS......43 APPENDIX I RESULT DESCRIPTION......47 APPENDIX II EMC............48...
-
Page 11: Overview
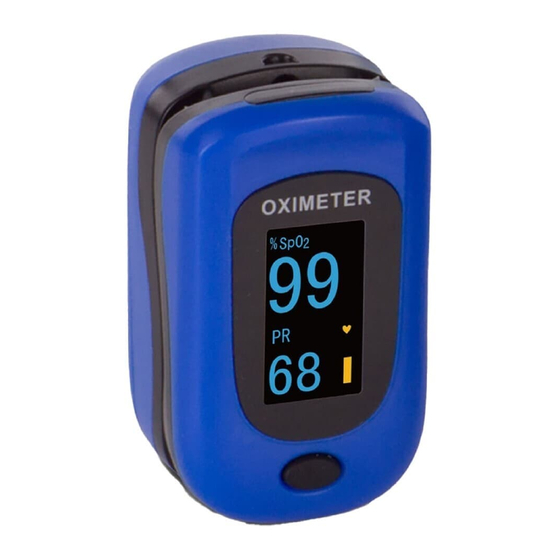
Fingertip Oximeter User Manual 1 Overview 1.1 Appearance Rubber Cushions Display Key Display Screen Figure 1 Front View Battery Cover Nameplate Lanyard Hole Figure 2 Rear View... -
Page 12: Name And Model
Fingertip Oximeter User Manual Note: the appearance is for demonstration only, please refer to the oximeter you purchased. 1.2 Name and Model Name: Fingertip Oximeter Model: POD-1a/POD-2a/POD-3a/POD-1/POD-2/POD-3/ POD-1W/PC-60B/PC-60B1/PC-60B2/PC-60B3/ PC-60B5/PC-60NW-1/PC-60C/PC-60C1/PC-60C2/ PC-60D/PC-60D2/PC-60E/PC-60N/PC-60NW/ PC-60F/PC-60FW/PC-60A 1.3 Intended Use This Fingertip Oximeter is intended for measuring... -
Page 13: Feature List
Fingertip Oximeter User Manual 1.4 Feature List Explanation of abbreviations: "√" this function is available, " × " without this function. Display type: X-Y-Z M=monochrome, D=dualcolor, C=full color L=LCD, O=OLED. S=segment, D=dot-matrix. Note: The finger clip of PC-60D & 60D2 are suitable for small fingers, especially for pediatric patients. - Page 14 Fingertip Oximeter User Manual Configuration of PC-XXXX Fingertip Oximeters Model POD-1a POD-2aPOD-3a POD-1 POD-2 POD-3 Function Display type S-L-M S-L-D S-L-C S-L-M S-L-D S-L-C √ √ √ √ √ √ √ √ √ √ √ √ PI (Perfusion × ×...
- Page 15 Fingertip Oximeter User Manual Model 60B1 60B2 60B3 60B5 Function Display type S-L-M D-O-D D-O-M D-O-D D-L-D √ √ √ √ √ √ √ √ √ √ PI(Perfusion √ √ √ √ √ index) Plethysmogra √ √ √ √ × √...
- Page 16 Fingertip Oximeter User Manual √ numerical × × × × display Model 60C1 60C2 60D2 Function Display type D-O-C D-O-C D-O-C D-O-C D-O-C D-O-C √ √ √ √ √ √ , PR, PI √ √ √ √ √ √ Plethysmogram √...
- Page 17 Fingertip Oximeter User Manual Big numerical √ √ × × × × display Note: PC-60D2 applicable measuring SpO and PR of pediatric. Model POD- 60NW 60NW-1 Function (Color) (Dual) 60D2 Display type S-L-M D-O-C D-O-C D-O-D D-O-D , PR, PI √...
- Page 18 Fingertip Oximeter User Manual Four √ √ √ √ directions display Orientation- √ × × × × sensor External √ √ × × × probe connection Wireless √ √ √ × × function Model PC-60FW PC-60A PC-60F Function D-O-D D-O-D Display type S-L-M √...
- Page 19 Fingertip Oximeter User Manual Indication sound Manual Manual × mute Four directions √ √ display √ √ × Setting menu Over-limits √ √ × setting √ √ × Pulse beep Wireless √ × × function Continuous, Continuous, Measuring × mode Spot check Spot check √...
- Page 20 Fingertip Oximeter User Manual seconds. Measuring mode Spot check mode: the measurement starts automatically when the finger is inserted into the finger clip properly, the measuring time lasts 30 seconds with a counting-down indication. The and PR readings will freeze at the end of 30 seconds, the analysis result for the pulse rhythm will be displayed on the screen as well.
- Page 21 Fingertip Oximeter User Manual Record list a single group of stable readings will be recorded in the record list each time when the Oximeter shuts down regardless of spot-check or continuous mode. However, if the time from displaying valid readings measurement is less than 5 seconds, then no...
-
Page 22: Battery Installation
Fingertip Oximeter User Manual can shift the records display, and if there is no key operation for 6 seconds, then the Oximeter will power off automatically again. 2 Battery Installation Figure 3 Battery Installation 1. Refer to Figure 3, insert two AAA size batteries into the battery compartment properly, and note the polarity markings. -
Page 23: External Spo Probe Connection
Fingertip Oximeter User Manual cause the device not to work. Please remove batteries if the device is not being used for more than 7 days to prevent and avoid potential damage from the battery leaking. Any such damage is not covered under the product warranty. -
Page 24: Operation
Fingertip Oximeter User Manual Figure 4 Probe Connection ( For PC-60E, 60N, 60NW) Note: When the external SpO probe is connected, the built-in finger clip sensor will be disabled. The measurement is detected from the external SpO probe. Default over-limit indication settings for and PR will change to: Low limit: 95% Pulse Rate high limit: 160bpm... - Page 25 2. Next enter into data display screen: ① POD-1, POD-2 & POD-3 display screen are as shown in figure 6. Figure 6 Note: the display direction of POD-1a, POD-2a &POD-3a is up and down. ② PC-60B display screen are as shown in figure 7.
- Page 26 Fingertip Oximeter User Manual symbol value Pulse beat symbol Unit of PR Pulse rate value Pulse bar Figure 7B PI display screen(for PC-60B) Figure 7A ③ For PC-60B, short time press Display Key to turn on/off the backlight. Longtime press Display Key to display PI as shown in figure 7B, after 8 seconds, the screen will return to the screen as shown in figure 7A.
- Page 27 Fingertip Oximeter User Manual Display Key to shift the parameter display between PR and PI. Please refer to figure 8C. ⑤ For POD-1W, the display screen is as shown in figure 8G. Figure 8A Figure 8B Figure 8C Figure 8D Figure 8E Figure 8F Figure 8G...
- Page 28 Fingertip Oximeter User Manual is shifted to the right or left direction, as shown in figure 8D; To the opposite, PC-60B1 has no plethysmogram on default measuring screen as shown in figure 8E, while the display direction is shifted to left side direction, there will be displayed plethysmogram please refer to figure 8F.
- Page 29 Fingertip Oximeter User Manual is as shown in figure 9A, short time press Display Key to change display direction, as shown in figure 9A, 9B, 9C, & 9D; Longtime press Display Key to shift the parameter display between PR and PI, as shown in figure 9E.
- Page 30 Fingertip Oximeter User Manual ⑦ For PC-60A, the display screen is as shown in below figure. ⑧ Description for PC-60F and PC-60FW short time press Display Key can change display direction, the four display directions are as shown in figure 10A, 10B, 10C, & 10D. For display screens of figure 10B and 10D, the PI% display value will be replaced with PR display value after 20 seconds if no key operation.
- Page 31 Fingertip Oximeter User Manual Figure 10A Figure 10B Figure 10C Figure 10D For PC-60F and PC-60FW, the display dirextion is remembered at each startup, that is, the screen layout (display direction) of the last time will be used as the initial screen layout when powering on the Oximeter next time.
- Page 32 Fingertip Oximeter User Manual Spot check mode. The total measuring time for Spot check mode is 30 seconds. When the measurement ends up for Spot check mode, the measured SpO , PR value and the analysis result of pulse rhythm will be displayed on the screen, as shown in figure 10E.
- Page 33 Fingertip Oximeter User Manual Long time pressing display key can enter the setup menu screen. PC-60 C1& 60N PC-60NW-1 Dual PC-60NW Color PC-60F and PC-60FW “Wireless” : the wireless on-off button. Transmitting data to PC when it is on. “on” and “off”...
- Page 34 Fingertip Oximeter User Manual set to on, every pulse beat makes a beep. Only for model PC-60NW, the pitch tone of this beep changes according to SpO value (within 90~99%). “Mode”: to set the measuring mode. “Continuous” and “Spot check” for optional, the default is “Spot check”.
- Page 35 Fingertip Oximeter User Manual The device is being to establish a “ ” wireless connection with flashes surrounding host. blue Successful wireless connection “ ” long between the device and a host is lights blue established. 1. "Wireless" function is disabled; display“...
- Page 36 Fingertip Oximeter User Manual information. Attention to the operation The finger should be put into the sensor correctly. Do not shake the finger and relax during measurement. Do not put wet finger directly into sensor. Avoid placing the device on the same limb which is wrapped with a cuff for blood pressure measurement or during venous infusion.
- Page 37 Fingertip Oximeter User Manual slowly because of not enough acceleration. Consequently the response of orientation detection would be delayed. Acceleration needs provided orientation-sensor for quick sensing the orientation change. Nail polish affect measuring accuracy, and too long fingernail may cause failure of measurement or inaccurate result.
- Page 38 Fingertip Oximeter User Manual movable within compartment orientation-sensor. Therefore you may hear a slight “clatter ” sound when you wave or shake the Oximeter, this is normal!
-
Page 39: Download The App Software
Fingertip Oximeter User Manual 5 Download the APP software Downloading the APP software for Android smart phone The terminal devices such as Android smart phone can be used to receive data from the Oximeter in real-time, and store the received data, review the stored data as well. - Page 40 Fingertip Oximeter User Manual connect with the Oximeter. ☞ Refer to the manual of this APP software for detail operation. Note: APP software for PC and Android smart phone is also available for download from below link: http://www.creative-sz.com/software/ Figure 10A Figure 10B (QR code for Oximeter (QR code for Oximeter...
- Page 41 Fingertip Oximeter User Manual and Figure 9B is for Oximeter with bluetooth V4.0. That's to say, if your Oximeter is PC-60NW or PC-60B5, you need to scan at Figure 10A to download the corresponding APP software, while for POD-1W, you need to scan at Figure 10B. ②...
- Page 42 Fingertip Oximeter User Manual search, please select "iPhone only" as well for searching. 2. Once the search results are listed, select the App name "@health" with icon , then download it from App software. Downloading the APP software for both ...
-
Page 43: Technical Specifications
Fingertip Oximeter User Manual 6 Technical Specifications Measurement Transducer: dual-wavelength LED sensor with wavelength: Red light: 663 nm, Infrared light: 890 nm. Maximal average optical output power: ≤2mW display range: 35%~100% measuring accuracy: ≤ 2% for SpO range from 70% to 100% Pulse Rate measurement PR display range: 30bpm~240bpm PR measuring accuracy: ±2bpm or ±2%... - Page 44 Fingertip Oximeter User Manual Over-limit indication settings for PC-60C1,N,NW: low limit setting range: 85%~95% Default setting: 85% Pulse Rate: Low limit setting range: 30~60bpm; High limit setting range: 100~240bpm; Default setting: high: 120bpm; low: 50bpm Over-limit settings for PC-60F, PC-60FW low limit setting range: 85%~99%, step: 1% Default setting: 90% Pulse Rate:...
- Page 45 Fingertip Oximeter User Manual For internal sensor: 90% For external sensor: 95% Pulse Rate: For internal sensor: High limit: 120bpm; Low limit: 50bpm For external sensor: High limit: 160bpm; Low limit: 60bpm H. Audible & visual alert function When measuring, if SpO value or pulse rate value exceeds the preset limit, the device will alert with beep automatically and the value...
- Page 46 Fingertip Oximeter User Manual J. Low Perfusion Performance: The accuracy of SpO and PR measurement still meet the precision described above when the modulation amplitude is as low as 0.6%. K. Ambient Light Interference: The difference between value measured in the condition of indoor natural light and that of darkroom is less than ±1%.
-
Page 47: Packing List
Fingertip Oximeter User Manual 60F/60FW/60A) Net Weight: approx. 60g M. Classification The type of protection against electric shock: Internally powered equipment. The degree of protection against electric shock: Type BF applied parts. The degree of protection against harmful solid foreign objects and ingress of liquid: The equipment is IP22 with protection against harmful solid foreign objects and ingress of liquid. -
Page 48: Repair And Maintenance
Fingertip Oximeter User Manual Note: the items and its quantity are subject to change, please refer to your subject in hand. 8 Repair and Maintenance 8.1 Maintenance The expected service life (not a warranty) of this device is 5 years. In order to ensure its long service life, please... - Page 49 Fingertip Oximeter User Manual humidity 10%~95%, atmospheric pressure: 50kPa~107.4kPa. The Oximeter is calibrated in the factory before sale, so there is no need to calibrate it during its life cycle. Any SpO simulators should not be used to validate the accuracy of the Oximeter, they can only be used as functional testers to verify its precision.
-
Page 50: Cleaning And Disinfecting Instruction
Fingertip Oximeter User Manual "DownLoadMake: KRK", then the user can use this particular R-curve to test the Oximeter. If the SpO simulator does not contain "KRK" R-curve, please ask the manufacturer for helping to download the given R-curve into the simulator. -
Page 51: Troubleshooting
Fingertip Oximeter User Manual oxide. Do not use the Oximeter if it is damaged. 9 Troubleshooting Problem: 1. The SpO and Pulse Rate display instable 2. Can not turn on the device 3. No display direction doesn’t change or changes Display insensitively. -
Page 52: Key Of Symbols
Fingertip Oximeter User Manual 10 Key of Symbols Symbol Description %SpO Pulse oxygen saturation Pulse rate (beats per minute) Perfusion Index (%) Pulse Strength Bar Graph Low battery voltage CE mark Serial number Date of manufacture Authorised representative in the European community Manufacturer (including... - Page 53 Fingertip Oximeter User Manual Attention ─ refer to User Manual Follow WEEE regulations for disposal Wireless icon 11 Frequently Asked Questions 1. Q: What's SpO A: SpO means the saturation percentage of oxygen in the blood. 2. Q: What's the normal range of SpO value for healthy people? A: The normal range varies by individual, but...
- Page 54 Fingertip Oximeter User Manual A: Usually, the normal range is 60bpm~100bpm. 4. Q: Why do the display value of SpO and PR vary with time? A: The measured SpO and PR value changes in correspondence with the change of patient's physiological conditions.
- Page 55 Fingertip Oximeter User Manual if the SpO value significantly decreases, it means that reading truly reflects physiological condition change. 7. Q: When to replace the batteries? A: The icon of low battery will appear on the screen when the battery voltages are low. By then, batteries need to be replaced.
- Page 56 Fingertip Oximeter User Manual infrared heating lamps, or direct sunlight; c) Vascular dyes or external used color-up product such as nail enamel or color skin care; d) Excessive patient movement; e) Placement of a sensor on an extremity with a blood pressure cuff,...
- Page 57 Fingertip Oximeter User Manual small). Please contact local distributor manufacturer if necessary. Appendix I Result Description Description No irregularity found Suspected a little fast pulse Suspected fast pulse Suspected short run of fast pulse Suspected a little slow pulse Suspected slow pulse Suspected occasional short pulse interval Suspected irregular pulse interval Suspected fast pulse with short pulse...
- Page 58 Fingertip Oximeter User Manual Suspected slow pulse with irregular pulse interval Poor signal. Measure again Appendix II EMC The equipment meets the requirements of IEC 60601-1-2:2014. Table 1 Guidance and manufacturer’s declaration-electromagnetic emission The Fingertip Oximeter is intended for use in the electromagnetic environment specified below.
- Page 59 Fingertip Oximeter User Manual The Fingertip Oximeter uses RF energy only for its internal function. RF emissions Therefore, its RF Group 1 CISPR 11 emissions are very low and are not likely to cause any interference in nearby electronic equipment. RF emissions The Fingertip Class B...
- Page 60 Fingertip Oximeter User Manual Guidance and manufacturer’s declaration-electromagnetic emission The Fingertip Oximeter is intended for use in the electromagnetic environment specified below. the customer or the user of the Fingertip Oximeter should assure that it is used in such an environment. Electromagne Complia Immunity...
- Page 61 Fingertip Oximeter User Manual Electrical ±2kV for power fast Supply lines transient/ ±1 kV for burst input/output IEC61000-4 lines ±1kV line (s) to Surge line(s) ±2kV line(s) to 61000-4-5 earth Voltage <5% U (>95% dip in dips, short ) for 0.5 interruptio cycle ns and...
- Page 62 Fingertip Oximeter User Manual Power frequency magnetic Power fields should frequency( be at levels 50Hz/60Hz) characteristic magnetic 3A/m 3A/m of a typical field location in a IEC61000-4 typical commercial or hospital environment. NOTE : U is the a.c. mains voltage prior to application of the test level.
- Page 63 Fingertip Oximeter User Manual Electromagnetic Immunity IEC60601 Complianc environment test test level e level -guidance Portable and mobile RF communications equipment should be used no closer to any part of The Fingertip Conducte 3 Vrms Oximeter, d RF 150 kHz including cables, IEC61000- to 80...
- Page 64 Fingertip Oximeter User Manual to 2.5 Recommended separation distance d=1.2 P d=1.2 P 80MHz to 800MHz d=2.3 P 800MHz to 2.5GHz Where P is the maximum output power rating of the transmitter in watts (W) according to the transmitter manufacturer and d is the recommended separation...
- Page 65 Fingertip Oximeter User Manual (m). Field strengths from fixed RF transmitters, as determined by an electromagnetic site survey , should be less than the compliance level in each frequency range . Interference may occur in the vicinity of equipment marked with the following symbol.
- Page 66 Fingertip Oximeter User Manual NOTE 1: At 80 MHz and 800 MHz, the higher frequency range applies. NOTE 2: These guidelines may not apply in all situations. Electromagnetic propagation is affected by absorption and reflection from structures, objects and people. a: Field strengths from fixed transmitters, such as base stations...
- Page 67 Fingertip Oximeter User Manual b: Over the frequency range 150 kHz to 80 MHz, field strengths should be less than 3V/m. Table 4 Recommended separation distances between portable and mobile RF communication the equipment The Fingertip Oximeter is intended for use in an electromagnetic environment in which radiated RF disturbances are controlled.
- Page 68 Fingertip Oximeter User Manual Separation distance according to Rated frequency of transmitter M(Meters) maximum 150kHz to 80MHz to 80MHz to output 80MHz 800MHz 2,5GHz power of transmitter d=1.2 d=1.2 d=2.3 W(Watts) 0,01 0.12 0.23 0.38 0.73...
- Page 69 Fingertip Oximeter User Manual For transmitters rated at a maximum output power not listed above, the recommended separation distance d in metres (m) can be determined using the equation applicable to the frequency of the transmitter, where P is the maximum output power rating of the transmitter in watts (W) according to the transmitter manufacturer.
- Page 70 Fingertip Oximeter User Manual...
- Page 71 Shenzhen Creative Industry Co., Ltd. Floor 5, BLD 9, Baiwangxin High-Tech Industrial Park, Songbai Road, Xili Street, Nanshan District, 518110 Shenzhen, P. R. China Tel: +86-755-2643 3514 Fax: +86-755-2643 0930 E-mail: info@creative-sz.com Website: www.creative-sz.com Shanghai International Holding Corp. GmbH (Europe) Eiffestrasse 80, 20537 Hamburg Germany...
Need help?
Do you have a question about the POD-1a and is the answer not in the manual?
Questions and answers