Table of Contents
Advertisement
Advertisement
Table of Contents

Related Manuals for Creative Medical PC-60B1


Summary of Contents for Creative Medical PC-60B1
- Page 1 Fingertip Oximeter PC-60B1 User Manual Shenzhen Creative Industry Co., Ltd.
- Page 2 Instructions to User Dear Customers, Thank you for purchasing this quality product. Please read the manual very carefully before using this device. Failure to follow these instructions can cause measuring abnormality or damage to the Oximeter. The manual is published in English and we have the ultimate right to explain the Manual.
- Page 3 Notes The contents contained in this manual are subject to change without notice. Information furnished by our company is believed to be accurate and reliable. However, no responsibility is assumed by us for its use, or any infringements of patients or other rights of third parties that may result from its use.
- Page 4 occur because of over-heating of the sensor at this situation. Necessary maintenance must be performed only by qualified service technicians. Users are not permitted to service this device. The Oximeter must not be used with devices and accessories not specified in User Manual. Cautions ...
- Page 5 the Oximeter should not be applied to the same location for longer than 2 hours. If any abnormal condition is found, please change the position of Oximeter. DO NOT clip this device on edema or tender tissue. The light (the infrared light is invisible) emitted from the device is harmful to the eyes.
- Page 6 If the Oximeter gets wet, please stop using it and do not resume operation until it is dry and checked for correct operation. When it is carried from a cold environment to a warm and humid environment, please do not use it immediately.
- Page 7 vertically falling water drops when enclosure tilted up to 15°. Please pay attention to the effects of lint, dust, light (including sunlight), etc.
- Page 8 Declaration of Conformity The manufacturer hereby declares that this device complies with the following standards: 60601-1: 2005 Medical electrical equipment-Part 1: General requirements for basic safety and essential performance; BS/EN/ISO 9919:2009 or the equivalent ISO 80601-2-61:2011 - Medical electrical equipment -- Part 2-61: Particular requirements for basic safety and essential performance of pulse oximeter equipment.
-
Page 9: Table Of Contents
Table of Contents 1 OVERVIEW..............1 ............1 1.1 A PPEARANCE ..........2 1.2 N AME AND ODEL ............2 1.3 I NTENDED ............2 1.4 F EATURE 2 BATTERY INSTALLATION.......... 3 3 OPERATION..............4 4 TECHNICAL SPECIFICATIONS.........12 5 REPAIR AND MAINTENANCE........ 15 ............15 5.1 M AINTENANCE... -
Page 10: Overview
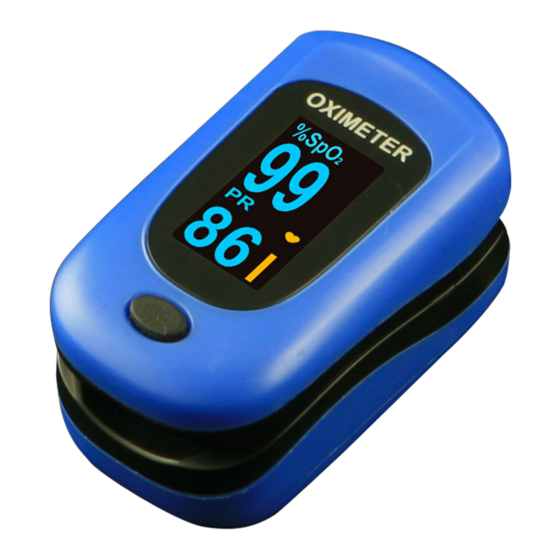
1 Overview 1.1 Appearance Rubber Cushions Display Screen Display Key Figure 1 Front View Lanyard Hole Lock button of Battery Cover battery cover Nameplate Figure 2 Rear View... -
Page 11: Name And Model
Note: the appearance is for demonstration only, please refer to the oximeter you purchased. 1.2 Name and Model Name: Fingertip Oximeter Model: PC-60B1 1.3 Intended Use This Fingertip Oximeter is intended for measuring the pulse rate and functional oxygen saturation (SpO ) through a patient ’s finger. -
Page 12: Battery Installation
Audible & visible over0limit indication Setting menu is available Shift parameter display between PR and PI 2 AAA alkaline batteries with low power consumption Low battery voltage indication 2 Battery Installation Figure 3 Battery Installation 1. -
Page 13: Operation
note the polarity markings. 2. Replace the cover. Please make sure that the batteries are correctly installed. Incorrect installation may cause the device not to work. Please remove batteries if the device is not being used for more than 7 days to prevent and avoid potential damage from the battery leaking. - Page 14 2. Put finger inside the rubber cushions of the clip (make sure the finger is in the correct position), and then clip the finger. 3. The device will power on automatically in 2 seconds, and start to display software version number.
- Page 15 For PC-60B1, when short time press Display Key to change display direction, PI value will automatically display on the device instead of PR value, PR value will restore after 20 seconds. Please refer to figure 6~9 for the oximeter with 4 display directions and PI display.
- Page 16 Figure 8 Figure 9 5. Long time press Display key to enter into the Setup Menu screen, as shown in figure 10.
- Page 17 Figure 10 SpO alm Lo: SpO low limit setting; range: 85%~99%, the step is 1%. The factory default value 85%. PR alm Hi: High limit setting of pulse rate; range: 100~240bpm, the step is 5bpm. The factory default value is 120bpm. ...
- Page 18 Save, exit menu: Move the setting item to “Save, exit menu”, and long time pressing Display Key to store the modification and exit from the setup menu. Restore default: Move the setting item to “Restore default ”, and long time pressing Display Key to restore to default setting.
- Page 19 correctly. Do not shake the finger and relax during measurement. Do not put wet finger directly into sensor. Avoid placing the device on the same limb which is wrapped with a cuff for blood pressure measurement or during venous infusion.
- Page 20 direction, if you move the Oximeter too slowly, the movable metal ball will also move slowly because of not enough acceleration. Consequently the response of orientation detection would be delayed. Acceleration needs provided orientation-sensor for quick sensing the orientation change. ...
-
Page 21: Technical Specifications
value is expected by waiting for a while, or a restart is needed when necessary. Technical Specifications Measurement Transducer: dual-wavelength LED sensor with wavelength: Red light: 663 nm, Infrared light: 890 nm. Maximal average optical output power: ≤2mW display range: 35%~100% measuring accuracy: ≤... - Page 22 low limit setting range: 85%~95% Default setting: 85% Pulse Rate: Low limit setting range: 30~60bpm; High limit setting range: 100~240bpm; Default setting: high: 120bpm; low: 50bpm Audible & visual alert function When measuring, if SpO value or pulse rate value exceeds the preset limit, the device will alert with beep automatically and the value which exceeds limit will flash on the screen.
- Page 23 J. Low Perfusion Performance: The accuracy of SpO and PR measurement still meet the precision described above when the modulation amplitude is as low as 0.6%. K. Ambient Light Interference: difference between value measured in the condition of indoor natural light and that of darkroom is less than ±1%.
-
Page 24: Repair And Maintenance
Electro-Magnetic Compatibility: Group Class B 5 Repair and Maintenance 5.1 Maintenance The expected service life (not a warranty) of this device is 5 years. In order to ensure its long service life, please attention maintenance. Please change batteries when low-voltage indicator lightens. - Page 25 The oximeter is calibrated in the factory before sale, so there is no need to calibrate it during its life cycle. Any SpO simulators should not be used to validate the accuracy of the oximeter, they can only be used as functional testers to verify its precision.
-
Page 26: Cleaning And Disinfecting Instruction
R-curve, please ask the manufacturer for helping to download the given R-curve into the simulator. High-pressure sterilization cannot be used on the device. Do not immerse the device in liquid. It is recommended that the device should be kept in a dry environment. Humidity may reduce the life of the device, or even damage 5.2 Cleaning and Disinfecting Instruction Surface-clean sensor with a soft cloth damped... -
Page 27: Troubleshooting
6 Troubleshooting Problem: 1. The SpO and Pulse Rate display instable 2. Can not turn on the device 3. No display direction doesn’t change or changes Display insensitively. 5. No display of the wireless icon “ ” Solution 1. Place the finger correctly inside and try again. 2. -
Page 28: Packing List
7 Packing List 1) Fingertip Oximeter 2) User Manual 3) Batteries Note: the items and its quantity are subject to change, please refer to your subject in hand. 8 Key of Symbols Symbol Description %SpO Pulse oxygen saturation BPM/PR Pulse rate (beats per minute) Perfusion Index (%) Pulse Strength Bar Graph Low battery voltage... - Page 29 Date of manufacture Authorised representative in the European community Manufacturer (including address) BF type applied part Attention ─ refer to User Manual Follow WEEE regulations disposal...
-
Page 30: Frequently Asked Questions
9 Frequently Asked Questions 1. Q: What's SpO A: SpO means the saturation percentage of oxygen in the blood. 2. Q: What's the normal range of SpO value for healthy people? A: The normal range varies by individual, but usually over 95%, otherwise, please consult your physician. - Page 31 physiological conditions. 5. Q : Wh a t to do if th e r e is no Sp O a n d PR A: Do not shake the finger, and keep calm during the measurement. Please also avoid the oximeter and the cuff on the same limb for blood pressure and oxygen saturation measurement simultaneously.
- Page 32 screen when the battery voltages are low. By then, batteries need to be replaced. 8. Q: What to do if the oximeter is moistened or sprayed by water? A: Remove the batteries immediately and dry the oximeter completely with a hair dryer. 9.
- Page 33 e) Placement of a sensor on an extremity with a blood pressure cuff, arterial catheter, intravascular line; f) Exposure to the chamber with High pressure oxygen; g) There is an arterial occlusion proximal to the sensor; Blood vessel contraction caused peripheral vessel hyperkinesias...
- Page 35 Shenzhen Creative Industry Co., Ltd. Address: Floor 5, BLD 9, Baiwangxin High-Tech Industrial Park, Songbai Road, Xili Street, Nanshan District, 518110 Shenzhen, P. R. China Tel: +86-755-2643 3514 Fax: +86-755-2643 0930 E-mail: info@creative-sz.com Website: www.creative-sz.com Shanghai International Holding Corp. GmbH (Europe) Eiffestrasse 80, 20537 Hamburg Germany...
Need help?
Do you have a question about the PC-60B1 and is the answer not in the manual?
Questions and answers