Table of Contents
Advertisement
Available languages
Available languages
Quick Links
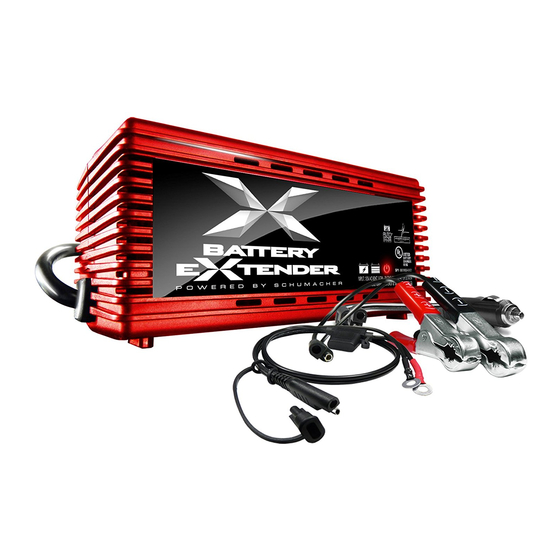
Model / Modelo:
DO NOT RETURN THIS PRODUCT TO THE STORE!
Call Customer Service for assistance: 800-621-5485
¡NO LO DEVUELVA ESTE PRODUCTO A LA TIENDA!
Llame a Servicios al Cliente para asistencia: 800-621-5485
SP1
READ THE ENTIRE MANUAL BEFORE USING THIS
PRODUCT. FAILURE TO DO SO COULD RESULT IN
SERIOUS INJURY OR DEATH.
LEA EL MANUAL COMPLETO ANTES DE UTILIZAR ESTE
PRODUCTO. CUALQUIER FALLA PODRÍA RESULTAR EN
SERIAS LESIONES O PODRÍA SER MORTAL.
MANUAL DEL USUARIO
Automatic Battery Charger
Cargador de batería automático
Voltage / Tensión: 6, 12
Amperage / Amperaje: 2
OWNER'S MANUAL
0099001148-01
Advertisement
Table of Contents

Related Manuals for Schumacher Electric SP1


Summary of Contents for Schumacher Electric SP1
- Page 1 OWNER’S MANUAL MANUAL DEL USUARIO Model / Modelo: Automatic Battery Charger Cargador de batería automático Voltage / Tensión: 6, 12 Amperage / Amperaje: 2 DO NOT RETURN THIS PRODUCT TO THE STORE! Call Customer Service for assistance: 800-621-5485 ¡NO LO DEVUELVA ESTE PRODUCTO A LA TIENDA! Llame a Servicios al Cliente para asistencia: 800-621-5485 READ THE ENTIRE MANUAL BEFORE USING THIS PRODUCT.
- Page 2 IMPORTANT: READ AND SAVE THIS SAFETY AND INSTRUCTION MANUAL. SAVE THESE INSTRUCTIONS – This manual will show you how to use your charger safely and effectively. Please read, understand and follow these instructions and precautions carefully, as this manual contains important safety and operating instructions. The safety messages used throughout this manual contain a signal word, a message and an icon.
- Page 3 IMPORTANT SAFETY INSTRUCTIONS – SAVE THESE INSTRUCTIONS. This manual contains important safety and operating instructions. RISK OF ELECTRIC SHOCK OR FIRE. Keep out of reach of children. Do not expose the charger to rain or snow. Use only recommended attachments. Use of an attachment not recommended or sold by Schumacher ®...
- Page 4 RISK OF EXPLOSIVE GASES. 1.10 WORKING IN THE VICINITY OF A LEAD-ACID BATTERY IS DANGEROUS. BATTERIES GENERATE EXPLOSIVE GASES DURING NORMAL BATTERY OPERATION. FOR THIS REASON, IT IS OF UTMOST IMPORTANCE THAT YOU FOLLOW THE INSTRUCTIONS EACH TIME YOU USE THE CHARGER. 1.11 To reduce the risk of a battery explosion, follow these instructions and those published by the battery manufacturer and the manufacturer of any equipment you intend to use in the vicinity...
- Page 5 Have plenty of fresh water and soap nearby in case battery acid contacts your skin, clothing or eyes. Wear complete eye and body protection, including safety goggles and protective clothing. Avoid touching your eyes while working near the battery. If battery acid contacts your skin or clothing, immediately wash the area with soap and water.
-
Page 6: Charger Location
Determine the voltage of the battery by referring to the vehicle owner’s manual and make sure that the output voltage is correct. Make sure that the charger cable clips make tight connections. CHARGER LOCATION RISK OF EXPLOSION AND CONTACT WITH BATTERY ACID. - Page 7 Stay clear of fan blades, belts, pulleys and other parts that can cause injury. Check the polarity of the battery posts. The POSITIVE (POS, P, +) battery post usually has a larger diameter than the NEGATIVE (NEG, N, -) post. Determine which post of the battery is grounded (connected) to the chassis.
- Page 8 FOLLOW THESE STEPS WHEN BATTERY IS OUTSIDE OF VEHICLE. A SPARK NEAR THE BATTERY MAY CAUSE A BATTERY EXPLOSION. TO REDUCE THE RISK OF A SPARK NEAR THE BATTERY: Check the polarity of the battery posts. The POSITIVE (POS, P, +) battery post usually has a larger diameter than the NEGATIVE (NEG, N, -) post.
-
Page 9: Control Panel
Never alter the AC cord or plug provided – if it does not fit the outlet, have a proper grounded outlet installed by a qualified electrician. An improper connection can result in a risk of an electric shock or electrocution. NOTE: Pursuant to Canadian Regulations, use of an adapter plug is not allowed in Canada. - Page 10 CHARGING (yellow) LED flashing: Indicates the charger is in abort mode. CHARGED (green) LED lit: Indicates the battery is fully charged and the charger is in maintain mode. CHARGED (green) LED blinking: Indicates the battery is at 80% of charge or higher. 12.
- Page 11 50 Amp Battery Clips 1. Connect the end of the charger output cable to the end of the Battery Cable, Quick-Disconnect and Clamps. 2. Follow the steps in sections 6 and 7 to connect the output clips to the battery. 3.
- Page 12 If there are none, have the battery checked or replaced. Maintaining a Battery The Schumacher SP1 is a battery maintainer that maintains both 6 and 12 volt batteries, keeping them at full charge. It can charge small batteries and maintain both small and large batteries. If you are maintaining a fully charged large battery, you will be properly utilizing the battery charger.
-
Page 13: Maintenance Instructions
13. MAINTENANCE INSTRUCTIONS 13.1 After use and before performing maintenance, unplug and disconnect the battery charger (see sections 6, 7 and 8). 13.2 Use a dry cloth to wipe all battery corrosion and other dirt or oil from the battery clips, cords, and the charger case. 13.3 Ensure that all of the charger components are in place and in good working condition, for example, the plastic boots on the battery clips. - Page 14 PROBLEM POSSIBLE CAUSE REASON/SOLUTION The charger is Battery is defective. Have the battery making an audible checked. clicking sound. Severely discharged The battery may battery, but otherwise not want to accept it is a good battery. a charge, due to a run-down state.
-
Page 15: Before Returning For Repairs
PROBLEM POSSIBLE CAUSE REASON/SOLUTION Charger will not turn AC outlet is dead. Check for open fuse on when properly or circuit breaker connected. supplying AC outlet. Poor electrical Check power cord connection. and extension cord for loose fitting plug. Connections are Unplug the charger reversed. - Page 16 7:00 am to 5:00 pm Central Time, Monday through Friday For REPAIR OR RETURN, contact Customer Service at 1-800-621-5485. DO NOT SHIP UNIT until you receive RETURN AUTHORIZATION from Customer Service at Schumacher Electric Corporation. SPECIFICATIONS Input Voltage ................120V AC Output Current Rating ..............2A Maximum Charge Voltage ............12V-14.6V...
- Page 17 Manufacturer does not provide any warranty for any accessories used with this product that are not manufactured by Schumacher Electric Corporation and approved for use with this product. This Limited Warranty is void if the product is misused, subjected to careless handling, repaired, or modified by anyone other than Manufacturer or if this unit is resold through an unauthorized retailer.
-
Page 18: Do Not Return This Product To The Store
WARRANTY AND THE MANUFACTURER NEITHER ASSUMES OR AUTHORIZES ANYONE TO ASSUME OR MAKE ANY OTHER OBLIGATION TOWARDS THE PRODUCT OTHER THAN THIS WARRANTY. Schumacher Electric Corporation Customer Service 1-800-621-5485 Monday – Friday 7:00 a.m. to 5:00 p.m. CST Schumacher and the Schumacher Logo are registered trademarks ®... - Page 19 • 19 •...
- Page 20 • 20 •...
- Page 21 IMPORTANTE: LEA Y GUARDE ESTE MANUAL DE INSTRUCCIONES Y SEGURIDAD. GUARDE ESTAS INSTRUCCIONES – Este manual le mostrará cómo utilizar su cargador en forma segura y efectiva. Por favor, lea, comprenda y siga estas instrucciones y precauciones cuidadosamente, ya que este manual contiene instrucciones operativas y de seguridad de importancia.
- Page 22 INSTRUCCIONES IMPORTANTES DE SEGURIDAD – GUARDE ESTAS INSTRUCCIONES. Este manual contiene instrucciones operativas y de seguridad de importancia. EL RIESGO DE DESCARGA ELÉCTRICA O INCENDIO. Manténgase alejado de los niños. No exponga el cargador a la lluvia o a la nieve. Utilice solamente accesorios recomendados.
- Page 23 No desarme el cargador; hágalo revisar por una persona capacitada que efectúe reparaciones cuando necesite servicio de mantenimiento o una reparación. Volver a ensamblar el cargador en forma incorrecta puede provocar riesgo de incendio o descarga eléctrica. RIESGO DE GASES EXPLOSIVOS. 1.10 RESULTA PELIGROSO TRABAJAR EN FORMA CERCANA A UNA BATERÍA DE PLOMO.
- Page 24 Utilice este cargador solamente para cargar baterías de PLOMO- ÁCIDO. Este cargador no está destinado a suministrar energía a sistemas eléctricos de baja tensión más que en una aplicación de un motor de arranque. No utilice este cargador de batería para cargar baterías de pila seca que por lo general se utilizan con artefactos domésticos.
-
Page 25: Ubicación Del Cargador
Asegúrese de que el área que rodea a la batería se encuentre bien ventilada mientras se carga la batería. Limpie los terminales de la batería antes de cargar la batería. Durante la limpieza, evite que la corrosión producida por aire tenga contacto con sus ojos, nariz y boca. -
Page 26: Precauciones De Conexión En Cc
No ubique la batería encima del cargador. Nunca permita que el ácido de la batería gotee sobre el cargador al leer el peso específico del electrolito o al cargar la batería. No utilice el cargador en un área cerrada o restrinja la ventilación en cualquier forma. -
Page 27: Siga Estos Pasos Cuando La Batería Se Encuentre Fuera Del Vehículo
En un vehículo con descarga a tierra por borne negativo, conecte el gancho POSITIVO (ROJO) del cargador de batería al borne POSITIVO (POS, P, +) sin descarga a tierra de la batería. Conecte el gancho NEGATIVO (NEGRO) al chasis del vehículo o al bloque motor alejado de la batería. - Page 28 Ubíquese junto con el extremo libre del cable que previamente sujetó al borne NEGATIVO (NEG, N, -) de la batería a la mayor distancia posible de la batería. Luego conecte el gancho NEGATIVO (NEGRO) del cargador al extremo libre del cable. Conecte el condón de alimentación del cargador de CA al tomacorriente.
-
Page 29: Instrucciones De Montaje
CARACTERÍSTICAS 1. Luces LED para verificar condición de la Batería 2. Juego de Cables c/Adaptador al encendedor de 12 Volts 3. Cable de Conexión rápida c/Fusible 4. Cable de Batería de 9", de Rápida Desconexión y Pinzas 10. INSTRUCCIONES DE MONTAJE Desenrede todos los cordones y extienda los cables antes de usar el cargador de baterías. -
Page 30: Instrucciones De Operación
12. INSTRUCCIONES DE OPERACIÓN Este cargador de baterías debe ser ensamblado correctamente de acuerdo a las instrucciones de ensamble antes de usar. Carga 1. Asegúrese de colocar el cargador sobre una superficie seca y no inflamable, como metal o concreto. 2. - Page 31 Cable de Conexión rápida c/Fusible 1. Para sujetarlos permanentemente a la batería, aflójelo y retire las tuercas del perno de los postes de la batería. 2. Conecte el conector, de argolla, rojo POSITIVO al poste POSITIVO de la batería. 3. Conecte el conector, de argolla, negro NEGATIVO al poste NEGATIVO de la batería.
- Page 32 Manteniendo una batería El Schumacher SP1, es un mantenedor de baterías, que mantiene baterías de 6 y 12 voltios, manteniéndolas a carga complete. Puede cargar baterías pequeñas y mantener pequeñas y grandes. Si usted está...
-
Page 33: Instrucciones De Mantenimiento
13. INSTRUCCIONES DE MANTENIMIENTO 13.1 Después de usar y antes de realizar mantenimiento, desenchufe y desconecte el cargador de la batería (ver secciones 6, 7 y 8). 13.2 Utilice un paño seco para limpiar la corrosión de toda la batería y otra suciedad o aceite de las pinzas de la batería, cables y carcasa del cargador. -
Page 34: Localización Y Solución De Problemas
15. LOCALIZACIÓN Y SOLUCIÓN DE PROBLEMAS PROBLEMA POSIBLE CAUSA SOLUCIÓN Las pinzas de la Este cargador está No hay problema; batería no hacen equipado con un es una condición corto al juntarse una auto-rectificador. Este normal. con otra. no permitirá paso de corriente si las pinzas de la batería no están conectadas en forma... -
Page 35: Instrucciones Operativas
PROBLEMA POSIBLE CAUSA SOLUCIÓN Indica que el Vea “Carga Anulada” LED CARGANDO cargador está en en la sección de intermitente. modo cancelar. INSTRUCCIONES OPERATIVAS. LED DE CARGADA La batería está Mantenga el cargador encendido intermitente. cargada a un 80% hasta que la luz LED o más. - Page 36 PROBLEMA POSIBLE CAUSA SOLUCIÓN El cargador no se El voltaje de la Este cargador enciende incluso al batería es muy bajo. tiene un dispositivo estar bien conectado de encendido (continuado). automático. Si el voltaje de la batería es menor a 0.2 volts, el cargador no lo detectará...
-
Page 37: Especificaciones
Si las soluciones descriptas no eliminan el problema o por información sobre la solución de problemas, puede llamar a la línea gratuita desde cualquier lugar de los EE.UU. 1-800-621-5485 7:00 a. m. a 5:00 p. m. hora central de lunes a viernes Para REPARACIÓN O DEVOLUCIÓN, comuníquese con Servicios al Cliente al 1-800-621-5485. - Page 38 ésta se pueda reparar o reemplazar. El Fabricante no presta garantía por lo accesorios utilizados con este producto que no sean los fabricados por Schumacher Electric Corporation y que no estén aprobados para su uso con este producto.
- Page 39 Schumacher y el logo Schumacher son marcas registradas ® de Schumacher Electric Corporation. Para hacer efectiva la garatía, por favor llene la tarjeta de garantía en página 20 y evíela, O, visite la página de internet www.batterychargers.com para registrar su producto en la red.
Need help?
Do you have a question about the SP1 and is the answer not in the manual?
Questions and answers