
Related Manuals for Bang & Olufsen BeoSound 3000 2671


Summary of Contents for Bang & Olufsen BeoSound 3000 2671
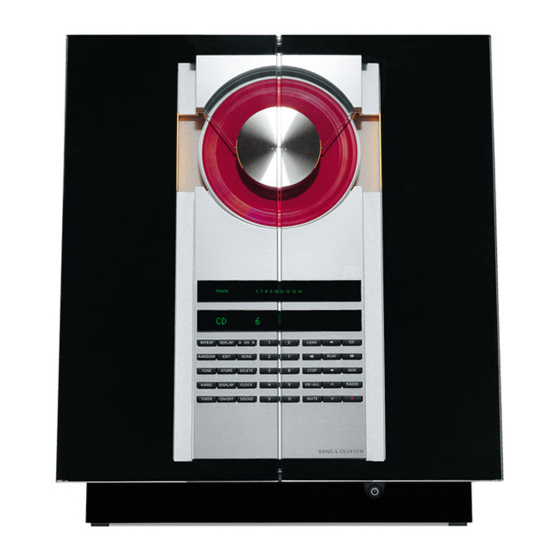
- Page 1 BeoSound 3000 Type 2671, 2672, 2673, 2674, 2675, 2676, 2677, 2680 Service Manual English, German, French, Italian, Spanish illustration...
- Page 2 Survey of modules 2 Interface f/µPH8 ..........diagram E 18 Headphone ............diagram G page 2.14 page 2.17 3 µPH8 Microcomputer ......... diagram E 20 IR receiver and left door sensor ...... diagram F, J page 2.14 page 2.15, 2.21 5 Display ............
- Page 3 Specifi cation guidelines SPECIFICATION GUIDELINES FOR SERVICE USE BeoSound 3000 With FM, AM and RDS Type 2671 EU (230V) Type 2672 GB (240V) Type 2673 USA-CDN (120V) Type 2674 J (100V) Type 2675 AUS (240V) Type 2676 TWN (120V) Type 2677 KOR (220V) Type 2680 LAT (230V) Preamplifi...
- Page 4 Specifi cation guidelines CD player CD, disc types 12 cm (5”), 8 cm (3”) Frequency response 20 - 20,000 Hz ±1 dB SNR (digital zero) >96 dB / 101 dB A-weighted Dynamic range >98 dB Channel difference ±0.3 dB D/A converter Bitstream + Analog fi...
- Page 5 Wiring of transformer Wiring of transformer, PCB15 Type 2671, 2677, 2680 EU, LAT 230V~ KOR 220V~ 100V 120V 240V 230V 100V 0.4mH 230V C13p 1000µ Type 2672, 2675 GB, AUS 240V~ 100V 120V 240V 230V 100V 0.4mH 240V C13p 1000µ...
- Page 6 Wiring of transformer Type 2673, 2676 USA-CDN, TWN 120V~ 100V 120V 240V 230V 100V 0.4mH 120V C13p 1000µ Type 2674 JPN 100V~ 100V 120V 240V 230V 100V 0.4mH 100V C13p 1000µ...
- Page 7 Brief operation guide Brief operation guide Tune in radio stations Switch on the radio For more detailed operation see RADIO Press RADIO to switch RADIO Press RADIO to switch User’s guide on the radio on the radio TUNE Press TUNE to access the 0 –...
- Page 8 Brief operation guide Using the Beo4 Set the built-in clock CLOCK Press CLOCK to access RADIO Turns on the radio the clock function. The 14 : 45 time appears Starts the CD player Press to change to the Press to step through exact time, if necessary your radio programs or tracks on a CD...
- Page 9 Explanation of diagram Explanation of diagram Type numbers of transistors and ICs are indicated on the diagrams. If the position is followed by an asterisk the spare part number must always be used because the component in question has been specially selected, e.g. TR102*. Component print and coordinate system The largest PCBs have component prints and a coordinate system on both the print and the component side.
- Page 10 Explanation of diagram Measuring conditions All DC voltages have been measured in relation to ground with a voltmeter with an input impedance of 10 Mohms. The DC voltages are stated in volts (V), e.g. 0.7V. All oscillograms and AC voltages have been measured in relation to ground with an oscilloscope or a voltmeter with an input resistance of 1Mohm.
- Page 11 Wiring diagram Wiring diagram Wiring diagram...
- Page 12 Block diagram Block diagram Block diagram for frontend tuner...
- Page 13 Block diagram Block diagram AM block diagram...
- Page 14 Block diagram Block diagram Block diagram for CD PRO EYEPATTERN 0.5µs/DIV...
- Page 15 Block diagram Block diagram Block diagram for system key controle...
- Page 16 Diagram A Diagram A Diagram A – Frontend tuner PCB drawing for PCB86 see page 2.13...
- Page 17 Diagram B 2.10 2.10 Diagram B 2.10 Diagram B – FM/AM Detector PCB drawing for PCB86 see page 2.13...
- Page 18 2.11 Diagram C 2.11 2.11 Diagram C Diagram C – Stereo decoder and power section PCB drawing for PCB86 see page 2.13...
- Page 19 Diagram D 2.12 2.12 Diagram D 2.12 Diagram D – RDS, µP & IIC bus fi lter PCB drawing for PCB86 see page 2.13...
- Page 20 2.13 PCB drawing 2.13 2.13 PCB drawing PCB86, Tuner-FM/AM-RDS-Stereo decoder...
- Page 21 Diagram E 2.14 2.14 Diagram E 2.14 Diagram E – Interface for µP & µPH8 PCB drawing for PCB2 see page 2.16...
- Page 22 2.15 Diagram F 2.15 2.15 Diagram F Diagram F – Light and Motor control, Light supply & IR PCB drawing for PCB9 see page 2.16...
- Page 23 PCB drawing 2.16 2.16 PCB drawing 2.16 PCB9, Light and motor control PCB2, Interface f/µPH8...
- Page 24 2.17 Diagram G 2.17 2.17 Diagram G Diagram G – Input select PCB drawings for PCB12 see page 2.20...
- Page 25 Diagram H 2.18 2.18 Diagram H 2.18 Diagram H – Master Link Interface PCB drawings for PCB12 see page 2.20...
- Page 26 2.19 Diagram I 2.19 2.19 Diagram I Diagram I – Power Supply & Transformer PCB drawings for PCB12 see page 2.20 PCB drawing for PCB15 see page 2.22...
- Page 27 PCB drawings 2.20 2.20 PCB drawings 2.20 PCB12, Power Supply, Input select & Pre-amplifi er...
- Page 28 2.21 Diagram J 2.21 2.21 Diagram J Diagram J – Door sensor PCB drawings for PCB20 & PCB21 see page 2.22...
- Page 29 PCB drawings 2.22 2.22 PCB drawings 2.22 PCB20, IR receiver and left door sensor PCB15, Transformer PCB21, Door sensor right MKII...
- Page 30 2.23 Diagram K 2.23 2.23 Diagram K Diagram K – CD Interface PCB5, Display...
- Page 31 Diagram L 2.24 2.24 Diagram L 2.24 Diagram L – CD Servo & Decoder EYEPATTERN 0.5µs/DIV...
- Page 32 2.25 Diagram M 2.25 2.25 Diagram M Diagram M – Display & Keyboard PCB drawing for PCB5 see page 2.23...
- Page 33 List of electrical parts List of electrical parts Resistors not referred to are standard, see page 3-9 PCB2, 8006796 Interface f/µPH8 IC1∆ 8342397 149 Memory/clock IC2∆ 8343699 169 AD 8531 M141T56M6 IC3∆ 8343682 151 PIC 12C508 TR38* 8320740 BF 840 8300606 250 LL 4448 8301120...
- Page 34 List of electrical parts Resistors not referred to are standard, see page 3-9 4010166 100nF -20+80% 50V 4010170 2.2nF 10% 50V 4010166 100nF -20+80% 50V C13- 4000241 100pF 5% 50V 4000241 100pF 5% 50V 4010157 10nF 10% 50V 4000241 100pF 5% 50V 4200517 2.2µF 20% 50V 8030221 Crystal 455KHz 7220714 Plug 7 pole...
- Page 35 List of electrical parts 7220714 Plug 7 pole 7220710 Plug 3 pole 7220711 Plug 4 pole P78- 7220709 Plug 2 pole PCB12, 8001833 Power Supply, Input IC1∆ 8341025 151 4094B IC6∆ 8341231 151 LF 347 IC2∆ 8341059 151 4052 IC7∆ 8341022 151 4558 select &...
- Page 36 List of electrical parts Resistors not referred to are standard, see page 3-9 4010271 10nF 10% 50V 4000418 330pF 5% 50V 4200824 22µF 20% 50V C18- 4000416 220pF 5% 50V C80- 4010271 10nF 10% 50V 4000418 330pF 5% 50V 4000420 470pF 5% 50V C82- 4010272 22nF -20+80% 50V C27-...
- Page 37 List of electrical parts PCB14, 8001771 Master Link Audio IC1∆- 8341022 138 4558 IC8- 8341024 150 4066 IC7∆ IC10 interface 8320811 BC 857B 8320811 BC 857B TR4- 8320755 BC 847B 5011841 11.8KΩ 1% 1/8W R14- 5011557 10KΩ 1% 1/8W 5011841 11.8KΩ 1% 1/8W 5011531 5.9KΩ...
- Page 38 List of electrical parts Resistors not referred to are standard, see page 3-9 PCB20, 8005738 IR receiver and left IC1∆ 8341041 138 LM 324 door sensor TR1- 8320740 BF 840 TR17 8320769 BC 849C TR18- 8320811 BC 857B TR3- 8320755 BC 847B TR21 TR22...
- Page 39 List of electrical parts 4010316 100nF 10% 25V 4010157 10nF 10% 50V 4010263 2.2nF 10% 50V 4010271 10nF 10% 50V 4000414 150pF 5% 50V 4200826 10µF 20% 16V 4010195 2.7nF 5% 50V C13- 4000414 150pF 5% 50V 4200961 220µF 20% 10V C57- 4010316 100nF 10% 25V 4000414 150pF 5% 50V...
- Page 40 List of electrical parts Resistors not referred to are standard, see page 3-9 C217 4001125 15pF 5% 50V C281- 4000408 47pF 5% 50V C218- 4011135 100nF -20+80% 16V C282 C283- 4010274 100nF -20+80% 25V C219 C287 C220 4001143 470pF 5% 50V C221 4001120 5.6pF 5% 50V C288...
- Page 41 List of electrical parts List of electrical parts L211- 8020626 Coil 470µH 5% L303 8021345 Coil 10mH Standard resistors L212 L400- 8020821 Coil 2.2µH 5% Resistors SMD 2% 1/8 W L213- 8020714 Coil 68µH 10% L404 x100 x10K x100K x10M SMD 5% 1/8 W L214 L500-...
- Page 42 List of mechanical parts List of mechanical parts List of mechanical parts Front 90/99 9021 9022 9023 9024 9025 9003 9024 9026 9025 9004 9027 9001 9005 9024 9006 9025 9027 9007 9008 9005 9002 9009 9011 0501 0502 9012 0503 05DP2 9013...
- Page 43 List of mechanical parts List of mechanical parts Front 9001 3162622 Cover, left 9002 3162830 Glass, left 9003 2802056 Ring f/clamper with magnet strips 9004 3017028 Wheel 9005 2830111 Cylinder pin 9006 3162652 Clamper 9007 3152726 Cover f/clamper 9008 2819251 Spring 9009 3164877 Cover 9010...
- Page 44 List of mechanical parts List of mechanical parts Chassis 9120 9101 9108 9162 91M1 9109 9121 9110 9102 9122 9111 9102 91M2 9122 9153 9103 9112 9123 9104 9124 9105 9126 9106 9125 9127 9107 9128 9154 9129 9148 2001 9130 9155 9149...
- Page 45 List of mechanical parts List of mechanical parts Chassis 9101 2722055 Belt pulley 02Module 8006796 Interface f/µPH8 9102 2831070 Shaft 9103 3151277 Holder 03Module 8006797 µPH8 Microcomputer 9104 2732076 Belt 9105 2722054 Belt pulley 12Module 8001833 Power supply, Input select & Pre-amplifi er 9106 2700152 Gear wheel, complete 1201...
- Page 46 List of mechanical parts List of mechanical parts Wire bundles See wiring diagram page 2.4 Stand, type 2051 The part no. is printed on the diagram above the wire bundle, as shown. 1205111, silver 1205194, green 1205196, black 1205198, blue 1205199, red Accessories See specifi...
- Page 47 List of mechanical parts Center wall bracket, black, type 2052 1205266 9510 2777052 Handle, right 2777053 Handle, left 9511 1205266 Wall bracket 9512 2038130 Screw 3 x 25mm 9513 2043016 Screw 4 x 10mm 2930126 Bush 3390432 Wire holder 3502922 Setting-up guide...
- Page 48 List of mechanical parts System wall bracket, black, type 2087 1208766 9520 9521 9522 9523 9524 9525 9520 3152790 Holder f/antenna 9521 2038116 Screw 3 x 20mm 9522 2777052 Holder, right 2777053 Holder, left 9523 2038130 Screw 3 x 25mm 9524 3031319 Wall plate 9525...
- Page 49 Testmodes, English TM (test mode) names/function for adjustments and service Tuner test modes TM 01: Automatic offset-adjustment for FM TM 02: Manual offset-adjustment for FM TM 03: Status for offset-adjustment TM 04: Variant status TM 06: Check RDS name TM 07: Setting up of tuner variant Master test modes TM 20: Test of display functions TM 21: Open ML-out...
- Page 50 Testmodes, English Glass doors lock When the glass doors are locked it is not possible to open them by magic open. The glass doors can only be locked if the product is in St. by, the glass doors are closed and only by remote control. Press SHIFT 9 0 3 6 9 with no more than 2 sec.
- Page 51 Testmodes, English TM07 Tuner variant setup: If from EU or AUS to US: Key in the 3 digits indicating the choice. No. 0: 003 = variant US No. 1: 001 = RDS on, or 000 = RDS off No. 2: 175 = FM starts in 500 kHz No.
- Page 52 Testmodes, English TM20 Checking the display by showing 3 types of letters in 3 rounds until all pixels are used/tested. Press PLAY to shift between icons in the display. TM21 Opens the signal from AUX-plug to the ML-output. The display shows “AUX 2 ML”. TM22 Test of key-board functions.
- Page 53 Testmodes, English TM27 Service Error detection. The last registred errors regarding EEPROM, ML, IIC-bus, RS232 driver, CD and lids can be read-out. This test mode is also used for deleting all error-registrations. To toggle between error indications press PLAY. When all errors are read press PLAY to reset all errors registered or press STOP to keep error register.
- Page 54 Testmodes, English - 8: TOC read error Set when the TOC could not be read, no access possible to lead-in. - 20: Serial communication overrun error Expected command byte, but received a data byte. - 22: Serial communication noise error Check did not match.
- Page 55 Testmodes, English E7: Last error in the main micro-processor. - 16: Illegal timer ID - 17: Timer not free - 21: Illegal date value - 22: Illegal time value - 23: Illegal timer parameters - 32: Illegal simple message ID - 33: Out of message buffers - 34: Message buffer virtual limit reached - 64: Non ISR func.
- Page 56 Testmodes, English TM28 This TM checks the function of ROM, RAM, EEPROM. (O, A, P). To readout TM, O and A have to be (+). E.g. MEM ++- indicates error in the EEPROM. TM31 Default settings for sale purpose. Option: Volume: Balance: Bass:...
- Page 57 Testmodes, English To use CD test modes it is necessary to select CD, in the TM the HF-signal will not be used TM61 Focus ON. The CD-pen will try to focus. This TM can only be turned off by using TM62. TM62 Focus OFF.
- Page 58 5.10 Repair tips, English Replacement of CD-mechanism - Open the glass doors. - Disconnect the main voltage. - Dismount the glass doors by pulling forward at the bottom fi rst and then at the top. Take care that the glass door does not scratch the display. - Remove the seven screws A in the back cover.
- Page 59 Repair tips, English 5.11 Removal of gearbox for CD-clamp The product must not be connected to the mains when dismantling. - The clamp must be electrically sealed. - Lift up the clamp manually. - Dismount the spring R at its bottom most point. - Dismount the lead to the motor, plug 9P78.
- Page 60 5.12 Repair tips, English Mounting of wire for glass doors - Turn the wire pulley G clockwise until it stops. (Closed door position). - Turn the wheel H in click position. - Mount the wire in the wire pulley H (the end with the heavy spring). - Run the wire in the second innermost groove of the wire pulley H (underneath the pulley), up around the uppermost pulleys (I, J, K and L) and down around the lowermost pulleys (M, N, and O).
- Page 61 Repair tips, English 5.13 Adjustment of the glass doors • - Open the glass doors, press and wait for the glass doors to close and disconnect main voltage. - Remove the seven screws A in the back cover. Pull out the back cover by wrenching the corners C of the back cover to the side.
- Page 62 5.14 Repair tips, English Test of Master Link DATA receiver/transmitter Test of the circuits 12TR30, 12TR31, 12TR52, 12TR53, 12TR55, 12TR56 and 12IC6. - Lift P107. - Mount on P4. - Connect a square-wave generator 10kHz 0-5 V to P107-4 (transmit). - Measure P107-2 (receive) with an oscilloscope;...
- Page 63 Service- and pin code, English 5.15 Theft protection The theft protection is a 4 digit PIN-code, of the user’s own choice, which must be entered if the product has been disconnected from the mains for 15-30 min. The theft protection is always deactivated from the factory, it is up to the user to activate it.
- Page 64 5.16 Service- and pin code, English Exchange of software EEPROM on PCB3 When exchanging the EEPROM on PCB3, the data from the micro-processor will be written into the EEPROM when selecting any source e.g. RADIO. It is possible to borrow an EEPROM from another BeoSound 3000 to test if there is suspicion of a fault in the original EEPROM.
- Page 65 Service- and pin code, English 5.17 Important When the product is reconnected to mains, wait 20-30 sec. before operating. All adresses in ML has to be updated after disconnecting mains voltage. Set and enter PIN code It is your own choice whether or not to activate the PIN code system. However, if you choose to activate the system, your BeoSound 3000 is protected against theft with a four-digit PIN code.
- Page 66 5.18 Service- and pin code, English If you have forgotten your PIN code If you have forgotten your PIN code, you must contact a retailer who then requests a fi ve-digit Master code from Bang & Olufsen. Once you have keyed in this code, your BeoSound 3000 is operational again and the PIN code system is deactivated.
- Page 67 Dismantling, English Dismantling Glass door - Open the glass doors. - Disconnect the main voltage. - Dismount the glass doors by pulling forward at the bottom fi rst and then at the top. Take care that the glass door does not scratch the display. Rear panel - Remove the seven screws A in the back cover.
- Page 68 Insulation test Insulation test Isolationsprüfung Test d’isolement Each set must be insulation tested after Nach der Zerlegung muß bei jedem Il convient de soumettre l’appareil à un having been dismantled. Gerät eine Isolationsprüfung test d’isolement après l’avoir démonté. Make the test when the set has been vorgenommen werden.
Need help?
Do you have a question about the BeoSound 3000 2671 and is the answer not in the manual?
Questions and answers