
Related Manuals for Samsung DSB-S305G


Summary of Contents for Samsung DSB-S305G
- Page 1 DSB-S305G FTA, EM NAG Instrukcja obs∏ugi Instrukcja obs∏ugi ....PL REV. 1.0 CYFROWY DEKODER SATELITARNY...
- Page 2 Instrukcja obs∏ugi ....PL DSB-S305G FTA, EM NAG...
- Page 3 DSB-S305G FTA, EM NAG Instrukcja obs∏ugi CYFROWY DEKODER SATELITARNY...
- Page 4 INSTRUKCJE BEZPIECZE¡STWA Niniejszy dekoder zosta∏ wyprodukowany w technologii, spe∏niajàcej mi´dzynarodowe standardy bezpieczeƒstwa. Prosimy o dok∏adne przeczytanie poni˝szych zaleceƒ dotyczàcych bezpieczeƒstwa. ZASILANIE: 100-240V~ AC, 50/60Hz PRZECIÑ˚ENIA: Nie doprowadzaj do przecià˝enia gniazd Êciennych, przewodów przed∏u˝ajàcych lub adapterów, poniewa˝ mogà spowodowaç po˝ar lub pora˝enie elektryczne. P¸YNY: Nie dopuszczaj do kontaktu dekodera z ˝adnymi p∏ynami.
-
Page 5: Table Of Contents
SPIS TREÂCI FUNKCJE G¸ÓWNE Instrukcje bezpieczeƒstwa ........1 1. -
Page 6: Pod∏Àczenia Dekodera
POD£¥CZANIE DEKODERA POD¸ÑCZANIE DEKODERA 1. LOKALIZACJA ODBIORNIKA DEKODERA Schemat pod∏àczania Dekoder powinien byç ustawiony w miejscu o w∏aÊciwej wentylacji. Nie umieszczaj go w zamkni´tej szafce ograniczajàcej obieg powietrza, co mo˝e spowodowaç przegrzanie. Lokalizacja powinna chroniç przed bezpoÊrednim dzia∏aniem s∏oƒca, nadmiernà wilgocià, niedba∏à... -
Page 7: Opis
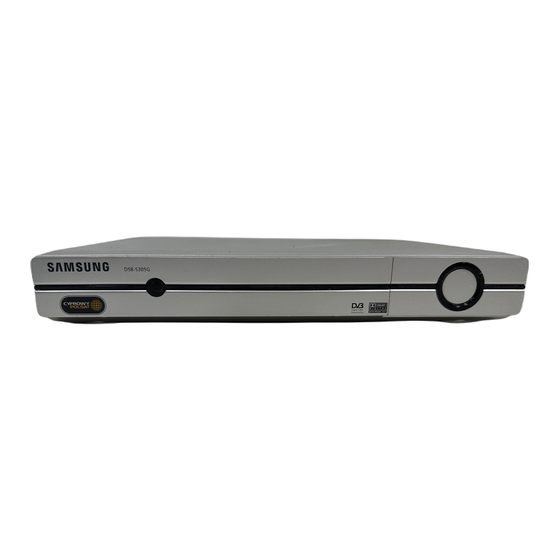
OPIS OPIS Panel przedni Panel tylny 1. Dioda LED Kiedy dioda LED Êwieci na Czerwono, dekoder jest w stanie czuwania. 1. WEJÂCIE ANTENOWE Ten port s∏u˝y do pod∏àczania kabla koncentrycznego do wejÊcia LNB Kiedy dioda LED Êwieci na Zielono, dekoder jest w∏àczony. talerza anteny satelitarnej. -
Page 8: Pilot Zdalnego Sterowania
OPIS OPIS Pilot zdalnego sterowania 10. ALT (YELLOW) Przycisk ten s∏u˝y do wyboru listy Êcie˝ek dêwi´kowych bie˝àcego serwisu. 1. ZASILANIE Przycisk dzia∏a tak samo, jak przycisk ˚Ó¸TY w menu. Przycisk do w∏àczania i prze∏àczania w tryb czuwania. WciÊnij raz, aby w∏àczyç Êcie˝k´ dêwi´kowà. WciÊnij dwukrotnie, aby w∏àczyç... -
Page 9: Funkcje Podstawowe
FUNKCJE PODSTAWOWE FUNKCJE PODSTAWOWE 3. Wybór Êcie˝ki dêwi´kowej 1. Ekran wyÊwietlacza ● WciÊnij przycisk ˚Ó¸TY (ALT), aby w∏àczyç list´ Przed oglàdaniem programu telewizyjnego musisz dokonaç instalacji. dost´pnych Êcie˝ek dêwi´kowych. Z tego powodu na poczàtku na ekranie telewizora widaç wy∏àcznie wyÊwietlane menu. ●... - Page 10 FUNKCJE PODSTAWOWE FUNKCJE PODSTAWOWE 5.1 Ulubione serwisy 6. Informacje o programie ● WciÊnij przycisk ZIELONY (TEXT) na pilocie zdalnego EPG.Elektroniczny Przewodnik po Programie sterowania, aby wybraç list´ Ulubione (Favorites). Elektroniczny przewodnik po programie EPG przedstawia informacje o programie. ● WciÊnij przycisk ZIELONY (TEXT), aby prze∏àczyç pomi´dzy listà...
-
Page 11: Sterowanie Dekoderem
FUNKCJE PODSTAWOWE STEROWANIE DEKODEREM 7. Telegazeta VBI Menu g∏ówne Je˝eli aktualnie odbierany program telewizyjny oferuje informacje Po zainstalowaniu swojego systemu antenowego i dekodera STB z u˝yciem odpowiednich gniazd. telegazety Teletext VBI wciÊnij przycisk ZIELONY (TEXT), ● Pod∏àcz i w∏àcz zasilanie dekodera. aby obejrzeç... -
Page 12: Ulubione Kana∏Y
STEROWANIE DEKODEREM STEROWANIE DEKODEREM 1.1 Ulubione Kana∏y 1.3 Usuwanie kana∏u Mo˝na przypisaç bie˝àcy kana∏ do grupy ulubionych (Favorite ● Wybierz ˝àdany kana∏ do usuni´cia wciskajàc przycisk Group) w sposób natychmiastowy. CZERWONY ( i ). Dodatkowo mo˝na przypisaç kana∏ do wielu ulubionych grup. ●... -
Page 13: Instalacja
STEROWANIE DEKODEREM STEROWANIE DEKODEREM 2.3 Skanowanie transpondera 2. Instalacja Je˝eli posiadasz zmotoryzowany system DiSEqC 1.2 w pe∏ni Menu niniejsze oferuje ustawienia osobiste, dodawanie nowych kompatybilny z DiSEqC1.2, wówczas mo˝esz korzystaç z zalet serwisów i wyÊwietlanie statusu dekodera. dost´pnych funkcji DiSEqC 1.2. ●... -
Page 14: Przywracanie Ustawieƒ Domyêlnych
STEROWANIE DEKODEREM STEROWANIE DEKODEREM 2.5 Przywracanie ustawieƒ domyÊlnych 3. Ustawienia systemowe Funkcja s∏u˝y do przywrócenia wszystkim ustawieniem dekodera Opcja niniejsza pozwala na zmiany domyÊlnych ustawieƒ domyÊlnych wartoÊci fabrycznych w przypadku napotkania fabrycznych systemu, by dopasowaç go do w∏asnych wymagaƒ. problemów, po dokonaniu b∏´dnych zmian ustawieƒ danych kana∏ów i innych. -
Page 15: Ustawienia Menu Ekranowego Osd
STEROWANIE DEKODEREM STEROWANIE DEKODEREM 3.2 Ustawienia menu ekranowego OSD Tryb ustawienia kolorów u˝ytkownika lub kolorów EPG ● WciÊnij przycisk ZIELONY (TEXT). Mo˝na ustawiç przeêroczystoÊç menu ekranowego (Transparency Pojawi si´ pozycja menu, którà chcesz zmieniç. level), czas jego wyÊwietlania na ekranie ,schemat kolorów (Color ●... -
Page 16: Ustawienia Czasu I Timera
STEROWANIE DEKODEREM STEROWANIE DEKODEREM 3.4 Ustawienia czasu i timera 4. Blokada rodzicielska 1) Czas Niniejsza funkcja blokady dost´pu “Parental Lock” pozwala na ograniczenie i chroni przed nieautoryzowanym dost´pem do ● Ustaw kursor na tym submenu i wciÊnij OK. dekodera STB za pomocà kodu PIN (Personal Identification Zmieƒ... -
Page 17: Audio
“You don’t need to update software!”. Je˝eli otrzymasz informacj´, ˝e zmieni∏ si´ transponder oprogramowania Samsung, powinieneÊ wybraç zaawansowany tryb u˝ytkownika ‘User Advanced Mode’ w trybie Menu u˝ywajàc przycisków / . Nast´pnie nale˝y ustawiç w∏aÊciwe parametry dla nowego transpondera Samsung. PL-26 PL-27... -
Page 18: Dane Techniczne
DANE TECHNICZNE DANE TECHNICZNE èród∏o zasilania WyjÊcie A/V Typ : SMPS Interfejs : 2 SCART (TV, VCR), 2 PIN RCA (L+R) Napi´cie wejÊciowe : AC 100-240V~, 50/60 Hz TV SCART : VIDEO (CVBS, YUV, RGB), AUDIO R&L Bezpiecznik : 250 V/T1.6AH VCR SCART : VIDEO (CVBS, RGB), AUDIO R&L SPDIF :... - Page 19 Instructions for use ....GB DSB-S305G FTA, EM NAG...
- Page 20 DSB-S305G FTA, EM NAG Instructions for use DIGITAL SATELLITE RECEIVER...
-
Page 21: Safety Instructions
SAFETY INSTRUCTIONS This STB has been manufactured to satisfy international safety standards. Please read the following recommended safety precautions carefully. MAINS SUPPLY: AC 100-240V~, 50/60Hz OVERLOADING: Do not overload wall outlets, extension cords or adapters as this can result in fire or electrical shock. LIQUIDS: Keep liquids away from the STB. -
Page 22: General Features
CONTENTS GENERAL FEATURES Safety Instructions ........1 1. -
Page 23: Connecting Your "Stb
CONNECTING YOUR "STB" CONNECTING YOUR “STB” 1. LOCATION OF THE RECEIVER Connecting Figure Your STB should be placed under proper ventilation. Don’t put in completely enclosed cabinet that will restrict the flow of air, resulting in overheating. The location should be safeguarded from direct sunlight, excess moisture, rough handling or household pets. -
Page 24: Description
DESCRIPTION DESCRIPTION Front Panel Rear Panel 1. LED When the LED light Red, the Set-Top Box enters the standby mode. 1. DISH INPUT This port is to connect the coaxial cable from LNB of your dish. When the LED light Green, it enters the operation mode. The IF input is provided through this port and the input frequency 2. -
Page 25: Remote Control Unit
DESCRIPTION DESCRIPTION Remote Control Unit 1. POWER 10. ALT (YELLOW) This key is for selecting the soundtrack list for the current service. This key functions same as the YELLOW key on the menu. This is for switching the receiver Press it once and sound track appears. ON/STANDBY mode. -
Page 26: Basic Functions
BASIC FUNCTIONS BASIC FUNCTIONS 3. Select Soundtrack 1. Display Screen ● Press YELLOW (ALT) key to see the soundtrack list. Before you can view the television program, you must perform the installation. ● Press and OK key to select one. Therefore you will see only menu images at first. - Page 27 BASIC FUNCTIONS BASIC FUNCTIONS 5.1 Service Favorites 6. Program Information ● Press the GREEN (TEXT) key on the remote control unit to EPG-Electronic Program Guide select the Favorites list. The electronic program guide gives you information for the channels. ● Press the GREEN (TEXT) key to switch between favorite list and channel list.
-
Page 28: Operating The Receiver
BASIC FUNCTIONS OPERATING THE RECEIVER 7. Teletext VBI Main Menu When the current broadcasting program provides Teletext VBI, After installing your antenna system and STB with appropriate connectors. press the GREEN (TEXT) key to see the current language list ● Plug in the AC main power and switch on the receiver. -
Page 29: Favorite Channels
OPERATING THE RECEIVER OPERATING THE RECEIVER 1.1 Favorite Channels 1.3 Delete Channel ● You can immediately register the present channel to the desired Select the desired channel you want to delete by pressing Favorite Group. RED ( i ) key. In addition, you can register a channel to multiple favorite groups. -
Page 30: Installation
OPERATING THE RECEIVER OPERATING THE RECEIVER 2. Installation 2.3 Transponder Scanning If you have a DiSEqC 1.2 motorized system which is fully The menu provides settings for customizing, adding new compatible with DiSEqC1.2, then you can take advantage of services and displaying the status of the receiver. the DiSEqC 1.2 functions available. -
Page 31: Reset To Factory Defaults
OPERATING THE RECEIVER OPERATING THE RECEIVER 2.5 Reset to Factory Defaults 3. System Setup This is to recover the Factory set values in case the user has This option enables you to change the factory preset encountered some problems after changing any values of system settings as per your requirements. -
Page 32: Osd Setting
OPERATING THE RECEIVER OPERATING THE RECEIVER 3.2 OSD Setting To set User defined mode or EPG color mode ● Press the GREEN (TEXT) key. You can set the OSD transparency, the display time, The item which you want to change will appear. Color Scheme and OSD Position. -
Page 33: Time & Timer Setting
OPERATING THE RECEIVER OPERATING THE RECEIVER 3.4 Time & Timer Setting 4. Parental Lock 1) Time This “Parental Lock” feature sets viewing restrictions and prevents unauthorized access to your STB through the PIN ● Place the cursor on this sub menu and press OK. (Personal Identification Number), which is a 4 digit number. -
Page 34: Change Pin Code
Or in case you don’t need to update, “You don’t need to update software!” will be displayed. If you get information that a Transponder is changed to different one for Samsung software, you should select ‘User Advanced Mode’ at Menu mode by using the key. -
Page 35: Technical Specifications
TECHNICAL SPECIFICATIONS TECHNICAL SPECIFICATIONS Power supply A/V output Type : SMPS Interface : 2 SCART (TV, VCR), 2 PIN RCA (L+R) Input voltage : AC 100-240V~, 50/60 Hz TV SCART : VIDEO (CVBS, YUV, RGB), AUDIO R&L Fuse rating : 250 V/T1.6AH VCR SCART : VIDEO (CVBS, RGB), AUDIO R&L...
Need help?
Do you have a question about the DSB-S305G and is the answer not in the manual?
Questions and answers