Table of Contents
Advertisement
Advertisement
Table of Contents

Related Manuals for Dali TE-W2


Summary of Contents for Dali TE-W2
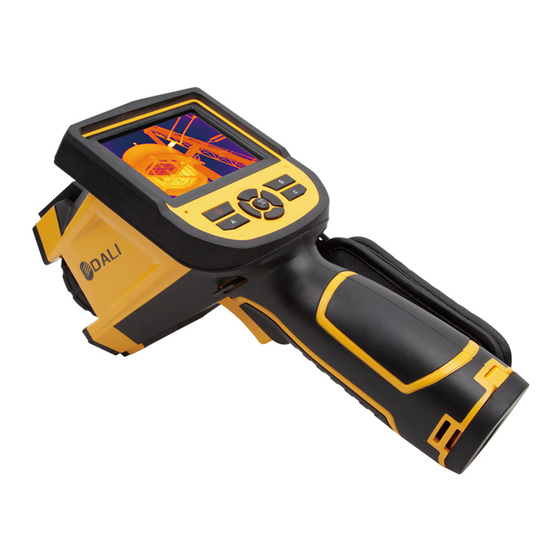
- Page 1 TE-W2 Thermal Image Camera User Manual...
-
Page 2: Warnings, Cautions And Notes
! Warnings, Cautions and Notes Definitions WARNING Could cause bodily injury or death. CAUTION Could cause damage to equipment or permanent loss of data. NOTE provides useful information to the operator. Important Information – Read before using the Instrument ... - Page 3 CAUTION - Do not open case. Unit does not contain any user serviceable parts. Repair should be performed by factory authorized technicians only.
-
Page 4: Table Of Contents
Contents ! Warnings, Cautions and Notes ............2 1 Introduction ................. 5 1.1 Standard accessories ....................8 1.2 Optional accessories ....................8 2 Camera overview ................9 2.1 Function keys ....................... 9 2.2 Interface ........................13 3 Basic operation ................14 3.1 ... -
Page 5: Introduction
Graphic setting ....................49 5.3.3 5.3.4 Measurement Setting ..................49 5.3.5 Network ........................ 50 Local Settings ..................... 50 5.3.6 5.3.7 System Maintainance ..................50 6 Configuration ................52 7 Troubleshooting ................54 1 Introduction Thank you for choosing Instruments “TE-W2” hand-held infrared thermal... - Page 6 Model Identification TE-W2 imagers use the detector with 25um 384*288, and measurement range from +30°C~+42°C Features TE-W2 includes the following features: 11 user selectable color palettes 11 user selectable languages 2X ,4X digital zoom 5 removable spot measurements 5 Areas measurements...
- Page 7 Applications: Preventive maintenance Power industry: Power line and power facility thermal state checking; problem and defect diagnosis. Electrical system: Identify potential circuit overloads. Mechanical system: Reduce downtime and avoid catastrophic failure. Construction science Roof: Quick identification of water penetration problems. ...
-
Page 8: Standard Accessories
1.1 Standard accessories Infrared thermal image camera (with wrist strap) Carrying case Video out cable Lithium ion batteries User manual, Infrared report and analysis software system CD Lithium battery charger Lens cap TF card ... -
Page 9: Camera Overview
2 Camera overview 2.1 Function keys... - Page 10 [1] Power key Press and hold the Power Key for > 3 seconds to power on/off the camera. ! Note: After powering off, please wait ten seconds before powering the camera on again. [2] Select/Auto key (Marked “A”) The “A” or attribute button performs 2 functions. a) The first function is modification of selected parameters.
- Page 11 short press A, it will display sending dialog. [3] Cancel/Camera key (Marked “C”) Pressing and releasing the C key cancels the present operation when in Menu mode. Pressing and releasing the C key when an image is frozen or being viewed from memory, will return to real-time measurement status.
- Page 12 attribute box. Press four navigation keys to move the spot location. In line temperature measurement editing mode (activated immediately after adding a line or by selecting via the A key), press the Menu key to pop up the attribute box. If measurement line is horizontal, press Up and Down keys to move the line location;...
-
Page 13: Interface
2.2 Interface [1] USB to RJ45 output Used for internet connecting. [2] TF Card slot Accepting standard size TF card such as supplied 8GB capacity card, for device upgrade or image storage. [3] Video port It is a video output interface. [4] Power interface External power input interface. -
Page 14: Basic Operation
3 Basic operation 3.1 Battery Installation and Replacement Inserting or removing battery 3.1.1 Battery compartment is located inside the handle. Turn the cover counter-clockwise to remove. Remove battery for replacement. Insert the battery (the battery contacts must face into the battery compartment). -
Page 15: Replacing Battery
Replace the cover and screw down. ! CAUTION: Use only original manufacturer replacement battery. Use of incorrect battery may result in physical or electrical damage to the instrument due to incorrect voltage or physical size difference. 3.1.2 Replacing battery When battery displays empty and flashes for about 1 minute and 50 seconds, the instrument displays a low battery dialog and shut down automatically after about 10 seconds. -
Page 16: Battery Safety And Usage
3.2 Battery safety and usage Batteries should be stored in an ambient temperature of -4°F (–20°C) to 67.9°F (+20°C). Lithium batteries will self-discharge during storage, so they should be fully charged before storage. Self-discharge may affect long term battery performance. Furthermore, it is recommended that the battery should be charged in a set time, as below;... -
Page 17: Temperature Measurement
the focus manually until get clear image. ! Note:Focus is not clear, and will lead to measurement error. Press button “A” to auto calibrate to get the best image. Press “C” button for two times to switch the display image into fusion ... -
Page 18: Save Image
3.3.3 Save Image Obtain the current image to store, you can choose one of the following four ways: Press Ok button and will show panel menu, select the "photo" option in the menu, the system will automatically save images Press S key, the image will froze, and press the same key again and the ... -
Page 19: Operation Guide
use left and right arrow keys on the floating panels to select the icon, click "OK" key to enter the relevant interface. Main menu interface: via "up and down" key to select the menu icon, click "OK" key to enter the submenu. Sub-menu interface: via "up and down"... - Page 20 [1] Emissivity: the current emissivity setting [2] Reference Temperature: Fixed reference temperature [3] Result: Indicates the temperature value of the target object. Black and yellow denotes the temperature value of the selected object. [4] Spot temperature measurement:white crosshair [5] System: the current system time [6] Min temperature:...
-
Page 21: Floating Bar Interface
! NOTE: Not all models have all functions, so the working status screen may not show all features. 4.1.2 Floating Bar Interface Floating bar interface Floating bar interface : From left to right is namely the temperature measurement, video, photo, preview and settings manu. 4.1.3 Main Manu Main Manu The main menu items: display the main menu item, namely the document... -
Page 22: Sub-Manu Interface
management and system setting. 4.1.4 Sub-manu interface Sub-manu interface [1] Figure name: Displays the name of the dialog box. The name of the dialog box as shown in the example is "temperature measurement setting. [2] Item title: A dialog box may contain more than one item. As shown in the above figure [3] Item Content: each item corresponds to the content of a project, the left and right keys to make changes, ">"... -
Page 23: Recording
Temperature Measurement Object Adding Manu If select“ ”, then press OK key, then the all the objects will be cleared. ! NOTE: When you delete a single temperature measurement object, direclty press “A” key and choose the object, then press the "C" key to delete. 4.3 Recording This function is used to save the video, save format to MP4. -
Page 24: Preview
function of mark. Backup note will pop up in the OSD as followed. Voice record note for photo Continuous photos mark will appears in the status column if set the continuous photo 4.5 Preview This item is for the preview files of backup. Press confirming key. Pop up the floating items ,select preview and press confirming key will appears as followed . -
Page 25: Setting
4.6 Setting Main OSD Normal setting OSD Press confirming key will pop up the panel and select the SETTING to open the main menu. Select the Normal setting in the main menu. Normal setting OSD will pop up after pressing confirming key. Users could set the time of auto calibration / definition of shortcut key /Bluetooth/pattern of power saving/ brightness adjustment of LCD / unit of temperature / unit of distance .totally 7 items. - Page 26 better thermal image and improve the precision. The unit is second Auto calibration OSD Shortcut key :Users could set the Functions of shortcut key. System offers record .screenshot. Enlargement. Reduction. Enlarge brightness of LCD. Reduce brightness. of LCD Laser. Lightness. Adding or removing spot 1 of testing temperature.
- Page 27 Bluetooth :Turn on the Bluetooth will enable status of scanning and searching below,Turn off Bluetooth the status is not valid .Select scan and search key and start to scan the Bluetooth device .the model and the name of devices will show in the OSD .Enable status of Bluetooth the device will scan and search one time automatically Bluetooth OSD Power saving :Screen off and power off...
-
Page 28: Measuring Setting
Power saving OSD LCD brightness adjustment :It is valid when changing the brightness. LCD brightness adjust OSD 4.6.1 Measuring setting... - Page 29 Measuring setting Menu Press OK button to call out the Setting Menu. Select “Measuring Setting”,then press “OK” again to call out the setting interface. In this interface ,Level ,magnification,Environment Temp,Ref Temp can be set. Use UP &Down button to select ,” >” means there is sub menu, press Right Button to enter the sub menu.
-
Page 30: Adjustment
4.6.2 Adjustment Adjustment Menu Press OK button to call out the “Adjustment” under menu “Measuring Setting”. In this menu , Emissivity, Tcorrect, Distance , Humidity ,TReflect can be set. Use UP &Down button to select ,use LEFT & Right to set the value. ” >” means there is sub menu, press Right Button to enter the sub menu. -
Page 31: Image Setting
4.6.3 Image Setting Image Setting Menu Press OK button to call out the Image setting menu under “Setting” . in this menu , Manual/Auto-Enhance Mode, Alarm types, Alarm Tempe , IR transparency, Alarm color, Alarmlink, Tiem Interval can be set. Use UP &Down button to select ,use LEFT &... - Page 32 can be viewed in the image. If Slect Manual mode, User can set the pallet value to adjust the image quality. Press “UP” button to increase the level range , press Down to decrease the level range. Press Left button to reduce the upper limit, increase the bottom limit;...
- Page 33 Isotherm Setup Menu Isotherm: Activates the Isotherm display by displaying the image in the set temperature range by the specified color. Isotherm Color: 9 colors available for your choice,Setting to Off, disables the feature. Isotherm low value:Set the Isotherm low value。 ...
-
Page 34: Network Setup
4.6.4 Network setup Network Setup Menu Press the menu button to show up the floating panel and choose the “setup” option to active the main menu. Select “Network function. IP Address: This IP address must be the only one, can not be conflicted with the other IP address of the same network segment. -
Page 35: Tf Card Management
4.6.5 TF Card Management TF Card Management Figure TF Unload TF Card Format Figure... -
Page 36: Photo Setting
TF Card Format Successful Press the Enter key to pop up floating panel, then select "Settings" option to activate the main menu, select the "TF Card Management item in the setup menu. Unload:Unload TF card. Format: This function is used to format the TF card. Select the formatting options, pressing the confirm key to format, press cancel or "C"... - Page 37 option to activate the main menu, selected the camera settings option Associated Pictures: This function is to associate the infrared images with digital image, to save the picture together. Image annotation mode : This option kinds annotations,audio annotations and text annotations. Audio annotations is to add voice when you save the picture;...
-
Page 38: System Setting
4.6.7 System Setting System Setting Manu Press the Enter key to pop up "Settings" option to activate the main menu, select "System Settings" item in the setup menu. Users can customize the set system language, time / date formats, time / date, restore the factory value items. - Page 39 Time Setting: Time Setting Manu Customer can via the Time Setting manu to set the thermal imaging camera’s time. After the setting, the data the time will be saved. Users can customize to set the year, month, day, hour, minute entries. Press the left and right key to do the settings.
- Page 40 Recover Factory Setting ! Note: Recover factory setting will cancel all user-defined parameters. System Version Info: System Version Figure Display thermal imaging device model, device number, software version number and MAC address Import: New TF card the Create DCIM / Import directory on the TF card, import the fixed file name as PicNote.cfg File Name Form:...
-
Page 41: File Management
menu and then click the Export button to export the contents stored in the TF card the DCIM / Export directory. 4.7 File Management 4.7.1 Playback Two modes of playback: File Management Figure 1、 File management mode: press the Enter key to pop up floating panel select "Settings"... - Page 42 Preview Mode Figure 2、 Preview mode: press the OK button to pop-up floating panel to select "Preview" option, enter the preview mode. Through the left and right keys to switch selection, selected press the OK button to enter the playback. Pressing the "C" key to exit open image and return to the measurement state.
-
Page 43: Bluetooth Transmission
The icon buttons from left to right is as follow: play / pause, stop, rewind, fast-forward, the former one, the next. Image Playback Interface The image playback interface: Via the left, right key to select the play button on the status bar, press the "confirm" key to take effect on the next key to show and hide the playback status bar (press the "on"... -
Page 44: Delete
Bluetooth Transmission Figure Press confirm key, will show the progress bar, as shown below: Transmission Progress Bar 4.7.3 Delete This function is used to delete data stored in files on the TF card. Open File Manager by the up and down keys to select the file you want to delete, press the "S"... - Page 45 File Delete Figure ! Note: Before deletion, make sure that the file is no longer needed or have backup, the deleted image can not be recovered...
-
Page 46: Webpage Operate
5 Webpage operate 5.1 Webpage login Will pop up a menu after inputting the IP of camera,as bellow: Login interface User ID and code both is admin .Enter the operate menu after press the login. If ActiveX cannot download automatically .please download manually. 5.2 Surveillance image Surveillance image will be shown as follow :... -
Page 47: Function Operate
Automatic /manually:refer to manual。 Calibration :refer to manual 。 Original data save:There are two types. One is frame rate Another is interval time between two frames. Frames rate means frames seconds. Could different modes like continuous /5/20/50/100/random. Interval time means time between two frame .it could also set different modes .like 20/40/100/200/1000/random。... -
Page 48: Photo Setting
System Configuration Manu The manu include the setting for time, for system setting and for the short key, see as the operation guide. 5.3.2 Photo Setting Click photo setting, and come to the setting manu, see as the follow: Photo Setting The details please see as the operation guide... -
Page 49: Graphic Setting
5.3.3 Graphic setting Click the setting, and see as the follow: Graphic Setting It include tow sub-manu, one is graphic setting, another is the alarm setting. 5.3.4 Measurement Setting Click the measurement setting, and see as follow: Measuring Parameters Menu Under Measuring Parameters Menu there are sub-menu of Measuring Settings, measuring correction and isothermal . -
Page 50: Network
5.3.5 Network User can enter network setting with pressing network button,refer below picture Network setting Menu Refer the operation manual for the detailed functional descriptions. 5.3.6 Local Settings Press Local settings can enter into local settings menu. Refer below picture: Menu of local settings Default Vedio port number is 5000 . - Page 51 Sub-manu Restore factory Setting: Refer operation Manual for detailed funcation description. Press Firmware update,it will switch into upgrade interface as below: Hardware Upgrade Figure upload/download configuration : click this function, and will seeasfolow: upload/download configuration figure System State:Click system situation, then will see : System State Figure...
-
Page 52: Configuration
6 Configuration Technical Specification Item TE-W2 Type Un-cooled FPA micro-bolometer Array size 384*288 Pixel Pitch 25μm Detec Spectral range 8-14μm Frame rate 50Hz Thermal 0.06℃@30℃ sensitivity 25°×19° Focus 10cm Distance Lens Focus Manual Interface Type Screw Type IFOV 1.36mrad 2×、4X... - Page 53 Auto/manual saving, single thermal images and CCD Stora Mode image association, thermal video and CCD association, thermal and CCD fusion function. JPEG format Format H.264 format image JPEG、H.264,include fusion format Voice annotation 60s, saved together with the image Text annotation can upload File Manu can upload...
-
Page 54: Troubleshooting
7 Troubleshooting Please follow the table below to diagnose and correct the problem. If problem still exists, please contact our service department (400-887-1897). Problem Cause & Solution Battery installed installed incorrectly →Install battery or re-install battery camera does Battery is out of power. ...
Need help?
Do you have a question about the TE-W2 and is the answer not in the manual?
Questions and answers