
Related Manuals for Vinotemp VT-34-2ZONE


Summary of Contents for Vinotemp VT-34-2ZONE
- Page 1 A P R O U D H E R I T A G E O F E X P E R I E N C E & Q U A L I T Y W i n e C e l l a r V T - 3 4 - 2 Z O N E ( 3 4 b o t t l e ) O W N E R ’...
- Page 2 W W W . V I N O T E M P . C O M...
- Page 3 Y o u r W i n e C e l l a r This unit can be used for storage and/or service. The unit has a glass door and soft interior light that you can leave on to elegantly display your wine. S e r v i n g W i n e s Storing wines at the proper temperature is important.
- Page 4 Upon receipt and inspection of unit, the supply cord must be replaced if it is damaged. Contact our customer service at 1-800-777-8466 or info@vinotemp.com. • Let the unit rest UNPLUGGED for 24 hours once you have it placed in your home.
-
Page 5: Table Of Contents
TABLE OF CONTENTS PARTS AND SPECIFICATIONS ............6 IMPORTANT SAFETY INSTRUCTIONS ..........7 CORD INSTRUCTIONS ..............8 WINE CELLAR INSTALLATION ............8 OPERATING INSTRUCTIONS ............9 TEMPERATURE CONTROL ............. 9 WINE RACK INSTALLATION / REMOVAL ........10 REVERSAL OF DOOR SWING ............11 CLEANING AND CARE .............. -
Page 6: Parts And Specifications
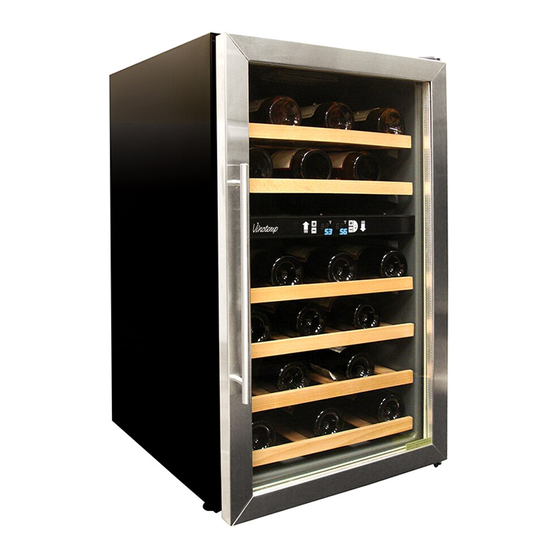
5. Temperature adjustment (for upper shelves, white wines) 6. LED display (for upper shelves, white wines) 7. Light button 8. Temperature adjustment (for lower shelves, red wines) 9. LED display (for lower shelves, red wines) Item Number VT-34-2ZONE Type 2 Temp. Bottle Capacity Approx. 34 Dimension 33.75”... -
Page 7: Important Safety Instructions
IMPORTANT SAFETY INSTRUCTIONS When using an electrical appliance, basic precautions should be followed to reduce the risk of fire, electric shock, and personal injury. 1. Use this appliance only as described in this manual. Other uses are not recommended and may cause fire, electric shock or injury. 2. -
Page 8: Cord Instructions
CORD INSTRUCTIONS For your protection, this unit should be properly grounded. Unit is equipped with a 3- conductor cord set that has a molded 3-prong grounding-type plug, and should be used in combination with a properly connected grounding-type outlet as shown in figure A. It is not recommended to use this wine cellar with an extension cord or power board. -
Page 9: Operating Instructions
OPERATING INSTRUCTIONS Gently place/slide the racks in the wine cellar. Determine the best temperature setting to use. Place bottles inside the cooler. Plug the power cord into a standard electrical outlet. Limit the frequency of opening the door to conserve energy and maintain proper storage temperature. -
Page 10: Wine Rack Installation / Removal
WINE RACK INSTALLATION / REMOVAL NOTE: To prevent damaging the door gasket, make sure to have the door open all the way when pulling shelves out of the rail compartment. To insert a rack in the cabinet (See Figure 1): 1. -
Page 11: Reversal Of Door Swing
REVERSAL OF DOOR SWING The door of the wine cellar could be opened either from the left or right side. The wine cellar is installed to open from the left side. To reverse, please do as follows: Remove the hinge cover on the top right side of the cellar, then remove the bolts and remove the hinges, and put them to the side. -
Page 12: Cleaning And Care
CLEANING AND CARE • Always unplug the wine cellar before cleaning. • Do not use benzene, scrubbing brushes or chemical cleaners as these will damage the unit. • Use only a mild, nonabrasive cleanser to clean the exterior of the cabinet. -
Page 13: Troubleshooting Guide
TROUBLESHOOTING GUIDE You can solve many common wine cellar problems easily, saving you the cost of a possible service call. Try the suggestion below to see if you can solve the problem before contacting Vinotemp at info@vinotemp.com. PROBLEM POSSIBLE CAUSE Door will not •... - Page 14 W W W . V I N O T E M P . C O M...
-
Page 15: Terms And Conditions
Note: Unfinished wood is subject to warping; all wood surfaces must be sealed before placing cellar into service. Improper placement of the unit will void the warranty. By Vinotemp in writing, any third party repair facility must be pre-approved before providing parts free of charge. -
Page 16: Service & Important Notice
Rancho Dominguez, CA 90221 www.vinotemp.com Vinotemp is a registered trademark of Vinotemp International. All products, features, and services are subject to change without notice. We cannot guarantee the accuracy of the contents of this document. We disclaim liability for errors, omissions, or future changes.
Need help?
Do you have a question about the VT-34-2ZONE and is the answer not in the manual?
Questions and answers