Table of Contents
Advertisement
Table Of Contents:
FCC COMPLIANCE
This device complies with Part 15 of the FCC rules and with RSS-210 of Industry Canada.
Operation is subject to the following two conditions:
1. This device may not cause harmful interference, and
2. This device must accept any interference received, including any interference that may cause undesired operation.
Warning!
Changes or modifications not expressly approved by the party responsible for compliance could void the user's authority
to operate the equipment
NOTE: The manufacturer is not responsible for any radio or TV interference caused by unauthorized modifications to this
equipment. Such modifications could void the user's authority to operate the
PATENTED: www.voxxintl.com/company/patents
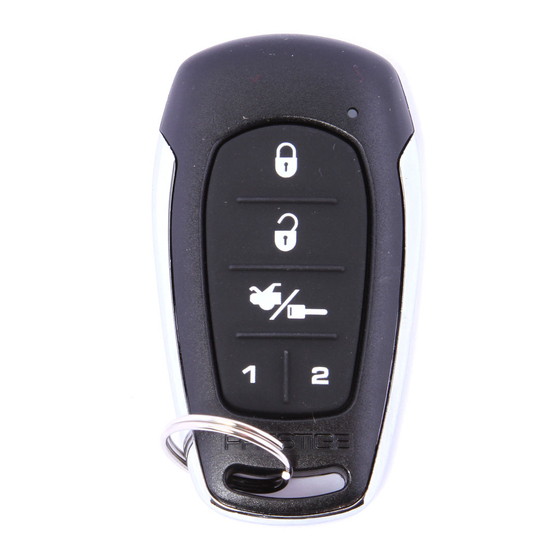
Model APS-510E
5 Button Remote Security System
with Dual Stage Shock Sensor
Owners Guide
equipment.
Page 1
Page 2
Page 3
Page 3 - 4
Page 4 - 5
Page 5 - 6
Page 6
Page 6 - 7
Page 7
Page 7 - 8
Page 8 - 9
Page 10
Page 10
Page 10 - 11
Page 11 - 12
Page 12
Page 12
Page 13
Page 15
Page 16
128-9313
1 of 16
Advertisement
Table of Contents

Related Manuals for Prestige APS-510E


Summary of Contents for Prestige APS-510E
-
Page 1: Table Of Contents
Model APS-510E 5 Button Remote Security System with Dual Stage Shock Sensor Owners Guide Table Of Contents: Features and Options Page 2 About Your "Code Hopping" Transmitters Page 3 Arming Your System Page 3 - 4 Protection While The System Is Armed... -
Page 2: Features And Options
Remote Keyless Entry ( must have power door locks ) Multiple Vehicle Capable Remote Starter Remote Power Window Roll Up Two Step Unlock Configurable PRESTIGE Headlight Illumination During Arming, Disarming, Or Both Interior Illumination Upon Disarm Page 2 128-9313... -
Page 3: About Your "Code Hopping" Transmitters
YOUR " CODE HOPPING" TRANSMITTERS The transmitters included with your new security system use the most advanced and secure form of radio frequency transmission available on any current automotive security system. Some of today’s sophisticated auto thieves use a device known as a code grabber, which will receive and store the signal from your keychain transmitter, and retransmit at a later time to disarm your system. -
Page 4: Protection While The System Is Armed
SILENT ARMING - ACTIVE 1. Turn off the engine, exit the vehicle, and close all doors, hood lid, and trunk lid. 2. Press and hold the Lock button on the keychain transmitter for 2 seconds. Dash mounted LED begins to flash slowly. ... -
Page 5: Disarming Your System
left a door opened, the alarm will sound for six 30 second cycles, remain armed and ignore that triggered zone. Whenever the system is armed, the dash mounted LED indicator will slowly flash. This serves as a visual deterrent to the potential thief. The LED is a very low current bulb and will not cause the vehicle’s battery to drain, even when left unattended for extended periods. -
Page 6: While The System Is Sounding
Headlight Illumination - Optional Illuminated Entry Upon Disarm SILENT DISARMING 1. As you approach the vehicle, press and hold the Unlock button on the keychain transmitter for 2 seconds. Dash mounted LED turns off. If passive arming was selected during the installation, then the LED will start flashing rapidly, indicating that the system is rearming automatically. -
Page 7: Push Button Led/Valet/Override/Programming Switch
If the LED is flashing one time...pause...one time...pause...etc., then an intrusion attempt was made to the shock sensor, or an accessory triggering device that may have been added to the system. If the LED is flashing two times...pause...two times...pause...etc., then an intrusion attempt was made to a hood or trunk pin switch that was added to the system, or to a light activated entry point if the alarm was installed using the voltage sensing feature. -
Page 8: Programming Your Custom Override Code
3. Within 5 seconds, press and release the PBLED override switch. The alarm system will stop sounding and enter the (bypassed) mode. You can now start and operate the vehicle normally. Typically this override mode is used only if the transmitter has become inoperative. Programming Your Custom Override Code: Unlike override switches easily found, and defeated, this security system allows the consumer to program a personal override code, offering a higher level of security. - Page 9 Custom Code Programming Example: To Change the code from the factory pre-assigned code of 11 to “52” you would do the following: 1. Disarm the system by use of the transmitter, or by use of the emergency override sequence. 2. Turn the ignition switch to the on position. 3.
-
Page 10: Using The Custom Code Override
MANUALLY OVERRIDING YOUR SYSTEM USING THE CUSTOM CODE OVERRIDE Assuming the override code programmed has not been changed, and the default override code of 11 is in the system's memory. 1. Enter the vehicle and turn the ignition switch to the on position. NOTE: The siren will sound. -
Page 11: Additional Remote Function (Channel 3)
1. Press and hold the ARM or DISARM button on the keychain transmitter for 3 or more seconds. The alarm will immediately sound. 2. To stop the alarm, press and hold the ARM or DISARM button on the transmitter again for 3 seconds. If the button is not pressed, the alarm will automatically stop after 30 seconds. -
Page 12: Ignition Controlled Lock/Unlock
To activate the optional accessory, press the programmed button on the keychain transmitter for up to 8 seconds for continuous output, or press and release for momentary activation. The optional accessory will immediately engage. Check with your installation center for more information on the optional accessory that may have been installed and how it is accessed. -
Page 13: Programming New Or Replacement Transmitters
PROGRAMMING NEW OR REPLACEMENT TRANSMITTERS (BANK 1) The Transmitter Model Name 145BP Is Also Found On The Back Of The Transmitter Case Battery Use CR2032 1. Turn the ignition key to the on position. 2. Press and release the valet/programming switch 3 times (Siren Chirps). 3. - Page 14 Two Vehicle Operation From One Remote Control This remote has the ability to operate 2 similar alarms from a single remote transmitter. To toggle on and off vehicle one or two,,, Press the Trunk/Key button + the Lock button for 5 seconds. The LED flashes 2 times.
-
Page 15: Transmitter Battery Replacement
Transmitter Battery Replacement: 1. Locate and remove the "00" point philips head screw on the back of the transmitter case. 2. Carefully separate the front case from the rear. 3. Slide the CR2032 battery out from under the battery clip and dispose of properly. -
Page 16: System Functions At A Glance
APS-510E SYSTEM FUNCTIONS AT A GLANCE DASH LED INDICATORS RAPID FLASHING PASSIVE ARMING SLOW FLASHING ARMED DISARMED ON SOLID VALET MODE 3 FLASH...PAUSE INTRUSION ZONE 3 2 FLASH...PAUSE INTRUSION ZONE 2 1 FLASH...PAUSE INTRUSION ZONE 1 SIREN CHIRP INDICATORS *1 CHIRP...
Need help?
Do you have a question about the APS-510E and is the answer not in the manual?
Questions and answers