Stihl 031 Instruction Manual / Owners Manual
Hide thumbs
Also See for 031:
- Instruction manual (280 pages) ,
- Instruction manual (24 pages) ,
- Instruction manual (116 pages)
Table of Contents
Advertisement
Advertisement
Table of Contents

Subscribe to Our Youtube Channel
Related Manuals for Stihl 031


Summary of Contents for Stihl 031
- Page 47 STIH) Chainsaw Safety Manual...
- Page 48 STIHL green labeled reduced kickback bars and low kickback chains and a STIHL Quickstop chain brake. Contact your STIHL dealer or the STIHL distributor for your area if you do not understand any of the instructions in STIHl this manual.
- Page 49 Sudden surprise contributes to reduce the risk of kickback injury. Kickback may occur when the nose or accidents. Ask your STIHL dealer about these tip of the guide bar touches an object, or devices. Keep a good firm grip on the saw...
- Page 50 English / USA Use caution when handling fuel. 10. Do not operate a chainsaw that is 17. All chainsaw service, other than the Move the chainsaw at least 10 feet damaged, improperly adjusted, or items listed in the Owner's Manual (3 m) from the fueling point before not completely and securely maintenance instructions, should be...
-
Page 51: Safety Precautions
These safety precautions and warnings operating a chainsaw. hand saw also apply to the operation of apply to the use of all STIHL chainsaws. Warning! chainsaws. However, because a Different models may have different chainsaw is a high-speed, fast-cutting parts and controls. - Page 52 – Many STIHL models are available syndrome. Therefore, continual and with an anti-vibration (AV) system Protect your hands with regular users should monitor closely the...
- Page 53 STIHL or expressly approved by STIHL Grip the front handle and place the Preparation for the use of the saw for use with the specific STIHL saw muffler away from the body. models are authorized. Although certain Take off the chain guard and inspect for unauthorized attachments are usable safety in operation.
- Page 54 Fueling and fumes, remove the fuel filler cap on To do this with this STIHL the STIHL product carefully so as to Your STIHL chainsaw uses an oil-gaso- cap, raise the grip on the allow any pressure build-up in the tank line mixture for fuel (see chapter "Fuel"...
- Page 55 The screwdriver end of Manual. Proper starting methods reduce ground. Make sure the chain brake is the STIHL combination the risk of injury. Do not drop start. This engaged, grip the front handle of the wrench or other similar method is very dangerous because you chainsaw firmly with your left hand.
- Page 56 Manual. If you cannot set the correct idle Let the engine cool down sitting on touches any object, it may cause kick- speed, have your STIHL dealer check concrete, metal, bare ground or solid back to occur (see section on reactive your saw and make proper adjustments wood (e.g.
- Page 57 If you have any suspect a clogged screen, have your particular dust, mist or fume at issue, reason to believe that you might be muffler maintained by a STIHL Servicing consult your employer, governmental cutting asbestos, immediately contact Dealer.
- Page 58 Do not operate your chainsaw with the questions as to whether the buffers operation is dangerous because the starting throttle lock engaged. Cutting should be replaced, consult your STIHL operator may lose control. with the starting throttle lock engaged servicing dealer.
- Page 59 English / USA Position the chainsaw in such a way that Warning! your body is clear of the cutting Never touch a chain with your hand or attachment whenever the engine is any part of your body when the engine is running.
- Page 60 (and work against the and force of the kickback reaction. Some operator). If the rotating chain is STIHL bar and chain types are designed suddenly stopped by contact with any to reduce kickback forces. STIHL solid object like a log or branch or is...
- Page 61 Take the saw kickback bar, etc. In order for powerheads below 3.8 cubic to your local STIHL Service Center! Do inch (62 cm³) displacement to comply not use the saw until the problem has with the computed kickback angle b) saws with a displacement of been rectified (see the section "Chain...
- Page 62 Quickstop activating lever, this contact will activate the Quickstop. The chain STIHL offers a variety of bars and brake on most new model STIHL chains. STIHL reduced kickback bars chainsaws can also be activated by and low kickback chains are designed to inertia.
- Page 63 English / USA reduce the risk of kickback injury. Other Please ask your STIHL dealer to Low kickback chain chains are designed to obtain higher properly match your powerhead with the Some types of saw chain have specially cutting efficiency or sharpening ease but...
- Page 64 Use extreme caution when speed before it contacts the wood. Warning! reentering a previous cut. Do not mount a bow guide on any STIHL Warning! Do not attempt to plunge cut if you chainsaw. Any chainsaw equipped with Use extreme caution when cutting small...
-
Page 65: Cutting Techniques
English / USA Cutting Techniques Felling Felling is cutting down a tree. Before felling a tree, consider carefully all conditions which may affect the direction of fall, including: The intended direction of the fall. The natural lean of the tree. B = Pushback: Felling Instructions: Any unusually heavy limb structure. - Page 66 English / USA 45° 45° Escape path Buttress roots Gunning sight First clear the tree base and work area If the tree has large buttress roots, cut When making the felling notch, use the from interfering limbs and brush and into the largest buttress vertically first gunning sight on the shroud and housing clean its lower portion with an ax.
- Page 67 English / USA Conventional cut Open-face technique Making sapwood cuts A = felling notch - determines the A = felling notch - determines the For medium sized or larger trees direction of the fall direction of the fall make cuts at both sides of the trunk, at same height as subsequent For a conventional cut: For an open-face cut:...
- Page 68 English / USA B = Felling cut C = Hinge Warning! Conventional and open-face technique: Helps control the falling tree Be extremely careful with partially fallen Do not cut through the hinge -you Begin 1 to 2 inches (2,5 to 5 cm) trees which are poorly supported.
- Page 69 English / USA First, cut a large, wide felling notch. Make a plunge cut in the centre of the notch. The plunge cut is made with the guide bar nose. Begin the plunge cut by applying the lower portion of the guide bar nose to the tree at an angle.
- Page 70 English / USA If you are inexperienced with a chainsaw, plunge-cutting should not be attempted. Seek the help of a professional. Limbing Limbing is removing the branches from a fallen tree. Warning! There is an extreme danger of kickback during the limbing operation. Do not work with the nose of the bar.
- Page 71 Maintenance, replacement, or repair Owner's Manual. Have such work of the emission control devices and performed at your STIHL service shop systems may be performed by any only. nonroad engine repair establishment or individual. However if you claim...
- Page 72 Keep the chain, bar and sprocket clean; chainsaw should be returned to trained replace worn sprockets or chains. Keep personnel such as your STIHL servicing the chain sharp. dealer for periodic inspection and You can spot a dull chain when easy-to-...
-
Page 73: Maintenance Chart
Check (wear, damage) Clean and turn over Guide bar Deburr Replace Chain sprocket Check Clean Air filter Replace Inspect AV elements (rubber buffers, springs) Replace Cooling inlets Clean Cylinder fins Clean 1) STIHL dealer 2) see "Chain brake" Chainsaw Safety Manual... - Page 74 English / USA Please note that the following maintenance intervals apply for normal operating conditions only. If your daily working time is longer than normal or cutting conditions are difficult (very dusty work area, resin-rich wood, tropical wood etc.), shorten the specified intervals accordingly. If you only use the saw occasionally, extend the intervals accordingly.
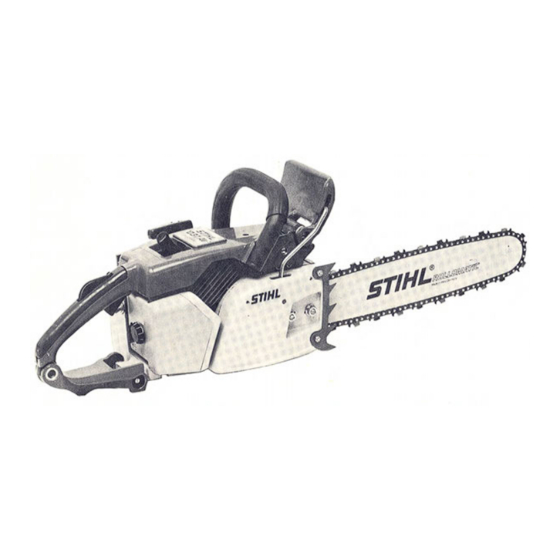
- Page 75 English / USA Main Parts of the Saw 1 Twist lock 2 Carburetor adjusting screws 3 Fuel pump (easy start*) 4 Decompression valve* 5 Chain brake 6 Muffler 7 Chain sprocket 8 Chain sprocket cover 9 Chain catcher 10 Chain tensioner (side) 11 Chain tensioner (front) 12 Guide bar 13 Oilomatic saw chain...
- Page 76 English / USA 16 Oil filler cap 17 Bumper spike 18 Front hand guard 19 Front handle (handelbar) 20 Starter grip 21 Spark plug boot 22 Master Control lever 23 Fuel filler cap 24 Throttle trigger 25 Throttle trigger interlock 26 Rear handle 27 Rear hand guard # Serial number...
- Page 77 English / USA Definitions 9 Chain Catcher 18 Front Hand Guard Twist Lock Helps to reduce the risk of operator Provides protection against Lock for carburetor box cover. contact by a chain if it breaks or projecting branches and helps Carburetor Adjusting Screws comes off the bar.
- Page 78 English / USA 26 Rear Handle The support handle for the right hand, located at the rear of the saw. 27 Rear Hand Guard Gives added protection to operator's right hand. Guide Bar Nose The exposed end of the guide bar. (not illustrated, see chapter "Tensioning the Saw Chain") Clutch...
- Page 79 English / USA Chainsaw Safety Manual...
- Page 80 ! WARNING! ! WARNING! The engine exhaust from this product The engine exhaust from this product contains chemicals known to the State contains chemicals known to the State of California to cause cancer, birth of California to cause cancer, birth defects or other reproductive harm.
Need help?
Do you have a question about the 031 and is the answer not in the manual?
Questions and answers
What is the oil gas mixture used