Table of Contents
Advertisement
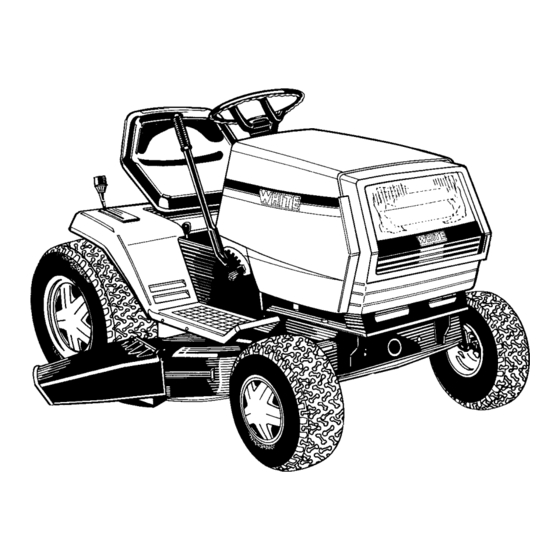
OPERATOR'S MANUAL
LT-17
Model Number
686
LAWN TRACTOR
IMPORTANT: READ SAFETY RULES AND INSTRUCTIONS CAREFULLY
Warning:
This unit is equipped with an internal combustion engine and should not be used on or near any unimproved forest-
covered, brush-covered or grass-covered land unless the engine's exhaust system is equipped with a spark arrester meeting
applicable local or state laws (if any). If a spark arrester is used, it should be maintained in effective working order by the operator.
In the State of California the above is required by law (Section 4442 of the California Public Resources Code). Other states may have
similar laws. Federal laws apply on federal lands. A spark arrester for the muffler is available through your nearest engine authorized
service dealer or contact the service department, P.O. Box 361131 Cleveland, Ohio 44136-9722.
WHITE OUTDOOR PRODUCTS COMPANY P.O. BOX 361131 CLEVELAND, OHIO 44136-9722
FORM NO. 770-10063A
PRINTED IN U.S.A.
(9/98)
Advertisement
Table of Contents

Related Manuals for White Outdoor LT-17 686


Summary of Contents for White Outdoor LT-17 686
-
Page 1: Model Number
Federal laws apply on federal lands. A spark arrester for the muffler is available through your nearest engine authorized service dealer or contact the service department, P.O. Box 361131 Cleveland, Ohio 44136-9722. WHITE OUTDOOR PRODUCTS COMPANY P.O. BOX 361131 CLEVELAND, OHIO 44136-9722 FORM NO. 770-10063A PRINTED IN U.S.A. -
Page 2: Section 1: Finding Your Model Number
This is where your model number will be. (Model Number) (Serial Number) This is where your serial number will be. Copy the model number here: WHITE OUTDOOR PRODUCTS COMPANY P.O. BOX 361131 CLEVELAND, OHIO 44136 Copy the serial number here:... - Page 3 Slope Gauge...
-
Page 4: Section 3: Important Safe Operation Practices
SECTION 3: IMPORTANT SAFE OPERATION PRACTICES WARNING: THIS SYMBOL POINTS OUT IMPORTANT SAFETY INSTRUCTIONS WHICH, IF NOT FOLLOWED, COULD ENDANGER THE PERSONAL SAFETY AND/OR PROPERTY OF YOURSELF AND OTHERS. READ AND FOLLOW ALL INSTRUCTIONS IN THIS MANUAL BEFORE ATTEMPTING TO OPERATE YOUR LAWN MOWER. FAILURE TO COMPLY WITH THESE INSTRUCTIONS MAY RESULT IN PERSONAL INJURY. -
Page 5: Slope Operation
• Your mower is designed to cut normal residential 3. CHILDREN grass of a height no more than 10". Do not attempt to Tragic accidents can occur if the operator is not alert to the mow through unusually tall, dry grass (e.g., pasture) presence of children. - Page 6 • Check the blade and engine mounting bolts at • Muffler, engine and belt guards become hot during frequent intervals for proper tightness. Also, operation and can cause a burn. Allow to cool visually inspect blade for damage (e.g., excessive down before touching.
-
Page 7: Section 4: Unpacking
SECTION 4: UNPACKING TO REMOVE UNIT FROM CRATE 6. Loose parts (may include the owner’s guide, steering wheel, optional oil drain sleeve or hose, 1. Remove all screws from the top of the crate. battery fluid, chute deflector, optional mulching 2. -
Page 8: Battery Identification
BATTERY IDENTIFICATION CHARGE THE BATTERY after the 30 minute standing period. Battery P/N 725-1705D—Charge at 2-3 amps for one hour. Battery P/N 725-1707D, 725- 0453G and 725-1750—Charge at 6 amps for one hour. NOTE: If you charge the battery at a lower AMP rate, use a hydrometer to make sure the battery is completely charged. -
Page 9: Attaching The Seat
ATTACHING THE SEAT Pull out tab on seat stop and hold open while sliding seat out of seat pivot bracket. See Figure 4. Turn the seat around and line up plastic seat spacers with the Seat Pivot slots in seat pivot bracket. Slide seat in until front Bracket seat spacer engages the seat stop. -
Page 10: Installing The Mulching Plug
INSTALLING THE MULCHING PLUG (OPTIONAL EQUIPMENT) 1. Remove the mulching plug from the box packed with your lawn tractor (If not already removed from the deck). Wing Nut Chute Deflector 2. Remove the wing nut from the bolt on the mulching plug. -
Page 11: Installing The Battery
INSTALLING THE BATTERY (TYPE “A” BATTERY) NOTE: If battery is put into service after date shown on top of battery, charge for minimum of 1 hour at 6-10 amps 1. Lift the seat. Positive Terminal (Inside Rubber Boot) 2. Remove the plastic cover from the negative terminal. -
Page 12: Section 6: Controls
AMMETER SECTION 6: CONTROLS The ammeter registers the rate of battery charge or discharge. The ammeter will register on the discharg- IGNITION SWITCH ing side with starting the engine. It should register on the opposite side (charging) when the engine is run- The ignition switch is located on the dashboard. -
Page 13: Section 7: Operation
PARKING BRAKE Turn the deck height adjustment knob clockwise to raise the cutting height; turn it counterclockwise to The speed control lever is used to set the parking lower the cutting height. brake. To set the parking brake, depress the clutch- brake pedal. -
Page 14: Gas And Oil Fill-Up
GAS AND OIL FILL-UP IMPORTANT: If you strike a foreign object, stop engine. Remove wire from spark plug, Check the oil level and add if necessary. Service thoroughly inspect the unit for any damage, and the engine with gasoline as instructed in the repair the damage before restarting and operating separate engine manual packed with your the mower. -
Page 15: Section 8: Adjustments Warning
1. Place shift lever in NEUTRAL. 2. Restart engine. 3. Place speed control lever in high speed position. 4. Release clutch-brake pedal fully. 5. Depress clutch-brake pedal. 6. Place speed control lever in desired position. 7. Place shift lever in either FORWARD or REVERSE, follow normal... -
Page 16: Wheel Adjustment
WHEEL ADJUSTMENT Check the adjustment by placing the lift lever in the BLADES STOP position. The deck should move up The caster (forward slant of the king pin) and the and forward, allowing the belt to become loose. camber (tilt of the wheels out at the top) require no Start and test for disengagement. -
Page 17: Speed Control Adjustment
Speed Control Lever Ferrule Speed Variable Speed Control Torque Bracket Assembly Back of Slot Hairpin Clip Speed and Flat Washer Control Speed Cotter Pin Link Control and Flat Washer Stop Rod Lever Back Speed Control of Slot Ferrule Hairpin Clip and Flat Washer Brake Ferrule... -
Page 18: Section 9: Lubrication Warning
BRAKE ADJUSTMENT (See Figure 20) SECTION 9: LUBRICATION The brake is located by the right rear wheel inside the frame. During normal operation of this machine, the WARNING: Always stop engine and brake is subject to wear and will require periodic disconnect spark plug wire before cleaning, examination and adjustment. -
Page 19: Section 10: Maintenance Warning
FUEL FILTER SECTION 10: MAINTENANCE Your unit is equipped with a replaceable in-line fuel filter. Replace filter whenever contamination or WARNING: Disconnect the spark plug discoloration is noticed. Order replacement filter wire and ground against the engine before through your authorized engine service dealer. performing any adjustments, repairs or maintenance. - Page 20 BATTERY CARE AND MAINTENANCE CLEAN THE BATTERY (TYPE “A” BATTERY) Clean the battery by removing it from the unit and washing with a baking soda and water solution. If Type “A” batteries are sealed and are maintenance necessary, scrape the battery terminals with a wire free.
- Page 21 DECK BELT Self-Tapping Stabilizer Belt 1. Place the lift lever in the engaged (all the way Screws Plate Guard forward) position. 2. Disconnect the spring which is attached to a bracket on the transaxle, inside the right rear wheel. Use a spring puller or other suitable tool. NOTE: When reassembling, make certain belt Deck...
-
Page 22: Section 11: Off-Season Storage
Transmission Shift Lever Bracket Pulley Variable Hex Bolt Speed Pulley Rear Pins Drive Belt Idler Pulley Variable Speed Pulley Figure 26 FRONT DRIVE BELT 1. To remove the front drive belt, first remove the Figure 28 rear drive belt from the idler pulley and variable 9. -
Page 23: Section 12: Optional Equipment
SECTION 12: OPTIONAL SECTION 13: LABELS EQUIPMENT PART DESCRIPTION At the time of manufacture of lawn tractor, the following optional equipment is available. 777I20239 Dash w/o PTO 777I20243 Height Adjustment Knob NOTE: These lawn tractors are not designed for 777I20270 Deck Lift ground-engaging equipment (tillers, plows, etc.). -
Page 24: Section 14: Trouble Shooting Guide
SECTION 14: TROUBLE SHOOTING GUIDE Possible Trouble Corrective Action Cause(s) Engine will Safety switch There are two switches in the starting circuit of your unit: the clutch pedal switch and not crank button not the deck lift lever switch. Make certain the actuator is fully depressing the buttons on depressed. - Page 25 Notes...
- Page 26 Model 686 GREEN HEADLIGHTS ORG/BLK SEAT SW. 725-1303 725-1439 YEL/BLK ORG/WHT GREEN DECK SW. 725-1657A BLUE ORANGE ORANGE ORG/BLK ORG/WHT LIGHT SW ORG/BLK 725-0634 KEY SW 725-1396 MAGNETO YELLOW WHITE MAIN HARNESS ALTERNATOR 629-0306B ALTERNATOR RED/BLK YEL/WHT AFTERFIRE SOL. ORG/BLK CLUTCH SW 725-1657A OIL PRESSURE...
- Page 27 Model 686...
- Page 28 Model 686 PART DESCRIPTION PART DESCRIPTION 731-1429 Hood 750-0755 Spacer .33" I.D. x .625" O.D. 710-0896 Hex Wash. B-Tap Scr. 1/4 x .62" Lg. 710-0167 Carriage Bolt 1/4-20 x .50" Lg.* 726-0233 Bolt Retainer 1/4" I.D. 736-0278 Fl-Wash. .328" I.D. x .68" O.D. 17782 Retainer Clip 710-0599...
- Page 29 Model 686...
- Page 30 Model 686 REF. PART DESCRIPTION REF. PART DESCRIPTION 731-1904 Steering Wheel Cap 634-0051 Front Wheel Rim Only 710-0643 Hex Bolt 5/16-18 x 1" Lg. 741-0569 Bearing 736-0242 Belleville Wash. .345" I.D. 736-0285 Fl-Wash. .635" I.D. x 1.59" O.D. 731-1869 Steering Wheel 731-2290 Hub Cap 17198A...
- Page 31 Model 686...
- Page 32 Model 686 REF. PART DESCRIPTION REF. PART DESCRIPTION 17840 Transaxle Mtg. Brkt. 748-0234 Shoulder Spacer .27" Lg. 736-0119 L-Wash. 5/16" I.D.* 747-0530A Speed Control Link 783-0310E Lower Frame Ass’y. 741-0405 Truss Bearing .56 Dia. x 1.25" 712-0287 Hex Nut 1/4-20 Thd.* 720-0232 Shift Knob 736-0329...
- Page 33 Model 686 Single Speed Transaxle-RH Model 618-0163B...
- Page 34 Model 686 REF. PART DESCRIPTION REF. PART DESCRIPTION 732-0614 Wire Ring 736-0371 Fl-Wash. .344" I.D. x .875" O.D. 716-0231 “E”—Ring 717-0700 Actuating Arm 710-1325 Hex Tap Scr. 1/4-20 x 1.625 Lg. 761-0198 Brake Yoke 719-0367 Upper Housing 717-0682 Puck Plate 711-1109 Input Shaft 717-0678...
- Page 35 Model 686 REF. PART NO. DESCRIPTION REF. PART NO. DESCRIPTION 738-1007 Shoulder Screw 3/8-16 x .5 710-3008 Hex Bolt 5/16-18 x .75" Lg.* 710-1208 Hex Wash. Hd. Tap Scr. 783-0042A Upper Frame—R.H. 5/16-18 x 3.25" Lg. 732-0581B Extension Spring 5.31" Lg. 783-0607A Seat Pivot Bracket 725-1750...
- Page 36 Model 686 REF. PART DESCRIPTION REF. PART DESCRIPTION 783-0103 Connecting Rod 711-0723A Adj. Ferrule 3/8-24 Thd. 683-0029A Pivot Link Ass’y.—L.H. 17712 Adj. Deck Lift Link 683-0028A Pivot Link Ass’y.—R.H. 712-3066 Hex Nut 1/2-20 Thd. (Gr. 5) 17710 Deck Hanger Link Ass’y. 711-0841 Lift Link Adjuster 14800A...
- Page 37 Model 686 REF. PART REF. PART DESCRIPTION DESCRIPTION 710-0157 Hex Bolt 5/16-24 x .75" Lg. 710-1260A Hex Wash. TT-Tap Scr. 5/16-18 x .75" 683-0141 42" Deck Ass’y. ** 712-0417A Hex Flange Nut 5/8-18 Thd.† 753-0698 42" Deck Ass’y. (For Service Only) ** 736-0158 L-Wash.
- Page 38 Model 686 Ref. Part Description 710-0924 Truss Mach. Scr. 1/4-20 x.75" Lg. 783-0341 8-Speed Selector Plate 720-0218 Shift Knob 16192A Speed Selector Lever Ass’y. 736-0192 Flat Washer .53" I.D. x .93" 711-0198 Ferrule 3/8-24 x .37" Dia. 738-0155 Shoulder Bolt 747-0503A Speed Control Link 714-0111...
- Page 40 White Outdoor Co. does not extend any warranty for White Outdoor Products Co. warrants this product against products sold or exported outside of the United States...
Need help?
Do you have a question about the LT-17 686 and is the answer not in the manual?
Questions and answers