Table of Contents
Advertisement
Advertisement
Table of Contents

Related Manuals for RIEJU TANGO 250


Summary of Contents for RIEJU TANGO 250
- Page 1 OWNER’S MANUAL TANGO...
- Page 3 RIEJU S.A. is very grateful for the trust you have placed in our company and congratulates you on your excellent choice. The Model TANGO 250cc is the result of long RIEJU experience developing a highly-reliable, multi-pur- pose vehicle. The purpose of this Owners Manual is to indicate how to use and maintain your vehicle, please carefully read the information and instructions that it contains.
-
Page 4: Table Of Contents
CONTENTS Page Page Motorbike description ....4 Checks before starting-up ....14 Motorbike identification . - Page 5 Page Page Technical specifications and characteristics . .30 Front suspension ....21 Rear suspension .....21 Sparkplug checks .
-
Page 6: Motorbike Description
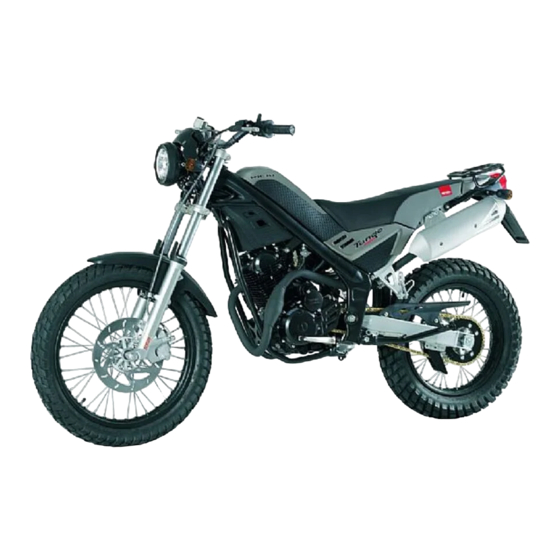
MOTORBIKE DESCRIPTION This motorbike incorporates a single-cylinder, 4-stroke, air-cooled, electrical and to pedal starting engine. Engine size is 249,9 cubic centimetres, with a 65,5 mm piston diameter and 74 mm travel. Ignition uses an AC 120 w magneto generator. Multiple steel disc in oil bath clutch. The engine is fixed to a perimeter-type chassis, made of high-strength rectangular section tubing, with conical steering bearings. -
Page 7: Motorbike Identification
MOTORBIKE IDENTIFICATION Your motorbike’s identification number is engraved on the chassis. The number engraved on the right-hand section of the ste- ering pipe will be used by us for all purposes (specifica- tions certificate, insurance and licence number etc), and should be included in any suggestion or complaint, and also when ordering spare parts. -
Page 8: Main Motorbike Components
MAIN MOTORBIKE COMPONENTS KEYS This model is supplied with a set of keys for the ignition contact switch. These keys are joined to a tab, which is engraved with the corresponding serial number. It is recommended that this is kept in a safe place so that the number is at hand if the keys are ever lost. - Page 9 5-. Main headlight indicator This indicator comes on when the main headlights are switched on. 6-. Milometer It indicates the whole range in km and different partisans. 7-. Direction indicator This indicator ignites when we drove the intermittent ones of direction.
-
Page 10: Handlebar Switches
HANDLEBAR SWITCHES 1-. Indicator switch This has three positions: In the central position the indicators are switched off, when turned to the right the right-hand indicators are switched on, and when turned to the left, the left-hand indicators come on. Note that the switch will automatically return to the central position. - Page 11 5-. Ignition switch This switch is used to start the engine, after verifying that the gear-change pedal is in the neutral position.
-
Page 12: Clutch Lever
CLUTCH LEVER The clutch lever is located on the left-hand side of the handlebar. To engage the clutch, the lever should be pressed towards the grip or handlebar. FRONT BRAKE LEVER The front brake lever is located on the right-hand side of the handlebar. This brake is operated by pres- sing the lever towards the handlebar. -
Page 13: Battery
Fuse BATTERY Open the seat with the key to reach the battery. The terminal block should be checked, together with the actual ter- minals themselves. If any oxide is observed on the terminal block or the ends of the terminals, this should be cleaned off with a metal bristle brush, sandpaper or similar. -
Page 14: Petrol Tank
PETROL TANK To access the petrol tank, open the filling cap and to turn the key in an anticlockwise direction. Only oil-free petrol should be used. The fuel tank capacity is 6,3 liters. REMEMBER: unleaded petrol must always be used. CHOKE CONTROL The choke control is over the clutch lever. -
Page 15: Petrol Tap
PETROL TAP The petrol tap is on the left, under the fuel tank. It has three positions: OFF: Fuel supply is cut-off in this position. The control should be set to this position when the engine is not running. ON: Fuel is supplied to the carburettor in this position. Normal driving is performed with the lever in this position. -
Page 16: Checks Before Starting-Up
CHECKS TO BE CARRIED OUT BEFORE OPERATING The following should be checked before using your motorbike: Items to check Checks Lights and indicators Check for correct operation Front and rear brakes Check both free-play and operation Accelerator grip Check free-play, adjust and lubricate as necessary Petrol tank Check level and refill as required Tyres... -
Page 17: Routine Checks
ROUTINE CHECKS Brake liquid level FRONT BRAKE The front brake consists of a 260 mm dia- meter disc brake, which is operated by means of a double-piston radial clip and hydraulic pump. The braking surface should be free from both grease and dirt to ensure perfect ope- ration. -
Page 18: Rear Brake
If the hydraulic clip brake pads are worn, they must be replaced. The minimum thickness of the Ferodo pads is 2 mm. Please remember that these operations should be carried out by an official RIEJU ser- vice centre. -
Page 19: Accelerator Grip
ACCELERATOR GRIP Check for correct operation by rotating the grip and verifying correct free-play. The grip should firmly return when the accelerator is released. LIGHTS AND INDICATORS Check that all headlights, road lights, indicator lights, rear lights and indicator lamps operate correctly. -
Page 20: Engine Starting And Operation
ENGINE STARTING AND OPERATION It is very important that you have full knowledge of your motorbike and how it works. WARNING: The engine should never be left running in an enclosed space because the toxic exhaust fumes could have serious consequences on your health. STARTING THE ENGINE Open the petrol tap. -
Page 21: Running-In
RUNNING-IN The most important part of your motorbike’s life occurs between 0 and 500 kilometres. For this reason, we recommend that you carefully read the following instructions. During the first 500 kilometres, you should not overload your motorbike since the engine is new and the various component parts have to mutually wear down and polish themselves until perfect running order is achieved. -
Page 22: Stopping
This is one of the most important components with respect to good engine performance because this is where petrol and air are mixed, poor carburettor operation means poor engine performance, which in turn, could lead to damaged engine parts. It is, therefore recommended that its adjustment is checked at an authorised RIEJU workshop. -
Page 23: Front Suspension
FRONT SUSPENSION The front suspension, which is one of the most advanced parts with regards to technology and design, consists of a telescopic hydraulic fork with Ø 37 mm diameter bars. Oil capacity: 340 c.c. per bar. Recommended type of oil: CASTROL SAE 15W. REAR SUSPENSION The rear suspension consists of a rectangular tube swin- garm anchored to a single hydraulic shock-absorber. -
Page 24: Sparkplug Checks
SPARKPLUG INSPECTION The sparkplug is a very important engine component and is easy to inspect. It should be removed and inspected on a regular basis because heating and soot deposits will slowly deteriorate it. If the electrode is excessively eroded or there are heavy soot or other deposits, then the sparkplug should be replaced using a recommended spare part. -
Page 25: Air Filter
AIR FILTER Correct operation and lifetime of the engine components, piston rod, piston, segments, crankshaft bea- rings and the cylinder, largely depend on the air filter’s state of cleanliness. In order to access the air filter, the right side cover should be removed. Remove the filter box cover, which is held in place by three screws, then remove the filter itself. - Page 26 The filter foam may then be separated from its plastic support and cleaned with a specific filter foam cleaning solvent. Once it has thoroughly dried, the filter may be reinstalled by follo- wing the above instructions in the reverse order after prior lubri- cation of the filter with special purpose filter oil.
-
Page 27: Transmission Chain Tensioning And Lubrication
TRANSMISSION CHAIN TENSIONING AND LUBRICATION Chain control and setting should be done only on the rear tyre axel, always concentrating on the chain’s maximum point of tension. To control free-play, spin the back wheel several times and check the tension in various areas to find the tensest point. - Page 28 Incorrect chain and wheel alignment could lead to the chain coming loose, together with machine stabi- lity problems. The chain should be periodically cleaned and lubricated. The chain consists of many parts that work toget- her. If the chain is not correctly maintained, it will quickly wear out, and it is therefore recommended that it be lubricated every 100 or 200 kilometres using a special chain oil.
-
Page 29: Lubrication And Greasing
LUBRICATION Engine lubrication uses an oil pump which is located inside the oil sump. The gearbox and clutch use the same oil and the recommended type is CASTROL SAE 20W-50, with a total capacity of 1 liter. The oil sump may be drained using the drain screw located at the lower left of the engine. -
Page 30: Cleaning And Storage
WARNING: Rieju cannot be held responsible for the use of degreasing agents which stain and/or cause deterioration the the motorbike components. Rieju cannot be held responsible for any possible damage resulting from the use of pressurised water to clean the motorbike. - Page 31 4. Once all dirt has been cleaned off, the surfaces should be washed warm water and mild detergent soap. Difficult areas to access can be washed with a bottle-brush or similar. 5. Rinse immediately with cold water and dry all surfaces. 6.
- Page 32 TECHNICAL SPECIFICATIONS AND CHARACTERISTICS Model TANGO Dimensions: Total length 1925 mm. Total width 800 mm. Total height 1110 mm. Seat height 820 mm. Distance between axles 1320 mm. Minimum distance to ground 250 mm. 109 kg. Weight: in dry 114 kg. in route order Engine: 4-stroke...
- Page 33 Transmission oil CASTROL SAE 20W-50 Type API, “SH” o superior Amount 1Liter Air filter Cartridge foam rubber humid type Fuel Unleaded gasoline Type 6,3 Liters Tank capacity DELLORTO VHST-28 ECS Carburettor Sparkplug D8EA / NGK DENSO Type 0,6 - 0,7 mm Electrode separation Multiple discs in oil Clutch type...
- Page 34 GEAR CHANGE Speed Primary shaft Secondary shaft Gear ratio 1ª Z = 13 Z = 36 1 : 2,77 2ª Z = 17 Z = 32 1 : 1,88 3ª Z = 20 Z = 28 1 : 1,40 4ª Z = 23 Z = 26 1 : 1,13...
- Page 35 Tyres: Integral rim C C o o m m p p o o u u n n d d / / H H i i g g h h w w a a y y 100/80-17” 55P Front 130/70-17” 63P Rear Radiated rim E E n n d d u u r r o o...
Need help?
Do you have a question about the TANGO 250 and is the answer not in the manual?
Questions and answers