Table of Contents
Advertisement
Quick Links
Advertisement
Table of Contents

Related Manuals for Flymaster Vario


Summary of Contents for Flymaster Vario
- Page 1 VARIO User manual Document version 2.0...
- Page 2 All rights reserved. Except as expressly provided herein, no part of this manual may be reproduced, copied, transmitted, disseminated, downloaded or stored in any storage medium, for any purpose without the express prior written consent of FLYMASTER Avionics Lda. herein FLYMASTER avionics. FLYMASTER Avionics hereby grants...
- Page 3 Flymaster VARIO. Flight safety is the sole responsibility of the pilot. It is unsafe to operate the Flymaster VARIO while in the air. Failure by the pilot equipped with a Flymaster VARIO to pay full attention to the aircraft and flying conditions while flying could result in accident with property damage and/or personal injury.
-
Page 4: Table Of Contents
1 Introduction............................5 2 Overview............................5 3 Getting started..........................6 3.1 Charging the Battery.........................6 3.2 VARIO Keys..........................7 3.3 Using keys Inside Menu......................7 3.4 Switching VARIO On and Off....................8 3.5 Resetting the VARIO........................8 4 Flight Mode............................9 5 VARIO Elements..........................10 5.1 Graphical Elements.........................10 5.1.1 Battery..........................10 5.1.2 Sound..........................11... -
Page 5: Introduction
1 Introduction Thank you for choosing FLYMASTER VARIO. If you have any questions or comments regarding the use of our equipment you can visit our website or contact our Support Department (support@flymaster-avionics.com). This manual covers Firmware versions up to 1.01v If you have a more recent version of firmware some of the features may not be covered. -
Page 6: Getting Started
Figure. 2 - USB Connector The battery may be charged by either connecting the VARIO USB connector to the wall socket charger or USB cable. USB connector can be found on the right side of the VARIO (see Figure. 2). -
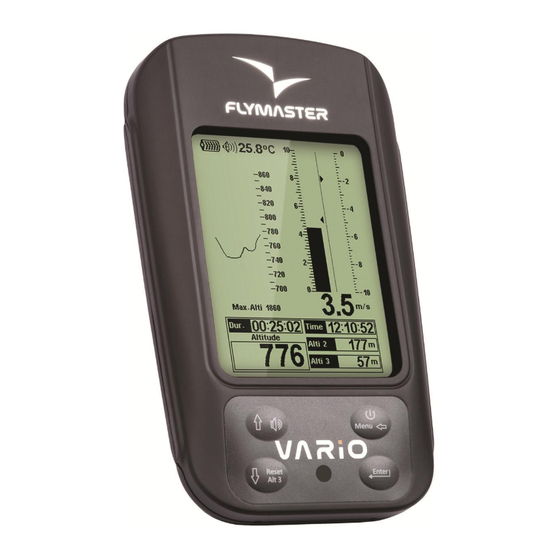
Page 7: Vario Keys
3.2 VARIO Keys Four keys are used to interact with VARIO (see Figure. 3). In this manual we will call MENU key to S1, ENTER key to S2, UP key to S3, and DOWN key to S4. Each key has 2 functions depending on whether the device is in flight mode or in menu mode. -
Page 8: Switching Vario On And Off
3.4 Switching VARIO On and Off To switch on the VARIO, briefly push the S1 key (Menu Key). This will display the start up screen with a 10 second countdown . Pushing the S2 (Enter key) before the 10 seconds have elapsed will power up the VARIO. -
Page 9: Flight Mode
Flight moe is used during flight, and this allows the user to see information such as Altitude, or Vario. The VARIO has up to 16 different pages (see Figure. 4) in memory. Each page corresponds to a different screen, which can be completely configured by the user. A set of 16 pages is called a Layout. -
Page 10: Vario Elements
Graphical elements are characterized by providing information in a graphical way. Most of the graphical elements have fixed dimensions, although their position can be altered. As the VARIO firmware evolves the list of Graphical Elements will likely grow. The current version includes the following graphical elements. -
Page 11: Sound
Table 1 - Battery Element description Symbol Description •Battery level above 90% •Battery level between 70% and 89% •Battery level between 50% and 69% •Battery level between 30% and 49% •Battery level between 15% and 29% •Less than 15% battery remaining 5.1.2 Sound The Sound Element provides graphical representation on the current volume level. -
Page 12: Analog Vario
Figure. 5 - Analog Vario Element When the VARIO detects that the pilot is climbing, a black bar starts to grow on the left, from the bottom of the scale to the top ,with 0,1 m/s increments. The same bar grows on the right, from the top of the scale to the bottom, if sinking is detected. -
Page 13: Altitude Graph
In this Element a black bar starts from the middle of the scale and grows at 0,1 m/s increments, up to 5 m/s at the top of the scale. When 5 m/s value is reached the black bar starts to disappear from 0 m/s (middle of the scale) until the top of the scale. When the bar completely disappears the climbing rate is equal, or above 10 m/s. -
Page 14: Data Field Elements
Data field elements can be used to shown numerical information like altitude, time, amongst others. These elements have configurable size, and position, although the text within has only 3 possible sizes. Table 3 explains the available data fields. As the VARIO firmware evolves this list will likely grow. -
Page 15: Menu Mode
The Gain indicator keeps track of how much altitude is being gained in the thermal. When a pilot enters a thermal the VARIO will reset the Gain indicator to 0 and will start to track how much altitude the pilot has gained. At a certain point in the thermal the lift may become weaker and inconsistent. -
Page 16: Flight Log
Figure. 9 - Main Menu Screen To access the different items on the menu you can use the UP(S3) and DOWN(S4) keys. Once a menu item is selected pushing the ENTER (S2) executes the selected function. The main menu screen can be seen in Figure. 9. 6.1 Flight Log The Flight Log option allows the user to access information about previous saved flights. -
Page 17: Set Altimeter
Figure. 10 - Flight Log 6.2 Set Altimeter The “Set Altimeter” page allows the user to adjusts the barometric altimeters. The VARIO has two altimeters. A barometric altimeter calculates altitude based on atmospheric pressure. Since atmospheric pressure can vary substantially with meteorological conditions it should be calibrated prior to takeoff. -
Page 18: Time
These thresholds correspond to the climbing and sinking rates at which the sound activates. Figure. 13 - Vario Acoustics The user can also define in the Acoustic Thresholds option the sink alarm and the sound volume. (see Figure. 13). -
Page 19: Sink Alarm
The “increments” can be set from 1 to 99 Hz. The preset value for “Increments” is 10 Hz.I Considering an “Increments” value of 10, and “Base Frq” of 700 Hz, the vario frequency at 1 m/s is 800 Hz. -
Page 20: Advanced Features
The Vario has six different sound levels, plus “no sound”. Pressing UP, or DOWN, key will respective increase, or decrease the sound level. After setting the sound value , to confirm and return to Settings menu press the ENTER key. -
Page 21: Cadence
8 and therefore the default value. 6.5.2 Cadence When a rate of climb is higher than that specified by the Climb threshold the VARIO creates a beeping sound. The rate (cadence) of the beeps increases as the climb rate increases. - Page 22 Finally, in the 3 zone, the air is rising at 1.2 m/s, and so both pilots climb at 0.2 m/s. The VARIO pilot starts Document version: 2.0...
-
Page 23: Auto Silent
The green pilot may have missed the thermal completely had he found the inner zone or if he was not watching his friend with the VARIO. -
Page 24: Language/Units
6.7 Language/Units The “Language and Units” menu option allows the user to change the VARIO interface language and units. A short description off the available options for this menu are shown in Table 4. Figure. 18 - Language/Units You can use the UP, and DOWN keys, to change each field option. Pushing the ENTER key confirms the current field value, and highlights the following field. -
Page 25: Rf Probes
ID should be set to 0024 (see Figure. 19) Figure. 19 - RF probes ID setting 7 Firmware Flymaster follows a policy of continuous improvement of its products. This means that a new version of firmware can be uploaded from our website periodically. The update process is simple. - Page 26 2. Click “Send Firmware” button. The message “waiting for Flymaster intrument...” will apear. 3. Connect the VARIO to the PC using the cable supplied. If it is the first time the VARIO is connected to the PC, wait until Windows show the message that new hardware is present a ready to use.
- Page 27 Figure. 20- Firmware Installer Document version: 2.0 Page 27...
Need help?
Do you have a question about the Vario and is the answer not in the manual?
Questions and answers