Table of Contents
Advertisement
Quick Links
Advertisement
Table of Contents

Subscribe to Our Youtube Channel
Related Manuals for Flymaster NAV


Summary of Contents for Flymaster NAV
- Page 1 User manual Document version:3.4...
- Page 2 Flymaster NAV . Flymaster Avionics is not responsible for any damages resulting from incorrect or no data provided by the Flymaster NAV . Flight safety is the sole responsibility of the pilot. It is unsafe to operate the Flymaster NAV while in the air. Failure by the pilot equipped with a Flymaster NAV to pay full attention to the aircraft and flying conditions while flying could...
-
Page 3: Table Of Contents
....... . 1.4 Switching NAV On and Off ...... - Page 4 5.3 Task Definition ........5.3.1 Setting up the task .
- Page 5 13.7 Screen ......... . 13.7.1 Screen Contrast .
-
Page 6: Getting Started
Figure 1.1: right view The battery may be charged by either connecting the NAV USB connector to the wall socket charger or USB cable. USB connector can be found on the right side of the NAV (see figure 1.1). Charging the Battery Flymaster NAV has an advanced battery power management system, which gives the pilot accurate information about the battery state, as well as the charging time and battery remaining time. -
Page 7: Nav Keys
NAV Keys Four keys are used to interact with NAV (see Figure 1.2). In this manual we will call MENU key (S1), ENTER key (S2), UP key (S3), and DOWN key (S4). Each key has 2 functions depending on context, whether the device is in flight mode or in menu mode. -
Page 8: Switching Nav On And Off
10 second countdown . Pushing the S2 (Enter key) before the 10 seconds have elapsed will power up the NAV . The NAV initiates in flight mode. If the S2 key is not pushed within 10 seconds the NAV will go back to sleep. To switch off the NAV , push the S1(menu key) to activate menu mode, using the arrow keys (S3 or S4) scroll the cursor to the Shutdown item and push the S2(Enter Key). -
Page 9: Flight Mode
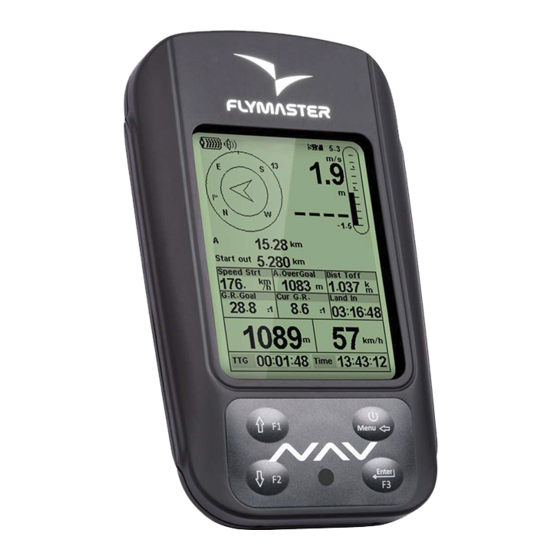
flight, and this allows the user to see information such as Altitude, Speed, or Vario. The NAV can have up to 16 different pages (see Figure 2.1) in memory. Each page corresponds to a different screen, which can be completely configured by the user. A set of 16 pages is called a Layout. - Page 10 This means that when you insert a element in a page, and after uploading the layout to the instrument, you will see exactly the same thing on the NAV screen. There are several elements available for the NAV which are presented in the following section.
-
Page 11: Nav Elements
Graphical elements are characterized by providing information in a graphical way. Most of the graphical elements have fixed dimensions, although their position can be altered. As the NAV firmware evolves the list of Graphical Elements will likely grow. The current list includes the following graphical elements. -
Page 12: Gps
(-160 dBm sensitivity), and very short acquisition times. The NAV has a 4 Hz GPS update rate (most of others only provide 1Hz) which allows the NAV pilot to see very small speed and position changes. Furthermore, the movement of the direction arrow is smoother and any position change is shown in a quarter of the time of other devices. - Page 13 Figure 3.1: Analog Vario When the NAV detects that the pilot is climbing, a black bar starts to grow on the left, from the bottom of the scale to the top ,with 0,1 m/s increments. The same bar grows on the right, from the top of the scale to the bottom, if sinking is detected.
-
Page 14: Navigation Circle
This element cannot be resized but can be re-positioned. For navigation information to be displayed the NAV must have a valid GPS fix. Figure 3.5: Navigation Element Navigation information is shown within the inner most circles. - Page 15 Note that, a start is automatically validated when a pilot correctly completes the start. Until the start is valid the NAV will not advance to the next point in the route. Another important aspect of the start is that the NAV does not point to the start cylinder but rather to the next turn...
-
Page 16: Airspaces
The map has always a North Up orientation. The first time the map is drawn, it is centred on the last GPS position the NAV has in its memory. The map is re-centred once the flight starts i.e. when a valid gps signal exists, and the start speed (see Section 13.5.6) is reached. -
Page 17: Altitude Graph
the pilot is outside a visible airspace area then a gray line is used to draw the area, whereas if the pilot is inside the airspace then a black line is used instead. Note that being inside a airspace area (2D) does not mean that the airspace is being violated, since the pilot can be above, or below the defined 3D shape. -
Page 18: Wind Arrow
range of the vertical axis is automatically adjusted in order to accommodate the gained height. In reality the altitude graph element is a plot of the absolute altitude over the last 4 minutes of flight (Figure 3.12). Figure 3.12: Altitude Plot 3.1.8 Wind Arrow The Wind Arrow element (Figure 3.13) is a re-sizable graphical element. -
Page 19: Map Page
3.1.9 Map Page The MAP element (Figure 3.15) provides information to the user about their position relative to waypoints, cylinder edges and the pilot’s trace or track. This element can be resized and moved around the screen. Figure 3.15: Map Element A typical map page in flight may look like Figure. -
Page 20: Data Field Elements
These elements have configurable size, and position, although the text within has only 3 possible sizes. Table 6 explains the available data fields. As the NAV firmware evolves this list will likely grow. Table 3.4: Data fields Description... - Page 21 Flight Level Current altitude in hundreds of feet, based on a fixed QNH of 1013.25hPa. Fuel Fuel level in liters (available when connected with Flymaster M1). G-Force Current G-Force being experienced by the pilot when using the Heart-G sensor. Goal Close Remaining time to goal close.
- Page 22 Motor Temperature (available when connected with Flymaster M1). Page Num. Current layout active page number. Pulse Current heartbeat in beats per minute, when using the Flymaster Heart-G sensor. Motor revolutions per minute (available when connected with Fly- master M1). Speed Indicates ground speed.
- Page 23 When a pilot enters a thermal the NAV will reset the Gain indicator to 0 and will start to track how much altitude the pilot has gained. At a certain point in the thermal the lift may become weaker and inconsistent.
-
Page 24: Menu Mode
Displays detailed GPS status and allows GPS module reset. (see Chapter 11) Pages Accesses different layout pages. (see Chapter 12) Settings Accesses the Settings sub menu. (see Chapter 13) Shutdown Switches off the NAV , and displays detailed battery status. -
Page 26: Waypoints And Task
Entering the page activates the WL area. At the top of the page next to the title Waypoints, is the total number of Waypoints stored in the NAV instrument. The first waypoint on the list appears highlighted, and the corresponding data of the selected waypoint is shown in the DO area. -
Page 27: Waypoints Actions Menu
Waypoints Actions Menu On entering the waypoint actions menu (WAM) the selected waypoint becomes grayed indicating that waypoint specific actions will be carried out using the selected waypoint. Once the WAM is active a list of options appears in the DO area. A short description of each option is show in Table 5.1. -
Page 28: Delete Waypoint
5.1.4 Delete Waypoint It is possible to delete just a single waypoint on the NAV . Select the waypoint to be deleted by pressing either the S3 or S4 buttons. Once the waypoint is highlighted, selecting Delete Waypoint will remove the waypoint from the NAV memory. If a waypoint is in use int the Task the delete function will be disabled, to delete the Waypoint it must firstly be removed from the Task. - Page 29 DOWN buttons will move between the Task points. For the highlighted task point, the bottom screen area will display the task point parameters. When a task has only one point it is considered as a Go To type route. The NAV will automat- ically start navigating to that point.
-
Page 30: Edit Route Point
When the NAV validates a turnpoint it emits a audible notice informing the user that navigation has advanced to the next waypoint, this audible notice can be disabled in the... -
Page 31: Move Route Point
Table 5.3– continued from previous page Type Navigation Start out or Start in The time at which the start opens. The start is only validated when the pilot crosses the perimeter line at a time later than the defined time. The TTG (time to go) will show how much time remains to the opening of the start, i.e the difference between this field’s value and the local time of day. -
Page 32: Task Definition
5.3.1 Setting up the task Start by deleting any existing task on the NAV (see Section 5.2.4). Then, add to the task, in the right order LAUNCH, WHALEB twice, SHEEP, HEBRON, GOOSEN, and finally WHALEL twice. The NAV will automatically assume LAUNCH as the takeoff since it is the first waypoint on the list. - Page 33 Beware, that it is very important that the first occurrence of WHALEB be set as Start, otherwise the NAV will assume that WHALEB needs to be completed before the start gate, and that is not what is required for this task. Nothing needs to be changed for the second occurrence of WHALEB since the default values are the ones wanted.
-
Page 34: Task Delay
Instead of having to edit the defined task, the NAV offers a task delay feature which moves all defined times in a task forward by X minutes. -
Page 35: Task Navigator
Chapter 7 Task Navigator This function is useful to override the automatic task navigation provided by the NAV , and should only be used if for some reason a mistake was made during the creation of the task. When this option is selected the NAV displays the task list. Using the UP and DOWN buttons the desired waypoint can be selected. -
Page 36: Critical Airspaces
Chapter 8 Critical Airspaces Critical airspace shows a list of airspaces within 100km of the pilot’s position. This list is generated when in flight mode and is ordered by the sequence in which the airspace appears in the file used to create the airspace. - Page 37 Figure 8.2: Critical Airspace Data...
-
Page 38: Nearby Landings
Chapter 9 Nearby Landings It is possible to define waypoints as Landing, allowing the pilot to quickly check for landing options. The Near Landings page will show all the waypoints (defined as Landings) for which the necessary glide ratio is finite. Additionally for each waypoint the distance and glide ratio is also shown, this list is sorted by glide ratio in ascending order (see Figure 9.1). -
Page 39: Flight Log
Chapter 10 Flight Log The Flight Log option allows the user to access information about previous saved flights (Figure 10.1). The top half of the screen lists flights stored in memory. Each flight is identified by the take off date, time and flight duration. Figure 10.1: Flight log Flights can be selected using UP and DOWN keys. -
Page 40: Delete Flight
Figure 10.2: Delete Flight 10.2 Delete All Flights All of the flights in the NAV can be deleted by selecting the Delete all flights option. A message is displayed asking the user to confirm the action of deleting all flights (Figure 10.3). -
Page 41: Memory Capacity
Figure 10.3: Delete all flights WARNING: Deleting all flights will completely erase the flight log memory, all track logs will permanently erased. 10.3 Memory capacity The current firmware version it can store up to 131000 points, which equates to over 36 hours with a 1 second recording interval (obviously if you set it to a 10 second recording interval you get 360 hours). -
Page 42: Gps Status
GPS menu item will reveal the Reset GPS option, changing it to yes will make the NAV reset the GPS status and start a new search. So if you notice NAV is taking abnormally long to get a fix (over 2 minutes) a gps reset will probably get it locked quicker (see Figure 11.1). -
Page 43: Pages
Chapter 12 Pages The Pages Menu shows a list of the different pages as defined in DESIGNER, that are available on the NAV . Figure 12.1 shows an example of what is available in a typical layout in the Pages Menu (this will be different depending on what was configured from the Designer). - Page 44 functions to display that particular page or having to scroll through all of the pages in sequence using the F3 button (if that option is set). It is also possible to disable a page so that when you toggle through the different pages using F3, that page is displayed, Figure 12.3. Also all triggers associated with the disable page will be ignored.
-
Page 45: Settings Menu
Chapter 13 Settings menu The settings menu (Figure 13.1) is used to configure the NAV ’s many features. The menu is divided into two sections, the menu option and the associated configurable fields. To use the configuration menu, select the desired option by using the arrow keys (UP and DOWN), then push the ENTER key to edit the fields. -
Page 46: Time
Altitude can also be set from the GPS. Below the QNH you will find a Get from GPS field which can be set to Yes No or Auto. Adjusting this value to Yes will make the NAV take the altitude from the GPS and adjust the altitude accordingly. -
Page 47: Utc Offset
13.2.3 UTC offset Using GPS data, the NAV automatically adjusts the internal clock to the Universal Coordinated Time (UTC). The user should adjust the UTC offset so that the time displayed by the NAV matches the local time. 13.3 Vario Acoustics The user can change the climbing, and sinking rate sound through the respective threshold values. -
Page 48: Increments
3.1.2 for more details). The NAV has six different sound levels, plus no sound. Pressing UP, or DOWN, keys will respective increase, or decrease the sound level. After setting the sound value , to confirm and return to the Settings menu press the ENTER key. -
Page 49: Turnpoint Complete
13.5.2 Cadence When a rate of climb is higher than that specified by the Climb threshold the NAV creates a beeping sound. The rate (cadence) of the beeps increases as the climb rate increases. This increase in rate is not linear. The cadence parameter specifies which cadence curve should be used. Current there... -
Page 50: Dynamic Frequency
Buzzer=3 (0.3m/s) the buzzing with start at -0.2m/s because 0.1 - 0.3= -0.2. In this case at 0.1m/s directly below the Climb threshold the NAV will emit a constant sound varying rapidly in pitch from around 100hz to the set base frequency at which the first beep is emitted. - Page 51 0.8 m/s, and so pilots are descending at -0.2 m/s. At this stage the orange pilot starts to hear the Next to Climb brrrrr sound of his NAV , which helps him to centre the thermal, while the green pilot is still unaware of the thermal.
-
Page 52: Auto Silent
13.5.5 Auto Silent Setting Auto silent on will keep the NAV ’s buzzer quiet until a start flight has been detected. The instrument will start flight when a 3D GPS fix is available, the speed exceeds the value defined in Start Speed and the vario rate of climb/sink exceeds 0.15m/s. -
Page 53: Screen
Figure 13.9: Track Up Off Figure 13.10: Track Up On 13.7 Screen The screen menu option allows the user to set the Screen contrast to Enable/Disable the pages triggers, and to colour-invert the titles (Figure 13.11). -
Page 54: Screen Contrast
Pages can be automatically activated during flight by defining a trigger event for the page. These triggers are set using the Flymaster DESIGNER program. See the DESIGNER manual for details. Using the triggers, the user can view different pages according to different flight contexts. These can be automatically activated (switched) if a certain condition is met. -
Page 55: Language/Units
13.9 Language/Units The Language and Units menu option allows the user to change the NAV interface language and units. A short description off the available options for this menu are shown in Table 13.2. The UP, and DOWN keys, can be used to change each field option. Pushing the ENTER key confirms the current field value, and highlights the following field. -
Page 56: Device Settings
The RF Probes menu option allows the user to pair up any of the Flymaster wireless devices including the M1 and Heart-G to the NAV . Pairing is performed automatically. The NAV will look to see what wireless devices are around and it will shows these on the screen (Figure 13.13). -
Page 57: Heart-G
13.13 Data fields The NAV has 6 user defined fields (UDF) which the pilot can configure for his own needs using this menu. UDF’s are numbered from 1 to 6. A description of available data Fields can be found in Section 3.2. If UDF data fields are set up in the current layout, then this menu can be used to defined which data fields are shown in each of the 6 UDF’s (Figure 13.15). -
Page 58: Navigation Settings
13.15.3 Datum Different datum models can be set on the NAV . Options available are WGS 84 and FAI sphere. At the start of any competition, be sure to check what Datum is used by the scoring system to ensure that the correct distances are being reported. - Page 59 Figure 13.16: Airspace Settings The CTR dist. Th, and CTR alt. Th, are the minimum horizontal distance, and minimum vertical distance respectively, that a pilot can be from an airspace without triggering an airspace warning. If this threshold is passed a warning is emitted (event). The Ref.
-
Page 60: Firmware
2. Click Send Firmware button. The message waiting for Flymaster instrument... will appear. 3. Connect the NAV to the PC using the cable supplied. If it is the first time the NAV is connected to the PC, wait until Windows show the message that new hardware is present and ready to use. - Page 61 Figure 14.1: Firmware Update...
-
Page 62: Interfacing With Gpsdump
Chapter 15 Interfacing with GPSDump With the Flymaster GPS it is possible to download tracks and upload waypoints using the GPS- Dump interface. GPSDump is freeware that can be downloaded to your MAC or PC. This section will describe how to use the GPSDump interface. It is assumed that the correct drivers have been installed on the computer and that GPSDump has been installed. -
Page 63: Uploading Waypoints
On a PC when you select COM port a smaller dialogue box pops up listing all of the COM ports that are currently interfacing with the instrument. Flymaster instruments typically populate with high COM port numbers such as COM 11 in the example below Figure 15.3. - Page 64 Figure 15.4: Waypoint list Once the file has been opened, select alll of the waypoints (COMMAND A in MAC and CON- TROL A for PC). In the drop down menu for WPTS you should see the following options (Figure 15.5).
-
Page 65: Downloading Tracklogs
Here you have the option of sending the waypoint ID, or the waypoint name or both. Once you select the type of waypoints to send you should see the the waypoints being sent to the instrument. 15.3 Downloading tracklogs To download a track simply click on the FLYMASTER button on GPSDump. - Page 66 Figure 15.6: Downloading tracklog When you click on the Flymaster button a list will populate showing all of the flight logs on the instrument (Figure 15.7). Figure 15.7: Tracklog list Simply clicking on the desired flight will download the tracklog to the computer. Once the tracklog has been downloaded it is possible to save the tracklog in several different formats: IGC,...
Need help?
Do you have a question about the NAV and is the answer not in the manual?
Questions and answers