Table of Contents
Advertisement
Quick Links
Advertisement
Table of Contents

Related Manuals for Flymaster GPSm


Summary of Contents for Flymaster GPSm
- Page 1 User Manual v.1.0 Flymaster Avionics, Lda...
- Page 2 GPS M . Flight safety is the sole responsibility of the pilot. It is unsafe to operate the Flymaster GPS M while in the air. Failure by the pilot equipped with a Flymaster GPS M to pay full attention to the aircraft and conditions while wing could result in accident with property damage and/or personal injury.
-
Page 3: Table Of Contents
Available data fields ....................... 28 Above Toff ................................28 Abs.Pressure ................................28 Active waypoint ..............................28 AGL ..................................28 Alt.Gain ................................... 28 Alt.Gain/Loss ................................28 Alt.to CTR ................................28 Altitude ................................... 28 Altitude2 ................................. 28 Page 3 Flymaster GPS M User Manual v. 1.0... - Page 4 Objects (Graphical Elements) ....................31 Battery ............................31 Volume indicator ..........................31 GPS ..............................31 Vario .............................. 31 Navigation wheel ..........................32 Navigation Arrows ..............................32 Route Optimisation ..............................32 Thermal Ball ................................33 Page 4 Flymaster GPS M User Manual v. 1.0...
- Page 5 On Landing - ........................... 47 User: .............................. 47 SN: Serial number ........................... 47 Battery: ............................47 Charging mode ..........................47 Charge up time: ..........................47 Firmware: ............................47 Cur: ..............................47 Page 5 Flymaster GPS M User Manual v. 1.0...
- Page 6 Contrast ............................54 Disable triggers: ..........................54 Inverse titles: ..........................54 Language units ........................55 Language: ............................55 Altitude units: ..........................55 Rate of Climb Units......................... 55 Speed Units ............................ 55 Page 6 Flymaster GPS M User Manual v. 1.0...
- Page 7 Automatic firmware update - ......................66 Main Screen and tools ........................67 Pages Layouts data fields and objects ..................68 Customizing datafields and objects ....................69 Page Triggers ..........................70 Manual firmware update ........................ 71 Page 7 Flymaster GPS M User Manual v. 1.0...
-
Page 8: Tech Specs
FLARM®...........Flarm ready with optional Flarm beacon Native USB Type C Connection....Allows connection to the PC Battery Charging........From wall adapter or standard usb port Firmware update by USB (upgrades are free) Size............152x90x18 mm Weight............200g Page 8 Flymaster GPS M User Manual v. 1.0... -
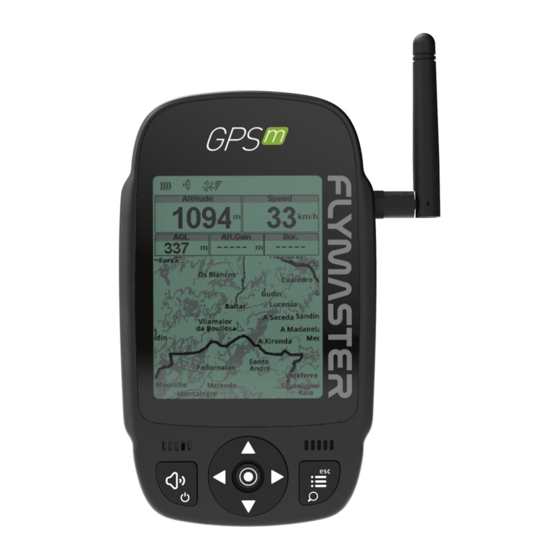
Page 9: Overview
Overview Page 9 Flymaster GPS M User Manual v. 1.0... -
Page 10: Flarm Antenna
FLARM ANTENNA Warning: The Flymaster uses an external antenna, which has been tuned to the Flarm board circuit, especially for the band used. Although it can be considered annoying when taking off, it is an essential element for the system to work for the distances required by Flarm and which we consider to be ideal for seeing and being seen by other aircraft. -
Page 11: Antenna Cap
Antenna cap - When the pilot does not want or does not need to fly with the Flarm antenna, must place the rubber cap (supplied) to cover the antenna socket. Page 11 Flymaster GPS M User Manual v. 1.0... -
Page 12: First Steps
Register the instrument in your account. https://livetrack360.com/devices/register Install “Flymaster Instrument Manager” to manage your Vario M or GPS M. F.I.M. will allow you to send new airspaces to the instrument, sending waypoints, building page layouts, update firmware, sync to Flymaster Cloud Flights, etc. -
Page 13: Reset And "Recovery Mode
If for some reason your instrument becomes unresponsive you can force a reset to force his reboot. Press the power together with the menu/esc button at the same time for 2 or 3 seconds and release. After releasing the buttons, the instrument should reboot. Page 13 Flymaster GPS M User Manual v. 1.0... -
Page 14: Enter "Recovery Mode
“recovery mode” so the firmware can be restored via Flymaster Instrument Manager. Check the Youtube video link bellow, that explains how to do it. https://youtu.be/YMSvr8MNkMc Page 14 Flymaster GPS M User Manual v. 1.0... -
Page 15: Charging And Battery Management
To charge the Flymaster GPS M battery we recommend the usage of the supplied wall charger and USB cable via USB Type-C port. Original Flymaster accessories are recommended in order to avoid damage to the power management system. -
Page 16: Check Battery Status
Go to Menu -> Device settings Battery – Actual battery percentage Slow char or Quick Char Charge up Time – Time to achieve full charge Cur: Charging/discharging current 3.000A - Battery capacity Page 16 Flymaster GPS M User Manual v. 1.0... -
Page 17: How To Preserve The Battery Lifespan
The Flymaster lithium-ion battery uses fast charging to quickly reach 80% of its capacity, then switches to slower trickle charging. The amount of time it takes to reach that first 80% will vary depending on your settings and which instrument you're charging. - Page 18 Place your instrument in a cool, moisture-free environment that's less than 32° C. • If you plan to store your device for longer than six months, charge it to 50% every six • months. Page 18 Flymaster GPS M User Manual v. 1.0...
-
Page 19: Keys And User Interface
Keys and User Interface Main menu navigation keys Use cursor buttons to choose the desired operation. Push enter button to confirm and enter the Sub-menus. Page 19 Flymaster GPS M User Manual v. 1.0... -
Page 20: Enter/Change Values In Sub-Menus
Press DOWN cursor buttons to change value. Press ENTER to accept the value and skip to next. Long press ENTER to skip to next line. Page 20 Flymaster GPS M User Manual v. 1.0... -
Page 21: Setting The Volume
Press (long) zoom button. Zoom mode is shown over the map object, indicating that the zoom mode is active. Use UP button to ZOOM IN or DOWN button to ZOOM OUT. The zoom mode will exit automatically after 5 seconds. Page 21 Flymaster GPS M User Manual v. 1.0... -
Page 22: Default Pages
Default Pages GPS M allows you to design up to 8 pages in portrait mode and 8 in landscape mode, using the Flymaster Instrument Manager. In flight you can change pages manually using the ENTER button. On the following pages we will show which pages Flymaster designed and which will be default to the instrument. -
Page 23: Page 2 - Airspace
Page 2 – Airspace –Vario 2 – Navigation wheel 3 – Wind arrow –GPS Altitude 5 – Distance to CTR 6 – Altitude to CTR 7 – CTR Status 8– Map (airspace) Page 23 Flymaster GPS M User Manual v. 1.0... -
Page 24: Page 3 - Thermal
–Ground altitude 2 – GPS Altitude 3 – Navigation wheel 4 – Wind arrow 5 – Vario 6 – Active waypoint 7 – Dist. Edge 8– Compass 9 – Speed -AGL Page 24 Flymaster GPS M User Manual v. 1.0... -
Page 25: Page 4 -Route
Page 4 –Route –Altitude 2 – Speed 3 – Vario 4 – Map (route) Page 25 Flymaster GPS M User Manual v. 1.0... -
Page 26: Page 5 - Roads
Page 5 – Roads –Altitude 2 – Speed 3 – 4 – Altitude gain 5 – Flight duration 6 – Map (roads) Page 26 Flymaster GPS M User Manual v. 1.0... -
Page 27: Section (Cut-Side View)
Altitude 2 – Speed 3 – Flight duration 4 – Altitude gain 5 – 6 – CTR Status 7 – Altitude to CTR 8– Distance to CTR 9 – Cut-side view Page 27 Flymaster GPS M User Manual v. 1.0... -
Page 28: Available Data Fields
Dist.Line Distance to Next. Shortest distance to the waypoint center. Distance next corresponds to the Distance Line plus the waypoint radius. Dist.Next Shortest distance to last thermal core (thermal dot). Dist.Thermal Page 28 Flymaster GPS M User Manual v. 1.0... - Page 29 Current local Time. This value is automatic revised when the device gets a valid Gps Signal. (see Note 2) Time Glide ratio during transition. Average glide ratio during transitions between thermals. Trans.G.R. Time to destination Radius of the active turnpoint. Turnpoint size Instant vario value. Vario Page 29 Flymaster GPS M User Manual v. 1.0...
- Page 30 Wind direction in degrees, calculated from gps when drifting. Wind Dir. Calculated wind speed using GPS speed. Wind Speed Page 30 Flymaster GPS M User Manual v. 1.0...
- Page 31 ,with 0.1 m/s increments. The same bar grows on the right, from the top of the scale to the bottom, if sinking is detected. Page 31 Flymaster GPS M User Manual v. 1.0...
- Page 32 1). If no route is defined the arrow will start showing the direction to the Take OFF after the Take OFF is detected combination of all three arrows provides a spatial location of the pilot relative to the next 2 waypoints. Page 32 Flymaster GPS M User Manual v. 1.0...
- Page 33 When the pilot is over 300m from the thermal core the dot will be at the edge of the circle. As the pilot moves closer to the thermal core the dot will move towards the centre. Page 33 Flymaster GPS M User Manual v. 1.0...
-
Page 34: Wind Flag
This view allows you to view 12 km ahead of your current position, being updated when you deviate more than a certain angle from your azimuth of travel and that justifies the update. 1 – Airspace limit and status 2 – Your position 3 - Terrain Page 34 Flymaster GPS M User Manual v. 1.0... -
Page 35: Map Layer Selection
The first time the map is drawn, it is centred on the last GPS position the GPS M has in its memory. The map is re-centred once the flight starts i.e. when a valid gps signal exists, and the start speed is reached. Page 35 Flymaster GPS M User Manual v. 1.0... - Page 36 CTR status ˝eld will indicate if an airspace is being violated by displaying Violating. If the pilot is not violating the airspace but it is inside a predefined margin then the messages Altitude Imminent, or Position Imminent will be shown. Page 36 Flymaster GPS M User Manual v. 1.0...
-
Page 37: Route
Route Page 37 Flymaster GPS M User Manual v. 1.0... -
Page 38: Roads
In the example above the wind is blowing from South. Both, the wind speed, and direction, value can be seen in a data fields. Page 38 Flymaster GPS M User Manual v. 1.0... -
Page 39: Compass
GPS M is turned the cardinal points will also turn in order the arrow tip points the right cardinal point. In the example of Figure the GPS M is pointing NW. The direction is represented by the arrow, and also indicated numerical (318°degrees). Page 39 Flymaster GPS M User Manual v. 1.0... -
Page 40: Waypoints/Route
Pressing the ENTER button again will show a cursor, indicating the character to edited. Characters can be changed using UP and Down cursor buttons. Pressing the ENTER button will move the cursor to the next character. Page 40 Flymaster GPS M User Manual v. 1.0... -
Page 41: Delete Waypoint
The GPS M can load a waypoints list directly from a waypoints file stored in the SD card. The file must be present in the root directory of the SD card in .WPT (Geo format) ONLY. Page 41 Flymaster GPS M User Manual v. 1.0... -
Page 42: Nearby Landings
ENTER key to immediately activate navigation to the selected waypoint. In order to define a waypoint as a landing the Landing parameter should be set to Yes in the waypoint edit screen. Page 42 Flymaster GPS M User Manual v. 1.0... -
Page 43: Route Navigator
DOWN buttons the desired waypoint can be selected. Pressing the ENTER button will cause navigation to be resumed to the selected waypoint. Route navigation will then continue in the sequence displayed in the route menu. Page 43 Flymaster GPS M User Manual v. 1.0... -
Page 44: Nearby Airspaces
200 meters then all the airspaces that are closer from the pilot's position than 200 meters are shown on the Nearby Airspaces list. A typical list of airspace may look like figure above. Page 44 Flymaster GPS M User Manual v. 1.0... -
Page 45: Airspace Detail
The floor of the airspace which is the lowest altitude of the airspace The ceiling which is the maximum altitude of the airspace. The Airspace class Pressing enter will allow to enable/disable the airspace Page 45 Flymaster GPS M User Manual v. 1.0... -
Page 46: Flight Log
After pressing ENTER in a flight log, there are 3 options available Generate IGC – This will generate the IGC for the SD card. The file will be stored in the root directory of the SD card. Delete Flight Delete all flights Page 46 Flymaster GPS M User Manual v. 1.0... -
Page 47: Device Settings
Firmware: firmware version Cur: actual current being used by the instrument Diag: diagnostic code 3.000A or other value: battery capacity reported by the “fuel gauge” IC. Page 47 Flymaster GPS M User Manual v. 1.0... -
Page 48: Set Altimeter
Note that position dilution of precision (pdop) gives you an indication of how reliable the GPS altitude is at the moment. The lower the pdop value the more accurate the position fix Page 48 Flymaster GPS M User Manual v. 1.0... -
Page 49: Time
X seconds defined by this value. In the example, the integration period is 5 seconds (default value). UTC offset - Using GPS data, the GPS M automatically adjusts the internal clock to the Universal Coordinated Time (UTC) Page 49 Flymaster GPS M User Manual v. 1.0... -
Page 50: Alerts
Altitude alarm - A siren type sound is produced and/or voice warnings indicating that the pilot is approaching or has entered the altitude limit, described bellow. Page 50 Flymaster GPS M User Manual v. 1.0... -
Page 51: Airspace Settings
Source: this is define where the airspaces will be read from. It’s possible to read from the SD card (world.frd) , internal memory (OpenAir files loaded by Flymaster Instrument manager) or both sources. Page 51 Flymaster GPS M User Manual v. 1.0... -
Page 52: Airspace Classes
Here you can selectively define which type of airspace class you want to disable. This setting is especially useful for disabling airspace warnings that are allowed to free-flying aircraft and which are listed in the airspace files. Page 52 Flymaster GPS M User Manual v. 1.0... -
Page 53: Trace
When Track UP is YES you will see the map turning around the pilot, while with North UP you will see the pilot moving around the Map. Page 53 Flymaster GPS M User Manual v. 1.0... -
Page 54: Screen
(switch to) during flight by associating one of the pre defined trigger events with the page. Triggers are set using the Flymaster Instrument Manager .Each trigger is activated when certain conditions are met. If a trigger is activated the GPS M switches to the associated page automatically. -
Page 55: Language Units
Speed Units can be in Km/h, Miles/h, or Knots. Distance units can be in Km, or Miles. Internal Temperature: units can be Celsius or Farenheit. Coordinates: DD°MM'SS; DD°MM.mmm' ; DD.dddd; or UTM Page 55 Flymaster GPS M User Manual v. 1.0... -
Page 56: Flarm
Even so, the FLARM beacon is currently the most popular and most implemented mean of being seen in the skies and has the potential for an aircraft to deviate from its current position, thus avoiding a potential collision with you. Page 56 Flymaster GPS M User Manual v. 1.0... -
Page 57: Calibrate Compass
The process ends with the message “calibration ended”. Repeat as many times as necessary until you possibly get a better result, which will be HIGH. https://youtu.be/P-4BvvM3xW0 Page 57 Flymaster GPS M User Manual v. 1.0... - Page 58 A Layout can include 8 different pages in portrait and 8 in landscape, and all of them can be drawn using the Flymaster Instrument Manager software. You can select different pages by selecting either the UP or DOWN keys. If you press ENTER for a certain page, 2 options become available.
-
Page 59: Disable Page
Note that on Figure above when selecting and pushing ENTER the Goto Page option is not active and the focus will be on the Enable Page. Pressing ENTER will re-enable the page. Page 59 Flymaster GPS M User Manual v. 1.0... -
Page 60: Navigation Settings
Sort WP by Distance: If set to Yes, the waypoints list will be sorted by distance, being the closet ones listed first. If set to NO, the list will be sorted by alphabetic order. Page 60 Flymaster GPS M User Manual v. 1.0... -
Page 61: Vario Acoustics
-10m/s, and alarm will be ˝red. This alarm can be used to identify high vertical speeds, as for example, in a spiral dive. The Sink Alarm parameter can vary from 0 to -25m/s. Set the Sink Alarm to OFF to disable the alarm. Page 61 Flymaster GPS M User Manual v. 1.0... -
Page 62: Base Frequency
Climb threshold. This value is set between 0 and 9 with each unit corresponding to be 0.1 m/s, ie. 3 is 0.3m/s. Subtracting this decimal value from the climb threshold will give us the value Page 62 Flymaster GPS M User Manual v. 1.0... -
Page 63: Damper
When dynamic frequency is zero, the pitch (frequency) of that beep will remain constant if the rate of climb changes. With dynamic frequency on, the pitch of the beep may vary if the rate of climb varies during the individual beep. Page 63 Flymaster GPS M User Manual v. 1.0... -
Page 64: Advanced Settings
If set to 0 “zero” the flight will start immediately after GPS fix position is acquired. This setting is only recommended in very exceptional occasions like walk-and-fly activities, because will produce a track log each time the instrument is turned on. Page 64 Flymaster GPS M User Manual v. 1.0... -
Page 65: Gps
So if you notice GPS M is taking abnormally long to get a fix (over 2 minutes) a gps reset will probably get it locked quicker. Page 65 Flymaster GPS M User Manual v. 1.0... -
Page 66: Flymaster Instrument Manager Software
Flymaster Instrument Manager Software Automatic firmware update - After launching the "Flymaster Instrument Manager" application and if your instrument is connected to your computer's USB port, it may be possible that there is a new firmware version available for your instrument. If you want to update, just answer “start update” and the process will be automatic. -
Page 67: Main Screen And Tools
3 – Connection state and info 4 – Next Page 5 - Pages Layouts 6 - Update firmware tool 7 – Current tool 8 – Settings tool 9 – FIM settings Page 67 Flymaster GPS M User Manual v. 1.0... -
Page 68: Pages Layouts Data Fields And Objects
12 – Vario object 13- Map object (configurable layers) 14 – Altitude graph 15 – Volume indicator object 16 – Compass 17 – Navigation wheel 18 – Battery status object 19 – Data field Page 68 Flymaster GPS M User Manual v. 1.0... -
Page 69: Customizing Datafields And Objects
After dragging a data field or double click it will show the customization pop-up window of it. It’s possible to change : The datafield (data you want to see) The title font size The title background The border The datafield font The data field background Page 69 Flymaster GPS M User Manual v. 1.0... -
Page 70: Page Triggers
The page trigger it’s a auto page switching when the instrument “understands” the pilot position of behaviour. When that behaviour is achieved the page is automatically called. 1 – Create or open a Layout 2 – Click on “triggers” tool Page 70 Flymaster GPS M User Manual v. 1.0... -
Page 71: Manual Firmware Update
Manual firmware update In this tool you can force manual firmware update. Just download the firmware package file, from the Flymaster website and save it to your hard drive. Then just point your location and the process will proceed normally.
Need help?
Do you have a question about the GPSm and is the answer not in the manual?
Questions and answers