
Related Manuals for Pentair Kreeply Krauly Racer


Summary of Contents for Pentair Kreeply Krauly Racer
- Page 1 ® ™ KREEPY KRAULY RACER PRESSURE SIDE POOL CLEANER INSTALLATION AND USER’S GUIDE IMPORTANT SAFETY INSTRUCTIONS READ AND FOLLOW ALL INSTRUCTIONS SAVE THESE INSTRUCTIONS...
-
Page 2: Table Of Contents
Pentair Water Pool and Spa, Inc. Those names and brands may be the trademarks or registered trademarks of those third parties. -
Page 3: Important Warning And Safety Instructions
The cleaner may get stuck in these areas which can not in use. A spring loaded safety cover (a “vac port result in damage to the pool finish or vinyl liner. Pentair Aquatic Systems fitting”) is included with your cleaner. Install it on the disclaims any liability for repairs or replacement to any of these structures suction port to prevent entrapment and injury. - Page 4 IMPORTANT WARNING AND SAFETY INSTRUCTIONS Disclaimer of Liability About your Pool and Pressure Side Pool Cleaner There are a multitude of factors that contribute to the life of your pool. The pool cleaner is a very passive product that will have no impact on pool life. Please be aware that over time, deterioration, discoloration and brittleness of any pool finish can be caused separately by, or in combination with, age, an imbalance in pool water chemistry, improper installation and other...
-
Page 5: Important Information
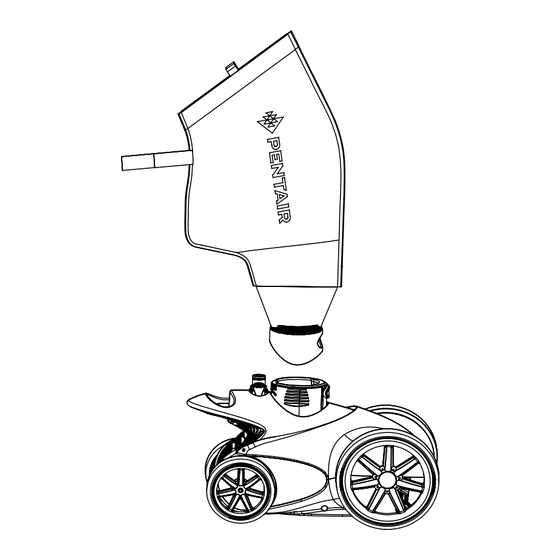
OVERVIEW Cleaner Components 1. RACER Cleaner Head 2. Debris Bag 3. Sweep Hose (not needed in most pools) 4. Feed Hose Assembly - Not shown (3-10 ft. sections) 5. Wall Fitting 6. Wall Adapter 7. Debris Seal Note: The cleaner system is delivered with debris seal installed inside of cleaner head. -
Page 6: Installation
INSTALLATION Booster Pump Installation Please refer to the instructions included with your booster pump for installation information. Please follow these instructions carefully. Wall Adapter (Shown Installed) Installing the Wall Fitting and Wall Adapter 1. Remove and disconnect any existing pool cleaner Wall Fitting and/or wall fitting. -
Page 7: Calculating Cleaner Speed/Rpm
If the RPM is below 31 with a sweep hose installed, or below 33 without a sweep hose, then call your local Pool Professional or contact Pentair’s Technical Support Department at 1-800-831-7133. If the RPM is higher than 33 with a sweep hose installed, or higher than 36 without a sweep hose, at the wall fitting adjust the valve, as described under “Setting the Water Flow to the Cleaner”... -
Page 8: Adjusting The Hoses To Fit Pool
Adjusting the Hose Assembly to Fit Pool The hose assembly consists of: Three (3) 10 ft. Measure Deepest Part of Pool sections, one (1) soft light grey lead hose marked as section one and two (2) stiffer dark grey feed hoses marked as sections two and three. - Page 9 Step 3: Connecting Hose Sections Barb on 1. After the hose sections have been cut to size, Feed Swivel Mender Nut reconnect them by pushing the hose end over Hose the barb on the swivel. Note: Be sure to push the hose all the way to the bottom of the barb.
-
Page 10: Assembling The Cleaner
Assembling the Cleaner 1. Attach the Quick Connect fitting on the end of the hose to the feed tube on the RACER™ Pressure Side Pool Cleaner. Be sure the snaps are engaged. 2. Attach the debris bag to the cleaner. Push the bag over vacuum tube to click it into place. 3. -
Page 11: Cleaner Adjustments And Operation
CLEANER ADJUSTMENTS AND OPERATION Cleaner Operation Note: The RACER™ Pressure Side Pool Cleaner may need some minor adjustments to ensure it is operating properly and to get the best performance possible. When operating correctly, the cleaner will travel in a random pattern throughout the pool, vacuuming and scrubbing the pool. -
Page 12: Cleaning The Debris Bag
Cleaning the Debris Bag 1. Detach the bag strap from the hose. 2. Press the release button on the cleaner vacuum tube and carefully pull up to remove the bag from the cleaner. See figure 16. 3. Open bag closure by pulling apart the fabric tabs at the top of the bag. Holding the bottom of the bag, turn over to empty debris out of the top. -
Page 13: Adjusting The Sweep Hose Regulator
Adjusting the Sweep Hose Regulator when Sweep Hose is Installed Sweep Hose The sweep hose operates in a gentle sweeping motion to Regulator clean debris from hard to reach corners of pools. Note: 1. Do not adjust the sweep hose regulator while cleaner is operational. -
Page 14: Maintenance
MAINTENANCE Periodic Maintenance Periodically inspect the RACER™ Pressure Side Pool Tires Cleaner and its components. Replace and/or repair any The tires are designed to protect the bottom of your worn or damaged components. Failure to follow instructions pool and provide traction. Tires will wear and need to be or improper installation of the cleaner can result in damage replaced occasionally. - Page 15 [Blank Page] KREEPY KRAULY ® RACER ™ Pressure Side Pool Cleaner Installation and User’s Guide...
-
Page 16: Replacement Parts
REPLACEMENT PARTS ™ RACER Pressure Side Pool Cleaner Illustrated Parts List KREEPY KRAULY ® RACER ™ Pressure Side Pool Cleaner Installation and User’s Guide... -
Page 17: Parts List
RACER ™ Pressure Side Pool Cleaner Parts List ITEM PART ITEM PART DESCRIPTION DESCRIPTION NUMBER NUMBER 360229 Top Front Cover Kit 260251 Feedline Wall Connector Kit 360252 Feed Line Connector Kit 360230 Rear Cover Kit 360231 Bottom Cover Kit 360253 Drive Shaft Kit 36023 Chassis Kit... -
Page 18: Troubleshooting
TROUBLESHOOTING ™ Use the following troubleshooting information to solve potential issues with the RACER Pressure Side Pool Cleaner. Problem Corrective Action Cleaner doesn’t move or moves slowly. Ensure filter pump and booster pump are on and moving water. (You may need to clean your pool filter system.) Ensure the wall fitting screen is free of debris;... - Page 19 TROUBLESHOOTING (Continued) Problem Corrective Action Brush on front of cleaner is not spinning. Watch front wheels while cleaner is operating in the pool. The wheels and front brush should rotate simultaneously. Ensure the scrubber is free of tangled debris. Rear wheels dragging/not spinning. Ensure the wheel sleeve is free of tangled debris.
-
Page 20: Steep Vinyl Liner Transitions
TROUBLESHOOTING (Continued) Steep Vinyl Liner Transitions In some pools with deep diving ends the transition angle from the deep end to the shallow end may cause the RACER ™ Pressure Side Pool Cleaner to have difficulty transitioning over this angle. If so, you may need to insert the tire wedges provided to help the cleaner make this transition.
Need help?
Do you have a question about the Kreeply Krauly Racer and is the answer not in the manual?
Questions and answers
My pool is 8 feet deep. Should the first two sections of hose equal 8 feet (ie the short 2 foot section with the backup valve and the feeder hose)?